Some links on this page are affiliate links: if you buy through them we may earn a commission, at no extra cost to you.
Yes, a Raspberry Pi can drive an authentic RGB CRT setup—but not with a simple HDMI cable. The practical route is to use the Pi’s 40-pin GPIO Display Parallel Interface (DPI) with a compatible HAT or adapter that converts digital pixel data into analog RGB, then configure timings for the exact display.
Your first decision is the CRT’s input: RGB SCART televisions generally need 15 kHz RGBS, VGA monitors usually expect 31 kHz or higher RGBHV, and component televisions need an RGB-to-YPbPr transcoder. The connector alone does not determine compatibility.
How the Pi produces CRT video
The Pi’s GPIO header can expose DPI video in RGB565, RGB666, or RGB888 formats. A dedicated board maps those signals to analog RGB and handles, depending on the design, sync, audio, and connector wiring. Raspberry Pi documents the available DPI formats and display configuration options in its video configuration documentation.
The signal path normally looks like this:
Pi DPI GPIO
   ├── RGB + composite sync → SCART television
   ├── RGB + H/V sync       → VGA CRT monitor
   └── RGB → transcoder → YPbPr component CRT
This is different from an HDMI-to-VGA or HDMI-to-SCART adapter. Those devices normally output conventional computer video or a converted television signal; they do not automatically provide native 15 kHz RGB suitable for a classic CRT.
#1 Best Overall
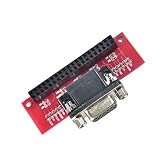
- Compatible with specific Raspberry Pi models.
- Enables VGA connection.
- Single-piece module.
- Guarantees stable signal transmission.
- Supports high-quality visual output.
Identify the CRT before buying anything
| Display | Typical signal | Typical scan rate | Likely route |
|---|---|---|---|
| European or Japanese RGB SCART TV | RGBS | 15 kHz | RGB-Pi or Recalbox RGB Dual hardware |
| VGA CRT monitor | RGBHV | 31 kHz or higher | VGA-capable HAT or VGA666-style adapter |
| Arcade monitor | RGBS or RGBHV | Often 15 kHz | Dedicated arcade/RGB hardware |
| Component CRT television | YPbPr | Varies | RGB output plus an RGB-to-component transcoder |
| Composite-only TV | Composite | 15 kHz | Separate composite-output solution, not SCART RGB |
Before ordering, confirm:
- Whether a SCART socket actually accepts RGB rather than composite only.
- Whether the display accepts 15 kHz, 31 kHz, or both.
- Whether it requires RGBS (composite sync) or RGBHV (separate horizontal and vertical sync).
- Whether it accepts PAL, NTSC, or both.
- Whether it is a consumer television, PVM/BVM, arcade chassis, or multisync monitor.
Some SCART televisions need a switching or blanking voltage before they select RGB. A SCART cable being physically connected does not prove that RGB is active.
Best hardware choices by Raspberry Pi model
Raspberry Pi 5: Recalbox RGB Dual 2
The Recalbox RGB Dual 2 is the most direct all-in-one option for a Pi 5 owner who wants SCART and VGA. Its product page lists SCART, VGA, composite, and audio outputs, along with 15 kHz TV and 31 kHz monitor RGB and progressive and interlaced modes.
The PCB-only listing showed €59.00 but was marked sold out when checked. Stock can change. The Pi is not included, and the vendor calls out a shielded SCART connector and Pi 5 fan considerations. Those advertised capabilities do not guarantee compatibility with every CRT, emulator, cable, or operating system.
Raspberry Pi 5, 4, or 3: RGB-Pi
RGB-Pi offers a dedicated hardware-and-software ecosystem. Its current site presents RGB-Pi 2 compatibility with Pi 5, Pi 4, and Pi 3, plus separate SCART, JAMMA, and VGA-DAC-related configurations.
Check the vendor’s current compatibility table before buying. Legacy RGB-Pi cables, RGB-Pi 2 hardware, and different OS generations should not be assumed interchangeable.
Pi 3, Pi 4, Pi 400, or Zero 2 W: original Recalbox RGB Dual
The original Recalbox RGB Dual is intended to add SCART and VGA output to Raspberry Pi 3, 4, 400, and Zero 2 systems, with a Recalbox-centered CRT workflow. It is not the same board as RGB Dual 2 and should not be treated as a universal Pi 5 replacement.
Rank #2

- COMPACT DESIGN - The compact-designed portable Benfei HDMI to VGA adapter connects a computer, desktop, laptop, or other devices with HDMI port to a monitor, projector, HDTV, or other devices with VGA port; Tuck this lightweight gadget into your bag or pocket to do a business presentation with your laptop and projector, or extend your desktop screen to a monitor or TV; A VGA cable is required.
- SUPERIOR STABILITY - Built-in advanced IC chip converts HDMI digital signal to VGA analog signal; It is NOT a bi-directional converter and cannot transmit signals from VGA to HDMI
- INCREDIBLE PERFORMANCE - The HDMI male to VGA female converter supports resolutions up to 1920x1080@60Hz (1080p Full HD) including 720p, 1600x1200, 1280x1024 for high definition monitors or projectors; Gold plated HDMI connector resists corrosion and abrasion and improve the signal transmission performance; Molded strain relief increases cable durability
- BROAD COMPATIBILITY - The HDMI-VGA adapter is compatible with computer, pc, desktop, laptop, ultrabook, notebook, Chromebook, Raspberry Pi, Intel Nuc, Roku, PS3, Xbox One, Xbox 360, Wii U, Set Top Box, TV BOX, or other devices with HDMI port; NOT compatible with Blu-ray player and devices with low-power HDMI ports such as SONY PS4, Apple MacBook Pro with Retina Display, Mac mini, and Apple TV
- 18 MONTH WARRANTY - Exclusive Benfei Unconditional 18-month Warranty ensures long-time satisfaction of your purchase; Friendly and easy-to-reach customer service to solve your problems timely
DIY VGA: VGA666 or a similar DPI adapter
VGA666 is a documented GPIO/DPI-to-VGA design for users comfortable with manual configuration. Its manual is useful for understanding the hardware, but older recipes may assume legacy firmware and may not work unchanged with Bookworm-era KMS configuration or Pi 5 systems.
Quick wins for a faster PC:
Repair Windows errors before they cause bigger problemsFix Now →Scan for outdated or missing drivers - takes under a minuteDriver Scan →Clear out junk files and repair common Windows errorsFree Scan →A VGA adapter may provide RGBHV rather than RGBS. A VGA-to-SCART cable is therefore not automatically a valid conversion: sync format, voltage, impedance, wiring, and scan rate all have to match.
SCART setup: RGB television requirements
For a SCART CRT, you generally need 15 kHz RGB with composite sync. The HAT or cable must route red, green, blue, sync, ground, and—where required—the SCART switching signal correctly. Stereo audio may travel through SCART, but this depends on the board and cable.
Do not assume that:
- Every SCART socket accepts RGB.
- Every SCART television accepts both PAL and NTSC timings.
- A VGA-to-SCART cable converts RGBHV into RGBS.
- An HDMI-to-SCART converter produces native-resolution analog RGB.
Use a hardware-and-OS combination with documented SCART support, such as a compatible Recalbox RGB Dual or RGB-Pi setup, rather than starting with an unknown passive cable.
VGA setup: monitor scan rates and sync
A conventional VGA CRT usually expects separate horizontal and vertical sync at approximately 31 kHz or higher. Some multisync monitors also accept 15 kHz, but that must be confirmed from the monitor’s documentation.
Crashes, No Sound, or Screen Glitches?
Random freezes, missing sound and display glitches usually trace back to one bad driver. Find and replace yours safely.Free scan · under a minutePC Slower Than It Used to Be?
A free scan shows the junk files, broken settings and background clutter dragging Windows down - then fixes them in one click.Free scan · Windows 10 & 11This makes VGA CRTs potentially simpler than SCART televisions, but only when the adapter outputs the monitor’s expected sync and timing. Sending 15 kHz to a 31 kHz-only monitor commonly produces a blank screen; sending an unsupported mode to an arcade monitor can be unsafe.
Rank #3

- Input RGBS (SCART), VGA (RGBHV). Output component YPBPR(YUV).
- Support resolution: 480i, 480p, 576i, 576p, 720p, 1080i and 1080p.
- Support each of three RGB single channel color adjustment. Support audio left and right channel input SCART.
- [Crucial Tip]: If you choose VGA input, you will need an extra 3.5mm video audio cable to get the sound and an exter USB-C 5V power supply.
- [NOTE]: This product does not support modified game consoles. Please check whether your TV has a color difference signal interface and whether your game console can output RGBS(Scart) or VGA signal before purchase.
Pi 5 configuration and interlaced output
On current Raspberry Pi OS releases, generic DPI configuration has moved toward the vc4-kms-dpi-generic overlay. Raspberry Pi’s documentation and the overlay reference describe parameters for pixel clock, active areas, porches, sync widths, polarity, interlace, and RGB formats.
A generic configuration follows this pattern:
dtoverlay=vc4-kms-dpi-generic
dtparam=clock-frequency=<pixel-clock>
dtparam=hactive=<active-width>,hfp=<front-porch>,hsync=<sync-width>,hbp=<back-porch>
dtparam=vactive=<active-lines>,vfp=<front-porch>,vsync=<sync-lines>,vbp=<back-porch>
Do not paste this as a universal CRT recipe. The values must match the adapter and display.
Raspberry Pi’s official Pi 5 interlaced-video example is:
Do these 3 things before closing this tab:
1Repair Windows errors before they cause bigger problems2Scan for outdated or missing drivers - takes under a minute3Clear out junk files and repair common Windows errorsdtoverlay=vc4-kms-dpi-generic
dtparam=clock-frequency=13500000
dtparam=hactive=720,hfp=12,hsync=64,hbp=68
dtparam=vactive=576,vfp=5,vsync=5,vbp=39
dtparam=vsync-invert,hsync-invert
dtparam=interlacedThis is a 720×576 interlaced example associated with PAL-style timing. It is an experimental technical demonstration, not a universal PAL television configuration and not an NTSC recipe. It also has GPIO0/GPIO1 implications, including precluding their normal I2C/DDC use in that example.
On current Raspberry Pi OS installations, config.txt is commonly located at /boot/firmware/config.txt. Back it up first and verify the path used by your particular OS image. Vendor-specific CRT distributions may store or regenerate settings elsewhere. Older tutorials using dpi_output_format, dpi_timings, dpi_group, or dpi_mode describe legacy configuration; Raspberry Pi documents those settings separately in its legacy configuration reference.
Choosing an operating system
- Recalbox: The natural route for Recalbox RGB Dual hardware. Use the image and instructions recommended for the exact board and Pi model.
- RGB-Pi OS/RePlayOS: The integrated route for RGB-Pi hardware. Match the OS generation to the exact RGB-Pi product.
- RetroPie or another general distribution: Flexible, but usually requires more manual modeline, emulator, and KMS configuration.
- Other CRT-focused images: Verify current support for the exact Pi, HAT, connector, and output mode rather than assuming support from a similar board.
Native-resolution output can be highly authentic, but “pixel perfect” still depends on emulator core, game video mode, refresh-rate handling, scaling policy, timing accuracy, and CRT geometry. It is an aim, not a guarantee supplied by the connector.
Rank #4
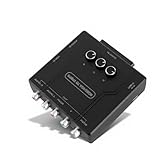
- COMPATIBLE OBJECTS: Converter is compatible with European and Japanese scart and RGBS input, external USB C 5V power supply is required when using VGA input.
- CONSOLE SUPPORT: Converter supports for , for , for N64, for 1 Fat, for 2 Fat, for , for , for MD, for , ect.
- CONVERSION FEATURES: Converter input RGBS (SCART), VGA (RGBHV), output color difference component YPBPR (YUV), support sound left and right channel input SCART.
- RGBS SCART VGA TO YPBPR: Component converter can convert the video RGBS SCART VGA output from the game console to the color difference YPBPR.
- SUPPORT : Converter supports 480i, 480p, 576i, 576p, 720p, 1080i and 1080p . Game screen color brightness (R G B), so that the original game picture is more clear and vivid.
Recommended installation sequence
- Record the exact Pi model and revision.
- Record the CRT’s input, accepted scan rates, sync type, and PAL/NTSC support.
- Choose a matching HAT or adapter and its recommended OS image.
- Power the Pi down before installing or removing the GPIO board.
- Configure the output mode using the board vendor’s instructions.
- Connect the correct SCART, VGA, or transcoder cable.
- Boot and verify stable sync, correct colors, aspect ratio, refresh rate, and geometry.
- Test a system with a known video mode—such as NES, SNES, Mega Drive/Genesis, or an arcade title—before testing the entire library.
North American CRTs with component input
If your television has YPbPr component input but no RGB SCART, use an RGB-to-component transcoder after generating compatible RGB from the Pi. RetroTINK’s RGB2COMP accepts RGB through SCART and outputs component video plus stereo audio; its listed price was $79.99 when checked.
Raspberry Pi → RGB SCART/VGA hardware → RGB2COMP → CRT component inputRGB2COMP does not generate the Pi’s RGB signal and does not make every arcade timing compatible with every component television. Confirm the upstream sync and resolution requirements before buying.
Troubleshooting
No picture
- Check whether the display is 15 kHz-only or 31 kHz-only.
- Confirm that the selected overlay matches the HAT and Pi model.
- Check RGBS versus RGBHV wiring.
- Check SCART RGB selection and switching voltage.
- Revert the last timing change and test with HDMI.
Black, rolling, or vertically unstable image
Suspect an incorrect refresh rate, interlaced/progressive mismatch, sync polarity, vertical porch, PAL/NTSC timing, or unsupported CRT mode. A signal interpreted as separate sync instead of composite sync can also roll or fail to lock.
Horizontally doubled, squashed, or distorted image
The scan rate or horizontal timing is probably wrong. The CRT may be receiving a 15 kHz mode when it expects 31 kHz, or vice versa.
Black-and-white picture
The television may be receiving composite instead of RGB, RGB selection may be disabled, the cable may be wired incorrectly, or the color standard may be unsupported. A SCART connection alone is not proof of RGB operation.
Free tools Windows power users keep installed
One-click scans. No signup required.
Games return to the menu or fail to start
The front end and emulator may be requesting different modes, the core may lack the required modeline, or the OS may not support the selected HAT. This is usually a software or mode-switching issue rather than proof that the CRT output hardware is defective.
No audio
Audio routing depends on the board. RGB Dual 2 advertises I2S DAC audio and a 3.5 mm audio/composite jack, while other adapters may use SCART, HDMI, USB, the Pi’s analog output, or an external DAC. Check the HAT’s audio path and cable wiring.
Recovering from a black screen
- Power down the Pi.
- Remove the microSD card and mount its boot partition on another computer.
- Open
config.txtor the vendor’s configuration file. - Comment out the latest overlay and timing lines with
#, or restore your backup. - Reconnect HDMI or another known-good display.
- Apply only one change at a time.
The exact recovery process can differ on vendor-specific images.
Quick Recap
Which route should you choose?
- Pi 5 with both SCART and VGA: Recalbox RGB Dual 2 if available and supported by your chosen software.
- Pi 5 in a dedicated RGB ecosystem: RGB-Pi 2, after checking the current hardware and OS matrix.
- Pi 3, 4, 400, or Zero 2 with SCART: Original Recalbox RGB Dual or compatible RGB-Pi hardware.
- VGA CRT and DIY preference: VGA666 or an equivalent DPI VGA adapter, provided you are comfortable with timings and sync troubleshooting.
- Component-only CRT: Generate compatible RGB first, then use an RGB-to-component transcoder such as RGB2COMP.
Product prices and availability are accurate as of the date/time indicated and are subject to change. Any price and availability information displayed on Amazon at the time of purchase will apply.

