Some links on this page are affiliate links: if you buy through them we may earn a commission, at no extra cost to you.
NVIDIA Control Panel can help improve frame pacing, latency, power behavior, and display synchronization, but it rarely delivers a large raw-FPS increase by itself. For a safe starting point, measure performance, create a per-game profile, and change only a few settings at a time. If the game is GPU-limited, lowering demanding in-game settings or using DLSS or resolution scaling will usually matter more than driver-level tweaks.
NVIDIA is moving supported GeForce graphics controls from the classic Control Panel into the NVIDIA app. Existing Control Panel installations remain available, but NVIDIA says new features and fixes are moving to the app; its Graphics > Program Settings replaces the classic Manage 3D settings screen for GeForce users. The steps below apply to the classic Control Panel where those controls are available.
Before changing settings: measure, check, and record
First decide what you want to improve. Average FPS measures throughput; 1% lows and frame-time graphs help reveal stutter; input latency and tearing are separate concerns. A setting that smooths frame delivery or reduces latency may not raise average FPS.
Do these 3 things before closing this tab:
1Clear out junk files and repair common Windows errors2Scan for outdated or missing drivers - takes under a minute3Repair Windows errors before they cause bigger problems- Record the game and driver version, resolution, graphics preset, refresh rate, and any in-game frame cap.
- Use the same built-in benchmark, replay, or repeatable scene for each comparison.
- Note average FPS, 1% lows, frame times, GPU utilization, GPU clock and temperature, VRAM use, and CPU utilization. NVIDIA FrameView can capture several of these metrics.
- Confirm Windows and the game are using the monitor’s intended refresh rate and the discrete NVIDIA GPU where applicable, especially on a laptop.
Change one or two options, restart the game if needed, then repeat the same test at least twice. Keep a change only if it improves the metric you care about without unacceptable costs in image quality, heat, power use, or stability.
#1 Best Overall

- Powered by Radeon RX 9070 XT
- WINDFORCE Cooling System
- Hawk Fan
- Server-grade Thermal Conductive Gel
- RGB Lighting
Settings vary by GPU, driver, Windows version, display, and game. NVIDIA’s 3D Settings reference describes the available controls and their qualifications.
Use a per-game profile, not a blanket “maximum performance” preset
In the classic interface, open Right-click desktop → NVIDIA Control Panel → Manage 3D settings → Program Settings. Select the game, or choose Add to browse to its executable if it is missing. Change the desired options and click Apply. NVIDIA documents that program settings apply when the selected application launches; see its per-application setup instructions.
Per-game profiles limit unintended side effects. Global changes can reduce image quality, raise power consumption, or cause compatibility problems in games that did not need them. Reserve Global Settings for preferences that truly apply across your games.
Rank #2

- Powered by the NVIDIA Blackwell architecture and DLSS 4
- Powered by GeForce RTX 5070 Ti
- Integrated with 16GB GDDR7 256bit memory interface
- PCIe 5.0
- WINDFORCE cooling system
Safe starting profile for maximum FPS
This is a testable starting point, not a universal preset. Use it only for a game where raw FPS matters more than tearing control or maximum image quality.
| Control Panel option | Starting value | What to expect and when to adjust |
|---|---|---|
| Power management mode | Prefer maximum performance | May help if a game is not maintaining appropriate GPU clocks. It is not a guaranteed boost; it can increase heat, fan noise, power draw, and laptop battery use. NVIDIA recommends it for cases of incorrect clock throttling, not as a universal fix. NVIDIA’s explanation. |
| Texture filtering – Quality | Performance, or High performance if available | Can reduce filtering work, but the FPS gain is often small and image quality may decline. Test for shimmer or distracting artifacts; keep application-controlled if the game handles filtering well. |
| Vertical sync | Off for unrestricted FPS | May allow tearing. For a G-SYNC setup, use the separate guidance below rather than applying this blindly. |
| Max Frame Rate | Off for unrestricted FPS | A cap does not increase peak FPS. Use one deliberately for thermals, steadier frame pacing, VRR, or latency goals. |
| Low Latency Mode | Off unless the game lacks Reflex | This manages render queuing and latency, not raw FPS. If Reflex is in the game, prefer that first. |
| Shader Cache Size | Driver Default | Primarily helps avoid repeated shader compilation, which can cause hitches; it usually does not raise average FPS. A larger cache uses more disk space. |
| Image Scaling | Optional; test only if GPU-limited | Can raise FPS by rendering fewer pixels and scaling up, with a clarity trade-off. Compare it with the game’s resolution scale or DLSS. |
| Preferred refresh rate | Highest available, if shown and appropriate | Helps avoid an unintended low-refresh mode; it does not increase rendered FPS by itself. |
| Antialiasing overrides | Application-controlled | Driver-forced antialiasing can add cost or cause compatibility issues. Prefer the game’s own controls. |
| Anisotropic filtering | Application-controlled | Let the game choose unless addressing a title-specific issue. |
| Ambient occlusion | Off for maximum performance, if available | Trades visual depth for performance; availability and impact vary by game. |
Do not set every option to a performance extreme by default. If the GPU was already boosting correctly, maximum-performance mode may do nothing useful. If the game is CPU-limited, filtering changes may barely affect FPS. For definitions and application-specific caveats, consult NVIDIA’s Manage 3D Settings reference.
Competitive games: prioritize responsive, consistent frames
For competitive play, distinguish latency from FPS. More frames can reduce the time between input samples and displayed frames, but a higher average alone does not guarantee a responsive or consistent experience.
Rank #3

- AI Performance: 767 AI TOPS
- OC mode: 2632 MHz (OC mode)/ 2602 MHz (Default mode)
- Powered by the NVIDIA Blackwell architecture and DLSS 4
- Axial-tech fan design features a smaller fan hub that facilitates longer blades and a barrier ring that increases downward air pressure
- A 2.5-slot design maximizes compatibility and cooling efficiency for superior performance in small chassis
- NVIDIA Reflex available: Enable Reflex in the game’s settings and start with the game’s recommended option. Avoid stacking Reflex, Control Panel Ultra Low Latency, multiple frame limiters, and third-party latency tools without testing; game and driver controls can interact.
- No Reflex: Test Control Panel Low Latency Mode On, then Ultra only if useful. NVIDIA describes Off as prioritizing render throughput, On as limiting queued frames, and Ultra as minimizing the queue. Ultra is not an FPS boost and may reduce throughput in some CPU-limited situations.
- Power and caps: Consider Prefer maximum performance per game if clocks fluctuate or latency consistency is a concern. Leave Max Frame Rate off for unrestricted FPS, or test a cap if it improves frame pacing or keeps the system within a desired VRR range.
- Visual compromises: Performance texture filtering and Image Scaling are optional experiments, not mandatory competitive settings.
NVIDIA’s system latency guide discusses Reflex, driver latency controls, frame caps, and G-SYNC. Use it as a configuration reference, then validate in your specific game.
G-SYNC, V-SYNC, and frame caps: choose a synchronization goal
There is no single V-SYNC setting that suits everyone. V-SYNC off favors unrestricted rendering and avoids synchronization overhead but can tear. V-SYNC on can remove tearing, but hitting the display’s refresh ceiling may add latency. G-SYNC or compatible variable refresh rate (VRR) changes how the display follows the GPU’s frame rate; it is not a way to increase raw FPS.
For unrestricted FPS
Leave G-SYNC unused or off, set V-SYNC off, and leave Max Frame Rate off. This prioritizes raw output and accepts possible tearing.
Rank #4

- Powered by the NVIDIA Blackwell architecture and DLSS 4. System Requirements: Minimum 850W PSU with 16-pin 12V-2x6 (12VHPWR) connector required. Verify before purchasing.
- Military-grade components deliver rock-solid power and longer lifespan for ultimate durability. Compatibility: 348mm (13.7") length, 3.6 slots, 4.3 lbs. Confirm case clearance and slot spacing. GPU bracket included.
- Protective PCB coating helps protect against short circuits caused by moisture, dust, or debris
- 3.6-slot design with massive fin array optimized for airflow from three Axial-tech fans
- Phase-change GPU thermal pad helps ensure optimal thermal performance and longevity, outlasting traditional thermal paste for graphics cards under heavy loads
For smooth G-SYNC/VRR play
- Confirm the display supports G-SYNC or G-SYNC Compatible, is enabled, connected appropriately, and selected as the primary display.
- In Control Panel, open Display → Set up G-SYNC, enable G-SYNC/G-SYNC Compatible, choose full-screen or windowed-and-full-screen operation as appropriate, select the display, and click Apply.
- Set the monitor to its highest supported refresh rate in Windows or the relevant display controls. If shown, set Monitor Technology to G-SYNC/G-SYNC Compatible for the game profile.
- As a common NVIDIA-guidance starting arrangement, enable V-SYNC in the NVIDIA Control Panel and disable it in the game, then cap FPS below the monitor’s maximum refresh rate. Test the game’s own limiter against the driver limiter; frame pacing differs by title and capper.
Practical cap starting points are about 58–60 FPS on 60 Hz, 117–119 on 120 Hz, 141–143 on 144 Hz, 162–164 on 165 Hz, and 237–239 on 240 Hz. These are starting ranges, not universal optima: the best cap depends on the VRR range, game limiter, driver, monitor, and latency target. Avoid repeatedly hitting the display’s hard refresh ceiling. For setup details and display requirements, see NVIDIA’s variable refresh rate instructions and VRR overview.
If you see tearing, flicker, or stutter, check that G-SYNC is enabled for the correct display and mode, verify the refresh rate, and remove competing in-game, driver, or third-party caps one at a time. Frame generation complicates comparisons: displayed FPS and rendered FPS are not identical, so assess frame pacing and latency rather than relying on the displayed count alone.
Image Scaling, DLSS, and resolution scaling
NVIDIA Image Scaling can improve FPS because the game renders at a lower resolution, reducing the pixel workload, then scales the image to the display. It does not make the GPU render the same native-resolution workload faster. In the classic interface, go to Manage 3D settings → Image Scaling → On, choose a sharpening level, and click Apply. NVIDIA explains the feature and its use in its Image Scaling support article.
Best Value
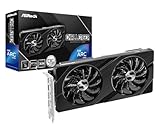
- Next-Gen Intel Arc Graphics: Powered by Intel Arc A580 GPU with Intel Xe HPG microarchitecture, featuring 384 XMX engines for enhanced AI acceleration and content creation.
- High-Performance Memory: 8GB GDDR6 on a 256-bit interface running at 16 Gbps, delivering excellent bandwidth for 1440p gaming and creative workloads.
- Factory Overclocked: Engine clock set at 2000 MHz out of the box, providing optimized performance for smooth gameplay and multimedia tasks.
- Advanced Dual-Fan Cooling: Features a dual-fan design with striped axial fans and an ultra-fit heatpipe for efficient thermal management. 0dB Silent Cooling stops fans completely at low temperatures for silent operation.
- Durable Construction: Includes a stylish metal backplate for enhanced PCB rigidity and a premium aesthetic, backed by ASRock's Super Alloy components for long-term reliability.
Try it when GPU utilization is high and you can accept some loss of fine detail, softness, or aliasing. Full-screen and borderless-window behavior may differ across games and drivers. A game’s own resolution scale is often easier to tune; on supported RTX games, integrated DLSS may provide a better image-quality/performance balance. Prefer the game’s own DLSS, Reflex, ray-tracing, and frame-limit controls when available and suitable.
Settings that are often overrecommended
- Unlimited shader cache: Not a guaranteed FPS fix. Cache size limits disk space for stored shader compilations; leave Driver Default unless diagnosing shader-related hitching. Deleting the cache can make stutter worse temporarily while shaders rebuild. Game updates, driver changes, and graphics-setting changes can trigger recompilation.
- Ultra Low Latency everywhere: This targets render-queue latency, not average FPS. Reflex is generally the better first choice when a game includes it.
- Maximum performance globally: It can raise heat, fan noise, power use, and laptop battery drain, with no benefit when clocks are already appropriate.
- High-performance filtering globally: Gains may be small or absent while image quality declines in games that were not bottlenecked by filtering.
- Driver-forced antialiasing: Can add rendering cost or conflict with in-game methods. Keep application-controlled unless solving a specific compatibility issue.
- Turning off every sync feature: That may suit unrestricted FPS, but ignores users who prioritize tear-free VRR play.
If FPS is still low, diagnose the bottleneck
- Check refresh rate and caps. Confirm the display’s intended refresh rate and inspect the in-game cap, Max Frame Rate, V-SYNC, G-SYNC/VRR, and laptop performance mode.
- Confirm the GPU. On hybrid laptops, check that the game uses the NVIDIA GPU. The Control Panel’s Preferred graphics processor option may not appear on every system, and Windows graphics preferences can take precedence on newer Windows versions. For applicable OpenGL programs, check OpenGL rendering GPU. On multi-GPU or multi-display setups, confirm the display path is what you intend. CUDA – GPUs and PhysX affect applicable workloads and are not general FPS switches.
- Check utilization and thermals. If GPU utilization stays near 95–100%, lower render resolution, ray tracing, shadows, volumetrics, or other GPU-heavy in-game settings; DLSS or resolution scaling may help. If GPU utilization is low, consider a CPU limit, background apps, an FPS cap, shader compilation, game-engine limits, or incorrect GPU selection. Check GPU temperature, clock behavior, and power limits for throttling.
- Update carefully. Get a suitable Game Ready or Studio driver from NVIDIA’s official driver page. A newer driver is not automatically faster for every game; if performance worsens after an update, consider reverting to a known-stable driver.
- Use the game’s benchmark and adjust its settings. When the GPU is the bottleneck, lowering demanding in-game options often matters more than Control Panel filtering tweaks. When it is a CPU or engine limit, a GPU upgrade may not solve the issue.
Reset a profile and recover from a bad change
To undo a setting, return to Manage 3D settings → Program Settings, select the game, use Restore, then click Apply. For global changes, choose Global Settings → Restore → Apply. NVIDIA documents Restore and Apply in its default-settings instructions. If only one game is affected, restore that game’s profile first and restart it; then retest before changing anything else.
Quick Recap
Product prices and availability are accurate as of the date/time indicated and are subject to change. Any price and availability information displayed on Amazon at the time of purchase will apply.
Quick wins for a faster PC:
Clear out junk files and repair common Windows errorsFree Scan →Fix the driver behind crashes, sound loss and screen glitchesFind Drivers →Repair Windows errors before they cause bigger problemsFix Now →
