Minecraft pixel art is an image assembled from colored blocks on a flat wall or floor. For a reliable first build, use a simple, high-contrast reference, reduce it to a 16×16 or 32×32 grid, choose a limited block palette, mark the canvas, and place blocks one row at a time while checking the result from a distance.
1. Choose an image that survives Minecraft’s grid
Start with a tightly cropped subject that has strong outlines, high contrast and mostly flat colors. Character faces, symbols, logos and simple objects are easier to read than photographs. Soft shading and continuous gradients often turn into muddy bands or visual noise when converted into blocks.


- Remove unnecessary background detail.
- Keep the main silhouette distinct from its background.
- Use a few clear color regions instead of many subtly different shades.
2. Pick the grid size
Your grid determines both the available detail and the amount of work. Every grid cell becomes one block in the finished image.
| Grid | Blocks | Best use |
|---|---|---|
| 16×16 | 256 | Icons, faces and first attempts |
| 32×32 | 1,024 | Small characters and logos with more recognizable detail |
| 64×64 | 4,096 | Larger wall murals |
| 128×128 | 16,384 | Very large murals or a single full map-art area |
These block counts are given by Minecraft Image Converter’s 2025 guide. Start at 16×16 or 32×32 unless you have a specific reason to build larger; doubling each dimension quadruples the block count.
Free tools Windows power users keep installed
One-click scans. No signup required.
#1 Best Overall
3. Select a practical block palette
Choose the closest available Minecraft color rather than trying to reproduce every shade in the source image. Wool, concrete, terracotta and stained glass are common choices, but each has a different visual character.
| Material | Visual character | When it helps |
|---|---|---|
| Wool | Basic 16-color range | Simple designs and accessible survival builds |
| Concrete | Bright, saturated colors | Bold outlines, logos and high-contrast images |
| Terracotta | Muted, earthy colors | Subdued shading and portraits that should not look neon |
| Stained glass | Transparent colored blocks | Special effects or designs where a see-through layer is useful |
Make a material list before starting in Survival. In Creative, you can test several near-matching colors quickly and replace them without gathering resources.
4. Mark a flat canvas
- Clear a flat wall or ground area larger than the planned design.
- Measure and mark the outer dimensions of the grid.
- For designs above 32×32, add temporary guide lines at regular intervals so rows and columns do not drift.
- Assign each reference color to one Minecraft block before placing the first permanent block.
A marked canvas makes counting errors easier to find and lets you rebuild a damaged section without losing the overall alignment.
5. Build row by row
- Begin at the top-left corner of the reference.
- Place every block in the first row from left to right.
- Check that row against the reference before moving down.
- Continue one complete row at a time, keeping the same left-to-right direction.
- Step back regularly and inspect the whole image from the distance at which it will be viewed.
Pixel art is judged as a complete silhouette, not only by its individual blocks. If the subject is unclear, simplify the outline, increase contrast or enlarge the design rather than adding random colors.
Rank #3

- AUTHENTIC MINECRAFT: Officially licensed Minecraft coloring book featuring iconic characters, blocks, and scenes from the popular game
- CREATIVE CONTENT: 80 pages of pixel art designs and activities that bring the Minecraft world to life through coloring
- PIXEL ART FOCUS: Detailed pixel-style illustrations that stay true to the game's distinctive blocky aesthetic
- EDUCATIONAL VALUE: With a variety of coloring pages and activities, this book helps develop fine motor skills and creativity.
- JUMBO FORMAT: Large-format pages provide plenty of space for coloring and creative expression
Manual building versus automated placement
| Approach | Time and resources | Control and correction | Best fit |
|---|---|---|---|
| Manual placement | Slowest; Survival requires gathering every block | Maximum control and easy visual adjustments while building | Small pieces, Survival projects and hands-on building |
| Creative placement | Much faster because materials are unlimited | Fast experimentation and replacement | Large murals or designs being refined |
| Converter-generated commands or schematics | Fastest for repetitive placement; requires compatible tools or WorldEdit for a schematic | Faithful to the chosen grid, but mistakes in the source or palette are reproduced automatically | Large, planned builds |
Using an image converter
The 2025 Minecraft Image Converter guide describes a workflow in which you upload an image, set the output size, adjust dithering, inspect a 3D preview and export a blueprint, generated commands or a .schematic for WorldEdit.
- Crop and simplify the source image first.
- Set the target width and height to your chosen grid.
- Choose a block palette that exists in your edition and build environment.
- Preview the result and look for broken outlines or noisy color changes.
- Use dithering only when a smoother transition is worth the speckled appearance it can create at close range.
- Export the format you can actually use: a blueprint for manual construction, commands for command-enabled building, or a schematic for a compatible WorldEdit workflow.
Drawing pixel art with Microsoft MakeCode
Microsoft’s official MakeCode tutorial lets you add the Pixel Art extension, edit an image with a palette and drawing tools, and place a pixelArt:draw image block in a program. Set the drawing position with coordinates before running it.
Rank #4
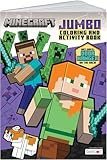
- AUTHENTIC MINECRAFT: Officially licensed Minecraft coloring book featuring iconic characters, blocks, and scenes from the popular game
- CREATIVE CONTENT: 80 pages of pixel art designs and activities that bring the Minecraft world to life through coloring
- PIXEL ART FOCUS: Detailed pixel-style illustrations that stay true to the game's distinctive blocky aesthetic
- EDUCATIONAL VALUE: With a variety of coloring pages and activities, this book helps develop fine motor skills and creativity.
- JUMBO FORMAT: Large-format pages provide plenty of space for coloring and creative expression
- Open MakeCode for your Minecraft environment and add the Pixel Art extension.
- Create or edit the image with the extension’s palette and drawing tools.
- Insert the
pixelArt:draw imageblock. - Set the coordinates for the intended build location.
- Run the program and wait until it finishes.
Do not move your player while the code is running: the block positions are relative to the player, so moving can shift the result away from the intended location.
Independent reader supportYour contribution helps us test, update, and keep practical guides available for everyone.World pixel art versus map art
Ordinary pixel art is built directly on a wall or ground and viewed in the world. Map art is designed to be rendered on a crafted map item, usually after the blocks are laid out in a suitable area. A 128×128 map-art design uses 16,384 block positions; larger displays can be made by stitching multiple 128×128 maps together.
What’s actually slowing this PC down?
Pick the symptom - the matching free tool is one click away.
Quick Recap
| Feature | World mural | Map art |
|---|---|---|
| Display | Viewed directly in the Minecraft world | Viewed on a map item, often in an item frame |
| Construction | Place blocks on a wall or floor | Lay out terrain suitable for the map renderer, then capture it on a map |
| Portability | Attached to that world location | Map items can be carried and arranged elsewhere |
| Large designs | Expand the wall or ground canvas | Combine multiple 128×128 maps into a larger mural |
Common problems and fixes
- The image looks muddy: replace gradients with larger flat color areas and strengthen the outline.
- The design is hard to recognize: step farther away, then simplify the silhouette or increase the grid size.
- Rows no longer line up: stop, recheck the marked outer dimensions and guide lines, and correct the first misplaced row before continuing.
- The converter output looks speckled: reduce or disable dithering and accept fewer, cleaner colors.
- A MakeCode drawing appears in the wrong place: keep the player still until execution completes, because coordinates are player-relative.
- You run out of materials in Survival: calculate the grid’s block count, inventory the palette first and build in sections only after each section’s supplies are ready.
Product prices and availability are accurate as of the date/time indicated and are subject to change. Any price and availability information displayed on Amazon at the time of purchase will apply.