Quick wins for a faster PC:
Clear out junk files and repair common Windows errorsFree Scan →Scan for outdated or missing drivers - takes under a minuteDriver Scan →Start with Nintendo’s basic checks: gently clean around a sticky button with a soft, dry toothbrush after turning off the console, verify button mapping, install the latest system update, and test supported inputs. If the Joy-Con is recognized but a supported button does not register in the system test, Nintendo recommends service for that controller.
Work through the checks in this order
-
Check for a sticky or stuck button
Turn off the Switch, then gently brush around the button with a soft, dry toothbrush. Nintendo warns: “Important: Avoid using any cleaners or fluids.” This is surface-cleaning guidance; do not open the controller or apply liquid as part of this step. Nintendo’s button troubleshooting page gives this advice for buttons that are unresponsive or do not work as expected.
-
Verify button mapping
A changed button layout can make an input behave differently than expected. Check the controller’s button mapping settings. Nintendo UK notes that a spanner icon appears beside a controller when its mapping has been changed. If you cannot remember the mapping, wake the console and use the available option to reset it. See Nintendo UK’s button troubleshooting steps.
# Preview Product Price 1 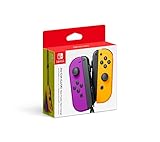
Nintendo Neon Purple/Neon Orange Joy-Con (L-R) - Switch $87.95 Buy on Amazon 2 
Nintendo Joy-Con (L/R) - Neon Red/Neon Blue (Renewed) $60.00 Buy on Amazon -
Update the system and restart if needed
Check that the console has the latest system update. Nintendo UK also advises restarting the console if it is already up to date. Follow the update and restart options shown in the console’s system settings.
The Tool Desk
Outbyte PC Repair FREEClear out junk files and repair common Windows errorsFree Scan →Outbyte Driver Updater FREEScan for outdated or missing drivers - takes under a minuteDriver Scan →Special offer. See more information about Outbyte and uninstall instructions. Please review EULA and Privacy policy. -
Test whether the button registers
For supported buttons, open System Settings → Controllers and Sensors → Test Input Devices → Test Controller Buttons. Press the affected button and see whether its icon registers. Nintendo says that if a Joy-Con is recognized as attached but the button test fails, the affected controller needs service.
#1 Best Overall
Nintendo Neon Purple/Neon Orange Joy-Con (L-R) - Switch- Two Joy Con can be used independently in each hand, or together as 1 game controller when attached to the Joy Con grip
- They can also attach to the main console for use in handheld mode, or be shared with friends to enjoy two player action in supported games
- Each Joy Con has a full set of buttons and can act as a standalone controller, and each includes an accelerometer and gyro sensor, making independent left and right motion control possible
-
Check whether the problem is limited to one game
If the button works elsewhere but not in one game or app, consult that software’s instructions. Nintendo notes that a button may not be compatible with a particular game or app; that symptom does not by itself establish a Joy-Con fault.
Buttons the system test cannot check
The built-in button test does not support POWER, Volume, HOME, SYNC, or Capture. For those inputs, use Nintendo’s troubleshooting guidance for the specific button rather than treating a missing test result as a failure. For example, Nintendo says a recognized right Joy-Con whose HOME button remains unresponsive needs service.
When to arrange service
If the Joy-Con is recognized but a supported input still fails the button test after the checks above, contact Nintendo through the support channel for your region. Repair availability and terms vary by region. Nintendo of America’s guidance says to send the affected Joy-Con for service and not include the console; follow the instructions from your local support channel.
What’s actually slowing this PC down?
Pick the symptom - the matching free tool is one click away.
Is DIY repair appropriate?
For most owners, official service is the appropriate next step after the diagnostic checks fail. Nintendo’s safety leaflet says to stop using a damaged product, contact Nintendo Customer Support, and not try to repair it yourself.
A narrower repair option exists for a specific fault: iFixit’s right Joy-Con SL/SR button-board replacement guide describes replacing that board when a bent board cable leaves SYNC, the player LEDs, and SL/SR buttons unresponsive. It requires a Tri-point Y00 screwdriver, Phillips #00 screwdriver, opening tools, and a replacement board. The guide warns that the ribbon cables are fragile and can be damaged if the controller halves are pulled apart forcefully. This procedure addresses that particular component fault; it is not a general fix for every unresponsive button.
Quick Recap
Product prices and availability are accurate as of the date/time indicated and are subject to change. Any price and availability information displayed on Amazon at the time of purchase will apply.



