This walkthrough covers the standard Water Temple in The Legend of Zelda: Ocarina of Time. Its central loop is to change the water level with Zelda’s Lullaby, then return to rooms and routes that the new height makes reachable. The route below follows the standard-quest progression; it is not a Master Quest guide, because Master Quest changes dungeon puzzles.
Which version this walkthrough covers
The route is for the standard quest, not Master Quest. Nintendo says Master Quest changes the dungeons and puzzles, so its key and room sequence may differ.
| # | Preview | Product | Price | |
|---|---|---|---|---|
| 1 |

|
Legend of Zelda: Ocarina of Time 3D | $49.99 | Buy on Amazon |
| 2 |
|
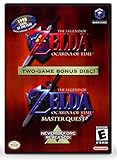
The Legend of Zelda: Ocarina of Time (w/ Master Quest) | $118.95 | Buy on Amazon |
| 3 |

|
The Legend of Zelda: Ocarina of Time -Legendary Edition-: Ocarina of Time | $11.87 | Buy on Amazon |
In the Nintendo 64 original, equipping and removing Iron Boots is less convenient than in the Nintendo 3DS remake. The 3DS version uses its touch-screen inventory for faster equipment changes; producer Eiji Aonuma described that improvement as one motivation for the remake. The route’s water-level logic remains the key to navigating the standard dungeon, but use the controls for your edition.
How to navigate the temple
At Triforce-marked locations, play Zelda’s Lullaby to set the water to low, middle, or high. Each height opens or closes routes, so treat changing the water as a navigation step rather than a one-time puzzle. After each change, check the main chamber and revisit the floor or room the new height has made accessible.
Do these 3 things before closing this tab:
1Scan for outdated or missing drivers - takes under a minute2Clear out junk files and repair common Windows errors3Fix the driver behind crashes, sound loss and screen glitches#1 Best Overall
- This is the world edition. It has different packaging but is fully authentic and works on US region 3DS systems.
- The Legend of Zelda veterans can look forward to the Master Quest - a second quest with revamped puzzles and redesigned dungeons.
- The Legend of Zelda: Ocarina of Time 3D is a masterful improvement on one of the landmark releases in video game history.
- “E10+”, w/Animated Blood, Fantasy Violence, Suggestive Themes
- Keep track of every small key you collect and which locked door you have not opened.
- If you seem to be missing a key, check side rooms and paths that only open at another water height before backtracking further.
- Expect to return to the main chamber and change the water more than once.
Standard-quest route
1. Enter the temple and meet Ruto
Begin by following Ruto’s introduction into the dungeon. Use the main chamber as your reference point: the temple’s branches and vertical routes become available as you alter the water level.
2. Set the water low and collect the early keys
Use the low-water route to reach the early accessible rooms and collect their small keys. Open the locked route available at this stage, and note any side room or door you cannot yet reach. Do not assume a missing key means the dungeon has sent you in the wrong direction; it may require a different height.
3. Raise the water to the middle level
Return to a Triforce-marked location and play Zelda’s Lullaby to raise the water to its middle setting. Recheck the main chamber, then explore the routes and rooms that are now accessible. Collect the keys available on this pass and use them on the corresponding locked doors.
Rank #2
- Play the original Legend of Zelda Ocarina of Time
- Or the Master Quest edition with many bonus features
4. Lower the water again and continue through the central structure
Change the water back to low when the route requires access to the central structure or a lower passage. Follow the newly opened progression route, and keep checking for doors that need a key you found on an earlier pass. The important checkpoint is not simply “low water”: it is low water after the middle-level rooms have been explored.
5. Defeat Dark Link and take the Longshot
Continue until you reach the Dark Link encounter. After defeating him, open the chest for the Longshot. This upgrade gives Link a longer reach and unlocks routes needed for the rest of the temple.
6. Inspect the area beyond the Longshot chest
Do not leave the room immediately after taking the Longshot. Check the area beyond the chest for the follow-on progression route, then return to the main chamber as needed. Use the Longshot to reach paths that were previously out of range.
7. Set the water heights needed for the Boss Key and boss door
Continue switching between water levels to reach the remaining route and obtain the Boss Key. Once you have it, use the appropriate water-height route to reach the boss door. If a passage is inaccessible, verify the current height and revisit the room or floor that height opens rather than searching the same route again.
8. Enter the boss room and defeat Morpha
Use the Boss Key to enter the final room and face Morpha. Defeating Morpha completes the standard Water Temple.
Recommended Free Tools
Where to find a room-by-room key map
The route above describes the standard-quest progression and its water-height checkpoints, but the precise room-by-room sequence and key tally depend on the edition’s layout details. Zelda Dungeon publishes a detailed standard-quest walkthrough and notes small differences between the Nintendo 64 and 3DS versions. Match its room sequence to your edition rather than applying a Master Quest route or assuming every version’s directions are interchangeable.
Quick Recap
Product prices and availability are accurate as of the date/time indicated and are subject to change. Any price and availability information displayed on Amazon at the time of purchase will apply.




