Quick wins for a faster PC:
Fix the driver behind crashes, sound loss and screen glitchesFind Drivers →Clear out junk files and repair common Windows errorsFree Scan →There are 20 Mask Shards in Hollow Knight: Silksong. Every four shards complete one mask upgrade, and collecting all 20 raises Hornet to ten masks without the separate Plasmium Phial effect. Sixteen shards are available by the end of Act 2; the remaining four are Act 3 rewards. This checklist groups them by area and quest rather than by guide numbering, which varies between walkthroughs.
How Mask Shards work
A Mask Shard is part of an ancient protective mask; completing one strengthens Hornet’s shell against damage. Four pieces make one mask upgrade, for five upgrades across the full set. The 20-shard count and Act 2/Act 3 split are reported in Nintendo Life’s location guide; the four-piece rule is also reflected in the Hollow Knight Wiki completion table.
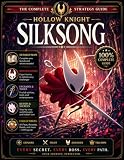
Some shards are tucked into platforming routes, but others come from shops, wishes, hunts, or quests. Check those rewards as well as hidden rooms. Several routes require movement abilities; the notes below identify the important prerequisites so you can avoid unnecessary backtracking.
Act 2 Mask Shards
These 16 shards can be collected by the end of Act 2. The routes below follow area and reward names, not a numbered sequence, because walkthroughs order some entries differently.
PC Slower Than It Used to Be?
A free scan shows the junk files, broken settings and background clutter dragging Windows down - then fixes them in one click.Free scan · Windows 10 & 11Outdated Drivers Are Slowing You Down
One free scan finds every outdated or missing driver and matches the right update for your exact hardware.Free scan · exact hardware match#1 Best Overall
![Hollow Knight: Silksong Standard - Nintendo Switch [Digital Code]](https://m.media-amazon.com/images/I/51mOgOC8xEL._SL160_.jpg)
- Discover the fallen insect kingdom of Pharloom! Explore mossy grottos, gilded cities and misted moors as you ascend to the shining citadel at the top of the world.
- Engage in lethal acrobatic action! Wield a huge suite of deadly moves as you dance between foes in swift, beautiful combat.
- Craft powerful tools! Master an ever-expanding arsenal of weapons, traps, and mechanisms to vanquish your enemies and explore new heights.
- Solve shocking quests! Hunt down rare beasts and solve ancient mysteries to grant the wishes of the downtrodden and restore the kingdom’s hope.
- Face over 200 ferocious foes! Beasts and hunters, monsters and knights. Defeat them all with bravery and skill!
Early Pharloom and travel between regions
- Bone Bottom shop: Buy the shard from the shop for 300 Rosaries. It is a purchase, not a hidden pickup.
- Wormways hidden pool room: Go west from Mosshome, cross the abandoned lifts, and enter the Wormways. Swift Step provides the intended access. Dash through the large ceiling beast’s acid chase, cross the next tall room, drop into the pool, and strike the right wall to reveal the room. GameSpot notes that pogo jumps on flying enemies can provide an alternate early approach; otherwise, return with Swift Step.
- Shellwood hidden room: In the tall room associated with Shakra and a Lost Flea, find the breakable wall at the upper right and complete the jumping challenge beyond it. Watch for enemies on the return route.
- Deep Docks combat trial: The shard is behind a door that cannot be opened from its side. Reach it from The Marrow, using Drift and wall-climbing to take the upper-right route below the passage to Hunter’s March. Defeat four waves of enemies, then collect the shard on the right. Cling Grip is a prerequisite noted in GameSpot’s route.
- Far Fields above the Seamstress: Complete the Seamstress quest to get Drifter’s Cloak. Glide to the top of her room, use the explosive ground or platforms to reach the upper-left exit, and solve the puzzle in the next room. Drop the hot coal from above to break the floor and expose the shard.
- Far Fields skull-shaped house lava room: This separate route requires Double Jump and Magma Bell; use Clawline to reach the house about three screens to the right of the Seamstress. Enter from above, navigate the spikes and explosive floor, and clear four enemy waves. Then climb quickly as the lava rises and use the airflow at the top to reach the hidden nook.
- Savage Beastfly Grand Hunt: Accept the wish from Bellhart’s Wishwall, defeat Savage Beastfly in Far Fields near the Fourth Chorus area, and bring the claw back to the Wishwall. Magma Bell is recommended for the fiery fight. GameSpot also identifies the shard as a bounty reward.
Citadel, Weavenest, and nearby regions
- Weavenest Atla lava room: At the bottom of the light elevator shaft, climb up and take the door on the right. Follow the route to the lava room and complete the jumping and pogo challenge. Move from the bugs toward the right wall, then pogo left while avoiding the lava to reach the shard.
- Cogwork Core / Choral Chambers: After defeating the Cogwork Dancers and resting at the bench in the lower part of Cogwork Core, descend carefully on the left to an opening. Follow the path outside the tall room in Choral Chambers. GameSpot describes this as the left-side collapsing-floor route after the boss.
- Songclave shop: Complete The Wandering Merchant quest, then return to Songclave. Jubilana sells the shard for 750 Rosaries.
- Whispering Vaults hidden block: From the corridor below the bench room, continue into the next room, descend, and head left. Jump and strike upward to expose or move the hidden block. Climb the shaft and use the block to reach the shard.
- Blasted Steps platforming route: Double Jump is required; Swift Step and Clawline are also used. From the Shellwood bench or Bellway, head west toward the edge of Blasted Steps. Make a long jump, grapple, double jump, climb the wall, and continue through the platforming route to the shard.
- Wisp Thicket: Double Jump is needed to enter. From the western tower near the Lost Flea, climb up and enter the area. Move east, then continue to the far right through spikes and fire enemies. Magma Bell is recommended against the fire enemies.
- Bilewater fish room: Above Shakra, take the second door on the right while climbing through Bilewater. Cross the long room with maggot water and fish. At the dead end, jump left and wall-jump to the shard; beware that the fish can pull Hornet into damaging water.
- The Slab, Key of Apostate room: Obtain the Key of Apostate in Putrefied Ducts, reached after defeating Groal in Bilewater according to Nintendo Life’s route. Return to The Slab, unlock the relevant gap, and press the center platform button to reveal the saw-blade puzzle. Use pogo jumps, wall jumps, cages, Clawline, and Double Jump to reach the shard.
- Mount Fay lower-left route: After obtaining Faydown Cloak (Double Jump), return toward the 90-Rosary bench on the mountain’s left side and go one room left. Use Double Jump and Cling Grip to reach the top of the broken pillar and collect the shard.
Four more Mask Shards in Act 3
Nintendo Life’s guide marks these four rewards as unavailable before Act 3. If you have collected 16 and have not entered Act 3, you have not necessarily missed an earlier pickup.
Mount Fay / Brightvein
After obtaining Silk Soar in Act 3, return to Mount Fay and reach the icy-water platform. Use Silk Soar to enter the hidden area, complete its platforming challenge, and collect the shard at the top. GameSpot also describes the Brightvein route and recommends Clawline for mobility.
Rank #2

- Hollow Knight: Silksong is the epic sequel to Hollow Knight, the award winning action-adventure.
- Journey to all-new lands, discover new powers, battle vast hordes of bugs and beasts and uncover secrets tied to your nature and your past.
Far Fields: Fastest in Pharloom
Use Silk Soar through Hunter’s March to reach the new Far Fields route. Beat Sprintmaster Swift in all three races. The first two wins give different rewards; the Mask Shard is the reward for winning the third.
Bellhart: Dark Hearts wish
Complete the Dark Hearts wish by destroying 12 Void Masses, then return to Bellhart for the reward. Void Masses can be found in multiple regions.
Recommended Free Tools
Rank #3
- Classic side-scrolling action, with all the modern trimmings.
- Tightly tuned 2D controls. Dodge, dash and slash your way through even the most deadly adversaries.
- Explore a vast interconnected world of forgotten highways, overgrown wilds and ruined cities.
- Forge your own path! The world of Hallownest is expansive and open. Choose which paths you take, which enemies you face and find your own way forward.
- Evolve with powerful new skills and abilities! Gain spells, strength and speed. Leap to new heights on ethereal wings. Dash forward in a blazing flash. Blast foes with fiery Soul!.Equip Charms! Ancient relics that offer bizarre new powers and abilities. Choose your favourites and make your journey unique!.An enormous cast of cute and creepy characters all brought to life with traditional 2D frame-by-frame animation..
Bellhart: The Hidden Hunter wish
Complete the wish and defeat Gurr the Outcast in Far Fields. Retrieve the Grass Doll from the trapped area and return it to Bellhart. The guide describes the wish as appearing during Old Hearts progression in Act 3; its exact appearance trigger is not established as universal.
Check your count and find what is missing
If you are unsure which pickups remain, first establish your current shard count, then compare it against the Act 2 list and the four Act 3 rewards. At 16 shards before Act 3, the remaining four are expected. At 16 or fewer after progressing into Act 3, check uncompleted quests and shop purchases as well as missed platforming rooms.
Rank #4
![Hollow Knight - Nintendo Switch [Digital Code]](https://m.media-amazon.com/images/I/51nXCF+sf5L._SL160_.jpg)
- Classic side-scrolling action, with all the modern trimmings.
- Forge your own path! The world of Hallownest is expansive and open. Choose which paths you take, which enemies you face and find your own way forward.
- Evolve with powerful new skills and abilities! Gain spells, strength and speed. Leap to new heights on ethereal wings. Dash forward in a blazing flash. Blast foes with fiery Soul!
- Equip Charms! Ancient relics that offer bizarre new powers and abilities. Choose your favorites and make your journey unique!
- An enormous cast of cute and creepy characters all brought to life with traditional 2D frame-by-frame animation.
The third-party Silksong Wiki progression tracker says it can read a save file to show collected and missing items, overall completion, and map markers. Its instructions say saves are under %userprofile%appdataLocalLowTeam CherryHollow Knight Silksong; select the most recently dated user*.dat file. The tracker lists all Mask Shards among 100% completion requirements and was last updated August 9, 2026. It is not an official Team Cherry feature, so use it only if you are comfortable uploading a save to a third-party tool.
Why guide numbers may not match
Nintendo Life and GameSpot both describe 20 shards and four pieces per mask upgrade, but their displayed order and numbering differ in places. Compare the area or quest name and the stated prerequisites rather than assuming a different number means a missing item. The location routes above are based on editorial walkthroughs; community-maintained wiki pages corroborate shard purpose and completion requirements, but there is no primary Team Cherry location list cited here.
Do these 3 things before closing this tab:
1Repair Windows errors before they cause bigger problems2Scan for outdated or missing drivers - takes under a minute3Clear out junk files and repair common Windows errorsQuick Recap
Product prices and availability are accurate as of the date/time indicated and are subject to change. Any price and availability information displayed on Amazon at the time of purchase will apply.



