Litematica is used in two distinct ways: as a blueprint overlay that you build against in any mode, or as a Creative-mode paste tool that performs the block placement for you. To use it, install the version-compatible mod and dependencies, place a .litematic file in .minecraft/schematics/, load it from the M menu, create a placement, position and inspect its hologram, then choose either a building workflow or the separate paste workflow.
Before you start
Litematica’s files and controls can vary with the Minecraft version and installed mod build. Check the current release, loader and dependency information on the official Modrinth listing before installing. The compatibility details are not identical for every version, so do not assume a tutorial for one release applies unchanged to another.
- Install Litematica and the required library/dependencies for your Minecraft version.
- Obtain a
.litematicschematic file. - Start the game once with the mod installed, then use the in-game menus rather than relying only on vanilla keybind settings.
Load a schematic
- Copy the
.litematicfile into.minecraft/schematics/. - Enter a world and press M to open Litematica’s main menu. If the key is different in your installation, open the mod’s Hotkeys settings as described below.
- Choose Load Schematics.
- Select the file and load it. Loading makes the schematic available as source data; it does not yet place a copy into the world.
The project’s overview and FAQ document this menu path and the distinction between a loaded schematic and an in-world placement: Litematica Wiki.
Create and position a schematic placement
A placement is an instance of the loaded schematic with its own position, orientation and visibility settings. One loaded schematic can have multiple placements, so loading a file and creating a placement are separate operations (official Litematica site).
#1 Best Overall

- CREEPIN’ IT REAL — Truly live the block life with Razer’s officially licensed gaming mouse for Minecraft
- 58G LIGHTWEIGHT DESIGN — Built to fit most grip styles, the mouse allows for fast, precise control and feels comfortable to use during long gaming sessions
- GEN-3 OPTICAL MOUSE SWITCHES — Unrivalled durability and speed with switches that have an extended 90-million click lifecycle and eliminate double-clicking issues, boasting a blistering 0.2 ms actuation time without debounce delay
- CHROMA LIGHTING WITH GRADIENT UNDERGLOW — Customize the mouse with 16.8 million colors and countless lighting effects, creating a more immersive gaming experience as the lights react dynamically with hundreds of Chroma-integrated games
- PRECISE SENSOR ADJUSTMENTS — Fine-tune the mouse's sensitivity with precise adjustments in 50 DPI increments to achieve a truly tailored play style
Create or select the placement
From the Litematica menu, open the placement controls and create a placement from the schematic you loaded, or select an existing placement. The selected placement is the one affected by placement tools and inspection actions.
Move the hologram
- Switch the tool to Schematic Placement mode.
- Use the placement controls to move the hologram to the intended origin.
- Set rotation or mirroring in the placement configuration when the build needs a different orientation.
- Lock the placement after aligning it. Locking prevents accidental movement while you build or inspect.
If the overlay appears in the wrong place, verify that you selected the intended placement before changing its position. The placement model and configuration options are covered on the official Litematica site.
Inspect the hologram and build from it
Once the placement is aligned, the rendered schematic shows where blocks belong. In the ordinary blueprint workflow, you place the real blocks yourself while using the overlay as a guide; Litematica does not automatically place normal survival blocks.
Rank #2

- ICONIC ERGONOMIC DESIGN WITH THUMB REST — PC gaming mouse favored by millions worldwide with a form factor that perfectly supports the hand while its buttons are optimally positioned for quick and easy access
- 11 PROGRAMMABLE BUTTONS — Assign macros and secondary functions across 11 programmable buttons to execute essential actions like push-to-talk, ping, and more
- HYPERSCROLL TILT WHEEL — Speed through content with a scroll wheel that free-spins until its stopped or switch to tactile mode for more precision and satisfying feedback that’s ideal for cycling through weapons or skills
- 11 RAZER CHROMA RGB LIGHTING ZONES — Customize each zone from over 16.8 million colors and countless lighting effects, all while it reacts dynamically with over 150 Chroma integrated games
- OPTICAL MOUSE SWITCHES GEN 2 — With zero unintended misclicks these switches provide crisp, responsive execution at a blistering 0.2ms actuation speed for up to 70 million clicks
Use render layers to work in sections
Large structures are easier to read when you isolate part of the height or another slice of the schematic. Use Render Layers to show only the portion you are currently building or checking, then change the layer range as you progress. Layer and rendering controls are documented in the project’s wiki.
Do these 3 things before closing this tab:
1Fix the driver behind crashes, sound loss and screen glitches2Repair Windows errors before they cause bigger problems3Scan for outdated or missing drivers - takes under a minuteToggle rendering when the overlay gets in the way
The documented default shortcuts are:
- M + R: toggle all Litematica rendering.
- M + G: toggle schematic rendering.
- M + P: open schematic placements.
These are defaults, not guaranteed universal bindings. A different keyboard layout, Minecraft version or personal configuration can change them.
Understand Litematica’s tool modes
The active tool mode determines what the Litematica tool does. You can change modes through the mode selector in the menu, or with Ctrl plus the mouse wheel while holding the enabled tool item. The default tool item is a stick, and it can be changed in configuration (official site).
Rank #3

- Pentakill, 5 DPI Levels - Geared with 5 redefinable DPI levels (default as: 500/1000/2000/3000/4000), easy to switch between different game needs. Dedicated demand of DPI options between 500-8000 is also available to be processed by software.
- Any Button is Reassignable - 11 programmable buttons are all editable with customizable tactical keybinds in whatever game or work you are engaging. 1 rapid fire + 2 side macro buttons offer you a better gaming and working experience.
- Comfort Grip with Details - The skin-friendly frosted coating is the main comfort grip of the mouse surface, which offers you the most enjoyable fingerprint-free tactility. The left side equipped with rubber texture strengthened the friction and made the mouse easier to control.
- 5 Decent Backlit Modes - Turn the backlit on and make some kills in your gaming battlefield. The hyped dynamic RGB backlit vibe will never let you down when decorating your gaming space, it would be better with other Redragon accessories with lights on.
- Fatigue Killer with Ergonomic Design - Solid frame with a streamlined and general claw-grip design offers a satisfying and comfortable gaming experience with less fatigue even though after hours of use.
Check the selected placement and tool
If a click or hotkey affects the wrong structure, check both selections: the active tool mode and the selected schematic placement. Also confirm that the tool HUD and relevant rendering are enabled. A correct schematic can appear unresponsive when the tool is in a different mode or is targeting another placement.
Change keybinds through Litematica’s configuration
Litematica uses the malilib custom keybind framework. Its controls are managed in the mod’s own configuration rather than only in Minecraft’s vanilla Controls screen.
Windows Errors? Fix Them Before They Spread
Repair common Windows errors and clear accumulated junk for a smoother, more stable PC - no reinstall needed.Free scan · no reinstallOutdated Drivers Are Slowing You Down
One free scan finds every outdated or missing driver and matches the right update for your exact hardware.Free scan · exact hardware match- Press M + C to open configuration with the documented default shortcut.
- Open the Hotkeys section.
- Find the action you want to change, such as opening the menu, toggling rendering or switching a mode.
- Assign an unused key combination and apply the change.
If M, M + C or another documented shortcut does nothing, open the configuration using the key currently assigned to Litematica’s menu, then inspect the Hotkeys tab. Check your keyboard layout and any conflicts with other mods. The project FAQ explains this keybind system and the documented defaults: Frequently Asked Questions.
Rank #4

- The next-generation optical HERO sensor delivers incredible performance and up to 10x the power efficiency over previous generations, with 400 IPS precision and up to 12,000 DPI sensitivity
- Ultra-fast LIGHTSPEED wireless technology gives you a lag-free gaming experience, delivering incredible responsiveness and reliability with 1 ms report rate for competition-level performance
- G305 wireless mouse boasts an incredible 250 hours of continuous gameplay on just 1 AA battery; switch to Endurance mode via Logitech G HUB software and extend battery life up to 9 months
- Wireless does not have to mean heavy, G305 lightweight mouse provides high maneuverability coming in at only 3.4 oz thanks to efficient lightweight mechanical design and ultra-efficient battery usage
- The durable, compact design with built-in nano receiver storage makes G305 not just a great portable desktop mouse, but also a great laptop travel companion, use with a gaming laptop and play anywhere
Blueprint building versus pasting
Choose the workflow that matches your game mode and permissions. They are not two names for the same operation.
| Aspect | Blueprint-assisted building | Pasting |
|---|---|---|
| Game mode | Can be used while playing normally and placing blocks yourself. | Creative-mode operation. |
| How blocks enter the world | You gather and place blocks while following the hologram. | Litematica performs the configured schematic placement operation. |
| Best use | Survival projects, learning a layout, and controlled construction. | Rapid reproduction in a permitted Creative environment. |
| Multiplayer limits | Ordinary building follows the server’s normal block-placement rules. | Server permissions and command/support implementation determine whether it works. |
| Safety check | Align and lock the placement, then build against the visible layers. | Confirm the selected placement, paste mode, target position and tool HUD before executing. |
The official Schematic Pasting instructions specify the Creative-only restriction and multiplayer dependency on server support.
Independent reader supportYour contribution helps us test, update, and keep practical guides available for everyone.How to paste a schematic in Creative mode
- Enter Creative mode in a world where the operation is allowed.
- Load the schematic and create or select its placement as described above.
- Switch the tool to Paste Schematic mode.
- Verify the placement’s position, rotation or mirroring, and the visible tool HUD before committing.
- Execute the configured paste operation using the action shown by your installed version.
Pasting is not a survival auto-builder. In multiplayer, a server may block the required commands or otherwise restrict the operation even when your local settings are correct.
The Tool Desk
Outbyte Driver Updater FREEFix the driver behind crashes, sound loss and screen glitchesFind Drivers →Outbyte PC Repair FREERepair Windows errors before they cause bigger problemsFix Now →Best Value
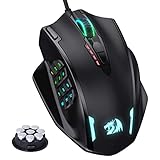
- Professional Gaming Mouse - Redragon M908 optical gaming mouse is designed with up to 12400 DPI, 5 adjustable DPI levels (500/1000/2000/3000/6200 DPI) meet your multiple needs, either for daily work or gaming. DPI can be adjusted freely by ±100 from 200 to 12400 via software. 1000 Hz polling rate, 30G acceleration and high-precision Pixart PAW3327 Sensor giving you a greater edge over your competition.
- RGB Backlight & Programmable Buttons - 16.8 million RGB LED color options (LED Backlight can be disabled). 18 programmable buttons, 5 memory profiles each with a dedicated light color for quick identification. Comes with 8-piece weight tuning set (2.4g x8), easy to change the weight to suit your games.
- Comfort & Precision At Your Hands - Redragon M908 gaming mouse is an essential computer accessory for die-hard with its aggressive design for hands! You will be amazed by the unmatched comfort, lethal accuracy and killer precision of our durable, desktop and laptop pro gaming mouse!
- High-end Design - Redragon M908 Mouse features 6 buttons and 12 MMO programmable side buttons. Durable smooth TEFLON feet pads for ultimate gaming control. 6ft braided-fiber cable with gold-plated USB connector ensures greater durability.
- Die-hard Players Choice - Whether you are targeting, aiming, slashing or attacking, a professional gaming mouse is your basic weapon! The mouse will be your ideal partner. Compatible with Windows 2000/ME/XP/03/VISTA/7/8/10 system for programmable using and Mac OS for normal using.
Troubleshooting checklist
The schematic is not listed
- Confirm the file ends in
.litematic. - Confirm it is in
.minecraft/schematics/for the game instance you actually launched. - Return to M → Load Schematics and refresh or reopen the list if needed.
The hologram is missing
- Make sure the schematic was loaded and that a placement was created.
- Use M + P or the placement menu to select the placement.
- Check whether M + R or M + G disabled rendering.
The hologram is in the wrong location or direction
- Switch to Schematic Placement mode.
- Check the selected placement, then adjust position, rotation or mirroring.
- Lock the placement only after it is aligned.
The tool does the wrong thing
- Check the current tool mode and selected placement.
- Hold the enabled tool item and use Ctrl + scroll to select the intended mode, or use the menu selector.
- Confirm the tool HUD and schematic rendering are enabled.
A shortcut or menu label differs
Open Litematica’s own configuration and inspect Hotkeys. Defaults can differ across versions and keyboard layouts; the FAQ’s listed combinations are reference defaults, not a promise that every installation uses them (FAQ).
Pasting fails on a server
First verify Creative mode, the selected placement and Paste Schematic mode. If those are correct, the remaining limitation may be server permissions or missing command support; local keybind changes cannot override that restriction. Consult the official pasting instructions.
Quick Recap
The practical sequence to remember
- Install the build and dependencies matching your Minecraft version.
- Place the
.litematicfile in.minecraft/schematics/. - Use M → Load Schematics.
- Create or select a placement.
- Position, orient and lock the hologram.
- Use render layers and configurable hotkeys while building.
- Use Paste Schematic mode only for an allowed Creative-mode operation.
Product prices and availability are accurate as of the date/time indicated and are subject to change. Any price and availability information displayed on Amazon at the time of purchase will apply.