The Tool Desk
Outbyte PC Repair FREERepair Windows errors before they cause bigger problemsFix Now →Outbyte Driver Updater FREEFix the driver behind crashes, sound loss and screen glitchesFind Drivers →Some links on this page are affiliate links: if you buy through them we may earn a commission, at no extra cost to you.
The best Arduboy DIY route depends on what you already have. Choose the official Arduboy Kit if you want a documented soldering project, install the official FX mod-chip if you already own an original Arduboy, or build a homemade clone only if you are comfortable matching its wiring, display, bootloader, and external flash to the software. If you mainly want to play games, the finished FX-C is the simpler choice.
“Arduboy DIY with FX” is not one universal product. It describes three related projects that add or use external flash storage for an Arduboy-compatible handheld.
What FX adds to an Arduboy
A standard Arduboy runs a game primarily from the ATmega32U4’s internal memory: 32 KB of program flash, 2.5 KB of RAM, and 1 KB of EEPROM. Arduboy FX adds external SPI flash so a device can hold a game collection and display a bootloader menu for selecting titles. The official FX-C specifications list 16 MB of external flash.
External flash does not increase the ATmega32U4’s RAM or internal program space. A conventional game can run from internal program flash while the external chip stores a collection. FX-aware games can also use the external memory for larger graphics, maps, music, or other assets, provided they are compiled for the appropriate target and library configuration.
#1 Best Overall

- 【Powerful Performance & Complete Features】 The RG43V Pro handheld game console is powered by a 2.0GHz RK3562 CPU, allowing free switching between EmuELEC and RGBOX systems. This retro gaming console runs 2D/3D games smoothly, comes with 64GB of built-in storage, and supports playing 22,000 classic games. It supports WiFi multiplayer gaming and HDMI TV output.
- 【RG43V Pro Compatible with Multiple Games】The newly upgraded RG43V Pro handheld gaming console adopts dual-system design for double gaming fun. The EmuELEC (EE) system includes 5,000 classic games, it supports over 10 game formats and allows free game downloading. The retro game console supports 2D and fifth-generation 3D games as well as ported games. RGBOX also allows access to the RGBOX APP via a WiFi downloader, offering over 22,000 classic retro games for a richer gaming experience.
- 【4.3-Inch IPS Full HD Display】The RG43V Pro handheld retro game console is equipped with a 4.3-inch HD IPS fully laminated display, featuring a clear 1024*768 HD resolution. The fully laminated display and anti-glare treatment ensure excellent color reproduction and wide viewing angles, significantly reducing eye strain and making long gaming sessions more comfortable. Whether playing classic 2D games or fifth-generation 3D games, every frame is presented with astonishing clarity and detail.
- 【All-in-One Multifunctional Gaming Console】The RG43V Pro handheld game console is designed for comfort and responsiveness, with dual 3D joysticks, sensitive mechanical buttons and Hall effect linear triggers for precision. Built-in vibration motor offers immersive feedback, plus 7-color adjustable joystick lights to enhance gaming vibe. Enjoy rich sound via high-fidelity speakers or 3.5mm headphone jack. Connect to TV via HDMI for big-screen play, and built-in 2.4G WiFi & Type-C OTG ensure smooth connection and expanded gameplay.
- 【Portable Design and 4000mAh Battery】 The RG43V Pro handheld gaming console is equipped with a safe 4000mAh battery, providing 6-8 hours of gameplay. The gaming handheld also features a compact and lightweight design, making it easy to fit into your bag or pocket. Whether commuting, traveling, or relaxing at home, it offers instant access to a vast game library, making it an ideal portable handheld gaming console for gaming anytime, anywhere.
EEPROM remains separate and is used for small persistent data such as settings or saves. When developing with Arduboy2, use the library-defined EEPROM starting address rather than overwriting its reserved area.
Choose the right DIY route
| Route | Best for | Main trade-off |
|---|---|---|
| Official Arduboy Kit | Learning soldering on a documented, purpose-built board | Still requires careful assembly, especially around the flash chip |
| FX mod-chip upgrade | Owners of an original Arduboy who want official-style FX functionality | Fine soldering, battery handling, and bootloader risk |
| Homemade clone | Experienced makers designing custom cases, boards, or controls | Pin mapping, display compatibility, firmware, power, and enclosure work |
| Finished FX-C | Players who want a working handheld with minimal troubleshooting | Less educational and less customizable than DIY |
Official Arduboy Kit
The kit is an educational hand-assembly project, not a plug-and-play console. Its documented parts include a PCB, Pro Micro, 128×64 OLED, buttons, speaker, headphone jack, reset button, external flash chip, tweezers, practice PCB, and USB cable. The official instructions describe it as an intermediate soldering project, although a beginner can attempt it with patience and magnification.
It is the most predictable DIY option because the PCB and expected wiring are documented. The kit’s external flash chip is also the component most likely to challenge a new surface-mount solderer.
Upgrade an original Arduboy
The official FX upgrade is suitable when preserving the original enclosure and display matters. The installation involves opening the case, managing the battery and speaker wiring, aligning the mod-chip with PCB pads, soldering it, and updating the relevant bootloader or FX firmware. The official installation guide describes the physical installation as taking less than ten minutes, but beginners should allow additional time for verification and recovery.
Do not continue to burn the bootloader if flash verification fails. The official guide warns that doing so can brick the device and may require external programming hardware.
Rank #2

- Classic Gaming Experience: Enjoy 200 built in games featuring a variety of retro classics including arcade, puzzle, and adventure games. Designed to bring back nostalgic gameplay while offering fun entertainment for all ages anytime anywhere.
- Portable Handheld Design: Compact and lightweight mini game console that is easy to carry in your pocket or bag. Perfect for travel, commuting, or relaxing at home with instant access to your favorite games.
- Multiplayer With Controller: Comes with an external controller that supports two player gaming. Share the fun with friends and family and enjoy interactive gameplay together on one device.
- Rechargeable Battery Powered: Built with a rechargeable battery for convenient wireless use. Easily recharge using USB and enjoy extended gaming sessions without the need for frequent battery replacement.
- User Friendly And Gift Ready: Simple controls and easy setup make it suitable for all ages. A great gift option for birthdays, holidays, and special occasions for anyone who loves retro gaming.
Build a homemade clone
A practical clone needs an ATmega32U4-based board, a compatible 128×64 monochrome OLED, six momentary buttons, a piezo speaker, reset circuitry, USB, and an external SPI flash chip. Portable versions additionally need a battery, safe charging and protection circuitry, a power switch, and an enclosure.
A Pro Micro is a common starting point, but “any Pro Micro” is not a safe compatibility assumption. Bootloader, voltage, clone quality, pin mapping, and USB behavior vary. The same applies to OLEDs: matching resolution is not enough. Verify the controller, voltage, interface mode, pin order, reset line, chip-select behavior, and library support.
Crashes, No Sound, or Screen Glitches?
Random freezes, missing sound and display glitches usually trace back to one bad driver. Find and replace yours safely.Free scan · under a minutePC Slower Than It Used to Be?
A free scan shows the junk files, broken settings and background clutter dragging Windows down - then fixes them in one click.Free scan · Windows 10 & 11Hardware and tools
Core electronics
- ATmega32U4 board or a verified custom PCB
- 128×64 monochrome OLED with a known-compatible controller and interface
- Six momentary buttons
- Piezo speaker
- Reset button
- USB data connection
- External SPI flash chip
- Wiring or PCB, enclosure, and power switch
- Battery and a properly designed charging/protection circuit for portable use
Workshop equipment
- Temperature-controlled soldering iron, solder, and flux
- Tweezers, side cutters, and solder braid
- Magnification and good lighting
- Multimeter
- Known-good USB data cable
Work with ventilation and eye protection. Disconnect power before soldering. Never short, puncture, bend, or put pressure on a lithium-polymer battery or its tabs. USB-C provides no automatic guarantee of safe battery charging: a homemade device must have an appropriate charging and power design.
Assembling the official kit
Use the supplied instructions as the authority for component orientation and exact assembly. A sensible overall sequence is:
- Inspect the PCB and identify each footprint.
- Practice on the included practice PCB.
- Install low-profile components first.
- Add buttons, reset switch, speaker, connectors, and other larger parts.
- Fit the Pro Micro.
- Install the OLED and headers.
- Solder the external flash chip carefully, using flux and minimal solder.
- Inspect every joint under magnification for bridges, lifted pins, and cold joints.
- Check continuity and power rails with a multimeter before applying power.
- Connect USB and test with known-good firmware before installing the board in its enclosure.
Preheating the pad and component, applying flux, and using less solder are generally safer than trying to correct a large blob afterward. Do not install the battery until the unpowered checks and USB test are satisfactory.
Rank #3
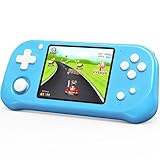
- 139 FUN 32-BIT GAMES:139 preloaded 32-bit games across casual, puzzle, and sports categories, this handheld game console works straight out of the box — no downloads, no WiFi needed, and no disruptive in-game ads required. With a fixed library of 139 non-expandable titles, kids can jump right into gameplay instantly with zero parental setup needed. The precision joystick is built to withstand frequent use, delivering smooth, responsive control for every race and puzzle challenge.
- EYE-FRIENDLY 3.5'' IPS HD SCREEN– The 3.5-inch IPS display delivers crisp, vivid colors with 178° wide viewing angles, so siblings can watch the action from either side. Low blue light technology helps reduce eye strain during longer play sessions. The screen is protected by a scratch-resistant plastic cover, and the shell is made from durable ABS plastic ,built to survive drops from little hands.
- ERGONOMIC DESIGN: This handheld game console boasts an ergonomic design that ensures a comfortable grip during play. The contoured shape fits snugly in little hands or adult palms. The responsive arcade-style joystick and well-placed buttons offer smooth, intuitive control, making every gaming session a breeze. Weighing just 0.48lb and with dimensions of 7.08"×3.35"×1.18", it’s ultra-portable,easy to slip into a backpack or pocket for road trips and flights.
- USB-C RECHARGEABLE:Equipped with a powerful rechargeable battery, this handheld game console delivers 6+ hours of uninterrupted playtime on just one charge.No disposable batteries needed,just plug in the included USB-C cable charge and Play. Whether you're diving into classic adventures or casual puzzles, ensures the fun going without sudden power cuts mid-game.
- PERFECT HOLIDAY & OCCASION GIFT: Makes a thoughtful birthday,christmas, easter or any special occasion gift for boys and girls ages 4-12. Blending nostalgic classic charm with modern convenience, this handheld game console is sure to surprise and delight kids, teens, and seniors alike.Perfect travel companion for kids.
Designing a compatible homemade board
Compatibility is a systems problem, not a parts-list problem. Document the ATmega32U4 pin assigned to every button, display signal, speaker channel, reset connection, and SPI flash line. Confirm the flash chip’s supply voltage and the firmware’s expected memory layout.
The original Arduboy pin arrangement is not optional if you want to use unmodified software. Different wiring may require board definitions, compile-time pin changes, a different Arduboy core, or patched builds. The official Kit flasher specifically warns that games for the kit must be compiled for its alternative wiring.
A display can remain blank even when it has the right resolution if its controller, interface mode, pin order, reset behavior, or initialization sequence differs. Likewise, a larger flash chip is not automatically usable: the wiring, voltage, firmware, and cartridge tools must all support it.
Set up Arduino development
The standard development path is Arduino IDE with the Arduboy libraries. The official quick-start guide lists libraries including Arduboy, Arduboy2, ArduboyTones, ArduboyPlaytune, ArdBitmap, ArdVoice, ATMlib, and Arduboy-TinyFont. Arduboy2 is the primary community development library described there; the original Arduboy library has been superseded for much community development.
- Install Arduino IDE.
- Open Sketch → Include Library → Manage Libraries… and install the library required by the project.
- Open File → Examples → Arduboy2 → Hello World.
- For a standard Arduboy-style target, select Tools → Board → Arduino Leonardo.
- Select the serial port under Tools → Port.
- Compile and upload the example.
A homemade board may need a custom board package or a target-specific core. The official guide notes that a homemade-board package can include Arduboy2 and conflict with a separately installed copy. Treat this as a version-sensitive setup issue: check the package documentation and remove duplicate or incompatible library installations when compilation reports ambiguous or duplicate definitions.
Do these 3 things before closing this tab:
1Repair Windows errors before they cause bigger problems2Fix the driver behind crashes, sound loss and screen glitches3Clear out junk files and repair common Windows errorsRank #4

- 【400 Preloaded Retro Classic Games】Built-in 400 classic retro games, covering puzzle, casual, shooting, action, sports and logic multiple genres. 100% offline playable with zero ads and no downloads. Diverse game libraries meet different play needs, bringing lasting fun and delivering safe and pure gaming experience for all players.
- 【3.0-inch Eye-Friendly IPS HD Screen】Adopts 3.0-inch high-definition IPS screen with vivid colors and ultra-clear picture quality. Upgraded eye-protection panel reduces eye fatigue effectively, bringing immersive and comfortable gaming vision. Compact screen size fits portable scenarios perfectly, suitable for home use and outdoor travel.
- 【Lightweight Ergonomic Portable Design】Mini lightweight body with ergonomic molding, fits small hands perfectly for long-time comfortable grip. Pocket-sized design is easy to store in bags or pockets. It combines retro style with modern comfort, ideal as a travel companion for handheld gaming anytime, anywhere.
- 【1020mAh Large-Capacity Rechargeable Battery】Built-in 1020mAh high-capacity battery supports long-lasting uninterrupted gaming. Adopts universal USB fast charging, portable for outdoor power supplement. Comes with adjustable volume function, enabling quiet private gaming in public without disturbing others.
- 【Easy Operation & Premium Festival Gift】Simple one-key operation with clear game guide, all-age friendly for all players. Safe, durable and fun, it is an ideal gift for birthday, Christmas, Easter and various holidays. A cost-effective entertainment gadget that brings full surprises and joy to game lovers.
Uploading ordinary games and FX collections
There are two different workflows:
- Single internal game: upload a normal compiled game, commonly as a
.hex, to replace the currently running internal program. - FX game collection: build and flash a cartridge image containing the menu, game metadata, game files, and any required external assets.
FX is not a USB drive, and a game is not normally added to the menu by copying one file into the external chip. The collection commonly has to be rebuilt and uploaded as a complete compatible image. Preserve the original cartridge image before experimenting.
The Arduboy Web Flasher states that an FX device must be in its bootloader menu before upload. It also explains that .arduboy files can contain the .hex and .bin components needed to publish an FX game. File support varies by target and tool, so do not assume that every uploader handles every package identically.
On an FX device, hold Up and Down together for about three seconds while in a game to enter the menu. Left and right select categories; Up and Down scroll through titles. Use a genuine USB data cable. A charge-only cable can make a perfectly working board appear to have no serial port.
Independent reader supportYour contribution helps us test, update, and keep practical guides available for everyone.Build a custom game collection
- Use game files you are legally allowed to distribute.
- Identify whether each game is a standard Arduboy title or FX-aware.
- Select the exact hardware target, including kit or clone wiring.
- Build or edit a compatible cartridge image and metadata.
- Back up the existing image.
- Flash the complete resulting image.
- Test both ordinary titles and games that require external assets.
Arduboy Cloud provides browser-based development, emulation, creative tools, .arduboy package handling, cartridge import/export, downloadable bundles, and Web Serial communication. It is convenient, but browser support, permissions, operating-system behavior, and device-target support can vary. For a homemade board, verify that the selected target matches your wiring before relying on direct hardware upload.
Quick wins for a faster PC:
Clear out junk files and repair common Windows errorsFree Scan →Fix the driver behind crashes, sound loss and screen glitchesFind Drivers →Repair Windows errors before they cause bigger problemsFix Now →Common problems and recovery
No USB serial port
- Replace the cable with a known-good data cable.
- Check the power switch and USB connector solder joints.
- Enter bootloader mode and look for the temporary port.
- Recheck the board and port selections.
- On a homemade board, test USB and the ATmega32U4 bootloader before adding battery or flash complexity.
Upload times out or fails verification
Check the board target, serial port, bootloader timing, browser permission, USB stability, and power. The Web Flasher specifically requires the FX device to be in its bootloader menu. An incompatible file type or cartridge image can also fail even when the USB connection is healthy.
Best Value

- 【2026Newly Classic Retro Game Console】 The XF40V retro handheld game console features a powerful Linux operating system and a 1.5GHz quad-core processor, allowing it to smoothly run over 20,000 pre-installed classic games across 20+ emulators. Fast loading and stable performance ensure a smooth gaming experience! Note: This product is not suitable for people under 12 year old.
- 【Innovative Dual 3D Detachable Joystick Design】 Our protable retro game console features a revolutionary detachable joystick system. Unlike traditional handheld game consoles with fixed handles, our specially designed joysticks can be easily swapped out to suit your gaming preferences. Enjoy smooth, precise control with stylish, responsive controls. Integrated 9-color LED lighting adds visual impact and enhances the gaming atmosphere, ensuring an immersive gaming experience at all times.
- 【64GB Large Storage, Powerful Performance】 The 64GB of built-in storage accommodates your extensive game library, allowing you to play classic games anytime without worrying about running out of memory, giving you a reliable, uninterrupted gaming experience.
- 【4.0-inch IPS Tempered Glass Screen】 The 4.0-inch IPS screen boasts a resolution of 720*720, delivering crystal-clear visuals. The scratch-resistant tempered glass protector ensures durability while displaying vibrant colors and crisp, sharp details. Whether you're playing fast-paced action games or exploring a detailed RPG world, the high-quality display provides an immersive viewing experience and reduces eye strain during extended gaming sessions.
- 【Portable Pocket Retro Game Console】 This compact retro game console is designed for mobile gaming and features a powerful 4000mAh rechargeable battery for up to 6 hours of continuous gaming. The lightweight design fits easily into a pocket or bag, and the built-in stereo speakers and 3.5mm headphone jack provide flexible audio options for both private and shared gaming experiences.
The game uploads but is absent from the FX menu
Likely causes include uploading only a normal .hex, failing to rebuild the cartridge image, compiling for another target, omitting the game from the image, malformed metadata, or using an incompatible FX format.
The screen is blank
Check power, ground, interface mode, pin order, reset, chip-select, data/command lines, controller type, library configuration, and solder bridges. A 128×64 label alone does not establish compatibility.
External flash verification fails
Stop before updating or burning the bootloader. Inspect chip orientation, bridges, lifted pins, ground, SPI wiring, supply voltage, and mod-chip contact. The official FX guide warns that proceeding after failed verification can brick the device.
The reset button does not work
The official guide warns that the button is fragile and should be pressed centrally without excessive force. Use the USB bootloader procedure when available rather than repeatedly forcing the switch.
The device is bricked
Recovery may require an ISP programmer, access to the ATmega32U4 programming pins, a known-good bootloader image, correct fuse settings, and careful verification. Do not apply a generic recovery procedure without knowing the exact board, bootloader, programmer, and firmware files.
DIY or FX-C?
The official FX-C product page currently lists a Standard edition from $79 and a Founders Limited Edition at $89, but price and availability are volatile. It lists USB-C, 16 MB external flash, an 180 mAh battery, and more than 300 games, while other official pages describe the menu as containing more than 200 games. Treat the count as edition- and catalog-dependent. The manufacturer also claims more than eight hours of battery life; that is not an independent measurement.
Buy the FX-C if your priority is playing quickly, a finished enclosure, and less troubleshooting. Choose the kit if the build itself is the point. Choose the mod-chip if you already own an original Arduboy and accept fine soldering and recovery risks. Choose a clone if custom hardware is more important than predictable compatibility.
Free tools Windows power users keep installed
One-click scans. No signup required.
DIY is not automatically cheaper. Tools, failed parts, PCB fabrication, batteries, enclosure work, and your time can erase any parts savings. It is worthwhile when the educational and customization value matters.
Quick Recap
Product prices and availability are accurate as of the date/time indicated and are subject to change. Any price and availability information displayed on Amazon at the time of purchase will apply.

