Some links on this page are affiliate links: if you buy through them we may earn a commission, at no extra cost to you.
Yes, you can load N64 homebrew through a GameShark Pro—but only with specific hardware, and it is a finicky, temporary upload method rather than an EverDrive replacement. The documented setup uses a GameShark Pro with a rear parallel port, a MosChip MCS7705-based USB-to-parallel adapter, an N64 Expansion Pak, and the open-source gs_libusb uploader. A computer sends code into the console while a retail game is running; the GameShark does not read homebrew from an SD card.
This guide walks through the known test path, explains what to check before buying hardware, and covers why arbitrary homebrew may need modification to work.
| # | Preview | Product | Price | |
|---|---|---|---|---|
| 1 |
|
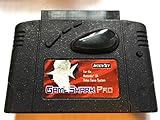
GameShark Pro | $51.99 | Buy on Amazon |
| 2 |
|
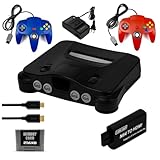
Nintendo 64 (Renewed) | $169.98 | Buy on Amazon |
| 3 |

|
Nintendo 64 Console | $195.16 | Buy on Amazon |
What “via GameShark” means
This is not about entering cheat codes. There are three different GameShark uses that are easy to conflate:
Quick wins for a faster PC:
Scan for outdated or missing drivers - takes under a minuteDriver Scan →Repair Windows errors before they cause bigger problemsFix Now →Fix the driver behind crashes, sound loss and screen glitchesFind Drivers →- Entering cheat codes for a retail game.
- Using the GameShark as a pass-through cartridge, with a retail game inserted on top.
- Using the GameShark Pro’s rear parallel port and Code Generator functionality to upload executable code from a computer.
This guide covers the third method. The computer transfers code into N64 memory after the console has booted a setup game. The GameShark is acting as a code loader, not as permanent storage. The gs_libusb project documents its uploader for a GameShark Pro 3.3 and a compatible USB-to-parallel bridge.
#1 Best Overall
Check the GameShark before you start
Look for a GameShark Pro with a physical parallel port on the back. A Pro 3.3 is the version directly documented by gs_libusb; community accounts also describe working versions in the 3.1–3.3 range. Do not rely on a listing that says only “GameShark 3.0+”: version and port details matter, and GameShark Pro 3.0 is reported to lack the rear port. See the Hackaday overview and the version history reference.
Before buying, request a clear photo of the back and version label. A standard GameShark without the port, an Xplorer 64, or another cheat cartridge is not a substitute unless it has been independently shown to support this specific loader. The compatibility claim is about the port and loader workflow, not every device that can apply N64 cheats.
What you need
- An original Nintendo 64 console and controller connected to Controller Port 1.
- A GameShark Pro with the rear parallel port, preferably a documented 3.3-compatible unit.
- A known-compatible retail N64 setup cartridge, such as Super Mario 64 or Pilotwings 64.
- A working 4 MB N64 Expansion Pak.
- A USB-to-parallel adapter based on the MosChip MCS7705 chipset. Generic printer adapters are not known to be interchangeable.
- A computer running Linux, or a Linux virtual machine with USB pass-through.
gs_libusb, its included test files, and eventually a homebrew binary that supports this loading method.
The Expansion Pak is required for the documented GameShark loader procedure, according to the Flyback Labs walkthrough. That does not mean every homebrew program needs the Pak, nor that the Pak makes every program fit: individual software still has its own memory requirements. The GameShark cannot emulate the Expansion Pak.
Set up Linux and the uploader
A native Linux installation avoids virtual USB complications. If you use a VM, the cited walkthrough uses VirtualBox with the Extension Pack and USB 3.0 enabled; pass the MCS7705 adapter through to the guest. The host must release the device so Linux in the VM can claim it.
On Debian or Ubuntu, install the libusb development package:
sudo apt-get update
sudo apt-get install libusb-1.0-0-dev
Obtain the gs_libusb source and, from its extracted repository directory, build it:
sudo make clean
sudo make
The repository’s basic build instruction is make; the walkthrough uses the clean build above. Before trying to upload, check that Linux sees the adapter:
What’s actually slowing this PC down?
Pick the symptom - the matching free tool is one click away.
Rank #2
- Sleek Black N64 Console: A classic Nintendo 64 reimagined in a bold black finish, blending retro charm with a modern aesthetic.
- Two Vibrant Controllers: Jump straight into multiplayer fun with a red and blue controller included, perfect for head-to-head gaming sessions.
- Save & Store with Ease: The included 256KB memory card gives you plenty of space to save game progress across your favorite titles.
- Modern Display Ready: An HDMI and cable are included, delivering a clean, high-quality connection to today's TVs right out of the box.
- Everything You Need to Play: Complete with a power and all essentiala, this is ready for instant setup — ideal for nostalgic fans and curious newcomers alike.
lsusbThe expected device is identified as a MosChip Semiconductor MCS7705 parallel-port adapter. If it does not appear inside the Linux environment, the uploader cannot reach the GameShark. Check the chipset, cable connection, VM USB settings and pass-through, and whether the host has claimed the adapter. A printer cable that works for printing may not expose the low-level interface this method requires.
Prepare the N64
- Turn off the console and install the Expansion Pak.
- Insert the GameShark Pro into the N64 cartridge slot, then insert the setup game into the GameShark’s top slot.
- Connect the MCS7705 adapter to the GameShark’s rear parallel port and connect it to the computer.
- Connect a controller to Controller Port 1 and power on the N64.
- In the GameShark menu, enable Code Generator.
- Start the game using Without Cheats and leave it running at a stable screen, such as the Super Mario 64 file-select screen.
The game must already be running and Code Generator must be enabled before you start the computer-side upload. The loader is not a way to boot a homebrew file from a powered-off console.
Load the included test program
Start with the included Neon64 example rather than an arbitrary ROM. From the repository directory, the documented command is:
./gsuploader/gsuploader examples/neon64gs.bin examples/efp.nesThis sends the GameShark-compatible Neon64 program and the included NES test image. A walkthrough gives the same command pattern with a placeholder ROM:
Crashes, No Sound, or Screen Glitches?
Random freezes, missing sound and display glitches usually trace back to one bad driver. Find and replace yours safely.Free scan · under a minutePC Slower Than It Used to Be?
A free scan shows the junk files, broken settings and background clutter dragging Windows down - then fixes them in one click.Free scan · Windows 10 & 11sudo ./gsuploader/gsuploader examples/neon64gs.bin examples/YOUR_ROM.binUse the actual file path in place of YOUR_ROM.bin. The N64 may appear frozen while the data transfers; do not reset it immediately. When the upload completes, Neon64 should appear. Press a button to start, and use L+R to open its main menu, as described in the loader walkthrough.
The repository also includes a flame demo, loadable with:
./gsuploader/gsuploader examples/flames.binThis is an advanced example: its required load address differs, and the project notes that the NEON64_MODE definition must be changed before compiling the relevant program. Treat Neon64 as the first validation test, not the flame demo.
Rank #3
Trying your own homebrew
Do not assume that any .n64, .v64 or .z64 file can be passed to the uploader unchanged. A homebrew title may expect a different load address, a different startup or ROM-header arrangement, more memory, or a cartridge feature this setup does not provide. It may have been built for a flashcart-specific loader rather than the GameShark path.
The Tool Desk
Outbyte Driver Updater FREEScan for outdated or missing drivers - takes under a minuteDriver Scan →Outbyte PC Repair FREEClear out junk files and repair common Windows errorsFree Scan →Test in stages: first get the included Neon64 example running, then try a simple homebrew demo, then attempt your own build. If you are developing for this route, the gsdevkit project combines GameShark-oriented tools with gsuploader and libdragon-related components. Its installer was tested on an old Ubuntu release, so do not treat it as a modern, turnkey setup.
An emulator is useful for checking basic program behavior, but emulator success does not prove a binary will run on an N64. Real hardware has fixed memory limits and actual cartridge, timing, controller, save and CIC behavior. For comparison, test the same program on a modern flashcart if one is available.
Independent reader supportYour contribution helps us test, update, and keep practical guides available for everyone.Key codes and setup games
Key codes concern whether a GameShark will boot with certain retail cartridges; they are not commands for uploading homebrew. The GameShark Pro 3.2 manual lists games including Ocarina of Time, Yoshi’s Story, F-Zero X, Diddy Kong Racing, Banjo-Kazooie and 1080° Snowboarding as requiring key-code handling in its April 1999 list.
If a target game will not reach the GameShark menu, begin with a known-compatible setup cartridge. Where the manual calls for a key code, the basic procedure is to reach the menu using a setup game, open Key Codes, select the code for the game you actually own, power off, replace the setup cartridge with that game, and reboot. The manual warns that activating a code without the corresponding game can leave the GameShark configured in a way that depends on that cartridge. For a first homebrew attempt, avoid a setup cartridge known to need a key code.
Troubleshooting
| Symptom | What to check |
|---|---|
| GameShark menu never appears | Reseat the GameShark and top cartridge; try a known-compatible setup game. If the game needs a key code, follow the manual’s procedure. Confirm that the GameShark is a suitable Pro model and is not faulty. |
Adapter is missing from lsusb |
Confirm it uses the MCS7705 chipset, check that it is connected, and ensure the VM has claimed it rather than the host. Verify VirtualBox USB 3.0 support and Extension Pack if using that VM route. |
| Upload times out or stalls | Confirm that the game is running, Code Generator is enabled, and the game was started without cheats. Check USB pass-through and adapter stability; a VM exposing the device through USB 1.1 can cause problems. |
| The picture appears frozen during transfer | A frozen-looking screen can be normal while code is being sent. Allow the upload to finish. If no expected output appears afterward, investigate the connection, mode, test file and Expansion Pak before resetting and retrying. |
| Black screen after the upload | Verify the Expansion Pak, start from a stable game screen, and test the included Neon64 example. If that works, the custom binary may have incompatible memory, startup, load-address, region or cartridge assumptions. |
| Program works in an emulator but not on the N64 | Check for reliance on emulated behavior, excessive memory, unsupported peripherals, timing assumptions, or a flashcart-specific layout. Emulator compatibility is not hardware verification. |
| Retail game fails after selecting a key code | Use a compatible setup cartridge to return to the menu and correct the key-code selection. Do not select a code for a game you do not have. |
Is a GameShark better than a flashcart?
The GameShark route makes sense if you already own a suitable Pro and want to experiment with a distinctive hardware upload technique. Its advantages are reuse of existing vintage hardware, an open-source uploader and no need to buy an SD flashcart. Its costs are a specific GameShark revision, a chipset-sensitive adapter, the Expansion Pak, a Linux build environment and repeated uploads after every power-off. Compatibility with arbitrary homebrew is not guaranteed.
For regular use, a flashcart is the more practical choice:
- SummerCart64 is an open-source-oriented option with USB and microSD loading, developer tooling, automatic save writeback and 64DD emulation, according to its feature list. It is a stronger fit for active development and experimentation, though sourcing may involve community production or DIY routes.
- EverDrive-64 X7 offers an SD-card workflow and USB development features. Its manual also documents GameShark cheats, IPS/APS patches, multiple save types and PAL/NTSC support.
- 64drive is developer-focused, with USB-oriented capabilities and hardware documentation. Its purchase page has carried an old order-hold notice; check the seller directly rather than assuming it is currently available.
These alternatives differ in features and availability; check their current documentation and supply before choosing. If you only need to test whether a program starts, an emulator is the quickest first check, but real-console testing still matters. Use homebrew, demos and game images you are legally entitled to use; technical ability to load a file does not determine the legality of distributing commercial game images.
Quick Recap
Product prices and availability are accurate as of the date/time indicated and are subject to change. Any price and availability information displayed on Amazon at the time of purchase will apply.
Do these 3 things before closing this tab:
1Scan for outdated or missing drivers - takes under a minute2Repair Windows errors before they cause bigger problems3Fix the driver behind crashes, sound loss and screen glitches
