The sync button’s location depends on the console. On a standard Wii, it sits behind the SD Card slot cover on the front. On a Wii mini, it is on the left side beside the battery compartment. On a Wii U, you press the console’s SYNC button to open the pairing screen. On Nintendo Switch, Switch Lite, Switch OLED, and Switch 2, there is no console sync step for Joy-Con. You start pairing from the HOME Menu and press the SYNC button on the controller itself.
Find your console model first
Nintendo’s sync instructions differ by generation, so identify your system before looking for a button. The model name is printed on the front of the console and on its box. The table below summarizes the official Nintendo procedures covered in this guide.
| Console | Where the console has a sync control | Where pairing starts | Controller step |
|---|---|---|---|
| Wii (standard) | Behind the SD Card slot cover on the front | Console SYNC button | Press the Wii Remote SYNC button below its batteries |
| Wii mini | Left side, beside the battery compartment; a darker red than the console body | Console SYNC button | Press the Wii Remote SYNC button below its batteries |
| Wii U | Console SYNC button (pressed from the Wii U Menu) | Pairing screen | Press SYNC on the back of the Wii U Pro Controller |
| Switch, Switch Lite, Switch OLED, Switch 2 | No console sync step for Joy-Con | HOME Menu: Controllers > Change Grip and Order | Hold the Joy-Con SYNC button for at least one second |
| Third-party controllers on any console | Not covered by Nintendo | Set by the controller maker | Follow the manufacturer’s instructions |
Wii and Wii mini
The Wii uses a console sync button and a controller sync button. Nintendo’s Wii Remote procedure applies to both the standard Wii and the Wii mini, with different console button locations.
Standard Wii
Open the SD Card slot cover on the front of the console. The console SYNC button is behind it.
Do these 3 things before closing this tab:
1Clear out junk files and repair common Windows errors2Scan for outdated or missing drivers - takes under a minute3Repair Windows errors before they cause bigger problems#1 Best Overall

- The next evolution of Nintendo Switch
- One system, three play modes: TV, Tabletop, and Handheld
- Larger, vivid, 7.9” LCD touch screen with support for HDR and up to 120 fps
- Dock that supports 4K when connected to a compatible TV*
- GameChat** lets you voice chat, share your game screen, and connect via video chat as you play
Wii mini
The SYNC button is on the left side of the console, next to the battery compartment. It is a darker shade of red than the rest of the console body, so look for the colour difference rather than a raised button.
Syncing a Wii Remote
- Press the Wii Remote’s SYNC button, located below its batteries, so its Player LED begins to blink.
- While the Player LED is blinking, quickly press and release the console’s SYNC button.
- Wait until the Player LED stops blinking and stays lit. Syncing is complete.
- Repeat the steps for each additional remote.
If a remote fails to sync, Nintendo notes that syncing extra remotes can fail while certain applications are running. Exit the application and try again.
Rank #2

- 6.2” LCD screen
- Three play modes: TV, tabletop, and handheld
- Local co-op, online, and local wireless multiplayer
- Detachable Joy-Con controllers
- Nintendo Switch is the home of Mario & friends
Wii U
On the Wii U, the pairing process begins at the console, not the controller.
- From the Wii U Menu, press the console SYNC button. The pairing screen appears.
- Press SYNC on the back of the Wii U Pro Controller. If the button is hard to reach, use the GamePad stylus or another small, suitable object.
- Confirm the controller’s Player LED is lit. That indicates syncing is complete.
Nintendo’s Wii U instructions also state that controllers can be synced from the HOME Menu. The official text for that path does not give a separate step-by-step sequence, so the steps above are the procedure to follow.
Rank #3

- Play your way with the Nintendo Switch gaming system. Whether you’re at home or on the go, solo or with friends, the Nintendo Switch system is designed to fit your life. Dock your Nintendo Switch to enjoy HD gaming on your TV. Heading out? Just undock your console and keep playing in handheld mode
- This model includes battery life of approximately 4.5 - 9 hours.
- The battery life will depend on the games you play. For instance, the battery will last approximately 5.5 hours for The Legend of Zelda: Breath of the Wild (games sold separately)
- Model number HAC 001( 01)
Nintendo Switch family
Switch controllers do not have a console sync button to find. Pairing is done from the system software, then the controller is synced at its own SYNC button. Nintendo’s current Joy-Con instructions cover Switch 2, Switch, Switch Lite, and Switch OLED.
Pairing Joy-Con wirelessly
- Make sure the console is turned on and is not in sleep mode. Pairing cannot happen while the console is asleep.
- From the HOME Menu, select Controllers, then choose Change Grip and Order.
- Hold the SYNC button on the Joy-Con for at least one second.
- Confirm the player LED or LEDs stay lit once pairing completes.
Nintendo’s Switch Q&A describes the same path for a first-time controller. The controller’s LED flashes while you hold SYNC, and the screen shows “Paired” when the connection is complete.
Rank #4
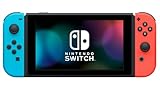
- This pre-owned product is not Apple certified, but has been professionally inspected, tested and cleaned by Amazon-qualified suppliers.
- 6.2” LCD screen.
- Three play modes: TV, tabletop, and handheld
- Local co-op, online, and local wireless multiplayer
- Detachable Joy-Con controllers
Attaching Joy-Con to the console
On the original Switch and Switch OLED, attaching Joy-Con to the console is also a supported pairing method. Switch 2 does not support attaching Joy-Con to the console, so use the wireless procedure above on that system.
Independent reader supportYour contribution helps us test, update, and keep practical guides available for everyone.Third-party controllers and other consoles
Nintendo’s guidance for third-party controllers is to contact the controller’s manufacturer for pairing instructions. The steps for a non-Nintendo controller depend on that maker, not on the console’s sync location.
Quick wins for a faster PC:
Scan for outdated or missing drivers - takes under a minuteDriver Scan →Clear out junk files and repair common Windows errorsFree Scan →Fix the driver behind crashes, sound loss and screen glitchesFind Drivers →Best Value

- One player can use a Joy-Con in each hand
- Two players can each take one
- Multiple Joy-Con can be employed by numerous people for a variety of gameplay options (additional Joy-Con sold separately)
- Slip a set of Joy-Con into a Joy-Con grip accessory, mirroring a more traditional controller. Or, select an optional Nintendo Switch Pro Controller.
Nintendo’s support pages used for this guide do not cover Xbox or PlayStation consoles. The Nintendo steps above should not be applied to those systems. Check the manufacturer’s support page for the console you own.
Nintendo’s official support pages were checked on 8 October 2026. They do not display publication dates, so confirm the current wording on the linked page before relying on a specific interface label.
If a sync attempt fails on any of these systems, check that the console is powered on, that any application you are running is closed, and that the controller has charged or fresh batteries. Then repeat the procedure for your model.
Quick Recap
“
Product prices and availability are accurate as of the date/time indicated and are subject to change. Any price and availability information displayed on Amazon at the time of purchase will apply.
The Tool Desk
Outbyte PC Repair FREEClear out junk files and repair common Windows errorsFree Scan →Outbyte Driver Updater FREEFix the driver behind crashes, sound loss and screen glitchesFind Drivers →



