
Most first-build problems are preventable. The usual causes are not mysterious component failures but mismatched parts, forgotten power connections, incorrect cooler installation, poor cable choices, or troubleshooting too many variables at once.
This guide covers planning, assembly, first boot, and diagnosis. Before working inside a PC, disconnect AC power, never force a connector, and stop using any visibly damaged power cable or connector.
As an Amazon Associate I earn from qualifying purchases.
Before you buy anything
1. Buying parts before defining the workload
Start with what the PC must do. Competitive gaming at high refresh rates, 4K gaming, video editing, 3D rendering, software development, and AI workloads place different demands on the CPU, GPU, memory, storage, cooling, and power supply.
The Tool Desk
Outbyte Driver Updater FREEFix the driver behind crashes, sound loss and screen glitchesFind Drivers →Outbyte PC Repair FREEClear out junk files and repair common Windows errorsFree Scan →Small-form-factor builds prioritize dimensions and thermals. Quiet builds may need a larger cooler and slower fan curves. A gaming build may prioritize the GPU, while a workstation may need more memory, CPU cores, or storage. Choose the case and parts around the workload—not the other way around.
#1 Best Overall

- The original electronics toolkit: Designed for computer, smartphone, tablet, and gaming repair, backed by thousands of free instructions.
- Intentional selection: All the tools you need. A 64 precision bit driver set, tweezers, flex extension, opening tools, and anti-static wristband.
- Secure design: Magnetic case and foam insert ensure secure storage and transportation. Additionally, the inside of the lid serves as a sorting/organization tray.
- Lifetime Warranty: We'll replace anything that breaks, as long as you own it.
2. Checking only the CPU socket
A matching socket does not guarantee a working system. Check the motherboard’s exact CPU support list and required BIOS version, along with its chipset features, VRM capability, memory support, PCIe layout, M.2 slots, rear and front I/O, and display-output behavior.
For example, MSI’s current build guidance identifies Intel Core Ultra desktop processors with LGA1851 and AMD Ryzen 9000 processors with AM5, but socket compatibility alone is not enough. Board revision and firmware support still matter. Use the motherboard manufacturer’s manual and CPU support page as the controlling sources.
MSI’s current PC-building guide covers platform, memory-profile, PSU, and connector considerations.
Quick wins for a faster PC:
Clear out junk files and repair common Windows errorsFree Scan →Scan for outdated or missing drivers - takes under a minuteDriver Scan →Repair Windows errors before they cause bigger problemsFix Now →3. Mixing DDR4 and DDR5
DDR4 and DDR5 are different standards, both physically and electrically. A DDR5 motherboard requires DDR5 desktop DIMMs; a DDR4 motherboard requires DDR4. They are not interchangeable, and a product listing that mentions DDR5 does not mean every motherboard revision in a product family supports it.
Also verify desktop DIMM versus laptop SODIMM, module capacity, ECC versus non-ECC, registered versus unbuffered memory, the number of supported modules, and the board’s memory topology.
4. Assuming advertised memory speed is guaranteed
Memory kits commonly advertise an XMP or EXPO profile rather than a speed guaranteed for every CPU, board, and module combination. XMP is commonly used on Intel platforms and EXPO on AMD platforms, but either may require a BIOS update, the recommended DIMM slots, a lower frequency, or manual stability work.
Install matched modules in the slots specified by the motherboard manual. Update the BIOS where appropriate, enable the profile only after confirming the system is stable at default settings, and test afterward. AMD recommends checking the motherboard’s qualified vendor list and supported configurations when diagnosing memory instability.
Recommended Free Tools
AMD’s memory and stability guidance explains why BIOS currency, QVL information, and supported hardware configurations matter.
5. Ignoring physical dimensions
Check the case specifications against the GPU’s maximum length and thickness, CPU-cooler height, radiator length and thickness, PSU length, RAM height, and front- or top-radiator clearance. A graphics card can fit by length while blocking front fans, drive cages, bottom fans, or the clearance needed to bend its power cable.
Check whether the case includes enough fans and whether a radiator, GPU support bracket, or vertical-mount kit changes the available space.
6. Ignoring PCIe lanes and M.2 sharing
M.2 slots are not always equivalent. Depending on the board, installing a drive can disable or reduce the bandwidth of SATA ports, a secondary PCIe slot, or another chipset-connected function. Some slots connect directly to the CPU while others share the chipset link.
Read the motherboard manual’s storage and expansion-slot table before installing multiple drives or expansion cards.
7. Treating PCIe generations as guaranteed performance
PCIe devices are generally backward-compatible, but the negotiated link runs at the slowest supported generation and width among the connected components. A PCIe 5.0 motherboard does not automatically make an older GPU faster.
Rank #2
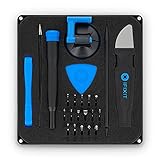
- COMPLETE: This set contains a variety of tools - Besides various opening tools, it includes 16 precision bits (4 mm) and a precision screwdriver with a magnetic bit socket, knurled grip, and swivel top for easy operation.
- STARTER SET: You want to replace a broken screen or battery in your smartphone? This toolkit provides the necessary tools for a basic electronic repair. Compatible with Apple, Samsung, Huawei, Sony and many more devices!
- FUNCTIONAL: Thanks to the foam insert and magnetic closure of the case, tools, components and bits can be safely stored and transported. Additionally, the inside of the lid serves as a sorting tray.
- MUST-HAVE: This tool-set was designed to repair any smartphone, game console, tablet, PC, etc. It also serves for most household DIY fixes.
- IFIXIT QUALITY: These 16 precision-bits (4 mm) are made of high-quality S2 steel. The precisely machined bits fit properly into the screws and protect both the bit and the fasteners from damages.
Riser cables add another variable. A PCIe 4.0 or 5.0 riser must be suitable for the slot and configuration, and signal problems can cause boot or display failures. For diagnosis, install the GPU directly in the primary slot first. AMD specifically recommends removing a riser while investigating instability.
Power-supply mistakes
8. Choosing a PSU by wattage alone
Evaluate continuous wattage, GPU transient behavior, CPU power limits, native connectors, ATX specification, protection features, platform quality, warranty, independent cable requirements, physical length, and fan behavior. A high-wattage poor-quality PSU is not automatically safer than a lower-wattage, well-designed unit.
Use the GPU manufacturer’s recommendation and a reputable calculator as starting points, then leave sensible headroom. There is no universal rule that every ordinary PC needs a particular wattage. MSI’s PSU calculator is useful for an estimate, but it cannot guarantee quality or transient handling.
9. Mixing modular PSU cables
Modular PSU cables are not universal. Cables from another brand—or even another product family from the same brand—may use a different pinout. A cable that fits can send voltage to the wrong pins and damage hardware.
Use only the cables supplied with that exact PSU or cables explicitly approved for its exact series. ASUS warns against treating modular cables as interchangeable.
10. Confusing CPU and PCIe power cables
CPU/EPS and PCIe/GPU connectors can look similar but are wired for different purposes. Identify the cables by their labels and follow the motherboard and graphics-card manuals.
Free tools Windows power users keep installed
One-click scans. No signup required.
- 24-pin ATX: motherboard power.
- 4+4-pin EPS: CPU power near the motherboard’s top edge.
- 6+2-pin PCIe: graphics-card power.
- 12VHPWR or 12V-2×6: compatible modern GPU power connection.
- SATA and peripheral cables: drives, hubs, pumps, and accessories where applicable.
Never force a connector.
11. Forgetting the CPU power connector
The 24-pin cable can be connected while the CPU’s 4- or 8-pin EPS connector is forgotten. The result may be fans or lighting without a successful POST. Confirm the motherboard ATX connector, CPU EPS connector, and GPU power connectors before looking for more exotic faults. AMD’s no-boot checklist starts with these connections.
12. Using inappropriate daisy-chained GPU power
For a GPU with multiple 8-pin connectors, follow the PSU and GPU manufacturer’s cabling instructions. Separate PCIe cables are the conservative default for high-power cards because they reduce the current carried through one cable and connector.
Daisy-chaining is not automatically unsafe for every GPU and PSU, but it is a poor default when the card’s power demand is high unless the manufacturer explicitly supports that arrangement. Corsair discusses connector current and overload considerations.
13. Mishandling a 12VHPWR or 12V-2×6 connector
These related 16-pin implementations are not identical, so identify the exact connector specified for your GPU and PSU. Use the PSU manufacturer’s native cable or an approved adapter, insert it fully, and avoid sharply bending the cable immediately at the plug or applying side-load.
What’s actually slowing this PC down?
Pick the symptom - the matching free tool is one click away.
Maintain the clearance specified by the GPU or PSU manufacturer. Inspect for looseness, discoloration, visible damage, or incomplete insertion. Stop using a damaged connector. Do not mix modular cables. MSI’s current build guidance includes 12V-2×6 and modern GPU power advice.
14. Forgetting the PSU switch or external power
Before assuming a component has failed:
- Test the wall outlet with another device.
- Check the surge protector or power strip.
- Confirm the AC cable is firmly inserted.
- Set the PSU switch to
IorOn. - Confirm the monitor has power and the correct input selected.
AMD includes these external checks before internal troubleshooting.
Assembly mistakes
15. Working on an unsafe or cluttered surface
Use a clean, stable, nonconductive surface and keep liquids, loose metal, and debris away. Avoid carpet where practical. Handle boards by their edges, avoid touching socket pins and exposed contacts, and disconnect AC power before changing components.
Rank #3

- 【Wide Application】STREBITO precision screwdriver set has 120 bits, complete with every driver bit you'll need to tackle any fix or DIY project. In addition, this PC tool kit comes with 22 accessories, such as magnetizer, magnetic mat, suction cup, spudger, cleaning brush, tweezers, etc. Whether you're a professional technician or a amateur, this essential electronics toolkit has what you need to repair all PC, iphone, laptop, PS5, switch, game controller, tablets, glasses, watch, etc
- 【Humanized Design】Our iphone repair tool kit has been designed with the professional in mind to maximize your repair capabilities. The screwdriver features a rubberized, ergonomic handle with swivel top, provides a comfort grip and smoothly spinning. Magnetic bit holder transmits magnetism through the bit, helping you handle small screws and parts. The blade can be extended for working in hard-to-reach areas. And flexible extension shaft is useful for removing screw in tight spots
- 【Magnetic Design】We put 2 magnetic tools in this computer repair tool kit that save your energy and time, make your fixing job easier. The 5.7 x 3.3" magnetic project mat can keep all tiny screws and parts organized, prevent from losing and messing up, make your repair work more efficient. Magnetizer demagnetizer tool helps strengthen the magnetism of the screw driver tips to grab screws, or weaken it to avoid damage to your sensitive electronics
- 【Organize & Portable】All screwdriver bits are stored in rubber bit holder which marked with type and size for fast recognizing. And the repair tools are held in a tear-resistant and shock-proof oxford bag, offering a whole protection and organized storage, no more worry about losing anything. The tool bag with nylon strap is light and handy, suit for your tool case, easy to carry out, or placed in the home, office, car, drawer and other places
- 【Lifetime Warranty】The precision bits are made of 60HRC Chromium-vanadium steel which is resist abrasion, oxidation and corrosion, sturdy and durable, ensure long time use. This computer screwdriver kit is covered by STREBITO lifetime warranty and 30 days money-back. If you have any issues with your phone repair tool kit, simply contact customer service for troubleshooting help, parts, replacement or refund. Buy the STREBITO electronic screwdriver set with confidence
ESD precautions are sensible, particularly in dry environments or on a repair bench, but a single touch does not guarantee that a component will be destroyed. AMD’s processor-handling guidance covers ESD and thermal precautions.
Do these 3 things before closing this tab:
1Clear out junk files and repair common Windows errors2Scan for outdated or missing drivers - takes under a minute3Repair Windows errors before they cause bigger problems16. Installing extra motherboard standoffs
Install standoffs only where the case and motherboard mounting holes correspond. An extra standoff underneath the board can contact circuitry and cause a short. Confirm the motherboard form factor, move misplaced standoffs, and check whether the case has preinstalled standoffs.
17. Forgetting the I/O shield
If the motherboard has a separate rear I/O shield, install it before mounting the board. Ensure its spring tabs do not block ports, then check that every port lines up before tightening screws. Boards with an integrated shield do not need a second one.
18. Installing the CPU incorrectly
Match the orientation marker, lower the retention mechanism correctly, and never force the processor. Keep fingers away from socket contacts. LGA sockets are particularly vulnerable to bent pins, while contamination, misalignment, and excessive force can affect either platform.
AMD’s handling guidance emphasizes correct orientation and contact with the socket.
Outdated Drivers Are Slowing You Down
One free scan finds every outdated or missing driver and matches the right update for your exact hardware.Free scan · exact hardware matchPC Slower Than It Used to Be?
A free scan shows the junk files, broken settings and background clutter dragging Windows down - then fixes them in one click.Free scan · Windows 10 & 1119. Leaving cooler film in place
Many coolers have protective plastic over the cold plate. Remove the intended film before mounting the cooler. Do not touch the contact surface unnecessarily, and confirm the cooler supports the CPU socket and includes the correct backplate and mounting hardware.
20. Applying thermal paste incorrectly
If the cooler does not have pre-applied paste, use the quantity recommended by its manufacturer. A small central application is sufficient for many desktop CPUs; do not create a thick layer unless the instructions say otherwise. Thermal paste fills microscopic imperfections—it is not meant to form a thick barrier.
Do not reuse paste after removing a cooler. Clean contaminated or dried paste and apply fresh material.
21. Mounting the cooler unevenly
Install the correct backplate and mounting bars, then tighten screws gradually in a cross pattern when specified. Confirm full contact, intended fan direction, and clearance from the RAM and first PCIe slot. Poor mounting pressure can cause high temperatures even when the cooler itself is adequate.
22. Installing fans backward
A practical airflow layout is front or bottom intake with rear or top exhaust, but no arrangement is universally best. The fan’s support-strut side usually indicates the exhaust side. Avoid making every fan an intake or every fan an exhaust, and account for filters, obstructions, radiator placement, and fan curves.
23. Forgetting cooler or pump power
A PC may boot briefly and then throttle or shut down if the CPU fan is disconnected, an AIO pump lacks power, or the pump’s USB or SATA connection is missing. Connect the cooler according to the motherboard and cooler manuals, then check CPU_FAN or pump monitoring in BIOS.
24. Installing the GPU in the wrong slot
Use the primary full-length PCIe slot recommended by the motherboard manual, normally the CPU-connected slot. A lower full-length slot may run through the chipset or at fewer lanes. Remove a riser during troubleshooting and connect the GPU directly to the primary slot.
25. Failing to support a heavy GPU
Large cards can sag and place stress on the slot or PCB. Use the included bracket or a stable, case-compatible GPU brace with nonconductive contact surfaces. Do not improvise with a conductive object that could short contacts or obstruct a fan.
Rank #4

- 【Multifunctional Repair Kit】This computer tool kit comes with 120 precision bits and 21 practical accessories, such as extension rods, magnetizers, ESD tweezers, spudgers, magnetic pads, etc., whether you are a professional or a hobbyist, you can use this set of tools to replace the battery and screen of mobile phones, laptops, build computer consoles, install SSDs, repair PS4, Xbox, iPad, tablets, glasses, drones, cameras, HVAC and other almost all electrical appliances.
- 【Wide Application】This precision screwdriver set is equipped with 19 kinds of bits made of CRV steel, hardness 60HRC, sturdy and durable, which can meet your daily maintenance needs. Trox (T5, T8, T10) for upgrading desktop PC, iPhone, Xbox, and PS3/4/5 gamepad controllers. Phillips (PH0, PH1, PH2) for Android phones/Macbook Pro. Pentalobe is for laptops. Others such as Three Wings, Torx Security, Flathead, Standoff, Triangle, Hex, etc. Can be used for doorbells, toy cars, smart watches, etc.
- 【Humanized Design】The screwdriver handle adopts an ergonomic curve design. Granular rubber is embedded on the outside of the handle, which is stable and non-slip. The rear of the handle can be rotated 360° for one-handed operation. The push-type handle head has a strong grip, and with a 5-section extension rod, it is suitable for deep and narrow gaps or holes. The 5.11-inch flexible shaft can be bent 180° and rotated 360°, helping you remove screws at various complex angles.
- 【Dual Magnetic Configuration】This PC tool kit is specially equipped with 2 magnetic tools to help you save time and effort and complete the repair work efficiently. The magnetizer is used to enhance the magnetism of the screwdriver head, which is convenient for you to hold the small screws more stably and not easily fall off. The 5.7*3.3" magnetic pad can adsorb small parts, record the disassembly sequence, prevent loss and mess, and make your repair work more efficient.
- 【Organized Storage & Practical Gift】 All repair tools are packed in Oxford bags, the interior is carefully designed, sorted, and stored, the drill holder is designed with Velcro, sturdy and durable, it is the perfect gift for your lover, father, son, friend, DIY enthusiast, and enjoy repairs with them.
26. Connecting the monitor to the wrong output
For a discrete-GPU gaming system, connect the monitor to the graphics card, not the motherboard. Motherboard video outputs require a CPU with integrated graphics and appropriate firmware behavior.
If there is no image, confirm the monitor input, GPU power, cable, and GPU seating. Try another output or cable where available.
Storage, wiring, and finishing mistakes
27. Installing an M.2 drive incorrectly
Remove the M.2 heatsink’s protective film, confirm the correct standoff position, insert the drive at the specified angle, and secure it flat with the screw or latch. Make sure the heatsink’s thermal pad contacts the drive. Check the manual for slot sharing before installing additional storage.
28. Miswiring the front-panel header
Use the exact motherboard diagram for the case power switch, reset switch, power LED, and drive LED. LED polarity matters; simple switch polarity generally does not. Front USB and audio cables must also go to their matching headers.
Do these 3 things before closing this tab:
1Scan for outdated or missing drivers - takes under a minute2Repair Windows errors before they cause bigger problems3Fix the driver behind crashes, sound loss and screen glitches29. Forgetting front USB-C, USB 3.x, or audio cables
A PC can operate normally while its front ports fail because the cable is disconnected, the motherboard lacks the matching header, or the case and board use different standards. Check header compatibility before buying the case and motherboard, and never force a connector at an angle.
30. Routing cables before confirming the system works
First assemble the core components, perform a preliminary POST test, confirm BIOS access, install the operating system, and test temperatures, storage, memory, and GPU operation. Complete final cable management afterward. Clean routing should improve serviceability, not make basic components inaccessible.
31. Adding too many accessories and adapters
Risers, sleeved extensions, fan hubs, RGB controllers, splitters, USB devices, capture cards, and adapters all add possible failure points. For a failed first boot, remove unnecessary accessories, expansion cards, risers, and hubs. Use one memory kit, one storage drive, and only essential cooling and power.
AMD recommends reducing the system while isolating stability problems.
Crashes, No Sound, or Screen Glitches?
Random freezes, missing sound and display glitches usually trace back to one bad driver. Find and replace yours safely.Free scan · under a minutePC Slower Than It Used to Be?
A free scan shows the junk files, broken settings and background clutter dragging Windows down - then fixes them in one click.Free scan · Windows 10 & 11First boot: what to verify
A PC that powers on is not necessarily working. Distinguish the failure state:
- No power: no meaningful fan, light, or board activity.
- Power but no POST: the system receives power but does not complete firmware initialization.
- POST but no display: firmware may be running, but the display path or GPU has a problem.
- Boot failure: firmware runs but cannot load an operating system.
In BIOS, verify the CPU model, total memory and channel configuration, storage detection, CPU temperature, fan and pump speeds, boot order, BIOS version, and relevant PCIe link information. Do not begin Windows troubleshooting until the firmware detects the essential hardware.
Allow for memory training
Some DDR5 systems take longer during their first boot or after a CMOS reset because of memory training. If the board’s diagnostic indicators show memory activity, consult the manual before repeatedly power-cycling. The exact behavior and duration depend on the motherboard and BIOS.
Update BIOS carefully
A BIOS update can add CPU support or improve memory compatibility, but the exact board model, revision, and firmware file matter. Download firmware only from the manufacturer, read the release notes, use stable power, and do not interrupt the update. Know whether the board supports USB BIOS Flashback or another recovery method.
Use official Windows media
Use Microsoft’s official Windows 11 installation-media process. Keep installation media, activation licensing, chipset drivers, GPU drivers, firmware utilities, and optional vendor control software conceptually separate. Avoid modified images, unofficial activation tools, and unknown driver bundles.
Best Value

- 【113-IN-1 ULTIMATE BIT SET】Includes 98 precision CR-V steel bits covering Phillips, Torx, Tri-Wing, Pentalobe & Spanner. Frequently used bits duplicated. Perfect multi-bit screwdriver kit ready for phone, laptop & PC repair
- 【PREMIUM CR-V & ERGONOMIC HANDLE】High-hardness CR-V steel bits ensure superior wear resistance. Magnetic screwdriver handle features smooth-rotating cap & extendable shaft. Offers maximum control, easy access to deep repair areas
- 【15 PRO REPAIR ACCESSORIES】Equipped with essential electronics tools: flexible extension hose, magnetic bit holder, electric screwdriver adapter, suction cup, spudger set, tweezers, brush & SIM tool. Hassle-free device disassembly
- 【UNIVERSAL DEVICE COMPATIBILITY】Versatile precision screwdriver kit supports smartphones, tablets, laptops, PC maintenance, game consoles, drones, RC toys, watches & glasses. Essential tool set for DIYers and professional technicians
- 【COMPACT PORTABLE STORAGE】Palm-sized, lightweight case keeps every bit clearly labeled and securely organized. Easy-to-carry design makes this magnetic repair tool kit perfect for on-the-go maintenance
Establish a default-settings baseline
Before overclocking or undervolting, test the PC at default settings. Change one setting at a time and validate memory, CPU, GPU, temperatures, sleep and wake, restart, shutdown, applications, and games.
Test more than whether it boots
Check that idle and load temperatures are plausible, run a memory test, exercise the CPU and GPU, try real games or applications, inspect Windows event logs for repeated hardware errors, and confirm every fan responds to temperature changes. AMD’s troubleshooting guidance includes memory testing, BIOS checks, CPU and GPU reseating, and PSU verification.
A practical troubleshooting flow
If there are no lights or fans
- Test the wall outlet.
- Check the power strip or surge protector.
- Confirm the PSU switch is on and the AC cable is secure.
- Check the 24-pin motherboard cable and CPU EPS cable.
- Check the case power-switch connector against the manual.
- If necessary, briefly bridge the identified power-switch pins with a screwdriver, following the manual.
- Remove unnecessary accessories.
- If a case short is suspected, test the core system outside the case on a safe surface.
If fans spin but there is no display
- Turn on the monitor and select the correct input.
- Connect the display cable to the GPU.
- Confirm GPU power and reseat the card.
- Try one memory module in the recommended slot.
- Check debug LEDs or POST codes.
- Clear CMOS according to the motherboard manual.
- Remove risers and expansion cards.
- Try integrated graphics only if the CPU supports it.
- Test another cable, monitor, or PSU where available.
If BIOS sees no memory
Power down, reseat the modules, test one module at a time in the board’s recommended slot, confirm the kit is the correct DDR generation, and clear CMOS if appropriate. Check the QVL and BIOS version. Do not assume a failed DIMM until you have tested the slot and module methodically.
If BIOS sees no storage
Reseat the M.2 drive, confirm the retaining screw and heatsink pad, check whether the selected M.2 slot shares lanes or disables SATA ports, and inspect the manual for supported drive types. For SATA drives, check both data and power cables.
If Windows crashes or the PC reboots
- Check CPU and GPU temperatures.
- Verify PSU capacity, quality, and cabling.
- Return BIOS settings to default.
- Check BIOS and chipset versions.
- Test memory without XMP or EXPO, then retest the profile separately.
- Reseat the GPU and remove any riser.
- Check GPU drivers and storage health.
- Substitute one known-good component at a time where possible.
If temperatures are too high
Check the cooler film, thermal paste, mounting pressure, backplate, fan direction, CPU_FAN or pump connection, pump operation, case airflow, filters, fan curves, room temperature, and CPU power or boost settings. Do not immediately conclude that the cooler is defective.
Important trade-offs
Air cooler versus liquid cooler
Air coolers are simpler, have no pump failure mode, and are often easier to troubleshoot. Liquid coolers can offer more radiator surface area and may improve clearance around tall memory or large VRM heatsinks, but add pump, radiator, tubing, USB, and SATA-power considerations. Radiator placement can affect both CPU and GPU temperatures.
Free tools Windows power users keep installed
One-click scans. No signup required.
Two memory modules versus four
Two modules are often easier to run at an advertised profile than four, but this depends on the platform, BIOS, modules, and operating speed. If capacity matters, a matched two-module kit is often preferable to combining separate kits. Identical model numbers from separate kits are not guaranteed to work together.
Modular versus non-modular PSUs
Modular PSUs reduce cable clutter but create a cable-origin hazard. Non-modular units make cable mixing less likely but leave more unused cables in the case. Semi-modular models sit between the two. In every case, use only cables approved for that exact PSU family.
Integrated versus discrete graphics
Integrated graphics can provide emergency display output and simplify GPU troubleshooting, but a CPU without integrated graphics cannot use motherboard video outputs. A discrete GPU remains the intended output for most gaming builds.
PCIe risers
Risers are useful for vertical GPU mounting and compact cases, but they add another connection and introduce signal-integrity and generation-compatibility variables. Direct GPU installation is the correct baseline when diagnosing a first-boot or stability problem.
Recommended Free Tools
Useful planning and build tools
PCPartPicker can help assemble a parts list, identify obvious conflicts, compare prices, and estimate power needs. Treat it as a discovery tool, not a replacement for the exact motherboard manual, CPU support list, or manufacturer connector instructions.
A basic build usually needs a correctly sized Phillips screwdriver, while a precision toolkit such as the iFixit Pro Tech Toolkit is more useful if you also repair laptops, consoles, or other electronics. Optional ESD equipment can be sensible for carpeted environments or repeated builds, but it is not a guarantee against all damage.
Replacement thermal paste is useful when a cooler has no pre-applied compound or must be remounted. Buy a replacement cooler, additional fans, GPU brace, or replacement modular cable only when the specific build needs one. A replacement cable must be explicitly matched to the PSU series; generic marketplace cables with unclear pinouts are a poor choice.
Quick Recap
Final checklist
- Exact CPU and required BIOS support verified.
- Correct DDR4 or DDR5 memory selected.
- Memory slots, capacity, QVL, and profile expectations checked.
- Case, cooler, radiator, PSU, GPU, RAM, and cable clearances verified.
- M.2 lane sharing and PCIe slot layout checked in the motherboard manual.
- PSU wattage, quality, connectors, and transient requirements evaluated.
- Only the correct modular cables used.
- 24-pin, CPU EPS, GPU, storage, cooler, pump, and front-panel cables connected.
- CPU installed in the correct orientation.
- Cooler film removed and thermal interface correctly installed.
- GPU seated in the primary slot and supported if heavy.
- Monitor connected to the intended display output.
- BIOS detects the CPU, memory, storage, temperatures, and fan or pump speeds.
- System tested at default settings before enabling XMP, EXPO, overclocking, or undervolting.
Product prices and availability are accurate as of the date/time indicated and are subject to change. Any price and availability information displayed on Amazon at the time of purchase will apply.
Quick wins for a faster PC:
Clear out junk files and repair common Windows errorsFree Scan →Scan for outdated or missing drivers - takes under a minuteDriver Scan →
