What’s actually slowing this PC down?
Pick the symptom - the matching free tool is one click away.
The most reliable fix for VALORANT VAN9003 is to make Windows report both BIOS Mode: UEFI and Secure Boot State: On in msinfo32. VAN9003 usually means Riot Vanguard cannot verify the computer’s Secure Boot or UEFI boot state, although a related TPM or attestation problem can produce similar compliance failures.
Do not enable Secure Boot blindly if Windows is currently in Legacy mode. Check whether the system disk is MBR or GPT first, save your BitLocker recovery key before firmware changes, and restart Windows after every BIOS/UEFI change. The steps below cover Windows 11 and the remaining Windows 10 cases, with an important warning that Windows 10 ended normal Microsoft support on October 14, 2025.
As an Amazon Associate I earn from qualifying purchases.
1. Confirm the exact VAN9003 message and restart Windows
Read the complete Vanguard warning before changing anything. VAN9003 is usually related to Secure Boot being unavailable, disabled, or failing Vanguard’s boot-time attestation. The exact message may also mention initial attestation, system compliance, or TPM requirements; those details determine which checks matter.
Quick wins for a faster PC:
Repair Windows errors before they cause bigger problemsFix Now →Scan for outdated or missing drivers - takes under a minuteDriver Scan →Clear out junk files and repair common Windows errorsFree Scan →Restart Windows once before making more complicated changes. If you recently changed a BIOS or UEFI setting, use Restart rather than assuming that shutting down and powering on is enough. Windows and Vanguard need to start again with the firmware’s new boot state.
#1 Best Overall

- 【Ergonomic Design, Enhanced Typing Experience】Improve your typing experience with our computer keyboard featuring an ergonomic 7-degree input angle and a scientifically designed stepped key layout. The integrated wrist rests maintain a natural hand position, reducing hand fatigue. Constructed with durable ABS plastic keycaps and a robust metal base, this keyboard offers superior tactile feedback and long-lasting durability.
- 【15-Zone Rainbow Backlit Keyboard】Customize your PC gaming keyboard with 7 illumination modes and 4 brightness levels. Even in low light, easily identify keys for enhanced typing accuracy and efficiency. Choose from 15 RGB color modes to set the perfect ambiance for your typing adventure. After 30 minutes of inactivity, the keyboard will turn off the backlight and enter sleep mode. Press any key or "Fn+PgDn" to wake up the buttons and backlight.
- 【Whisper Quiet Design】Experience near-silent operation with our whisper-quiet gaming switch, ideal for office environments and gaming setups. The classic volcano switch structure ensures durability and an impressive lifespan of 50 million keystrokes.
- 【IP32 Spill Resistance】Our quiet gaming keyboard is IP32 spill-resistant, featuring 4 drainage holes in the wrist rest to prevent accidents and keep your game uninterrupted. Cleaning is made easy with the removable key cover.
- 【25 Anti-Ghost Keys & 12 Multimedia Keys】Enjoy swift and precise responses during games with the RGB gaming keyboard's anti-ghost keys, allowing 25 keys to function simultaneously. Control play, pause, and skip functions directly with the 12 multimedia keys for a seamless gaming experience. (Please note: Multimedia keys are not compatible with Mac)
2. Check what Windows actually sees in System Information
A BIOS screen saying that Secure Boot is enabled is not conclusive. Vanguard relies on the state Windows receives from the firmware, so check that effective state first:
- Press Win + R.
- Type
msinfo32and press Enter. - In System Summary, find BIOS Mode and Secure Boot State.
The target values are:
| System Information value | Required result | What it means |
|---|---|---|
| BIOS Mode | UEFI | Windows booted through modern UEFI firmware rather than Legacy BIOS compatibility mode. |
| Secure Boot State | On | Windows can verify that Secure Boot is active. |
If BIOS Mode says Legacy, do not simply enable Secure Boot in the firmware yet. A Legacy installation is commonly paired with an MBR system disk, and switching directly to UEFI can make Windows unbootable. If Secure Boot State says Off or Unsupported, continue with the appropriate branch below.
3. Check the disk layout before changing Legacy or CSM settings
Secure Boot requires UEFI. UEFI Windows installations normally use a GPT system disk, while older Legacy installations often use MBR. Confirm the partition style of the disk that contains Windows before changing the boot mode.
The Tool Desk
Outbyte PC Repair FREEClear out junk files and repair common Windows errorsFree Scan →Outbyte Driver Updater FREEScan for outdated or missing drivers - takes under a minuteDriver Scan →One way to check it is through Disk Management:
- Press Win + X and select Disk Management.
- Find the disk containing the
C:partition. Do not assume it is Disk 0 if the computer has multiple drives. - Right-click the disk label on the left, such as Disk 0, and select Properties.
- Open the Volumes tab and check Partition style.
If it already says GPT, the installation is generally ready for a UEFI-only configuration. If it says MBR, use the conversion procedure in the next section rather than switching firmware modes immediately.
4. Convert an MBR Windows disk to GPT when appropriate
Microsoft’s MBR2GPT tool can validate and convert a supported Windows system disk from MBR to GPT without deleting the disk’s user files. Conversion is not guaranteed on every layout, however, and a failed validation should not be bypassed.
Before proceeding:
- Back up important files and make sure you can access Windows recovery options.
- Save your BitLocker recovery key and suspend BitLocker protection if it is enabled. See the BitLocker section below.
- Confirm the correct disk number in Disk Management.
- Do not interrupt the conversion or power off the computer while it is working.
Open Command Prompt as an administrator and validate the Windows disk. Replace 0 with the correct disk number if necessary:
mbr2gpt /validate /disk:0 /allowFullOSIf validation completes successfully, conversion is a separate command:
mbr2gpt /convert /disk:0 /allowFullOSThe tool has layout requirements, including limits on the number and arrangement of primary partitions and a boot configuration it can modify. If validation fails, stop and resolve the reported partition or boot-layout problem with Microsoft’s documentation or a qualified technician. Do not run the conversion command repeatedly or delete recovery partitions casually.
Rank #2
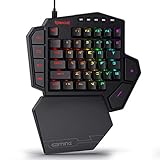
- 7 Onboard Macro Keys for Instant Combos - Bind multiple commands to each of the 7 keys (28 total across 4 profiles), so MMO and MOBA ability rotations fire with a single press instead of fumbling for a full keyboard.
- Swap Switches Without Soldering - The upgraded socket accepts almost any 3-pin or 5-pin switch, so you can tune the feel of your off-hand keypad to match your main board.
- USB Pass-Through Port, Detachable Wrist Rest - Plug your mouse or headset directly into the keypad for a cleaner desk, and unclip the magnetic wrist rest whenever you want a smaller footprint.
- 16.8 Million Colors, 5 RGB Modes - Vibrant lighting effects let your off-hand setup match the rest of your battlestation.
- Pro Software for Even Deeper Customization - Record your own macro sequences and design custom lighting effects, so the keypad adapts to your exact keybinds.
After a successful conversion, restart into the firmware settings and change the boot configuration to UEFI. The computer must boot from the newly created UEFI configuration before Secure Boot can be enabled. Then return to msinfo32 and confirm that BIOS Mode is UEFI.
5. Enter UEFI firmware and disable Legacy or CSM
Once the Windows disk is GPT—or if it was already GPT—enter the motherboard or laptop firmware settings. Windows provides a route to the firmware on many systems:
- Windows 11: open Settings > System > Recovery, choose Restart now beside Advanced startup, then select Troubleshoot > Advanced options > UEFI Firmware Settings > Restart.
- Windows 10: open Settings > Update & Security > Recovery, choose Restart now under Advanced startup, then use the same Troubleshoot and UEFI Firmware Settings path.
If the UEFI option is missing, use the manufacturer’s documented startup key. Depending on the device, it may be F2, Delete, Esc, or another key shown briefly during startup.
Windows Errors? Fix Them Before They Spread
Repair common Windows errors and clear accumulated junk for a smoother, more stable PC - no reinstall needed.Free scan · no reinstallOutdated Drivers Are Slowing You Down
One free scan finds every outdated or missing driver and matches the right update for your exact hardware.Free scan · exact hardware matchIn the firmware, look for settings named Boot Mode, UEFI/Legacy Boot, CSM, or Compatibility Support Module. Set the machine to UEFI-only, or disable Legacy/CSM using the manufacturer’s equivalent option. Do not change unrelated overclocking, storage, or security settings.
Save the change, restart Windows, and run msinfo32 again. You want BIOS Mode: UEFI. If Windows no longer starts, stop changing settings and use the recovery guidance near the end of this article.
6. Enable Secure Boot and restore standard keys if necessary
After Windows is booting in UEFI mode, return to the firmware and enable Secure Boot. The option may be under Security, Boot, or Authentication. Some systems call the Windows-compatible setting Standard, Windows UEFI mode, or a similar name.
Some firmware reports Secure Boot as enabled while Windows still reports Secure Boot State: Off. This can happen when the default Secure Boot key database is missing, altered, or the system is still operating in a compatibility mode. In the firmware’s Secure Boot key-management area, look for an option such as:
Free tools Windows power users keep installed
One-click scans. No signup required.
- Install default keys
- Restore factory keys
- Load default Secure Boot keys
- Reset to standard Secure Boot mode
Exact labels differ by manufacturer. Use the standard factory key configuration for a normal Windows installation, save the changes, and restart. Then check msinfo32 once more. The successful result is BIOS Mode: UEFI and Secure Boot State: On.
Rank #3

- 🎮𝐀𝐥𝐥-𝐢𝐧-𝐎𝐧𝐞 𝐆𝐚𝐦𝐢𝐧𝐠 & 𝐎𝐟𝐟𝐢𝐜𝐞 𝐂𝐨𝐦𝐛𝐨 - 𝐔𝐧𝐛𝐞𝐚𝐭𝐚𝐛𝐥𝐞 𝐕𝐚𝐥𝐮𝐞: Experience premium features without the premium price. This complete wired set includes a full-size RGB backlit keyboard AND a high-precision gaming mouse, offering everything you need for gaming, work, or study. Perfect for first-time gamers, students, and budget-conscious users seeking a durable and responsive upgrade from basic peripherals.
- ✨𝐅𝐮𝐥𝐥𝐲 𝐂𝐮𝐬𝐭𝐨𝐦𝐢𝐳𝐚𝐛𝐥𝐞 𝐑𝐆𝐁 & 𝐌𝐚𝐜𝐫𝐨𝐬 - 𝐘𝐨𝐮𝐫 𝐂𝐨𝐧𝐭𝐫𝐨𝐥, 𝐘𝐨𝐮𝐫 𝐒𝐭𝐲𝐥𝐞: Dive into your gameplay with dynamic lighting. The keyboard features 6 vibrant backlight modes, and the mouse boasts 10 lighting effects. Easily customize colors, brightness, and patterns using the intuitive software (downloadable at redragon.com). Record complex command sequences with the 5 dedicated macro keys for a competitive edge in any game.
- 🔇𝐐𝐮𝐢𝐞𝐭, 𝐂𝐨𝐦𝐟𝐨𝐫𝐭𝐚𝐛𝐥𝐞 & 𝐑𝐞𝐬𝐩𝐨𝐧𝐬𝐢𝐯𝐞 𝐓𝐲𝐩𝐢𝐧𝐠 𝐄𝐱𝐩𝐞𝐫𝐢𝐞𝐧𝐜𝐞: Designed for marathon sessions. The soft-touch membrane keys provide satisfying feedback while remaining remarkably quiet—ideal for shared spaces, late-night gaming, or office use. The included ergonomic wrist rest reduces fatigue, and the anti-ghosting keyboard ensures every key press is registered instantly, even during intense action.
- ⚙️𝐏𝐥𝐮𝐠, 𝐏𝐥𝐚𝐲, 𝐚𝐧𝐝 𝐏𝐞𝐫𝐬𝐨𝐧𝐚𝐥𝐢𝐳𝐞 - 𝐄𝐚𝐬𝐲 𝐒𝐞𝐭𝐮𝐩, 𝐋𝐚𝐬𝐭𝐢𝐧𝐠 𝐒𝐞𝐭𝐭𝐢𝐧𝐠𝐬: Get straight to the fun with true plug-and-play compatibility for Windows 10/11. Your personalized lighting and DPI settings are saved directly to the hardware, meaning they stay the way you set them, even after restarting your PC. Adjust the mouse sensitivity on-the-fly (800-7200 DPI) with a dedicated button for precision in any task.
- ✅𝐑𝐞𝐥𝐢𝐚𝐛𝐥𝐞 𝐏𝐞𝐫𝐟𝐨𝐫𝐦𝐚𝐧𝐜𝐞 & 𝐄𝐧𝐡𝐚𝐧𝐜𝐞𝐝 𝐂𝐨𝐦𝐩𝐚𝐭𝐢𝐛𝐢𝐥𝐢𝐭𝐲: Built to last and work seamlessly. We’ve listened to feedback to ensure reliable performance. This combo is rigorously tested for durability and offers wide compatibility with major PCs and laptops. It’s the trusted, feature-packed kit that delivers excitement for young gamers and reliable functionality for everyday users.
Do not delete individual keys or switch to a custom key configuration as a first-line fix. If the computer uses a custom bootloader, a nonstandard operating system, or a dual-boot setup, restoring keys can affect its ability to boot; consult the device or operating-system documentation first.
7. Check TPM 2.0 only when the message or related Vanguard check requires it
TPM 2.0 and Secure Boot are separate security components. VAN9003 is primarily a UEFI/Secure Boot attestation issue, so a TPM check does not replace the msinfo32 check. Perform this step if the Vanguard message mentions TPM, if a related Vanguard error requires it, or if your Windows security configuration indicates a TPM problem.
Recommended Free Tools
- Press Win + R, type
tpm.msc, and press Enter. - Check that the status says the TPM is ready for use.
- Check Specification Version. When TPM is required, it should be 2.0.
You can also open Windows Security > Device security > Security processor details to inspect the security processor. On many modern systems, the firmware option is not literally called TPM:
- Intel systems may call it Intel PTT or Platform Trust Technology.
- AMD systems may call it AMD fTPM or Firmware TPM.
Windows normally initializes and takes ownership of a supported TPM automatically. Do not manually take ownership of it or clear it from tpm.msc merely because VAN9003 appeared.
8. Protect BitLocker before firmware, boot, or TPM changes
BitLocker can detect changes to Secure Boot, TPM settings, firmware, boot mode, and boot measurements. It may then ask for a recovery key at the next startup. This is expected security behavior, not necessarily a sign that the drive is damaged.
Before changing any of the settings in this guide:
- Search Windows for Manage BitLocker and open the BitLocker control panel, or check Settings > Privacy & security > Device encryption where that option is available.
- Save or print the recovery key. Make sure it is accessible from another device if the affected computer cannot boot.
- Use the available Suspend protection option before a BIOS/UEFI update or significant boot configuration change. Suspending protection is different from decrypting the entire drive.
- After Windows boots normally and the configuration is stable, resume BitLocker protection.
If you are already at a BitLocker recovery screen, use the saved recovery key rather than repeatedly changing firmware settings. If you cannot locate the key, stop before clearing the TPM or making further boot changes.
9. Update Windows, firmware, and official drivers
Pending Windows updates, outdated firmware, or chipset problems can contribute to Secure Boot, TPM, and attestation failures. Update in this order:
Rank #4

- 【65% Compact Design】GEODMAER Wired gaming keyboard compact mini design, save space on the desktop, novel black & silver gray keycap color matching, separate arrow keys, No numpad, both gaming and office, easy to carry size can be easily put into the backpack
- 【Wired Connection】Gaming Keybaord connects via a detachable Type-C cable to provide a stable, constant connection and ultra-low input latency, and the keyboard's 26 keys no-conflict, with FN+Win lockable win keys to prevent accidental touches
- 【Strong Working Life】Wired gaming keyboard has more than 10,000,000+ keystrokes lifespan, each key over UV to prevent fading, has 11 media buttons, 65% small size but fully functional, free up desktop space and increase efficiency
- 【LED Backlit Keyboard】GEODMAER Wired Gaming Keyboard using the new two-color injection molding key caps, characters transparent luminous, in the dark can also clearly see each key, through the light key can be OF/OFF Backlit, FN + light key can switch backlit mode, always bright / breathing mode, FN + ↑ / ↓ adjust the brightness increase / decrease, FN + ← / → adjust the breathing frequency slow / fast
- 【Ergonomics & Mechanical Feel Keyboard】The ergonomically designed keycap height maintains the comfort for long time use, protects the wrist, and the mechanical feeling brought by the imitation mechanical technology when using it, an excellent mechanical feeling that can be enjoyed without the high price, and also a quiet membrane gaming keyboard
- Open Settings > Windows Update and install pending updates. Restart when Windows requests it.
- Find the exact model of the laptop, desktop, or motherboard. Download BIOS/UEFI firmware and chipset-related drivers from that manufacturer’s official support page.
- Read the manufacturer’s release notes and installation instructions before applying a firmware update. Keep the computer connected to reliable power and do not interrupt the update.
- Check
msinfo32again after the update. Firmware can reset Secure Boot, CSM, or TPM options to different defaults.
Firmware updates sometimes correct Secure Boot, TPM, or attestation compatibility issues, but they also change the boot measurements BitLocker uses. That is why saving the recovery key and suspending protection belongs before this step.
Prefer official manufacturer packages. Registry cleaners, unofficial BIOS files, cracked Vanguard installers, and generic driver-updater downloads are not appropriate fixes for VAN9003. They can introduce new security or boot problems.
10. Reinstall Vanguard only after the security state is correct
Although this article has nine main fixes, the final fix has two parts: reinstall Vanguard, then collect diagnostic logs if the verified platform state still fails. Reinstalling Vanguard cannot turn Legacy mode into UEFI or make a missing Secure Boot key database valid, so do it after confirming:
msinfo32shows BIOS Mode: UEFI.msinfo32shows Secure Boot State: On.tpm.mscshows a ready TPM with specification version 2.0 when TPM is required.
To reinstall Vanguard using the normal Riot installation flow:
- Open Settings > Apps > Installed apps in Windows 11, or Settings > Apps > Apps & features in Windows 10.
- Find Riot Vanguard and choose Uninstall.
- Restart Windows.
- Launch the Riot Client or VALORANT so Vanguard is installed again through the official client.
- Restart Windows again if prompted, then test VALORANT.
Do not download a separate Vanguard installer from an unofficial website. If the error remains, run the Riot Repair Tool as administrator, select VALORANT, and collect the generated ZIP file. Attach that ZIP to a Riot support ticket. The tool collects logs for diagnosis; it does not prove that the BIOS or Secure Boot configuration is correct.
Independent reader supportYour contribution helps us test, update, and keep practical guides available for everyone.Windows 10 warning: the troubleshooting path is different in 2026
Riot’s dedicated historical VAN9001/VAN9003 guidance focused on Windows 11, even though users may encounter similar Vanguard messages on Windows 10. Secure Boot and UEFI checks can still be useful on a Windows 10 machine, but Windows 10 reached end of support on October 14, 2025. It no longer receives Microsoft’s normal security and technical-support updates.
If your hardware supports it, upgrading to a supported Windows version is the safer long-term solution. Do not force an upgrade without checking application compatibility, backups, BitLocker recovery information, and the computer’s UEFI and TPM capability. If VALORANT continues to show VAN9003 on Windows 10 after the required security state is verified, the operating system’s unsupported status may be part of the compatibility problem; Riot’s current support requirements should take priority over older Windows 10 instructions.
What to do if Secure Boot causes a boot loop or invalid-signature error
If Windows stops booting after you change UEFI, CSM, Secure Boot, or key settings, do not keep toggling options at random.
Best Value

- Ip32 water resistant – Prevents accidental damage from liquid spills
- 10-zone RGB illumination – Gorgeous color schemes and reactive effects
- Whisper quiet gaming switches – Nearly silent use for 20 million low friction keypresses
- Premium magnetic wrist rest – Provides full palm support and comfort
- Dedicated multimedia controls – Adjust volume and settings on the fly
- Return to the manufacturer’s firmware documentation and verify that the Windows disk is GPT and that the firmware is configured for UEFI.
- Check that the standard Secure Boot keys are installed if the firmware reports that keys are missing.
- If a custom bootloader or dual-boot setup is present, restore the configuration required by that operating system rather than deleting keys.
- Use Windows recovery media or Windows Recovery Environment if available.
- Use professional support if Windows remains unbootable or if you cannot identify the correct firmware settings.
Do not clear the TPM as a recovery shortcut. If BitLocker asks for recovery, use the saved recovery key.
When the computer cannot support the required security features
Some older computers have no UEFI Secure Boot implementation, no compatible firmware TPM, or firmware that cannot be updated to support the required configuration. Software changes cannot add Secure Boot to hardware that does not implement it.
Do these 3 things before closing this tab:
1Clear out junk files and repair common Windows errors2Fix the driver behind crashes, sound loss and screen glitches3Repair Windows errors before they cause bigger problemsFor a desktop, a motherboard replacement may be possible if the processor, memory, storage, case, and power supply are compatible. For a laptop, replacement is usually less practical. A Windows 11-compatible PC is the more realistic fallback when the existing machine cannot provide UEFI Secure Boot and the required TPM capability. Treat this as a hardware-compatibility decision, not a guaranteed VAN9003 fix for every model.
Final VAN9003 verification checklist
- BIOS Mode: UEFI in
msinfo32. - Secure Boot State: On in
msinfo32. - TPM: Ready for use and Specification Version 2.0 in
tpm.mscwhen required. - Disk style: GPT before switching a Legacy installation to UEFI.
- BitLocker: Recovery key saved before firmware or boot changes.
- Software: Windows, official firmware, and official chipset drivers are current.
- Vanguard: Reinstalled only through the Riot Client or Riot’s official support process.
- Diagnostics: Riot Repair Tool ZIP attached to Riot Support if the verified security state does not clear the error.
Common questions
Frequently Asked Questions
Does VAN9003 always mean my TPM is broken?
VAN9003 is mainly a Secure Boot and UEFI attestation error. TPM 2.0 is a separate requirement and should be checked when the Vanguard message or a related error specifically requires it. First open msinfo32 and verify BIOS Mode is UEFI and Secure Boot State is On.
Can I enable Secure Boot while my PC is in Legacy mode?
No. If Windows is installed in Legacy mode on an MBR disk, switching directly to UEFI or enabling Secure Boot can prevent Windows from booting. Check the disk’s partition style first; use MBR2GPT only if validation succeeds, then switch the firmware to UEFI.
Does VAN9003 work differently on Windows 10?
Windows 10 reached end of support on October 14, 2025, so it no longer receives Microsoft’s normal security and technical-support updates. You can still use the UEFI and Secure Boot checks for troubleshooting, but moving to a supported Windows version is the safer long-term path when the hardware allows it.
Should I clear the TPM to fix VAN9003?
Do not clear the TPM as a first-line fix. Clearing it can trigger BitLocker recovery and affect security-protected credentials. Save the BitLocker recovery key, verify UEFI and Secure Boot in msinfo32, and then reinstall Vanguard or collect Riot Repair Tool logs if the state is already correct.
What should I do if Secure Boot makes Windows stop booting?
Return to the manufacturer’s firmware documentation and verify GPT/UEFI compatibility and the standard Secure Boot keys. Use Windows recovery media or professional support if Windows will not boot. If BitLocker requests recovery, use the saved recovery key rather than changing more firmware settings.
The Bottom Line
Bottom line: Start with msinfo32, not with a random BIOS change. VAN9003 normally requires Windows to report BIOS Mode: UEFI and Secure Boot State: On. Check the disk’s MBR/GPT layout before changing boot mode, protect BitLocker, verify TPM 2.0 only when required, and reinstall Vanguard only after the platform security state is correct.
Quick Recap
Product prices and availability are accurate as of the date/time indicated and are subject to change. Any price and availability information displayed on Amazon at the time of purchase will apply.
Free tools Windows power users keep installed
One-click scans. No signup required.




