The Tool Desk
Outbyte Driver Updater FREEFix the driver behind crashes, sound loss and screen glitchesFind Drivers →Outbyte PC Repair FREERepair Windows errors before they cause bigger problemsFix Now →Pick Charm early if support-card bond is valuable: the Global Edition reference reports a 90% success rate, and success grants Charming, which adds +2 bond gain. Pick Winning later if Straightaway Recovery and Corner Recovery suit your build. Choose Health when energy matters more than those skills, or decline treatment for a reported guaranteed +10 energy. The rates and effects below come from a fan-maintained guide, not independently verified official game data.
What each acupuncturist choice does
The event can appear randomly during training; the reference reports a 10% chance of encountering it during a training run. It offers four chakra treatments and the option to decline. The outcomes and success rates in the table are reported for the Global Edition by the Uma Musume Global Reference’s Acupuncturist: Training Events guide, updated August 26, 2026.

| Choice | Reported success outcome | Reported failure outcome | Reported success rate |
|---|---|---|---|
| Strength chakra | +20 to all stats and mood up | -15 to all stats, mood down, and Night Owl | 50% |
| Winning chakra | Learn Straightaway Recovery and Corner Recovery | -20 energy and mood down | 60% |
| Health chakra | +12 maximum energy and +40 energy | -20 energy, mood down, and Practice Poor | 80% |
| Charm chakra | +20 energy, mood up, and Charming | -10 energy and mood down, or -20 energy, mood down, and Practice Poor | 90% |
| Decline treatment | +10 energy | No failure outcome listed by the guide | 100% |
These percentages are guide-reported probabilities, not official rates confirmed independently. In particular, declining is listed as 100% with no failure outcome stated in the guide.
How to choose for your run
Choose Charm when bond gain can pay off
Charm is the usual early-run pick if support-card bond is a priority. On success, Charming provides +2 bond gain, which can help support cards reach orange bond sooner. Its reported 90% success rate is the highest among the four treatments, but it is not risk-free: failure costs energy and lowers mood, with Practice Poor included in one of the guide’s listed failure outcomes.
What’s actually slowing this PC down?
Pick the symptom - the matching free tool is one click away.
#1 Best Overall
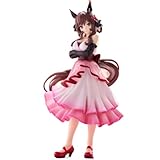
- Display Base Included: Comes with a sturdy base stand for stable display of your figure
- Official Licensed Product: Authentic merchandise officially licensed from the Umamusume: Pretty Derby series
- Character Design: Features Gentildonna from Umamusume: Pretty Derby in detailed sculpted form
- Trio-Try-iT Collection: Part of the Trio-Try-iT figure series manufactured by FuRyu Corporation
- Collectible Figure: High-quality sculpted figure suitable for display in your anime figure collection
Choose Winning when the recovery skills fit
Winning teaches Straightaway Recovery and Corner Recovery on success, with a reported 60% success rate. It can make sense later in a run when those skills fit the build. The guide estimates the pair at about 320 skill points; that is the guide author’s valuation, not a universal conversion. On failure, the listed penalty is -20 energy and lower mood, without a listed debuff.
Choose Health when energy is worth more than skills
Health is an option when energy is the priority and the recovery skills are not needed. Success adds +12 maximum energy and +40 energy, according to the guide. The trade-off is an 80% reported success rate and a failure outcome of -20 energy, lower mood, and Practice Poor.
Rank #2
Decline when you want the lower-risk outcome
Declining treatment gives +10 energy with a reported 100% success rate and no failure outcome listed. It forgoes the larger potential treatment rewards, but is the straightforward choice when avoiding treatment risk matters more than a chance at stats, bond, or skills.
Usually skip Strength unless you want its specific upside
Strength can grant +20 to all stats and raise mood on success, but it has the lowest reported success rate of the treatments, at 50%. Failure costs 15 to all stats, lowers mood, and gives Night Owl. Consider it only when the stat-and-mood upside is worth that risk for your run.
Rank #3

- From Banpresto
- From the popular game
- Figure measures 7 inches tall
- Non-scale
How much confidence to put in the rates
The linked reference is a fan-maintained Global Edition guide, written and reviewed by Erzzy and last updated August 26, 2026. It reports the event’s effects and choice probabilities, but those figures were not independently confirmed against official game data. Treat the percentages as the guide’s reported values rather than guaranteed or officially published odds; the best choice remains dependent on run timing, support bond, skill needs, energy, and your tolerance for a bad outcome.
Quick Recap
Best Value
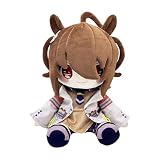
- 【Size】about 9.8 inch
- 【Package】1 Uma Musume Plush
- 【Material】The plush is made of soft pp cotton
- 【Safe】Everything is attached and sewn. There is nothing on the plush that could be dangerous to people
- 【Perfect Home Accent】Ideal for living rooms, bedrooms, offices
Rank #4

- Uma Musume: Pretty Derby Figure from FuRyu Corporation!
- Base Stand included
- Official Licensed Product
- Uma Musume: Pretty Derby
- FuRyu Corporation-Umamusume: Pretty Derby Trio-Try-iT Figure -Orfevre- is the perfect sculpted figure to add to your collection from FuRyu Corporation! Perfect for collectors and fans!
Product prices and availability are accurate as of the date/time indicated and are subject to change. Any price and availability information displayed on Amazon at the time of purchase will apply.




