On Minecraft Java Edition, install Iris with Sodium, place a compatible shader-pack .zip file in the active instance’s shaderpacks folder, and enable it under Options → Video Settings → Shader Packs. On Bedrock Edition, Java shader mods do not work: use the built-in Vibrant Visuals mode where your device supports it, or use a compatible Bedrock PBR/Vibrant Visuals resource pack.
This guide covers the current Java Edition 26.2 workflow, the supported OptiFine alternative, Bedrock graphics options, safe shader downloads, performance tuning, modpacks, and recovery from crashes or missing menus. Compatibility can change independently for Minecraft, Iris, Sodium, OptiFine, and each shader pack, so verify the exact version before installing.
First, identify your Minecraft edition
The most important installation decision is whether you are playing Java Edition or Bedrock Edition. The two editions use different mod systems, file formats, and graphics features.
| Where or how you play | Likely edition | Correct shader method |
|---|---|---|
| Windows, macOS, or Linux using the Java launcher | Java Edition | Iris + Sodium, or OptiFine for an exactly supported version |
| Windows using “Minecraft for Windows” | Bedrock Edition | Vibrant Visuals, RTX where supported, or a Bedrock resource pack |
| Xbox, PlayStation, Nintendo Switch, Android, or iPhone/iPad | Bedrock Edition | Vibrant Visuals or compatible Bedrock content, subject to device support |
| CurseForge, Modrinth App, Prism Launcher, or another modded Java instance | Java Edition | Use that instance’s loader and folder, not necessarily the default .minecraft folder |
Mojang’s Java and Bedrock comparison explains the broader differences, including Java’s traditional mod support and Bedrock’s Marketplace and add-on model.
What’s actually slowing this PC down?
Pick the symptom - the matching free tool is one click away.
#1 Best Overall

- AI Performance: 767 AI TOPS
- OC mode: 2632 MHz (OC mode)/ 2602 MHz (Default mode)
- Powered by the NVIDIA Blackwell architecture and DLSS 4
- Axial-tech fan design features a smaller fan hub that facilitates longer blades and a barrier ring that increases downward air pressure
- A 2.5-slot design maximizes compatibility and cooling efficiency for superior performance in small chassis
On the Windows Minecraft Launcher, the profile normally identifies itself as Java Edition or Minecraft for Windows. If you are using a console or mobile device, you are using Bedrock and should skip the Java installation instructions.
What Minecraft shaders actually are
A shader pack changes how Minecraft renders the scene. Depending on the pack and its settings, it can add or alter dynamic shadows, water reflections and refraction, ambient occlusion, bloom, volumetric fog and lighting, clouds, sky color, depth of field, motion blur, color grading, and material effects such as parallax or PBR.
Three terms are easy to confuse:
- Shader loader: the mod or built-in graphics system that makes shader effects load. Iris is a Java shader loader; Vibrant Visuals is a Bedrock graphics mode.
- Shader pack: the visual-effect files selected in the game’s shader menu. Traditional Java shader packs are usually downloaded as compressed
.zipfiles. - Resource pack: a package that mainly changes textures, models, sounds, and other assets. Some Bedrock Vibrant Visuals packs also contain PBR and lighting-related data.
- Modpack: a larger collection of mods in a managed game instance. It may already include Iris, Sodium, another renderer, or its own shader instructions.
A Java shader pack is therefore not the same thing as a Bedrock resource pack, and neither is the same as a Java mod such as Iris or Sodium.
Install shaders on Java Edition with Iris and Sodium
For a current Java release, Iris + Sodium is the recommended starting point. Iris is designed to load most OptiFine-format shader packs, and its official installer automatically installs Iris and Sodium. Iris currently lists support for Minecraft 26.2 and several earlier releases on its Modrinth project page. Sodium is a client-side rendering optimization mod, although actual performance depends on your hardware, settings, and the rest of your installation.
Iris does not support every OptiFine feature or every shader pack perfectly. Check the shader author’s compatibility notes if a particular pack is important to you.
Before you begin
- Install Minecraft Java Edition and launch the intended Minecraft version at least once through the official launcher.
- Use current graphics drivers and a GPU that can run the selected shader pack.
- Back up important worlds before changing a modded installation. A shader normally changes client rendering, but a separate backup is sensible whenever you modify a game instance.
- Check that the shader pack, Iris, Sodium, Minecraft version, and mod loader are compatible with one another.
Fabric’s mod-installation documentation specifically warns that a mod must match both the Minecraft release and the loader. A pack marked for an older release is not automatically compatible with 26.2.
Step-by-step: use the Iris installer
- Launch vanilla Minecraft once. In the official launcher, select the intended Java release, start the game, reach the title screen or a world, and then exit. This creates the necessary version files and confirms that the basic installation works.
- Download Iris from the official website. Use the Iris download page, rather than a third-party installer or a search-result download button. The page provides a Windows installer and a universal JAR.
- Run the installer. Choose the exact Minecraft version you intend to play. Select the Iris/Sodium installation option if the installer presents one, then choose Install. Iris says its installer downloads and installs both Iris and Sodium automatically.
- Open the Minecraft Launcher. The installer creates a new profile. Its name may be Iris, Iris & Sodium, or a similar name depending on the launcher and installer version.
- Launch the new Iris profile. Do not select the ordinary vanilla profile by mistake. If Iris loaded correctly, the video settings will include a shader-related menu.
- Download a compatible shader pack. Keep the Java shader pack in its original
.zipformat unless the author explicitly documents a different procedure. - Open the shader menu. From the title screen or pause menu, choose Options → Video Settings → Shader Packs. Some Minecraft or modded interfaces label this menu Shaders instead.
- Open the active folder. Click Open Shader Pack Folder. This is safer than guessing the location because launchers and modpacks often use separate instance directories.
- Copy the shader-pack ZIP into that folder. Put the ZIP directly in the folder, not in
modsand not in a second unnecessary folder. - Select the pack in Minecraft. Return to the shader list and click the pack’s name. The renderer may briefly turn the screen black or appear to pause while it compiles the shader.
- Start with a modest preset. Choose the pack’s Low, Lite, Potato, or Medium profile before attempting its highest-quality settings.
Expected Java folder layout
For the default launcher, a typical layout looks like this:
.minecraft/
└── shaderpacks/
    ├── ComplementaryUnbound.zip
    └── BSL_vX.X.zip
That example is not a promise that every launcher uses the same root folder. CurseForge, Modrinth App, Prism Launcher, and other launchers commonly give each profile its own directory. Use Open Shader Pack Folder from the running instance whenever possible.
Manual installation with Fabric
The Iris installer is easiest for a clean setup. A manual Fabric installation is useful when you already have a Fabric instance, are adding shaders to an existing mod list, or your launcher manages instances separately.
- Install Fabric for the exact Minecraft version.
- Download the matching Iris and Sodium JAR files from trusted project pages such as Iris on Modrinth and Sodium on Modrinth.
- Place those JAR files in the active instance’s
modsfolder. - Launch the Fabric profile.
- Open Options → Video Settings → Shader Packs, use Open Shader Pack Folder, copy in the shader ZIP, and select it.
For the default Minecraft launcher, Fabric documents these common folder locations:
Rank #2

- Powered by the NVIDIA Blackwell architecture and DLSS 4. System Requirements: Minimum 850W PSU with 16-pin 12V-2x6 (12VHPWR) connector required. Verify before purchasing.
- Quad-fan design boosts air flow and pressure by up to 20%. Compatibility: 357mm (14.1") length, 3.8 slots, 6.3 lbs. Confirm case clearance and slot spacing. GPU bracket included.
- Patented vapor chamber with milled heatspreader for lower GPU temperatures OC mode: 2790 MHz/ Default mode: 2760 MHz (Boost Clock)
- Phase-change GPU thermal pad ensures optimal heat transfer, lowering GPU temperatures for enhanced performance and reliability
- 3.8-slot design: massive heatsink and fin array optimized for airflow from the four Axial-tech fans
- Windows:
%appdata%.minecraftmods - macOS:
~/Library/Application Support/minecraft/mods - Linux:
~/.minecraft/mods
Third-party launchers may use different paths. Open the launcher’s instance folder or follow its documentation instead of putting files in the default directory. Also, do not assume that Fabric API is universally required for Iris and Sodium; check the dependency list for the exact versions you install. Other Fabric mods may require it.
Using Iris with NeoForge, Forge, or a modpack
Do not copy Fabric-only JAR files into a Forge instance. Iris currently lists Fabric, Quilt, and NeoForge compatibility, but the correct Iris, Sodium, loader, and Minecraft versions must all match. An existing modpack may also pin a specific renderer version.
Free tools Windows power users keep installed
One-click scans. No signup required.
For a NeoForge or other mod-heavy installation:
- Read the modpack author’s shader instructions first.
- Use the loader supported by that pack.
- Do not add Iris, Sodium, OptiFine, or another rendering replacement if the pack already includes a competing renderer without checking compatibility.
- Back up the instance before changing renderer mods.
- Use the pack’s own Open Folder function or the shader folder opened from inside the running game.
Shaders are usually client-side visual changes. A Java server normally does not need your shader pack installed, and other players do not need to use the same pack. However, a modded server may still require a specific client loader, mod list, and Minecraft version before you can connect.
OptiFine: use it only for supported versions
OptiFine remains useful for older installations, OptiFine-specific configurations, and shader setups built around features that Iris does not implement. It should not automatically be the first choice for a current Minecraft release.
As checked for this guide, the official OptiFine downloads page lists Minecraft 26.1.2 preview builds and older releases, but does not list a 26.2 build. Do not install a random file from a tutorial or unofficial mirror and assume it supports 26.2.
Use this route only when the official OptiFine page lists a build for your exact Minecraft version:
The Tool Desk
Outbyte PC Repair FREEClear out junk files and repair common Windows errorsFree Scan →Outbyte Driver Updater FREEScan for outdated or missing drivers - takes under a minuteDriver Scan →- Download the matching OptiFine JAR from the official site.
- Run the installer and allow it to create the OptiFine profile.
- Launch that profile from the Minecraft Launcher.
- Open Options → Video Settings → Shaders.
- Click Shaders Folder.
- Place the shader-pack ZIP in the opened folder and select it.
Do not casually combine OptiFine with Iris, Sodium, or another renderer replacement. Choose one compatible rendering stack for the instance.
Install or enable shaders on Bedrock Edition
Bedrock does not use Iris, Fabric, OptiFine, Java shader JARs, or the Java .minecraft/shaderpacks folder. The official Bedrock graphics path is Vibrant Visuals, while Windows users with suitable hardware can also use the separate RTX/PBR path.
Enable Vibrant Visuals
- Update Minecraft Bedrock through your platform’s normal update system.
- Return to the title screen. If you are already inside a world, exit it completely before changing the graphics mode.
- Open Settings.
- Select Video.
- Find Graphics Mode.
- Choose Vibrant Visuals.
Vibrant Visuals is currently available on compatible Bedrock versions of Windows, Xbox, PlayStation, Android, and iOS. Requirements vary by platform. The official Vibrant Visuals information page specifies, among other requirements, DirectX 12 on PC, Adreno 640/Mali-G68/Mali-G77/Xclipse 530 or newer on Android, and A12 or M1 or newer on iOS. Check the official compatibility information for your exact device.
Depending on the version and device, the mode may offer choices such as Favor Performance and Favor Visuals. Start with performance if the game stutters, then move toward visual quality after confirming that the device remains stable.
Windows Errors? Fix Them Before They Spread
Repair common Windows errors and clear accumulated junk for a smoother, more stable PC - no reinstall needed.Free scan · no reinstallOutdated Drivers Are Slowing You Down
One free scan finds every outdated or missing driver and matches the right update for your exact hardware.Free scan · exact hardware matchRank #3

- 1506MHz Boost Clock (OC Mode) with 2GB GDDR5 on NVIDIA's Pascal architecture
- Asus exclusive heatsink design with passive cooling ensures quiet HTPC and multimedia operation
- Auto-extreme manufacturing technology delivers premium quality and reliability with aerospace-grade Super Alloy Power II components
- Gpu Tweak II makes monitoring performance and streaming easier than ever, featuring Game Booster and a free 1-year premium license of XSplit Gamecaster
- Fully supports DX12 on Microsoft Windows 10
If Vibrant Visuals is missing or grayed out
Try these steps in order:
- Exit the world and change the setting from the title-screen Settings menu.
- Update Minecraft.
- Update the device’s graphics drivers or operating system where applicable.
- Temporarily disable incompatible add-ons, worlds, or texture packs.
- Return to the title screen and check the Video menu again.
- If it remains unavailable, the device may not meet the graphics requirements.
Minecraft Help’s Vibrant Visuals guidance identifies active worlds, incompatible systems, and conflicting add-ons as common reasons the option cannot be selected.
Bedrock resource packs and PBR
A Bedrock visual pack is normally a resource pack or a Vibrant Visuals/PBR pack, not a Java shader ZIP. For ordinary players, use content from the Minecraft Marketplace or a clearly maintained Bedrock source that identifies the required Minecraft version and says whether Vibrant Visuals is supported.
Microsoft’s creator documentation describes Vibrant Visuals packs using the pbr capability and recommends a minimum engine version of 1.21.120 or higher for such packs. This is a Bedrock pack requirement and should not be confused with Java shader-loader compatibility. The technical details are documented in Microsoft’s Vibrant Visuals resource-pack documentation.
Bedrock RTX is a separate option
RTX is not the same as Vibrant Visuals. Bedrock RTX is a Windows-only, hardware-dependent ray-tracing path that requires a DirectX ray-tracing-capable GPU and a compatible PBR/ray-tracing world or resource pack. Microsoft gives NVIDIA GeForce RTX 20-series-and-newer and AMD Radeon RX 6000-series-and-newer hardware as examples in its ray-tracing requirements.
Recommended Free Tools
Where to download shader packs safely
Good starting points include:
- The shader author’s official website.
- Modrinth’s shader directory, using its Minecraft-version and loader compatibility information.
- CurseForge when the author or project maintains the official page.
- GitHub Releases when the shader author links to that repository.
Examples are best chosen by visual style and hardware rather than by a permanent ranking:
| Style or hardware target | Examples | What to expect |
|---|---|---|
| Polished general-purpose visuals | Complementary Reimagined and Complementary Unbound | Multiple quality profiles and different visual styles; check the project’s current compatibility labels |
| Bright, colorful presentation | BSL Shaders | Shadows, volumetric lighting, ambient occlusion, bloom, customizable clouds and water, and built-in anti-aliasing |
| Lower-performance hardware | Sildur’s Basic Shaders, Sildur’s Enhanced Default, MakeUp — Ultra Fast, or a low preset of Sildur’s Vibrant Shaders | Lighter starting points, although the actual frame rate depends on the GPU, resolution, render distance, and world |
Compatibility labels are guidance, not a performance guarantee. Avoid pages with several fake download buttons, executable files disguised as shader packs, modified repackaged files, or suspicious URL shorteners. A normal Java shader download is usually a .zip; do not run an .exe that claims to be a shader pack.
Check compatibility before installing
Every part of a modern Java shader setup can have its own version requirement. Before troubleshooting, write down:
Minecraft version: 26.2
Loader: Fabric / Quilt / NeoForge
Iris: compatible with 26.2
Sodium: compatible with 26.2
Shader pack: lists the same Minecraft version and Iris compatibility
If a shader page mentions only 1.21 while your launcher shows 26.2, do not assume either compatibility or incompatibility from the number alone. Read the project’s current files, supported-version labels, and author notes. If no current information exists, test it in a separate profile rather than risking a heavily modded world.
Do these 3 things before closing this tab:
1Fix the driver behind crashes, sound loss and screen glitches2Repair Windows errors before they cause bigger problems3Scan for outdated or missing drivers - takes under a minuteHardware requirements and realistic performance expectations
Mojang’s current Java system-requirements page gives a general Minecraft baseline, not a guarantee for shader performance. Its minimum target is 1080p at 30 FPS on Fast settings with 8 GB of RAM and a Vulkan 1.3-capable GPU; when using a discrete GPU, it specifies at least 2 GB of VRAM. The recommended target is 1080p at 60 FPS on Fancy settings with 16 GB of RAM and a GPU with 6 GB of VRAM. See the complete Minecraft Java Edition system requirements.
A demanding shader can perform poorly on a computer that runs vanilla Minecraft smoothly. Performance changes with the shader pack, preset, resolution, render distance, world complexity, resource packs, PBR effects, and other mods. Sodium is designed to improve rendering performance, but its results also vary by hardware and software configuration; it does not guarantee a particular frame rate.
Rank #4

- 【Amazing Gaminig Experience】GTX 1660 Super graphics card is a mainstream gaming GPU built on the 12 nm process, equipped with 192-Bit and 6GB GDDR6 memory with 14000 MHz. Providing computer enthusiasts with a smoother, higher quality gaming experience.
- 【High Definition Display Effect 】GTX 1660S 6GB Graphics Card has 3 monitor support ouput included 1X DVI Port+ 1X Display Port + 1X HDMI Port, can support three monitors. GTX 1660 super is connected to the rest of the system using a PCI-Express 3.0 x16 interface, supports up to 8K display, delivers more higher definition pc gaming effect.
- 【Powerful Cooling Performance】ZER LON cooling system uses a combination of traditional grooved and copper powder sintered composite heat pipes that directly contact the GPU core to quickly export core heat. At the same time, the integrated thermal design makes the core, memory, power supply MOS tube and the heatsink fully in contact, effectively reducing the working temperature, avoiding MOS tube overheating caused by full load degradation and other reasons, thus improving the stability and life
- 【VR-Ready Graphics】Equipped with advanced technologies, such as NVIDIA VRWorks, the GTX 1660S 6G graphics card provides an excellent virtual reality (VR) gaming experience. It ensures low latency, high compatibility, and stunning visuals for VR applications.
- 【What You Will Get】1x GTX 1660 Super 6GB graphics card, 2-Year Limited warranty, Before installing the driver, you must uninstall the old driver first, otherwise it may cause the driver installation to fail. You can download the driver for this graphics card directly from the official website. Select the driver corresponding to your computer's operating system for download and installation. Alternatively, you can use software that automatically installs drivers for the installation process.
Best first settings for a low or mid-range PC
- Confirm the shader is active, then compare the same scene with shaders disabled.
- Select the shader’s lowest or medium preset.
- Reduce render distance.
- Reduce simulation distance if the CPU is also struggling.
- Lower shadow-map resolution.
- Reduce or disable volumetric clouds, reflections, screen-space effects, bloom, depth of field, motion blur, parallax, and PBR effects.
- Lower the shader’s internal resolution or the game’s display resolution.
- Close recording software, browsers, overlays, and other GPU-heavy programs.
- Update the graphics driver.
Change one or two settings at a time so you can identify which effect is expensive. Test both daytime and nighttime, then check water, foliage, caves, the Nether, the End, and newly generated terrain. A shader that looks fine in a quiet test world may perform very differently in a mod-heavy base with a high-resolution resource pack.
Independent reader supportYour contribution helps us test, update, and keep practical guides available for everyone.Troubleshooting Java shader problems
There is no “Shader Packs” or “Shaders” button
Usually, the game was launched with the vanilla profile or the loader did not start. Check the following:
- Return to the launcher and confirm that the selected profile is Iris, Iris & Sodium, Fabric, or a supported OptiFine profile.
- Confirm that the profile uses the intended Minecraft version.
- If you used a modpack, confirm that you edited the same instance you launched.
- Check the launcher profile and game log for a loader or dependency error.
- Launch a clean Iris test profile before adding other mods.
If you are playing Bedrock, this button is expected to be absent. Use Settings → Video → Graphics Mode → Vibrant Visuals instead.
The shader pack does not appear in the list
Common causes include an extracted archive, the wrong instance folder, a nested download, or a version mismatch.
- Open the folder with Open Shader Pack Folder from the active game instance.
- Place the original shader
.zipdirectly in that folder. - Do not place the ZIP in
mods. - If the download contains an outer folder with another ZIP inside, inspect the contents and use the actual shader-pack ZIP.
- Refresh the list or restart Minecraft.
- Check the shader’s supported Minecraft version and loader.
Do not extract a normal Java shader pack unless its author specifically instructs you to do so.
Minecraft crashes when the shader is selected
- Close Minecraft.
- Open the correct instance’s
shaderpacksfolder. - Move the selected shader ZIP to another folder temporarily.
- Relaunch Iris without an active shader.
- Try a lower-demand or different shader pack.
- Update Iris, Sodium, the shader pack, and your GPU driver where compatible.
- Test the shader in a clean profile without other rendering mods or resource packs.
If the game crashes before you can reach the menu, move every shader ZIP out of the active shaderpacks folder or temporarily rename that folder. Do not delete your worlds.
The screen is black, or water and skies look broken
Possible causes include unsupported shader features, an outdated shader, an incompatible resource pack, a graphics-driver problem, or a conflict with another rendering mod. A Java resource pack that overrides Minecraft’s core shader files can also conflict with a shader-pack loader; Iris documents this limitation on its official site.
If your graphics driver is missing, outdated, or incompatible with the setup, Outbyte Driver Updater is an optional way to check for a compatible update.
Disable the resource pack and test again. If the problem disappears, use a resource pack that does not replace the conflicting core shaders. Otherwise, try another shader, update the driver, and use the loader version recommended by the shader author. Do not combine OptiFine with Iris or multiple competing renderer replacements.
FPS is too low
Use the performance sequence above: low shader preset, shorter render distance, lower shadows, fewer volumetric and reflection effects, lower resolution, and a test with shaders disabled. If vanilla Minecraft is also slow, the shader is not the only problem. Check background applications, drivers, allocated memory, resource packs, and other mods.
Quick wins for a faster PC:
Scan for outdated or missing drivers - takes under a minuteDriver Scan →Clear out junk files and repair common Windows errorsFree Scan →The shader works in one launcher but not another
That normally means the launchers are using different instances. Install the shader pack into the folder opened by the launcher or by the in-game Open Shader Pack Folder button. A pack placed in the default .minecraft/shaderpacks directory will not automatically appear in a separate CurseForge, Modrinth App, or Prism Launcher instance.
Best Value
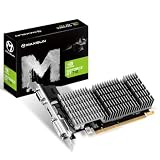
- Chipset: NVIDIA Geforce GT 710, Passive 0dB efficient cooling, huge heat sink radiator covers the area of GPU and memory. Providing a low noise & temperature environment for gaming and multimedia.
- Low profile design, Compatible with most of the computer case (even ITX or SFF), you can DIY slim or smaller system easier.
- Support: PhysX,NVIDIA CUDA,PureVideo HD 4K decode,HDR,MFAA,GeForce 3D Vision,GameWorks,G- Sync-Ready,GameStream-Ready,GeForce ShadowPlay,GPU Boost 2.0
- FUll HD I/O: HDMI + VGA + DVI-D support multi screens
- Support built-in DirectX 12 effect test
Shader settings keep resetting
This can happen after a shader update, when changing profiles, or when the pack changes its settings format. Save screenshots of your preferred settings and keep separate launcher profiles for separate modpacks. Do not copy configuration files between unrelated shader-pack versions without checking the author’s instructions.
How to uninstall shaders
To stop using a Java shader without removing Iris, open Options → Video Settings → Shader Packs and select OFF or the equivalent disabled option. To remove a specific pack, close Minecraft and delete or move its ZIP from the active shaderpacks folder.
To remove the Java loader entirely, select the vanilla Minecraft profile in the launcher. If you installed Iris or OptiFine into a modpack, remove the corresponding files through that pack’s instance manager rather than deleting files from the default Minecraft directory. Bedrock players can turn off Vibrant Visuals by returning to Settings → Video → Graphics Mode and selecting the standard graphics mode.
Snapshots, previews, and backups
Do not switch to a snapshot or preview release simply to obtain shaders. Preview versions can change rendering internals and may not yet have compatible Iris, Sodium, or shader-pack builds. Mojang warns that testing versions can corrupt worlds and recommends backups or separate game folders; use the guidance on the Minecraft Java Edition 26.2 release page when working with testing versions.
Frequently Asked Questions
Can you install Java shaders on Minecraft Bedrock?
No. Java shader loaders such as Iris and OptiFine, Java mod JARs, and the Java .minecraft/shaderpacks folder do not work on Bedrock. Use Settings → Video → Graphics Mode → Vibrant Visuals on a compatible device, or use a compatible Bedrock PBR/Vibrant Visuals resource pack.
Do other players or a multiplayer server need the same shader?
Usually not for Java shaders. Iris and the shader pack are client-side visual changes, so the server normally does not need them and other players do not need the same pack. A modded server can still require particular client mods and versions before allowing you to connect.
Do Minecraft shader packs need to be unzipped?
Usually no. Keep a Java shader pack as its original .zip and place it directly in the active shaderpacks folder. Use Open Shader Pack Folder to avoid putting it in the wrong instance. Follow the author’s instructions if that project documents a different format.
Is Iris better than OptiFine?
For a current Java installation, Iris + Sodium is the recommended default because Iris has current 26.2 support and its installer includes Sodium. OptiFine remains useful for older versions or OptiFine-specific setups, but it should be used only when the official OptiFine page lists a build for the exact Minecraft version. Neither option supports every shader pack or every feature.
Can you use shaders with other Minecraft mods?
Often, yes, but the loader and versions must match. Iris currently lists Fabric, Quilt, and NeoForge compatibility, while a modpack may require a particular renderer. Do not install Fabric-only files into a Forge instance, and do not combine Iris, OptiFine, Sodium, or other renderer replacements without checking compatibility.
Why does a shader tutorial mention 1.21 when my launcher shows 26.2?
Minecraft, shader packs, and shader loaders use separate release schedules and compatibility labels. A tutorial may be outdated, or the shader may support a broader range than the page title suggests. Check the shader author’s current files and notes for your exact Minecraft version and loader instead of relying on an old tutorial.
How do you disable shaders after a crash?
Close Minecraft and move the active shader ZIP out of the correct instance’s shaderpacks folder. If necessary, move all shader ZIPs out or temporarily rename that folder, then relaunch Iris without an active shader. This preserves your worlds and lets you test a different pack or configuration.
Windows Errors? Fix Them Before They Spread
Repair common Windows errors and clear accumulated junk for a smoother, more stable PC - no reinstall needed.Free scan · no reinstallOutdated Drivers Are Slowing You Down
One free scan finds every outdated or missing driver and matches the right update for your exact hardware.Free scan · exact hardware matchThe Bottom Line
For Java Edition: install Iris from its official site, use its Sodium-enabled profile, download a compatible shader ZIP from a reputable project page, place it in the folder opened by Open Shader Pack Folder, and enable it under Options → Video Settings → Shader Packs. For Bedrock Edition: skip Java mods and try Settings → Video → Graphics Mode → Vibrant Visuals if your device supports it. Start with a low or medium preset, verify every version match, and move the shader ZIP out of the active folder if the game crashes.
Quick Recap
Product prices and availability are accurate as of the date/time indicated and are subject to change. Any price and availability information displayed on Amazon at the time of purchase will apply.