Yes, you can often improve light scratches on a Game Boy’s bare plastic outer lens—but you should never polish the LCD itself. First identify which part is damaged: fine scuffs on a separate, uncoated plastic lens may respond to plastic polish; a deep gouge or crack usually calls for a new lens; lines, dead pixels, or internal haze require display repair or replacement.
First, identify which part is scratched
“Screen” can mean the outer cover, the display behind it, or a modern replacement assembly in which the lens is bonded to the display. Only a compatible, uncoated plastic outer lens is a reasonable candidate for polishing.
- Outer lens: The visible cover in the front shell. On many original systems it is a separate part, and it is usually the part a scratch-removal polish is intended for. iFixit’s Game Boy Advance guide treats the plastic lens as separate from the screen assembly: Game Boy Advance Screen Lens Replacement.
- LCD: The display module behind the lens. Do not apply polish to it. Dead or stuck pixels, lines, bleeding, internal haze, damaged polarizer film, and cracks are display problems, not lens scratches.
- Laminated or IPS display: Some modern replacement screens bond the lens to the display. Abrasives can damage its coating, adhesive, or assembly; follow the kit maker’s instructions rather than treating it like a separate plastic cover. One example is a Game Boy Color IPS display with a laminated lens.
Construction differs across the original Game Boy (DMG), Pocket, Light, Color, Advance, Advance SP, and aftermarket displays. Don’t assume that a removal or polishing method for one model applies to another.
Decide whether to polish, replace, or repair the display
| What you see | Most sensible option | Why |
|---|---|---|
| Light scuffs or fine scratches on bare, removable plastic | Try plastic polish cautiously | Polishing can reduce fine surface damage, but results depend on the lens material and finish. |
| Deep gouge, widespread scratches, crack, or warped lens | Replace the outer lens | Removing enough surrounding material to erase deep damage risks an uneven or distorted surface. |
| Coated, laminated, or uncertain surface | Do not polish unless the display or lens maker confirms compatibility | Abrasives may damage a coating or bonded assembly. |
| Dead pixels, lines, LCD bleeding, internal haze, or a failed display | Diagnose or replace the LCD/display | Polish cannot fix damage inside the display. |
Replacement lenses are sold in model-specific plastic and glass versions. Glass is generally more scratch-resistant than plastic, but it is aftermarket and can differ in glare, fit, printing, tint, and originality. For example, see the options from Hand Held Legend and Retro Modding’s GBA glass lens and DMG glass or plastic lens. Confirm the exact model and display before ordering. Prices and availability vary; seller listings can change.
Quick wins for a faster PC:
Clear out junk files and repair common Windows errorsFree Scan →Scan for outdated or missing drivers - takes under a minuteDriver Scan →#1 Best Overall

- Platform:screen lens for Gameboy classic
- Classic Game Boy :protect your screen from scratches or damage
- Gameboy screen replacement Screen Lens only:This item will not repair an LCD Screen
- Gameboy screen cover Screen Lens has adhesive backing,
- Plastic material lens: grey color with original logo
Check the damage before applying anything
- Turn the console off, remove the cartridge and batteries, and work under good light.
- Blow away dust, then clean the lens gently with a clean, soft cloth and a suitable plastic cleaner or barely damp cloth. Let it dry fully.
- Shine light across the surface at an angle. A mark that changes with the viewing angle may be on the lens; a defect that remains aligned with the image may be in the display.
- If the lens is intact, lightly pass a fingernail across the scratch. A mark that barely catches may be shallow; one that catches decisively is likely too deep for a simple polish. This is only a rough check—do not test a cracked or fragile lens.
- If the mark still appears to be on the lens, confirm that it is uncoated plastic. When in doubt, stop and check the model or replacement-display maker’s guidance.
How to polish a removable plastic lens
Prefer removing the lens first when that is practical and you have model-appropriate instructions, especially on a valuable console. A removed lens is easier to polish evenly, and compound is less likely to enter seams, controls, or the display area. Removal itself can crack the lens or damage the shell and adhesive, however. There is no single safe heat-and-pry procedure for every Game Boy; use instructions for the exact model and display.
For a confirmed bare plastic lens, use a product intended for compatible plastic, not a general household abrasive. NOVUS advises testing compatibility, keeping plastic cool, clearing dust before scratch removal, and using a clean, soft, lint-free cloth; it warns against using its polish on coated plastics. See its polishing tips and FAQ.
Rank #2
- Plattform: Gameboy Color GBC Console.
- It is a replacement screen les cover for Gameboy Color. You have a scrated screen or it was removed ? This is for you.
- Package includes: 1x Glass Screen Lens Case.
- Prepare the surface. Remove dust before wiping; grit caught under a cloth can make fresh scratches. Use a clean, soft, lint-free cloth, preferably one that has not been used for abrasive work.
- Test first. Try the product on a spare lens or an inconspicuous corner. Do not proceed if the surface clouds, changes sheen unevenly, or appears coated.
- Use a small amount of plastic polish. Apply it to the cloth or lens as the product directs. Keep the compound away from the LCD, shell seams, buttons, and openings.
- Work in short, controlled passes. For NOVUS No. 2, the manufacturer recommends back-and-forth strokes at right angles to the scratches. Use firm, controlled pressure rather than aggressive force.
- Wipe and inspect between passes. Repeat only while the surface is improving. Stop if you see a cloudy patch, waves, or uneven gloss; more pressure may worsen the finish.
- Finish as the product specifies. NOVUS describes a staged process using No. 2 Fine Scratch Remover and No. 1 Clean & Protect, with No. 3 intended for heavier scratches: NOVUS three-step system.
polyWatch Plastic Polish is marketed for plastic watch crystals, not specifically certified for every Game Boy lens. Its instructions call for polishing under pressure for roughly two to three minutes and repeating for deeper scratches. Treat that as the manufacturer’s product guidance, not a guaranteed Game Boy repair time or result.
What not to use—and when to stop
- Do not polish the LCD, a cracked lens, or a bonded display assembly. The risk of damage outweighs any chance of improving the surface.
- Do not use glass polish on plastic. polyWatch sells a separate glass-polishing product with a different abrasive system; it is not a substitute for plastic polish.
- Avoid toothpaste, baking soda, and other household abrasives. Their grit and additives are uncontrolled for this use, so they can haze, stain, or scratch the lens. NOVUS distinguishes its plastic products and warns about coated surfaces in its product FAQ.
- Avoid rotary tools and aggressive force. Heat can deform plastic, while uneven pressure can create optical distortion.
- Consider wet sanding only as an advanced last resort on a removable, inexpensive lens you can afford to ruin. Sanding removes material, can thin the lens, and requires refinishing a much larger area. A replacement is usually more predictable.
Polishing may reduce or level fine surface damage, not restore factory geometry. A deep scratch can remain visible; a successfully polished original may still have altered gloss or swirl marks.
PC Slower Than It Used to Be?
A free scan shows the junk files, broken settings and background clutter dragging Windows down - then fixes them in one click.Free scan · Windows 10 & 11Crashes, No Sound, or Screen Glitches?
Random freezes, missing sound and display glitches usually trace back to one bad driver. Find and replace yours safely.Free scan · under a minuteRank #3
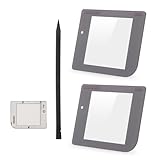
- Compatibility: Only for Gameboy GB System front glass replacement(Grey,And Not with LCD and Touch Digitizer).Please make sure your mode and replace parts that you needl before place the order.
- Application: For Game boy GB front glass are used for fix a faulty screen,cure-replace cracked, broken, damaged screen, which function use normal, but the appearance is cracked or damaged to influence to use.
- Quality Guarantee: All for Gameboy glass panel screen lens have passed strictly QC double tested and 100% in good condition before shipment.To Make sure no scratch/no dead area/ no touching problem in the front glass.
- Professional Tools: High quality for Game boy GB protective screen lens case cover replacement and opening tool. Help to disassemble and install the touch panel more convenient .Our touch panel are packed in strong boxes,avoid damage during shipping.
- Installation Suggestions: Please test this 2pcs touch panle for Gameboy GB before installation, make sure the outer len is normal to use.Not recommend Installation without any experiences.If you need link of installation guide video or has any problem, please leave a message.
Replacing the lens without turning it into a bigger repair
A replacement is often the more predictable cosmetic fix for a cracked, deeply scratched, or badly worn cover. Check whether the part is intended for the original display or an IPS screen: some modern displays need a differently shaped lens. Replacement may involve opening the console, and difficulty varies by model and construction.
- Confirm the console model, display type, and lens dimensions before ordering.
- Use instructions for that exact model. For the Advance, iFixit’s lens replacement guide documents the lens as a separate front-shell component.
- Before removing the original, compare the replacement’s logo, alignment, tint, thickness, and fit. Keep its protective film on until installation is ready.
- Clean away old adhesive and dust carefully, then dry-fit the new lens and check alignment before securing it. A trapped speck is conspicuous once the console is closed.
- Keep the original lens if the console is collectible or you may want to reverse the repair.
Do not force a lens that resists removal. Stop if the lens starts cracking or the shell begins whitening, and verify the model-specific method before continuing.
Rank #4

- 100% Brand new and quality assurance.
- Fit for Game Boy Advance .
- Material: Glass.
- Protect your screen from scratches or damage.
- Package Includes: 1 x Screen with Adhesive.
If the LCD is damaged
Polishing will not repair dead or stuck pixels, horizontal or vertical lines, bleeding, internal haze, a damaged polarizer, a cracked LCD, or a failed backlight or display ribbon. Depending on the model and the owner’s goals, options include keeping a tolerable original display, replacing an original-style LCD where available, installing an IPS display, or asking a repair technician to diagnose the fault.
These are separate repairs from replacing the outer lens. iFixit’s references for original Game Boy screen replacement and Game Boy Pocket LCD replacement illustrate the distinction. An IPS upgrade can improve visibility, but it changes the console and may involve fit, shell, battery, or installation trade-offs depending on the kit. Check the instructions for the specific display; one example is Hand Held Legend’s IPS V3 documentation.
The Tool Desk
Outbyte Driver Updater FREEFix the driver behind crashes, sound loss and screen glitchesFind Drivers →Outbyte PC Repair FREERepair Windows errors before they cause bigger problemsFix Now →Best Value

- Applicable model: Gameboy GB DMG
- This screen lens is made of glass and is very scratch resistant
- Package Include :1 x Original Glass Screen Lens
- Color: Light Grey
- Please make sure that this is the model and product type you need, wish you a pleasant shopping
For collectors and valuable consoles
Polishing keeps the original lens in place, but it does not preserve its untouched factory finish: the surface may acquire swirls, altered sheen, or uneven geometry. A replacement glass lens may be more durable, but it is not original Nintendo hardware. If originality matters, test on a spare lens first, photograph the console before repair, and retain any removed original parts—particularly for unusual colors or limited editions.
Choose professional help if the console is rare or sentimental, you lack the right tools, the lens is difficult to remove, or you cannot tell whether the damage is on the lens or LCD. Service scope, total price, and turnaround vary by provider and repair; for examples of service offerings, see RetroSix and GBMake.
Quick Recap
Product prices and availability are accurate as of the date/time indicated and are subject to change. Any price and availability information displayed on Amazon at the time of purchase will apply.