Windows Errors? Fix Them Before They Spread
Repair common Windows errors and clear accumulated junk for a smoother, more stable PC - no reinstall needed.Free scan · no reinstallOutdated Drivers Are Slowing You Down
One free scan finds every outdated or missing driver and matches the right update for your exact hardware.Free scan · exact hardware matchAn E-Ink front panel for the Steam Machine is a separate, Bluetooth-connected information display—not a conventional gaming screen fed by HDMI or DisplayPort. In the documented DIY Inkterface, a host-side app sends selected status data to an ESP32-S3 controller, which updates a monochrome e-paper panel fitted into a removable, magnet-mounted faceplate.
How the panel gets information
The system has two sides. Inside the faceplate, the e-paper panel displays the image, a breakout board provides its display interface, and an ESP32-S3 Feather runs the controller firmware. On the Steam Machine, companion software collects selected readouts and sends them to the faceplate over Bluetooth. The project documentation describes discovering the panel in the app and running the app as a user service. The panel’s Bluetooth name begins with “INKTF” followed by part of its Bluetooth address. The community fork’s build and setup notes identify the original Valve Inkterface project as their upstream source.
This means the faceplate receives data for its own display rather than mirroring the Steam Machine’s video output. Valve’s general external-display support page concerns ordinary displays and troubleshooting, not this accessory.
What hardware is inside the DIY faceplate?
The documented build combines a monochrome e-paper panel, a compatible breakout, an ESP32-S3 Feather board, a battery, wiring, and a printed enclosure. Magnets hold the assembled faceplate on the machine so it can be removed. The display and electronics are separate pieces: the panel supplies the visible image, while the controller and breakout manage its connection and updates.
#1 Best Overall
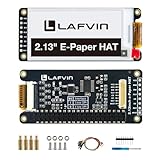
- Enjoy a paper-like viewing experience with the 2.13-inch e-paper display. The screen can retain the last displayed image even after power is removed, making it ideal for applications requiring long-term information display without continuous power supply.
- Designed for low-power projects, this e-ink module only consumes energy during screen updates and remains in standby mode most of the time. Perfect for battery-powered devices, smart labels, IoT projects, and long-running applications.
- Featuring a 250x122 pixel black-and-white display, this e-paper HAT delivers clear text and image rendering. Partial refresh support helps reduce update time and power consumption for smoother display operation.
- Equipped with a standard Raspberry Pi 40-pin GPIO header and SPI communication interface, this display module works with Raspberry Pi series boards, Arduino, ESP32 and other compatible development platforms. Built-in voltage conversion supports both 3.3V and 5V MCUs.
- Comes with connection accessories and supports online resources including driver board diagrams and example programs for Raspberry Pi, Arduino, and ESP32, helping developers quickly start their projects.
Panel specifications
The identified Adafruit panel measures 5.83 inches diagonally, has a 648 × 480 resolution, and uses a UC8179 chipset. Those specifications describe a monochrome e-paper display suitable for text, symbols, status values, and still artwork; they do not establish a measured refresh time. Adafruit’s product page lists the panel specifications.
Controller wiring and board revisions
The build connects the Feather to the display breakout with signals including MOSI, MISO, SCK, ground, 3.3V to VIN, and display-control lines. The guide covers Feather V1 and V2, but assigns their logical pins differently. Builders should use the pin table for their exact board revision rather than assuming identically named pins map the same way. The instructions document those boards and parts; they do not establish that arbitrary substitute controllers or panels will work.
Rank #2

- This is 2.13inch E-Ink display HAT with Raspberry Pi 40PIN GPIO extension header, compatible with Raspberry Pi series boards, Jetson Nano. 250x122 resolution, Black and White Two Display colors, with embedded controller, communicating via SPI interface, supports partial refresh.
- No backlight, keeps displaying last content for a long time even when power down. Ultra low power consumption, basically power is only required for refreshing.
- SPI interface, for connecting with controller boards likeArduino/STM32, etc. Onboard voltage translator, compatible with 3.3V / 5V MCUs.
- Version Notice: The driver board is Rev2.1 (Version 2.1), which is independent of the screen version. Currently, there is only Rev2.1 (Version 2.1) for the driver board and QC label V4 is for the screen version, QC label V4 is currently being shipped.
- Comes with online development resources and manual (driver board circuit diagram, examples for Raspberry Pi/Jetson Nano/Arduino/STM32): bit.ly/3hZh77i
What can the display show?
The documented software allows readouts to be configured and additional data collectors to be registered. The original telemetry layout described in the project materials includes CPU, GPU, and fan information. A community fork adds a Now Playing mode that displays the active game’s box art, playtime, and achievement progress; those additions should not be assumed to exist in the original Valve build.
The fork says achievement information comes from a Steam Community profile endpoint and requires public game details. If a profile’s game details are private, that feature’s stated prerequisite is not met.
Quick wins for a faster PC:
Clear out junk files and repair common Windows errorsFree Scan →Scan for outdated or missing drivers - takes under a minuteDriver Scan →Rank #3

- Provide online user manual (examples for Raspberry Pi/Jetson Nano/Arduino/STM32), please check the manual carefully before using!
- This is an E-Ink raw display, 7.5inch, 800×480 resolution, with embedded controller, communicating via SPI interface.
- Due to the advantages like ultra low power consumption, wide viewing angle, clear display without electricity, it is an ideal choice for applications such as shelf label, industrial instrument, and so on.
- No backlight, keeps displaying last content for a long time even when power down
- Ultra low power consumption, basically power is only required for refreshing
What does building one involve?
The project is a hands-on hardware assembly, not simply a panel that plugs into the Steam Machine. Its documented parts include an ESP32-S3 Feather with 2MB PSRAM, an e-paper breakout and display, a battery, wires, screws, magnets, and printed enclosure components. The general assembly sequence is to wire and solder the controller to the breakout, secure the boards to the printed plate, carefully position the display’s fragile flex cable, add the battery, and assemble the magnetic faceplate.
- Check the exact parts and board revision. Confirm that the display, breakout, and Feather revision match the project instructions, including the applicable pin table.
- Assemble the electronics. Connect and solder the controller and breakout according to the revision-specific wiring notes.
- Fit the display and enclosure. Handle the flex connection carefully, mount the components and battery, then assemble the printed plate and magnets.
- Set up the host connection. Enable Bluetooth, launch the companion app, discover the panel, and, if desired, install the app as a user service.
The guide documents a particular build; compatibility of replacement components should be checked rather than presumed. The available project information also does not establish a verified total DIY cost.
Rank #4

- Provide online user manual (examples for Raspberry Pi/Jetson Nano/Arduino/STM32), please check the manual carefully before using!
- This is an E-Ink display module, 4.2inch, 400x300 resolution, with embedded controller, communicating via SPI interface. Due to the advantages like ultra low power consumption, wide viewing angle, clear display without electricity, it is an ideal choice for applications such as shelf label, industrial instrument, and so on.
- No backlight, keeps displaying last content for a long time even when power down
- Ultra low power consumption, basically power is only required for refreshing
- SPI interface, for connecting with controller boards like Raspberry Pi/Arduino/Nucleo, etc. Onboard voltage translator, compatible with 3.3V/5V MCUs
Can you buy a ready-made E-Ink faceplate?
GamingOnLinux reported on September 22, 2026, that JSAUX had announced an E-Ink Faceplate with a 5.83-inch, 640 × 480 monochrome display, Bluetooth, and a built-in 500mAh battery. The reported eight modes were Time, Weather, Calendar, Performance, Playtime, Progress, Digital Frame, and AI Agent Status. That report listed an announced price of $99.99 and shipping expected in early October 2026; those were announcement details, not confirmation of current price, stock, actual shipment, or compatibility. Check the dated report and the seller’s current product information before making a purchase decision.
The DIY route offers access to the documented build and its customizable software, but requires sourcing parts, printing, soldering, and setup. A ready-made faceplate may reduce assembly work, but its current availability, supported software, repair options, and fit for the exact Steam Machine should be verified. The available information does not provide a directly comparable total DIY price.
The Tool Desk
Outbyte Driver Updater FREEFix the driver behind crashes, sound loss and screen glitchesFind Drivers →Outbyte PC Repair FREERepair Windows errors before they cause bigger problemsFix Now →Quick Recap
Best Value

- This is 2.13inch E-Ink display HAT V4 with Raspberry Pi 40PIN GPIO extension header, compatible with Raspberry Pi series boards (includes Raspberry Pi 5/4B/3B+/3B/2B/Zero W/WH/Zero 2 W,etc. ) and compatible with Jetson Nano.
- 250x122 resolution, Black and White Two Display colors, with embedded controller, communicating via SPI interface, supports partial refresh.
- No backlight, keeps displaying last content for a long time even when power down. Ultra low power consumption, basically power is only required for refreshing.
- SPI interface, for connecting with controller boards likeArduino/STM32, etc. Onboard voltage translator, compatible with 3.3V / 5V MCUs.
- Comes with Comes with Online Development Resources and Manual (driver board circuit diagram, examples for Raspberry Pi/Jetson Nano/Arduino/STM32). PLEASE READ THE ONLINE INFORMATION CAREFULLY BEFORE USING IT.
Product prices and availability are accurate as of the date/time indicated and are subject to change. Any price and availability information displayed on Amazon at the time of purchase will apply.