
Reserve at least 26 cm (10.5 in) of usable width, 19 cm (7.5 in) of usable depth, and over 6 cm (2.5 in) of usable height for the assembled console in LEGO PlayStation set 72306. That is the official model envelope, not a complete display plan: the separate controller, cable detail, your hand clearance, and any case or riser all need additional room.
For a display that is easy to see and remove, choose a shelf with more capacity than the bare console footprint. Measure the shelf’s internal, usable dimensions rather than relying on its advertised outside size.
As an Amazon Associate I earn from qualifying purchases.
Official dimensions of LEGO PlayStation 72306
LEGO PlayStation 72306 is a 1,911-piece adult display set recreating the original PlayStation console and controller. LEGO describes it as suitable for display on a shelf or desk. PlayStation’s 2026 announcement calls the build a near-1:1-scale replica and gives the same assembled width as LEGO’s product information.
Free tools Windows power users keep installed
One-click scans. No signup required.
| Specification | Published value | How to use it when planning |
|---|---|---|
| Assembled console width | 10.5 in (26 cm) | Minimum horizontal space for the console body |
| Assembled console depth | 7.5 in (19 cm) | Minimum front-to-back shelf depth for the console body |
| Assembled console height | Over 2.5 in (6 cm) | Minimum vertical clearance above the console |
| Piece count | 1,911 pieces | Identifies the adult display set and distinguishes it from other PlayStation-themed LEGO products |
| Scale | Near 1:1 scale | The replica is intended to resemble the original console at close to life size |
| Recommended setting | Shelf or desk display | The model is designed as decor rather than a small toy intended to be packed away after every use |
The published dimensions describe the assembled console itself. They do not establish a measured clearance allowance for the separate controller, its cable detail, or a protective enclosure.
#1 Best Overall

- Lights Only, 72306 Model Sold Separately: Kyglaring LED light kit is designed for the LEGO PlayStation 72306 building set; the package includes lighting and touch-control components only, and the brick model is sold separately
- Retro Console Lighting: Color-changing accent lighting adds a vivid game-room glow around the gray console and controller, bringing out the disc lid, front controls and removable hidden dioramas. The layered light emphasizes the near 1:1 retro hardware silhouette and gives the display a nostalgic 1990s gaming atmosphere after dark.
- Touch Color & Multi-Effect Control: Use the touch area to turn the lights on or off and change the accent color; double-tap to switch among multiple lighting effects. Press and hold to adjust effect speed and brightness for different retro gaming display moods.
- Online Installation Guide: Numbered light packs, slim wiring, and online video and PDF instructions help make each step easier to follow while keeping cable placement neat; power with the included battery box, a compatible power bank, or a 5V USB adapter; batteries not included
- Retro Gaming Display & 1-Year Replacement Support: Color-changing lighting gives the near 1:1 console and controller a stronger night-display presence on a desk, shelf or game-room setup; contact us through Amazon messages for setup help or 1-year replacement support
Why the minimum footprint is not the ideal display footprint
A rectangle matching the console’s official width and depth can technically hold the main model, but it leaves no margin at the edges. A model placed exactly against a back panel is harder to reach, and one pushed to the front can be bumped when books, games, or other objects are moved nearby.
The controller is a separate visual element. Depending on how you arrange it, it can extend the display sideways, toward the viewer, or onto a second level. The cable detail also affects how much breathing room looks natural. Because the official information does not publish the controller’s required clearance, there is no defensible single number for a complete controller-and-console footprint.
Use the official console envelope as the starting rectangle, then add space for three practical needs:
- Placement margin: room to set the console down without scraping a wall, side panel, or neighboring object.
- Viewing margin: open area that lets you see the controller and the console’s front and top details instead of hiding them behind the shelf lip.
- Handling margin: space for your fingers when dusting, reconnecting a display cable detail, or lifting the model out of a case.
The right amount of extra space depends on the shelf design and your chosen composition. A deep, open shelf can use the console as the visual anchor. A shallow cubby may need the controller placed in front or on a riser, while a narrow shelf may require a side-by-side arrangement that uses more width.
How to measure a shelf before you commit
Measure the compartment that will actually contain the model. Product listings often quote a bookcase’s outside width, but trim, side walls, doors, hinges, and a rear stop reduce the usable area.
- Clear the intended compartment. Remove objects, shelf liners, and temporary risers so you can measure the permanent boundaries.
- Measure usable width. Measure between the inside faces of the side panels at the level where the console will sit. If the opening narrows toward the front, use the narrower measurement.
- Measure usable depth. Measure from the front edge or door plane to the back panel. Account for a rear cable channel, molding, or a raised lip that prevents the model from sitting fully back.
- Measure usable height. Measure from the supporting surface to the lowest obstruction above it. For a cabinet, include the thickness and position of the door frame or hinge hardware.
- Check the route in. A compartment can be large enough after assembly but too tight to insert the completed model. Measure the door opening and the angle available for turning the console.
- Record the smallest values. Use the tightest width, depth, and height readings, not the largest point in a tapered or irregular compartment.
Compare those three usable measurements with the official console envelope first. Then decide where the controller will go and whether that arrangement needs the extra width or depth.
Rank #2

- Light Accessories Only: BrickSoul LED light kit is designed for the LEGO PlayStation 72306 building set; lighting and touch-control components only are included, and the brick model is sold separately
- Layered Retro Gaming Lighting: Color-changing illumination adds depth to the gray console and original-style controller while drawing attention to the disc lid, front controls and hidden diorama areas. The shifting accent color turns the near 1:1 display into a stronger game-room centerpiece without losing the clean retro-console look.
- Touch Color-Changing Control: Use the touch area for power and color changes, then double-tap to cycle through multiple lighting effects. Press and hold to fine-tune pattern speed and brightness, from a steady retro-console glow to a more dynamic game-room scene.
- Easy Installation with Online Guides: Numbered light packs, slim wiring, and online video and PDF instructions help keep installation clear and cable placement neat around the console and controller; power with the included battery box, a compatible power bank, or a 5V USB adapter; batteries not included
- 1-Year Replacement Support: Made for retro gaming fans, collectors, and display builders who want to upgrade their 72306 console display; contact us through Amazon messages for installation help or product support
Fit checks for common display locations
Open bookcase or media shelf
An open shelf is the least restrictive option because there is no door frame to reduce the opening or limit the insertion angle. Confirm that the shelf surface is flat and that its front edge does not conceal the lower part of the controller. Leave open space around the model so the distinctive console shape can be seen from normal standing or seated viewing positions.
Cube organizer or closed cubby
A cubby must clear the model in all three dimensions, including the thickness of its top and side panels. Measure the opening rather than the nominal cube size. If the controller is displayed in front of the console, check that the cubby’s depth still allows the door or adjacent cube to operate without touching it.
Glass-door or acrylic cabinet
Doors add a second fit problem: the interior can be large enough while the door opening is too small for the assembled set. Measure both the internal compartment and the clear opening. Hinges, catches, and door seals can project into the usable space.
Desk or console table
A desk gives you flexibility to place the controller beside, in front of, or slightly offset from the console. Keep the assembly away from the desk edge and from areas where a sleeve, controller, or charging cable is regularly moved. A desk display can use a low riser to improve the viewing angle, but the riser becomes part of the required height and depth.
Planning the controller’s position
The console’s published footprint should not be interpreted as a complete rectangle for both objects. Treat the controller as an additional display element and choose its position before finalizing the shelf.
Side-by-side layout
Placing the controller beside the console keeps the front of the replica visible and makes both pieces easy to pick up. This layout consumes more width than the console alone. It works best when the shelf has clear side space and no vertical divider immediately next to the model.
Rank #3

- Light Accessories Only: Nitemode LED light kit is designed for the LEGO PlayStation 72306 building set; lighting and touch-control components only are included, and the brick model is sold separately
- Touch Color & Effect Control: Use the touch area to power the lights and change the accent color; double-tap to switch among multiple lighting effects. Press and hold to adjust pattern speed and brightness for a calmer desk glow or a more vivid night display.
- Immersive Retro Game-Room Lighting: Color-changing accent light washes the gray console and controller display with a vivid glow, while the disc lid, front controls and hidden diorama presentation remain easy to read. The lighting adds a neon-style night atmosphere to the near 1:1 console replica for desks, shelves or gaming rooms.
- Clean Installation for Display: Organized light packs, slim wires, and online PDF and video guidance help reduce visible cables around the console and controller and keep the finished model tidy; power with the included battery box, a compatible power bank, or a 5V USB adapter; batteries not included
- Night Display & 1-Year Replacement Support: Color-changing accent lighting gives the retro console and controller a vivid focal point for desks, shelves or gaming rooms while keeping the original silhouette clear; contact us through Amazon messages for setup help or 1-year replacement support
In-front layout
Placing the controller in front can conserve width, but it uses more depth and may hide the console’s lower front edge. Check the shelf lip, cabinet door, and your seated viewing angle before choosing this arrangement.
Offset or angled layout
An offset arrangement can make a shallow shelf look less crowded and preserve a view of the console’s front face. It may require more diagonal clearance than a straight placement, especially in a cubby with fixed side walls.
Raised layout
A small riser can separate the controller visually from the console or place it at a more readable angle. Include the riser’s footprint and height in your measurements. A riser does not reduce the space needed for the model; it changes how that space is distributed.
Crashes, No Sound, or Screen Glitches?
Random freezes, missing sound and display glitches usually trace back to one bad driver. Find and replace yours safely.Free scan · under a minutePC Slower Than It Used to Be?
A free scan shows the junk files, broken settings and background clutter dragging Windows down - then fixes them in one click.Free scan · Windows 10 & 11Cases and protective enclosures
If you plan to use an acrylic or glass case, specify the case by its internal clearance. The interior must exceed the console’s official width, depth, and height, with additional room for the controller and for lifting the assembled model out without catching an edge.
Do not size a case from its external measurements. Wall thickness, a base, a lid, and corner hardware all consume interior capacity. A front-opening case also needs enough door clearance for the controller arrangement you selected. If the case has a removable lid, test the vertical path required to lift the model rather than checking only the closed height.
A case can protect the build from dust, but it increases the total footprint and weight placed on the shelf. Check the cabinet or shelf manufacturer’s stated capacity for the finished case, and place the load on a stable, level surface. The official LEGO and PlayStation information does not publish a required shelf load rating, case material, or exact controller-clearance allowance.
Rank #4

- All you received was the lighting, it would not come with the model itself
- High Quality: No worries that the lighting kit would damage your Game Boy during installation. We adopt high quality ABS materials and the light wires are slim to well fit within the bircks. And you just should take apart some blocks to build our lights
- Installation Guide: Step-by-step video installation instructions are provided by our professional light-build team. Just enter our website provided in booklet coming with the package to get it
- Update Your Model: It's a fun idea to light up your model. Surprising decoration lights compatible with Lego 72306 will make a static display piece into something more interesting and show more hidden details. You shouldn't miss it
- Warm Tips: When receiving the parcel, please confirm if there are any missing parts and test whether every lamp pellet can light up. Avoid damaging the light wires, please do not over pull, bend or shake it during installation
Viewing clearance and orientation
Fit is not only a matter of whether the model can be squeezed into an opening. The original PlayStation’s recognisable details are concentrated on its front, top, and controller. Orient the console so the face you want to show is not blocked by a shelf lip or a neighboring game case.
At eye level, a small amount of open space above the model helps the top details read clearly. On a low shelf, viewing from above may make the top more visible while a front obstruction becomes more noticeable. On a high shelf, the opposite can happen. Before fixing the arrangement, stand or sit where the display will normally be viewed and check the sightline.
Leave enough room to reach the model from the front or sides. Handling clearance matters because a near-1:1 replica is a display object with many assembled parts, not a solid molded block. Avoid planning a location where the only way to remove it is by pressing on the controller or cable detail.
Independent reader supportYour contribution helps us test, update, and keep practical guides available for everyone.Common shelf-space mistakes and fixes
Using the furniture’s advertised dimensions
Symptom: The listing says the shelf is wide enough, but the console contacts a side panel or door frame.
Fix: Re-measure the clear internal opening at the model’s actual height. Use the smallest width and depth readings.
Do these 3 things before closing this tab:
1Clear out junk files and repair common Windows errors2Fix the driver behind crashes, sound loss and screen glitches3Repair Windows errors before they cause bigger problemsAllowing room only for the console
Symptom: The console fits, but the controller has to be hidden behind it or pushed over the shelf edge.
Best Value
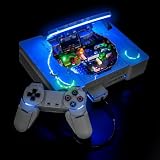
- Bring Your LEGO PlayStation to Life with Premium LED Lighting – Is your completed LEGO model missing that final touch? Designed by LEGO enthusiasts for LEGO enthusiasts, LocoLee lighting kits add a warm glow that highlights the PlayStation, creating a more immersive experience for LEGO PS fans.
- Easy Installation Without Rebuilding Your Model – Upgrading your finished LEGO build doesn’t mean starting over. The ultra-thin flexible wires are designed to fit neatly between LEGO bricks and hidden areas for a clean installation. Clearly labeled numbered bags and detailed instructions help you complete the setup step by step with ease.
- A Thoughtful Upgrade for LEGO Builders and Fans – Add creativity and personalization to your LEGO PlayStation 72306 with a dedicated lighting accessory. Whether you are an adult builder, LEGO enthusiast, or looking for a unique gift, this lighting kit helps bring your favorite PlayStation to life with carefully designed lighting solutions.
- Flexible Power Options with Dedicated Support – Enjoy a steady warm glow with USB POWER. The compact design allows flexible placement of your LEGO model, with PDF instructions and video guides included. Our support team is available to assist with installation questions and provide helpful solutions.
- IMPORTANT NOTE: THIS IS A LIGHT-KIT ONLY (No LEGO bricks included). Confused if this includes the actual building set? Let's be clear: We state this upfront to prevent misunderstanding. Built with a safe low-voltage system (under 5V), LocoLee is backed by a 2-year warranty with replacement parts support available when needed.
Fix: Choose the controller layout first, then reserve the additional width or depth that layout requires.
Ignoring the insertion path
Symptom: The assembled model fits on paper but cannot pass through a cabinet door or turn inside a narrow cubby.
Fix: Measure the opening and the turning angle. If necessary, place the set in an open shelf or install the shelf before assembling the final display arrangement.
Quick wins for a faster PC:
Fix the driver behind crashes, sound loss and screen glitchesFind Drivers →Repair Windows errors before they cause bigger problemsFix Now →Scan for outdated or missing drivers - takes under a minuteDriver Scan →Buying a case with matching external dimensions
Symptom: The case appears large enough from the outside, but its base and walls leave insufficient internal clearance.
Fix: Request the manufacturer’s internal width, depth, and height, then add room for the controller and removal path.
Putting the model on an unstable or crowded surface
Symptom: The display is difficult to dust or is likely to be knocked when nearby objects are moved.
Fix: Use a level shelf with clear handling space, keep neighboring objects from pressing against the model, and verify the furniture’s load guidance before adding a case or riser.
What’s actually slowing this PC down?
Pick the symptom - the matching free tool is one click away.
A practical planning checklist
- Confirm that the product is LEGO PlayStation 72306, the 1,911-piece adult display set.
- Measure the shelf’s internal usable width, depth, and height.
- Check the bare console against the official envelope of 26 cm wide, 19 cm deep, and over 6 cm high.
- Decide whether the controller will sit beside, in front of, offset from, or above the console.
- Add clearance for the controller, cable detail, sightlines, and hand access.
- For a case, verify internal dimensions and the opening or lid-removal path.
- Check the shelf or cabinet’s load guidance when a case or riser is added.
- View the proposed arrangement from the normal position before committing the shelf space.
Bottom line
The official console footprint is the hard minimum: 26 cm wide, 19 cm deep, and over 6 cm high. A shelf that matches those measurements may hold the console body, but a comfortable display needs additional room for the separate controller, visual clearance, and safe handling. Measure the shelf’s internal opening, plan the controller’s location, and choose a case or riser only after its added space is included.
Quick Recap
Product prices and availability are accurate as of the date/time indicated and are subject to change. Any price and availability information displayed on Amazon at the time of purchase will apply.

