
Free tools Windows power users keep installed
One-click scans. No signup required.
Beat Kearush by treating the encounter as a patience test: prepare enough health and equipment to survive mistakes, use fire and Back Hang only if they are available in your current build, defend through complete attack sequences, and take short punish windows instead of extending a risky combo. Pearl Abyss adjusted certain Kearush attack patterns in version 1.00.03 on March 25, 2026, so older videos may show timings that no longer match your game.
What is confirmed about the Kearush fight
Kearush the Slayer is encountered at Hernand Castle during a story sequence that secondary guides associate with a banquet and Chapter 5. Those guides disagree about the quest name and even about whether the encounter displays two or three health bars. Because neither detail is consistent across the available coverage, use your current quest journal and the boss UI as the authority rather than searching for a particular quest title or assuming a fixed bar count.
As an Amazon Associate I earn from qualifying purchases.
The most important date for a current strategy is March 25, 2026. In the version 1.00.03 update notice, Pearl Abyss wrote, “Adjusted certain attack patterns for Kearush the Slayer.” The same notice also says, “Reduced Stamina consumption for blocking attacks.” It additionally reports health and attack reductions for some enemies and bosses, but the note does not say that every general reduction applies to Kearush. A guide recorded before 1.00.03 can therefore be useful for broad ideas while still being wrong about an opening, a sequence length, or how much stamina a block consumes.
Finding the encounter without relying on a disputed quest label
Use Hernand Castle as the location anchor
Guide coverage consistently places Kearush at Hernand Castle. If you are following the main story, look for the Chapter 5 progression that leads into the castle and the banquet-related sequence. The exact wording of the quest is not settled by the available sources, so do not abandon the search because your journal does not match a guide’s title word for word.
#1 Best Overall

- Join Kliff, captain of the Greymanes, and his comrades as they embark on a relentless journey to defend Pywel and fulfill their mission.
- Along your perilous path stands both dependable allies and countless foes who will stop at nothing to see your downfall.
- Face trials to uncover the truth of the catastrophe looming over Pywel and restore peace to the continent.
- Explore the mesmerizing landscapes of the continent where mystical beings, hidden treasures, and thrilling adventures await.
- Pre-order to receive the Khaled Shield (Pre Order Code on Receipt). PS5 Editions include the Grotevant Plate Set DLC as a PS5 exclusive bonus. (In Pack DLC Voucher). Bonus DLC Includes: Grotevan Plate Helm, Grotevan Plate Armor, along with Grotevan cloak, gloves, and boots!
Confirm that the story event is active
- Open the current-story section of your journal and identify the objective directing you toward Hernand Castle or its associated event.
- Travel to the castle and follow the active objective markers rather than an old video’s route. Story staging can change when updates alter encounter flow.
- Make a manual save, if your current game settings and mode permit one, before entering the event. This gives you a clean attempt after changing equipment or abilities.
- When Kearush appears, note the number of health bars shown on your screen. Published guides conflict on this point, so your interface is more reliable than a fixed number quoted elsewhere.
If the boss does not appear, re-check the active objective and complete the immediately preceding banquet or castle step. The evidence does not establish a separate free-roam spawn, a universal time of day, or a single quest title that applies to every current version.
Preparation: make mistakes survivable
No single, version-tested “best build” has been established for Kearush. The useful preparation principle is survivability first: a setup that lets you block, recover and learn the sequence is more valuable than a high-damage loadout that dies to one missed defense.
| Preparation choice | What to do | How to interpret the recommendation |
|---|---|---|
| Health and general equipment | Increase health and improve equipment if ordinary attempts remove most of your life before you can learn the pattern. | A broad boss guide recommends this approach; it is a practical fallback, not a published Kearush requirement. |
| Fire | Equip a fire option if your character has access to one and you can use it without sacrificing basic defense. | One Kearush guide recommends fire. Its exact damage value and ideal application timing are not independently established. |
| Back Hang | Bring Back Hang only when it is unlocked and you know its input and recovery in your current game state. | A secondary guide pairs it with fire as an opening-making tactic. Treat that as a reported strategy, not a guaranteed stun or damage loop. |
| Blocking resources | Enter with enough stamina and healing capacity to survive a failed read; avoid spending the entire bar on an attack string. | Patch 1.00.03 reduced stamina consumption for blocking attacks, but the official note does not publish a Kearush-specific stamina number. |
Compare preparation by the problem it solves
| Approach | Primary benefit | Resource or requirement | Main pitfall |
|---|---|---|---|
| More health and stronger equipment | Provides more attempts to observe a complete sequence and survive a late defensive input. | Requires returning from the encounter to upgrade, if your current progression allows it. | It does not replace learning the pattern; extra health can merely hide an unsafe habit. |
| Fire | May add an offensive option during a safe opening. | Requires access to a fire ability or weapon option and enough resources to use it. | Casting too early can trade health for damage and leave you exposed. |
| Back Hang | May help create a safer angle or brief opening when used correctly. | Must be unlocked, and you need to know its current input and recovery. | Assuming it guarantees a stun or repeated loop is unsupported. |
| Conservative blocking | Lets you prioritize survival while identifying the end of a sequence. | Still consumes stamina, even though version 1.00.03 lowered the cost. | Holding block indefinitely can empty the reserve before the next attack. |
When to leave and upgrade
If two or three mistakes end each attempt before you have identified a complete sequence, leave the encounter and improve health or equipment before trying again. This is not a claim that Kearush has a mandatory gear check; it is a way to turn an information problem into a manageable fight. Return when one missed block or late dodge costs health rather than the entire attempt.
The safest fight rhythm
The available evidence does not establish reliable move names, frame counts, exact parry windows, or a guaranteed combo route. The following rhythm is deliberately conservative and remains useful when an update changes an animation or timing.
1. Spend the opening learning, not proving damage
At the start of an attempt, watch how Kearush closes distance and how long the first attack sequence continues. Defend through the sequence instead of committing to a full attack string. Your first objective is to recognize when the boss has actually finished, not to remove a particular percentage of health.
2. Keep a resource reserve
Stay far enough from the edge of your effective range that you can react without immediately colliding with Kearush. Preserve stamina for the next defensive action. The patch reduced blocking cost, but a lower cost is not an invitation to hold block forever or to spend the entire bar before the sequence ends.
3. Wait for a clearly completed sequence
Use a short punish only after the visible attack string has ended and Kearush has entered a recovery animation. A single safe hit, or a brief ability followed by a return to defense, is preferable to a long combo that is interrupted by the next swing. Because attack patterns were adjusted in 1.00.03, do not transplant an old video’s “third hit is always safe” timing into the current version.
Quick wins for a faster PC:
Scan for outdated or missing drivers - takes under a minuteDriver Scan →Repair Windows errors before they cause bigger problemsFix Now →4. Reset after every punish
After your hit connects, return to a defensive distance and watch again. This reset prevents a successful opening from turning into an overextended exchange. If Back Hang creates a safe angle in your build, use the smallest follow-up you can execute consistently; abandon the tactic if its recovery leaves you exposed.
Rank #2

- A VAST, SEAMLESS WORLD — Explore the continent of Pywel as a fully seamless open world, where countless destinies unfold across uncharted lands filled with danger, beauty, and discovery.
- RELENTLESS ACTION, BRUTAL COMBAT — Fight for survival in fast‑paced, visceral battles using swords, spears, bows, elemental abilities, and powerful skills, where a single moment can determine victory or defeat.
- DAWNING FATE — Witness the fragile balance between rival factions shatter as Kliff and the Greymanes are drawn into a brutal conflict that reshapes the fate of the continent.
- THOSE WHO PROTECT AND THOSE WHO TORMENT — Confront the Black Bears and their ruthless leader Myurdin as allies fall, loyalties fracture, and Pywel descends further into chaos.
- THE BEGINNING OF A NEW JOURNEY — Set out to rebuild the Greymanes, reclaim a lost homeland, and pursue vengeance along a path that reveals deeper truths about power, war, and destiny.
5. Repeat rather than force a finish
Kearush’s bar count is disputed in published guides, so do not change your risk tolerance because a source says the fight has two bars or three. The same loop—defend, confirm recovery, take a short punish, reset—works regardless of the number shown by your game.
6. Change one variable per attempt
If you alter distance, equipment, fire use and blocking timing all at once, you cannot tell which change helped. Keep your basic defense stable, then test one adjustment: a shorter punish, a different starting distance, or one Back Hang attempt. This makes failed attempts informative without requiring exact frame data.
Using fire and Back Hang without overcommitting
One secondary guide recommends combining fire with Back Hang. That pairing can be considered when both options are unlocked, but the available evidence does not prove a specific order, duration, damage multiplier, or stagger behavior. Test it safely during an early attempt rather than building your entire plan around an assumed stun.
A low-risk way to evaluate the pairing
- Enter with your normal defensive equipment and enough healing capacity to survive a failed experiment.
- Apply the fire option only when you are outside the end of a known attack sequence; do not trade health for a cast that can be interrupted.
- Use Back Hang once, then observe whether it creates a genuine recovery window in your current version. Look for time to reposition, not merely a visual effect.
- If the opening is real, take one or two attacks and retreat. If Kearush immediately resumes pressure, stop repeating the tactic and return to defense.
- Keep the setup only if it improves your ability to create safe openings without consuming resources you need for blocking or healing.
Players who have not unlocked Back Hang, cannot use fire, or dislike the resource trade do not need to force this approach. No source establishes it as a requirement for victory.
Reading failed attempts
You lose health during apparently safe attacks
Your punish is probably beginning before the sequence has fully ended, or you are staying for too many hits. Cut the response to one attack, then reset. Record mentally which animation you believed was the end and whether Kearush had actually returned to a neutral stance.
Your block breaks or your stamina empties
Do not assume the patch makes blocking unlimited. The official note says blocking attacks now consumes less stamina, not that all pressure can be held indefinitely. Begin each exchange with a reserve, release block when the sequence ends, and avoid attacking until your character can defend again. If older advice tells you to dodge a specific hit because blocking was too expensive, reassess that advice in version 1.00.03 or later.
You cannot identify a repeatable opening
Stop trying to win the attempt and spend one run observing. Track the start and end of each complete sequence, the distance at which Kearush begins it, and whether the boss remains active after a fire or Back Hang attempt. Exact move names and timings have not been reliably published, so your own screen is the appropriate reference for this learning pass.
You die before learning anything
Improve health and equipment as recommended by the broad boss guidance, then return. Also remove optional damage tools that require complicated inputs until you can survive long enough to recognize the pattern. A slower attempt that reveals one complete sequence is more useful than a high-damage attempt that ends immediately.
Rank #3
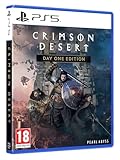
- Crimson Desert is an open-world action-adventure game set in the beautiful yet brutal continent of Pywel. Take on the role of the Greymane Kliff and embark on a journey across the continent to reclaim everything youve lost. Explore uncharted lands, encounter mysterious factions, and experience firsthand a world that is as breathtaking as it is merciless.
Your route or quest does not match a video
Check the journal objective and the current story chapter. Secondary guides use different quest labels even while placing the encounter at Hernand Castle and linking it to a banquet sequence. Follow your live objective and do not treat a video’s chapter wording as a universal identifier.
The fight feels longer than a guide describes
Do not assume you missed a phase simply because your screen shows a different number of bars. Published counts conflict, and damage can vary with equipment. Continue using the same conservative loop, and let the current boss UI determine how much health remains.
Independent reader supportYour contribution helps us test, update, and keep practical guides available for everyone.What changed in patch 1.00.03
Pearl Abyss’ March 25, 2026 notes identify a direct Kearush change: certain attack patterns were adjusted. That wording confirms that the encounter itself was altered, but it does not list every changed animation or provide a new timing chart. The same update reduced stamina consumption for blocking attacks. It also lists reduced health and attack for some enemies and bosses; because Kearush is not explicitly named in that general statement, do not promise that his health or damage was reduced by the same amount.
What’s actually slowing this PC down?
Pick the symptom - the matching free tool is one click away.
For practical purposes, date any external guide or video before using it. Keep its broad advice—watch sequences, avoid greed, prepare adequately—while verifying every precise opening in your current game. If a later patch is installed after 1.00.03, give the newer notes priority.
Health bars, quest names and rewards: facts you should not assume
Health-bar count
Secondary sources report different counts, with some describing two bars and others three. No reliable published statistic resolves the disagreement. Use the bars displayed in your current encounter and plan for a longer fight than an old guide suggests if your damage is low.
Quest title
The location and broad story context are more consistent than the quest label. Search your journal by Hernand Castle, Chapter 5 progression and the banquet-related objective rather than by a single title copied from a guide.
Rewards
Do not rely on a definitive online drop list. One guide names The Grove’s Thorn, Gale I and Howling of Chaos, while another reports different rewards. Those conflicting lists are not enough to establish a universal reward table. Read the reward screen after your current victory and record the result for your edition and patch.
A repeatable attempt checklist
- Confirm that the game is running version 1.00.03 or a later update, and expect older timings to differ.
- Verify the active Hernand Castle story objective in the journal.
- Raise health or improve equipment if your attempts end before you can observe a full sequence.
- Equip fire and Back Hang only if they are unlocked, usable and do not undermine your defensive resources.
- Begin by observing Kearush’s complete sequence and preserving stamina.
- Block or evade until the sequence visibly finishes.
- Take a short punish, then reset instead of extending the combo.
- Change one variable at a time—distance, defensive timing or optional ability—so you know what improved the attempt.
- Check the in-game reward screen rather than trusting conflicting drop lists.
Bottom line for a current Kearush strategy
Kearush is best approached as a version-sensitive endurance duel, not a memorized video script. The only confirmed encounter-specific update is Pearl Abyss’ adjustment to certain attack patterns in 1.00.03; blocking also costs less stamina in that patch. Prepare enough survivability to learn, treat fire and Back Hang as optional guide-reported tools, punish only completed sequences, and let your current journal, animations, health bars and reward screen override conflicting secondary coverage.
Rank #4

- A boundless connected, wide world - countless destinies await you on the seamlessly designed open world continent Pywel
- Versatile action, merciless battles - There is no predetermined solution on the battlefield of Crimson Desert
- The beginning of fate - In Pailune on the continent of Pywel there is a fragile balance between different powers
- Contents: the game, "deluxe package", "Khaled Shield" DLC, Steelbook, character cards, patches, etc.
Frequently Asked Questions
Where do I fight Kearush the Slayer?
Secondary guides place the encounter at Hernand Castle during a banquet-related Chapter 5 story sequence. Quest names differ, so follow the objective in your current journal rather than searching for one exact title.
Does Kearush have two health bars or three?
Published guides disagree. Check the boss UI in your current version and plan around what your game displays; neither count is established as universal.
Is fire required to beat Kearush?
No requirement is established. One guide recommends fire, but use it only if it is unlocked and does not compromise your defensive resources.
The Tool Desk
Outbyte PC Repair FREEClear out junk files and repair common Windows errorsFree Scan →Outbyte Driver Updater FREEFix the driver behind crashes, sound loss and screen glitchesFind Drivers →Is Back Hang a guaranteed stun or combo loop?
No. A guide pairs Back Hang with fire as an opening-making tactic, but its exact stagger and damage behavior are not confirmed. Test it once, take a short punish if it creates recovery, and retreat.
Why do older Kearush videos feel inaccurate?
Pearl Abyss adjusted certain Kearush attack patterns in version 1.00.03 on March 25, 2026. Blocking stamina consumption was also reduced, so older timings and stamina advice may not match.
Should I upgrade before trying again?
If you die before observing a complete sequence, improve health or equipment and return. This is a survivability recommendation, not proof of a mandatory gear check.
What rewards does Kearush drop?
Online lists conflict. One guide names The Grove’s Thorn, Gale I and Howling of Chaos, while another reports different rewards. Verify the reward screen in your current game instead of relying on a fixed list.
Recommended Free Tools
The Bottom Line
Use Hernand Castle and your live journal objective to find Kearush, prepare for survivability, and fight in a repeatable loop: defend, confirm recovery, take a short punish, then reset. Version 1.00.03 changed attack patterns and lowered blocking stamina cost, so verify every precise opening in the current build.
Quick Recap
Product prices and availability are accurate as of the date/time indicated and are subject to change. Any price and availability information displayed on Amazon at the time of purchase will apply.

