
What’s actually slowing this PC down?
Pick the symptom - the matching free tool is one click away.
Most Retroid Pocket Duo input problems are configuration problems rather than failed hardware. Start by installing the latest official OTA update, restarting the handheld, and testing both displays and the built-in controls before importing games. In the emulator, use a stacked top-and-bottom layout, make the upper panel primary, and assign the lower panel to touch. Then test taps, swipes, drags, and stylus movement; recreate or calibrate the emulator’s touch profile if contact lands away from the pointer. Map physical controls inside the emulator, use Android’s Game controller settings only for supported system-level changes, and save a per-game profile after everything works. Back up saves and profiles before resetting, changing emulator versions, or moving folders.
The Pocket Duo has a 5.5-inch 1080p AMOLED primary display and a 4.5-inch 960p AMOLED secondary display, both listed at 120 Hz, plus 8 GB of RAM, 128 GB of storage, and a 6,000 mAh battery. Those specifications explain why it can present two independent input surfaces, but they do not automatically make every DS or 3DS emulator assign touch and buttons correctly.
As an Amazon Associate I earn from qualifying purchases.
What the Duo’s input problem usually is
The Pocket Duo is an Android handheld with two physical displays. A game may therefore be receiving input from the wrong screen, an emulator may have an offset touch profile, or a controller binding may be correct for one emulator but wrong in another. Treating all of these as one generic “touch-screen failure” leads to unnecessary resets.
First identify the layer where the fault appears:
- Android system: the problem remains in settings or across every app.
- Emulator: the wrong panel, pointer offset, or button assignment occurs only in one emulator.
- Individual game: other games work, but one title expects a different layout or control scheme.
- Touch layer: taps, swipes, and stylus movement are inaccurate even in a touch-focused test.
- Physical input: a D-pad, stick, shoulder, trigger, or shortcut is detected as another action.
Make changes at the narrowest layer that fixes the fault. A per-game profile is safer than a global remap when only one title is affected, and a system-level change should be reserved for a controller that is wrong in multiple apps.
#1 Best Overall
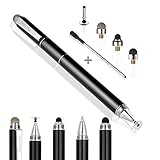
- 4-in-1 UNIVERSAL STYLUS: Penyeah stylus pen for touchscreen include 4 different of touch screen stylus replaceable tips: 1 X 0.27" clear disc tip; 1 X 0.23" mesh fiber tip; 1 X 0.16" rubber tip and 1 X 0.2 " rubber tip; plus a smooth black ink ball point writing pen. One stylus delivers 4 different using experience; Note: It's not paml-rejection, please don't rest your hand on the screen, or it will not work smoothly
- FULLY COMPATIBLE & VERSITILE: The clear disc stylus is universal and drawing like a fine point stylus; 100% compatible with all capacitive touch screen devices (iPhone,iPad,iPad Pro,Samsung,Galaxy, Android, Cellphone,Laptop,Computer,Kindle,Tablets,HP,Dell,Microsoft,Surface etc.); Perfect for digital signing,browsing,writing,taking notes,drawing apps,playing games; Quick responsive, no battery required, no need for setup; Slim with sturdy pocket clip, easy to use and carry around
- UNIQUE DESIGN FOR YOUR STYLE: The tablet pens for touch screen is made of high grade metal material, handy comfortable feeling, solid, durable and corrosion resistant. All screw type tips are interchangeable. So you can DIY your-style stylus pen according to your needs and using preference
- HIGH ACCURATE & PRECISE: The precison stylus for ipad disc tip provides much better flexibility and accuracy, allows you to see exactly where your mark is being made and gives you the accurate point; Mesh fiber tip glides easily on your screens, and rubber tips can help you select small icons exactly, Penyeah stylus provide you more choice for all your daily use
- WHAT YOU GET: Penyeah universal stylus pen x1; High sensitive disc stylus tip x1; Responsive mesh stylus tip x1; 0.16 inch fine point small rubber tip x1; 0.2 inch larger rubber tip x1; Standard D1 pen refill x1; black pen sleeve x1; User manual x1.
Establish a clean baseline before changing mappings
A clean baseline prevents a stale profile or old firmware setting from being mistaken for a hardware defect.
- Install official system updates. Open the Duo’s system update screen and install any available official OTA package. Firmware menu labels can vary, so use the device’s built-in update entry rather than an unofficial package.
- Restart the handheld. A restart clears a stuck input service and ensures the updated firmware is running.
- Test both displays outside a game. Confirm that the upper and lower panels light correctly, respond to finger taps, and show a stable image. Check audio and every built-in control as well.
- Use a small touch-focused title for testing. Do not begin with a large imported library. A simple DS- or 3DS-style game makes it easier to see whether a tap, swipe, drag, or stylus movement is being registered.
- Back up before making destructive changes. Copy save files and emulator profile folders to the microSD card and to another location when possible. The card is useful as expandable storage, but it should not be the only copy of a save.
If both screens and controls work in the baseline test, the fault is probably an emulator layout or profile issue. If touch is inaccurate everywhere, continue with the touch-layer checks below before changing rendering options.
Set the correct top-and-bottom screen layout
For Nintendo DS and 3DS software, begin with a stacked top-and-bottom arrangement. The upper display should be the primary screen, and the lower display should be assigned as the touch screen. This assignment is made in the emulator’s display or screen-layout menu, not merely through Android’s global rotation setting.
Configure the emulator
- Launch the emulator and open its Display, Screen layout, or similarly named video menu. Exact labels differ by emulator and version.
- Choose a stacked top-and-bottom layout rather than a side-by-side or single-screen mode.
- Set the upper panel as the primary display. If the emulator offers a “main” or “top” designation, select the upper screen.
- Assign the lower panel to touch input. Look for a touch-screen, touchscreen, or input-display selector and choose the lower display.
- Apply the setting, return to the game, and verify that the game image appears on the intended panel.
Do not assume that Android’s rotation setting can correct a bad emulator assignment. Rotation controls orientation at the operating-system level; an emulator can still send touch coordinates to the wrong physical panel.
Verify the result with four gestures
- Tap: select a menu item near the top, middle, and bottom of the lower screen.
- Swipe: move horizontally and vertically through a menu or map.
- Drag: hold an object and move it across the display without lifting your finger.
- Stylus movement: trace a slow line across the lower panel and check that the game follows the contact point.
If all four actions land where expected, save the layout in the emulator before changing other settings. If the pointer is consistently displaced, use the touch-profile procedure rather than changing resolution or renderer settings.
Rank #2

- Stylus Pen for Touchscreen: No Bluetooth or charging needed—use instantly on any capacitive touch screen (iPad, iPhone, Android, Samsung). Dual rubber tips (5mm/6.6mm) ensure precise control for writing, drawing, or gaming. Lightweight aluminum body with vibrant colors.
- Precision & Comfort Redefined: High sensitivity rubber tip glides smoothly without lag or scratches. Ergonomic design reduces wrist strain for extended use. Compatible with tablets, phones, and Laptops.
- Dual-Tip Flexibility: Switch between 0.20” and 0.26” rubber nibs for detailed art or bold notes. Anti-scratch, fingerprint-resistant tip. Pretty bright metal colors inspire creativity.
- Effortless Multi-Device Compatibility: Works seamlessly on Apple, Samsung, Android, and more. No apps or setup—just pick up and write. Perfect for notes, games, or gifts—ready to spark ideas instantly. Replaceable tips included for long-term use.
- Creative Freedom, Anywhere: Lightweight aluminum stylus with natural grip. Includes 6 replaceable tips and 3 color stylus pens. Perfect for sharing with friends, family, or colleagues, this bundle ensures you’re always equipped to capture inspiration.
Correct touch coordinates and stylus offset
Recreate or calibrate the touch profile
An offset pointer usually means that the emulator’s coordinate profile does not match the current screen assignment or resolution. Open the emulator’s touch, input, or controller-profile editor and either run its available calibration step or delete and recreate the touch profile. Follow the on-screen targets exactly, then repeat the tap, swipe, drag, and stylus tests.
- Close the game and open the emulator’s input or touch-profile editor.
- Choose the lower display as the touch surface before starting calibration.
- Run the available calibration routine. If no calibration routine exists, remove the existing touch profile and create a new one.
- Save the profile, restart the game, and test points at all four edges and the center of the lower screen.
- Only after coordinates are accurate should you experiment with resolution, scaling, or renderer settings.
If the offset changes when you switch between emulators, keep each emulator’s touch profile separate. A profile created for one emulator’s coordinate system may not be valid in another.
Free tools Windows power users keep installed
One-click scans. No signup required.
Use a capacitive stylus for precision, not repair
A capacitive touchscreen stylus can make precise taps, drawing, and drag gestures easier on the lower AMOLED panel. It works by presenting a conductive contact similar to a finger. It cannot correct a failed digitizer, an incorrect screen assignment, or a firmware defect. If finger taps are offset in every app, a stylus will reproduce the same error; return to calibration and hardware diagnosis instead.
Hide virtual controls when physical controls are mapped
Once the Duo’s D-pad, sticks, buttons, shoulders, and triggers control the game correctly, hide on-screen virtual buttons where the emulator permits it. This removes accidental touches and leaves the lower screen available for actions that genuinely require touch. Keep a touch overlay only when the game needs controls that are not practical to map to the handheld.
Map the Duo’s physical controls inside the emulator
Emulator-level mapping is the first choice because it can be limited to the system or game that needs it. Map one control at a time so a duplicate binding is easy to spot.
Rank #3

- 【Enhanced Precision with Dual Rubber Tips - Smooth, Comfortable, and Stylish】Experience unparalleled accuracy with our dual-tip stylus, featuring two premium silicone rubber tips (7mm/5mm) designed for smooth, responsive performance across tasks like browsing, writing, drawing, and gaming. These soft, durable tips protect your screen from scratches and reduce fingerprints, making it perfect for users with long nails or larger fingers. Crafted with a sleek aluminum body, this stylus blends functionality and elegance, ensuring a seamless and stylish digital experience every time.
- 【High Precision & Scratch Protection】 This stylus Pen for Touchscreen is equipped with a highly sensitive rubber tip that glides effortlessly across the screen, delivering pixel-perfect precision for seamless writing, drawing, and navigation. Its anti-scratch design safeguards your device from fingerprints, smudges, and scratches, keeping your screen pristine. Perfect for unleashing creativity and enhancing productivity with smooth, lag-free performance.
- 【Ready to Use, No Hassle Setup】Experience instant creativity with our iPad stylus pen—no Bluetooth connection or charging required. Simply pick it up and start writing or drawing effortlessly. Perfect for jotting down ideas, sketching designs, or unleashing your creativity, it delivers a smooth, natural, and reliable performance every time.
- 【Universal Compatibility】 Our stylists pens for touch screens is designed to seamlessly work with all capacitive touch screen devices, including iPhone, iPad, Nintendo Switch, Android phones, Samsung Galaxy, tablets, Chromebooks, Microsoft Surface, and more. Perfect for drawing, writing, note-taking, browsing, and gaming, this versatile tool effortlessly adapts to your needs, enabling you to switch between devices and unleash your creativity with ease. One stylus is all you need for a smooth, pen-like experience across multiple platforms!
- 【Comprehensive Stylus Set and After-Sales Support】Elevate your touchscreen experience with this stylus set, designed for precision and versatility. It includes replaceable accessories, featuring two different-sized rubber tips for adaptable use. Both ends are easy to replace without any tools, ensuring effortless functionality. Perfect for personal use or sharing with family and friends, these styluses deliver exceptional accuracy. Have questions or need assistance? Our responsive customer support team is here to provide prompt and reliable solutions, ensuring your satisfaction every step of the way.
Build a complete control profile
- Open the emulator’s Input, Controller, or Key mapping menu.
- Start a new profile instead of editing a known-good profile if several controls are wrong.
- Assign the D-pad directions individually: up, down, left, and right.
- Assign both analog sticks, including their click actions if the emulator exposes stick presses.
- Assign the face buttons one at a time and confirm the labels shown by the emulator.
- Assign the left and right shoulders and both triggers. Some emulators distinguish digital shoulder buttons from analog trigger axes.
- Assign emulator shortcuts only after gameplay controls are complete. Keep shortcuts away from buttons used frequently during play.
- Remove duplicate bindings. A single physical button assigned to two actions can make a game appear to have random input.
- Save the profile, launch a game, and test every mapped action before adding another title.
If a button is detected under the wrong action, delete that binding and record it again rather than compensating by swapping several unrelated buttons. Recreate the complete profile when the editor has accumulated conflicting entries.
When Android’s controller settings are appropriate
Android also provides Game controller settings for supported wired and Bluetooth controllers. Use those settings when the same external controller is wrong across multiple apps, or when you need a system-level button or joystick assignment. Open Android Settings and search for Game controller; the exact path and labels depend on the Android build.
Apply a system-level remap only after confirming that the emulator itself is not translating the input incorrectly. Android’s assignment may not be honored by every emulator, so verify the result in the target application. If the emulator still reports the old arrangement, undo the global change and create an emulator profile instead.
Keep different emulators and games from fighting each other
A working mapping in one emulator is not proof that another emulator uses the same button names, axis order, or touch coordinates. A title may also require a different screen arrangement or a special shortcut.
- Leave the Android baseline unchanged when only one emulator or game is affected.
- Create an emulator-specific profile for a different emulator.
- Within that emulator, create a game-specific profile when one title needs unusual bindings or a different screen ratio.
- Give profiles descriptive names that include the emulator and game, then save after testing.
- Export or copy profile files before updating, reinstalling, or deleting the emulator.
This approach prevents a fix for one title from breaking another and makes rollback possible when an emulator update changes its input schema.
Recommended Free Tools
Rank #4
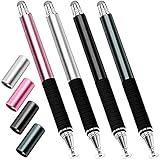
- Great Stylus Pens for Touch Screens: The stylist pen for ipad is designed to imitate human finger touch effect on the screen, which has a better touch point than the tip of your finger, giving better accuracy to little touch focuses like keys on the console. Made from stainless steel and Aluminum, no plastic parts, good grips real pen feeling, making you feel comfortable all day.
- Anti-scratch Tip: With a clear disc tip and a soft fiber head, GUUGEI 2 in 1 stylus pen features ultra soft and smooth while using. It protects your screen from scratching and fingerprints.
- High Precision & Sensitivity: The capacitive stylus pen for ipad has a clear and thin disc tip, which allows you to see exactly where your mark is pointing and give you supreme accuracy. You can get a more quiet and accurate writing and drawing experience.
- Universal Touchscreen Stylus: 100% compatible with all capacitive touch screen devices,such as iPads, iPad Mini, iPhones, Android Tablets, Android Phones, Samsung Galaxy, E-readers, Smartphones and so on.
- Easy to Carry: This capacitive stylus pens for touch screens is very lightweight and compact. No need to charge, connect or pair with device, you can use it at anytime and anywhere. Perfect ipad stylus/iPhone stylus/tablet stylus for kids and family friends to enjoy.
Back up saves and profiles before resets
Input troubleshooting can become data-loss troubleshooting if a reset removes emulator folders or changes the location of save files. Before a factory reset, emulator reinstall, folder move, or major version change, copy both categories:
- Save data: in-game save files and save states, if you use them.
- Configuration: emulator profiles, control mappings, touch profiles, shader or layout presets, and any per-game configuration files.
Keep one copy on the microSD card and another in a separate location. After the change, launch one game, confirm that the save loads, and test input before restoring a large library. If the restored profile causes the offset or wrong-button problem to return, remove only that profile and rebuild it rather than deleting saves.
Choose the right fix by symptom and scope
| Observed fault | First place to change | Recommended action | What to preserve |
|---|---|---|---|
| Lower-screen taps land on the upper screen | Emulator display layout | Choose stacked top-and-bottom, make the upper panel primary, and assign the lower panel to touch | Existing saves and the working profile before edits |
| Pointer is consistently offset | Emulator touch layer | Recreate the touch profile or run the available calibration, then retest all four gestures | Touch profile backup |
| Only one game has wrong buttons | Game-specific emulator profile | Keep the Android baseline unchanged and map that title separately | Other emulator profiles |
| Every emulator sees an external controller incorrectly | Android controller settings | Search Android Settings for Game controller and remap the supported device, then verify emulator compatibility | Original mapping and profile exports |
| Virtual buttons cause accidental touches | Emulator overlay | Hide the overlay after physical controls are confirmed | Touch-only actions that still need the screen |
| Touch is wrong in every app | System or hardware layer | Install official OTA updates, restart, test both panels, and seek hardware service if calibration cannot correct it | All saves and profiles before any reset |
Failure modes and recovery steps
The lower screen is displayed correctly but does not accept touch
Confirm that the emulator’s touch assignment names the lower physical panel, not merely the lower image in a preview. Restart after applying the layout. Test the screen outside the game; if it also ignores finger input there, the issue is not a game mapping and may require hardware service. No Duo-specific digitizer replacement procedure is established here, so do not open the device based on a generic handheld guide.
Touch works, but every point is shifted
Recreate or calibrate the touch profile with the correct lower-screen assignment. Check all edges, because an apparently acceptable center point can hide scaling errors near the borders. Avoid compensating with arbitrary resolution changes; those can create a second mismatch.
Do these 3 things before closing this tab:
1Repair Windows errors before they cause bigger problems2Fix the driver behind crashes, sound loss and screen glitches3Clear out junk files and repair common Windows errorsOnly the stylus misses its target
Test the same locations with a finger. If both inputs miss identically, the issue is screen assignment or calibration, not the stylus. If finger input is accurate but the stylus fails, use a clean capacitive stylus tip, remove anything that interferes with contact, and test again. A stylus remains optional; it does not replace calibration.
Best Value

- 【Stylus for Touch Screen】This stylus can be used on touch screen, designed to replace your fingers, the stylus can free up your fingers and provide higher sensitivity and response on the screen.
- 【Capacitive stylus】This is a capacitive stylus (battery-free, requires no charging, and functions like a fingertip)—not an active stylus. It does not support pressure sensitivity or palm rejection. However, it allows for tapping, scrolling, note-taking, and drawing on touchscreens; if you require professional-grade drawing capabilities on an iPad, please choose an active stylus instead.
- 【2-in-1 Stylus Pen】This stylus features two different tips: a flexible transparent disc tip and a rubber tip. Applying moderate pressure when using the rubber tip ensures full contact with the screen—especially on screens with protective films—thereby enabling stable signal transmission. The combination of the rubber tip and the disc tip offers two distinct touch experiences.Please note that the plastic piece on the transparent disc is an integral part of the tip and cannot be removed.
- 【Works On Capacitive Touch Screens】Compatible with iPad, iPad Air/mini, iPhone, Samsung Galaxy Tab, Android tablets, Kindle and smartphones. Also works over most screen protectors — glide, no scratch. The stylus is used to replace your fingers on a touchscreen, Avoid rubbing your fingers and leaving fingerprints on touchscreen devices. If it cannot be used for writing on some devices, This may be due to limitations in the settings of touchscreen devices. If you cannot find a solution, please contact us at any time, and we will help you resolve the issue.
- 【Multiple Usage Scenarios】Whether you are taking notes in class, reviewing documents at work, drawing creative designs, or enjoying mobile games, this universal stylus pen delivers a smooth and comfortable touch experience. It is ideal for writing, sketching, annotating, scrolling, and precise screen control on tablets and smartphones. From daily tasks to creative projects, this stylus helps you capture ideas anytime and anywhere.
A button performs two actions
Open the emulator profile, remove duplicate bindings, and assign each control once. If the editor still shows inconsistent detections, discard that profile and recreate it from a clean profile. Do not solve a duplicate by changing unrelated buttons globally.
A remap works until the emulator restarts
Save the profile explicitly, then confirm that it is attached to the intended game or system. If a profile folder was moved or the emulator was updated, restore the backed-up profile or recreate it and save again. Verify persistence with a restart before importing more games.
A system remap works in Android but not in the emulator
Some emulators do not honor every Android-level assignment. Revert the global change if it disrupts other apps and map the controller inside the emulator instead. Keep a per-game profile when only one title needs the change.
Quick wins for a faster PC:
Fix the driver behind crashes, sound loss and screen glitchesFind Drivers →Clear out junk files and repair common Windows errorsFree Scan →Hardware context and what it means for troubleshooting
Retroid’s current product listing describes a 5.5-inch primary AMOLED display at 1080p and 120 Hz, a 4.5-inch secondary AMOLED display at 960p and 120 Hz, 8 GB of RAM, 128 GB of storage, and a 6,000 mAh battery. The dual-panel design is why DS and 3DS software benefits from a stacked layout, while the high-refresh panels do not by themselves determine touch coordinates or emulator bindings. Official OTA support means firmware should be brought current before deeper diagnosis.
Those published specifications do not establish a digitizer-replacement method or prove that a particular emulator supports every Android controller assignment. For persistent cross-application touch failure after updates and profile recreation, preserve your data and contact the device manufacturer or a qualified repair service rather than treating a stylus or global remap as a hardware fix.
Quick Recap
A repeatable recovery checklist
- Back up saves and emulator profiles.
- Install the official OTA update and restart.
- Test both displays, audio, touch gestures, and built-in controls with a small title.
- Set the emulator to stacked top-and-bottom mode.
- Make the upper panel primary and assign the lower panel to touch.
- Run tap, swipe, drag, and stylus tests.
- Recreate or calibrate the touch profile if coordinates are offset.
- Map the D-pad, sticks, face buttons, shoulders, triggers, and shortcuts inside the emulator.
- Remove duplicate bindings and recreate the profile if detection is wrong.
- Use Android’s Game controller settings only for supported system-level controller issues.
- Save a per-game profile and verify that it survives a restart.
- Keep backup copies before any future reset, reinstall, folder move, or emulator update.
Product prices and availability are accurate as of the date/time indicated and are subject to change. Any price and availability information displayed on Amazon at the time of purchase will apply.

