Free tools Windows power users keep installed
One-click scans. No signup required.
To host BeamNG.drive multiplayer, install the dedicated BeamMP-Server on Windows or Linux, launch it once to create ServerConfig.toml, choose private or public visibility, and make the configured port reachable. The usual port is 30814 over both TCP and UDP, but always use the value shown in your own configuration.
A same-network game needs no internet port forwarding. Friends connecting from outside your home need a reachable IPv4 address, router forwarding, and firewall rules. A VPS avoids your home router and is the simpler external-hosting route, while home hosting costs nothing beyond the computer and connection you already have.

As an Amazon Associate I earn from qualifying purchases.
What you are actually hosting
BeamNG.drive does not provide a standalone server through the normal game client. This guide covers multiplayer through BeamMP-Server, the dedicated server software documented by BeamMP. Download links, supported builds and current licensing are maintained in the BeamMP Server Setup guide.
The server process coordinates players, vehicles and mods; each player still runs the BeamNG.drive game and BeamMP client on their own computer. Do not use BeamNG.drive’s client system requirements as server requirements. They describe the game you play, not the small headless process that accepts BeamMP connections.
#1 Best Overall

- MOZA R5 Racing Wheel and Pedals Bundle Kit is designed for PC Users (Not Compatible with Xbox and ps), provides an affordable, direct-drive setup force feedback system that transforms your sim racing experience.
- Direct-Drive Simulator: Delivers smooth, detailed 5.5 Nm peak torque without the mechanical slack or noise of older gear- and belt-driven wheels.
- Ready-to-Race Kit: Includes the wheel base, MOZA ES Steering Wheel with an aluminum quick-release system, and steel pedals and desk clamp in a single package.
- ES Wheel: At 280mm (11 inches), the compact diameter gives the motor maximum leverage, ensuring the 5.5Nm force feedback feels crisp, strong, and detailed rather than dampened or weak.
- SR-P Lite Pedals(No Clutch): Crafted from high-strength steel, this Pedal with throttle and brake feature precise Hall sensors, adjustable spacing and height, customizable output curves, and an anti-slip base—offering reliable, adaptable performance for any setup.
You can run a private server for invited friends or configure a public server that appears in BeamMP’s server list. Public listing requires an authentication key. BeamMP recommends configuring a key for private servers too; treat it as a password and never post it in screenshots, chat, repositories or example configuration files.
Choose where to run the server
Make this decision before installing anything, because the network steps differ substantially.
| Option | Cost model | Internet reachability | Work and risk | Best fit |
|---|---|---|---|---|
| Home computer, same LAN | No hosting fee | Use the host’s local IP; no public forwarding | Lowest setup; stays inside your home network | Household or LAN sessions |
| Home computer, internet players | No hosting fee, but uses your home connection and electricity | Requires reachable IPv4, router forwarding for configured TCP and UDP port, and host-firewall rules | You expose one service to the internet and maintain the machine and router | Small private groups when your ISP permits inbound access |
| Virtual private server (VPS) | Paid monthly service; price depends on provider and resources | Uses the VPS public IP; no home-router rule | BeamMP describes this route as easier and more secure than home hosting, but you still administer the server and firewall | Friends connecting from different networks or a continuously available server |
| Managed BeamMP-compatible host | Paid plan; limits and support vary by provider | Provider supplies the public endpoint and handles some infrastructure | Potentially the least administration; verify documented BeamMP support, player/resource limits, backups and access to configuration | People who do not want to maintain Linux, updates or networking |
BeamMP’s own guide says, “Creating a Home Server is free, hosting one with a VPS is easier and more secure.” That is BeamMP’s description, not an independently measured speed, uptime or security comparison. The official pages do not establish prices, capacity guarantees or a particular provider. If you pay for hosting, confirm the exact port/protocol support, CPU and RAM allocation, mod policy, backups, cancellation terms and whether you receive a public IPv4 address.
Do these 3 things before closing this tab:
1Clear out junk files and repair common Windows errors2Fix the driver behind crashes, sound loss and screen glitches3Repair Windows errors before they cause bigger problemsIf you would rather not run the machine yourself, Godlike.Host offers BeamNG.drive server hosting with its own game panel, SFTP access, up to three free backups a day with restore, and 24/7 support by live chat or ticket. See the current plans, and check the port and mod needs described above before you order.
Server requirements versus game-client requirements
BeamMP’s Server FAQ lists minimum figures for the dedicated process. They are minimums, not a player-count calculator or a promise of smooth performance with a heavy map, traffic mod or large group.
| Dedicated BeamMP server item | Published minimum | Qualification |
|---|---|---|
| Usable memory | 50+ MiB | Excludes operating-system overhead; mods and plugins add their own demand |
| CPU | Above 1 GHz, preferably multicore | No workload or player-scaling formula is provided |
| Graphics processor | None | The server is headless; GPUs belong to players’ game clients |
| Disk space | 10 MiB plus mods and plugins | Leave additional room for logs, downloaded files and updates |
| Upload bandwidth | 5–10 Mb/s | BeamMP’s stated range; actual demand depends on activity, players and content |
For comparison, BeamNG’s 2026 client requirements page lists 16 GB RAM and 6 GB VRAM as minimums, recommends 32 GB RAM and at least 8 GB VRAM, names Ryzen 7 3700X/Core i7-9700-class recommended CPUs, and lists 60 GB available storage. Those figures apply to the game client. They are not requirements for BeamMP-Server, and BeamNG notes that the game can use more than 16 GB of memory.
Install BeamMP-Server on Windows
Use the current Windows build and instructions in BeamMP’s official setup documentation rather than an old video or copied executable link. The guide requires the Microsoft Visual C++ Redistributables.
- Prepare a dedicated folder. Create a folder used only for the server, such as a BeamMP server directory. Keeping the executable, configuration, logs and plugins together makes backups and updates easier.
- Install the Visual C++ Redistributables. Complete this prerequisite before launching the server. If Windows reports a missing runtime DLL, revisit this step instead of downloading DLL files from unofficial sites.
- Download the Windows server build. Get it from the current BeamMP documentation/download location and place the executable in the dedicated folder.
- Launch it once. The first run creates the server configuration files beside the executable. Stop it after generation so you can edit the configuration safely.
- Edit
ServerConfig.toml. Set the server name, visibility, authentication information, port and other options in the generated file. Keep the authentication key private. Do not paste a configuration template from a different server version without checking the current guide. - Start the server again. Run the executable and watch its console output for a successful bind/listening message or an explicit error. Leave this window available while testing so you can see connection and configuration errors.
Windows Defender Firewall may display a first-run prompt. Allow the server on the networks you actually use, and create explicit inbound and outbound rules if the prompt does not appear. Allowing the process or the configured port is safer than disabling the firewall globally.
Rank #3
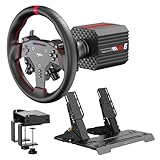
- VD6 Sim Racing Bundle & Compatibility: The PXN VD6 Bundle includes: VD6 direct drive PC steering wheel base, W AS racing wheel, PD HM 2-pedal set, desk clamp, USB cables, mounting accessories, and user manual. This complete racing simulator setup is compatible with popular PC racing games and truck simulators such as iRacing, Assetto Corsa, WRC, Euro Truck Simulator 2, and the F1 series. Note: Compatible ONLY with PC Windows 7–11.
- VD6 Direct Drive Base: Powered by a 20-pole low-inertia servo motor, the VD6 steering wheel base delivers 6Nm continuous and 7Nm peak torque with high-precision 24-bit encoder and multi-core processing. Sense+ algorithm offers detailed, smooth force feedback reflecting road conditions and tire dynamics. The aluminum chassis and smart thermal control system provide stable and consistent performance, even during long racing sessions.
- W AS Racing Wheel: This 11-inch (28cm) gaming steering wheel features a sturdy aluminum alloy frame with a microfiber leather grip for comfort and control. It includes a dynamic RGB telemetry light bar for real-time speed display, 19 programmable buttons, 2 rotary encoders, and 4 aluminum paddle shifters (2 linear, 2 tactile) for immersive racing input. The quick-release system enables fast and secure attachment to PXN VD-series bases.
- PD HM Hall Sensor 2-Pedal & Desk Clamp: Constructed from full-metal, the PD HM 2-pedal set features high-precision Hall-effect sensors on throttle, brake, and clutch for accurate input. Adjustable height and angle settings enable customization, with response curves configurable via PXN’s PC software. The included desk clamp ensures stable mounting on desktops or compatible racing stands.
- PXN SimRacing Software: The PXN SimRacing software allows full customization of your racing wheel setup: adjust force feedback levels, map buttons, configure RGB effects, and fine-tune pedal response curves. Easily switch between official presets or save and load your personalized profiles with one click. Integrated game launcher lets you jump into your favorite sim racing titles instantly. Available for download on PXN’s official website.
Install BeamMP-Server on Linux
BeamMP publishes Linux builds for relevant distributions. The exact package and binary names can change, so follow the current official Linux section for your build.
- Create a separate service account. BeamMP recommends running a Linux server as an unprivileged user rather than root, sudo or your personal account. Give that user ownership of the server directory and only the permissions it needs.
- Download the Linux build. Place it in the dedicated directory. Verify that the file came from BeamMP’s current documentation or release channel.
- Mark the binary executable. Use your distribution’s normal file-permission method, then launch it once from the server directory to generate
ServerConfig.tomland related files. - Edit the generated configuration. Set the name, private/public mode, key and port. Preserve the syntax produced by the current version.
- Run it as the service user. For a long-running VPS, configure your distribution’s service manager to start the process as that unprivileged account and restart it after a crash. Keep logs available for troubleshooting.
- Open only the configured port. Use your distribution firewall’s documented method to allow that port for both TCP and UDP. Do not turn the firewall off to solve a connection problem.
Configure a private or public server
Private server for friends
Set the server to private in ServerConfig.toml and give friends the endpoint only through a channel you trust. Internet players need your public IPv4 address and configured port; people on the same home network should use the host’s local address. Sharing an IP address reveals a network endpoint, so limit it to people you know and stop forwarding when you no longer need the server.
Public server in the BeamMP list
Enable the public-list settings and provide the authentication key required by BeamMP. Once the server is reachable and authenticated, players can search for its configured name in the BeamMP server list. A public listing means anyone may attempt to connect, so use a strong, non-identifying server name, keep the software current and monitor logs.
BeamMP recommends an authentication key for private servers as well. Store it outside public documentation, redact it before sharing logs, and replace it if you accidentally disclose it.
Rank #4
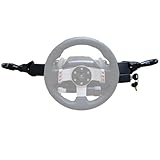
- Product Features ----Multi-Function Stalks Turn Wiper Lever+ Headlight Switches + Ignition Switch Key for Logitech G920 G923 G25 G27 G29 G RS50 System Driving Force Euro truck simulator2 /American truck simulator/ OMSI 2/ The Bus/BeamNG.drive;Powerful game management with distinct configurations and logic for different games, automatically switching according to the game.No need to install drivers-plug and play.Support original steering wheel installation.
- Turn Signal Headlight Switches functions ---- The stalks feature up to 21 programmable switches to cover all your driving needs.Support game Auto-Sync(No need to pause the game to adjust the position of the lever position when entering the game.); Meter/Low beam switch,High beam/light switch;you can switch small lights, headlights, switch instrument lights, turn signal, high beam, warning light, cruise light, can expand the vehicle start light, meter mode switch.
- Turn Wiper Switches functions ---- 1.Switching to Universal Mode:Recommend binding buttons as:Upward lever: Right turn signal; Downward lever: Left turn signal. Pull lever closer: Flash headlights/Honk horn; Push lever away: Toggle high/low beams.2.Euro Truck Simulator mode:Three-speed windshield wiper( high speed / low speed / off switch);Recommended bindings buttons as:Up lever - Wiper;Down lever - Next view/camera;Pull lever - Cockpit view;Pull and hold lever - Lean-in view;Push lever - Horn.
- Product Ignition Switch Technology ---- The key module is modified from heavy truck factory key. The LOCK position is used for steering wheel lock (ignored in-game).In Euro Truck Simulator (ETS2), there is only a single "ignition" option. Therefore, you can bind either OFF→ACC or ACC→ON for the ignition sequence.Engine start is performed from ON→START (START position).
- Package including--1X Basic kit;1 X Ignition Switch Key Model;1X Mounting Bracket and screws.If you find the Turn Signal Wiper Lever Switch could not connect to your Steering Wheel or could not work for your game, please do not worry and contact us via message first we will offer professional resolution to make it work again or replacement for free.
Set the port and network rules
The BeamMP FAQ identifies 30814 as the usual server port and specifies TCP and UDP. Your ServerConfig.toml can use a different value; every rule and connection attempt must match that configured value.
Same computer or same home network
- If the game and server run on one machine, BeamMP’s FAQ says to use direct connect with
127.0.0.1and the configured port. - For another device on the same LAN, connect to the server computer’s private address, such as its router-assigned local IPv4 address, plus the configured port.
- Do not create a public router-forwarding rule for a LAN-only session.
Home server for internet friends
- Give the server computer a stable local address. A DHCP reservation in the router is preferable to a temporary address that can change after reboot.
- Forward the configured port in the router. Create one rule for TCP and one for UDP, both pointing to the server computer’s local IPv4 address. If the router offers a protocol choice, select both rather than only TCP.
- Allow the same traffic on the host firewall. Permit BeamMP-Server or the configured port for inbound and outbound traffic. Keep the firewall enabled.
- Confirm the public endpoint. Friends use your current public IPv4 address and port, not the private address shown by the router. Do not test from inside the LAN using the public address unless your router supports hairpin NAT; use local direct connect for the host’s own test.
- Test from outside your network. Ask a friend on another connection to try while the server console is visible. A successful local test proves the process runs, not that internet routing works.
VPS server
A VPS does not use your home router. Bind BeamMP to the configured port, allow TCP and UDP in the VPS provider’s network firewall and the operating-system firewall, then give players the VPS public IPv4 address and port. Review the provider’s inbound-firewall terminology: some require a cloud security-group rule in addition to Linux or Windows firewall rules.
Join and verify the server
- Start BeamMP-Server and wait until its console indicates that it is listening without configuration or bind errors.
- From the host computer, use BeamMP direct connect to
127.0.0.1:<configured-port>. - For a second device in the house, use the server computer’s local IPv4 address and port.
- For an outside friend on a private server, provide the public IPv4 address and port privately.
- For a public server, search the configured server name in the BeamMP list after authentication and network rules are working.
- Check the server console while each test occurs. An incoming attempt that never appears usually indicates routing, CGNAT or firewall trouble; an attempt that appears and is rejected points more toward configuration, version or authentication.
Troubleshoot connection failures
The server works locally but nobody outside can join
- Verify that the router forwards the exact port shown in
ServerConfig.toml, not merely the usual 30814, and that both TCP and UDP rules exist. - Confirm the forward targets the server computer’s current local IPv4 address. A changed DHCP address silently breaks an otherwise correct rule.
- Check Windows Defender Firewall or the Linux firewall for both the application and the port.
- Make sure friends are using your public IPv4 address, not a private address such as 192.168.x.x or 10.x.x.x.
- Test while the server is running; a closed process cannot answer a port check.
Your ISP uses CGNAT
BeamMP warns that carrier-grade NAT can prevent home port forwarding from working. In CGNAT, the router’s “WAN” address is not a directly reachable public IPv4 address, so an inbound connection never reaches your network even when forwarding is perfect. Ask the ISP whether your service has a public IPv4 option. If it does not, use a VPS or managed host, or keep sessions limited to a network path that does not require inbound forwarding.
The Tool Desk
Outbyte PC Repair FREERepair Windows errors before they cause bigger problemsFix Now →Outbyte Driver Updater FREEScan for outdated or missing drivers - takes under a minuteDriver Scan →You are using mobile 4G or 5G internet
BeamMP’s FAQ notes that mobile 4G/5G connections do not support port forwarding. A home server behind such a connection generally cannot accept ordinary incoming BeamMP connections. Use an external server or a different internet service with reachable IPv4.
Best Value
- Product Features ----Multi-Function Stalks Turn Wiper Lever+ Headlight Switches + Ignition Switch Key for Logitech G920 G923 G25 G27 G29 G RS50 System Driving Force Euro truck simulator2 /American truck simulator/ OMSI 2/ The Bus/BeamNG.drive;Powerful game management with distinct configurations and logic for different games, automatically switching according to the game.No need to install drivers-plug and play.Support original steering wheel installation.
- Turn Signal Headlight Switches functions ---- The stalks feature up to 21 programmable switches to cover all your driving needs.Support game Auto-Sync(No need to pause the game to adjust the position of the lever position when entering the game.); Meter/Low beam switch,High beam/light switch;you can switch small lights, headlights, switch instrument lights, turn signal, high beam, warning light, cruise light, can expand the vehicle start light, meter mode switch.
- Turn Wiper Switches functions ---- 1.Switching to Universal Mode:Recommend binding buttons as:Upward lever: Right turn signal; Downward lever: Left turn signal. Pull lever closer: Flash headlights/Honk horn; Push lever away: Toggle high/low beams.2.Euro Truck Simulator mode:Three-speed windshield wiper( high speed / low speed / off switch);Recommended bindings buttons as:Up lever - Wiper;Down lever - Next view/camera;Pull lever - Cockpit view;Pull and hold lever - Lean-in view;Push lever - Horn.
- Product Ignition Switch Technology ---- The key module is modified from heavy truck factory key. The LOCK position is used for steering wheel lock (ignored in-game).In Euro Truck Simulator (ETS2), there is only a single "ignition" option. Therefore, you can bind either OFF→ACC or ACC→ON for the ignition sequence.Engine start is performed from ON→START (START position).
- Package including--1X Basic kit;1 X Ignition Switch Key Model;1X Mounting Bracket and screws.If you find the Turn Signal Wiper Lever Switch could not connect to your Steering Wheel or could not work for your game, please do not worry and contact us via message first we will offer professional resolution to make it work again or replacement for free.
You tried IPv6
The BeamMP setup guide states that IPv4 is supported and IPv6 support has not yet been implemented. An IPv6-only address therefore does not replace the required reachable IPv4 path.
The public server is not listed
- Confirm the authentication key is valid and present in the server configuration.
- Check that the process is listening on the configured port and that TCP and UDP are allowed.
- Ensure the server has outbound internet access as well as inbound permission; list registration requires it.
- Read the console for authentication or registration errors and regenerate the key through BeamMP’s current process if it was revoked or exposed.
Players time out after a mod or map change
Return to a known-good configuration, then add mods or plugins one at a time. Keep server and client versions compatible, retain enough disk space for content, and inspect logs for the first reported error rather than repeatedly restarting with the entire mod set.
Security and maintenance checklist
- Run Linux under a separate unprivileged account; do not run the service as root.
- Expose only the configured BeamMP TCP and UDP port. Do not disable the host or router firewall.
- Keep the authentication key secret and redact it from screenshots, support posts and backups shared publicly.
- Use a stable local address for a home server and record the router rule so you can audit it later.
- Back up
ServerConfig.toml, plugins, mods and any service definition before upgrading, while removing secrets from copies stored in public locations. - Update from current BeamMP documentation because binary names, configuration fields and platform support can change.
- Watch CPU, memory, upload usage and logs as you add players or content. The published 50+ MiB and 5–10 Mb/s figures are minimum server guidance, not a capacity guarantee.
- Stop forwarding the port when the server is retired, and remove unused firewall rules.
Home hosting, VPS or managed hosting: a practical decision
Choose home LAN hosting when every player is on the same network and you want the simplest free setup. Choose home internet hosting when you can obtain a reachable public IPv4 address, configure both protocols, and accept the exposure and maintenance responsibility. Choose a VPS when you need an always-on endpoint, cannot forward ports at home, or prefer to separate the game service from your household network. Choose managed hosting only after verifying what “BeamMP support” includes: the allocated CPU/RAM, upload limits, mod and plugin rules, backups, console access, geographic location, public IPv4 availability and cancellation policy.
Crashes, No Sound, or Screen Glitches?
Random freezes, missing sound and display glitches usually trace back to one bad driver. Find and replace yours safely.Free scan · under a minuteWindows Errors? Fix Them Before They Spread
Repair common Windows errors and clear accumulated junk for a smoother, more stable PC - no reinstall needed.Free scan · no reinstallBeamMP’s homepage, beammp.com, promotes hosting partners, but partner names, prices, performance and commercial terms are not established here. Treat any provider’s marketing as a separate claim to verify rather than as an endorsement by BeamMP.
What a successful setup looks like
You have a current BeamMP-Server build in a dedicated folder, the first launch has generated ServerConfig.toml, the server name and visibility are intentional, and the authentication key is private. The configured port is allowed for TCP and UDP through the host firewall; if the server is at home, the router forwards both protocols to the correct local IPv4 address. A local direct-connect test succeeds, and an outside test succeeds from a different network—or you have deliberately selected a VPS or managed host because your ISP uses CGNAT, mobile networking or an IPv6-only path.
Quick Recap
Product prices and availability are accurate as of the date/time indicated and are subject to change. Any price and availability information displayed on Amazon at the time of purchase will apply.




