To install a CurseForge mod on a dedicated Hytale server, download a file that matches the server’s Hytale build, copy it into the server’s mods/ directory, restart the server, and read the startup log for validation or dependency errors. A file in that directory is not automatically active in every world: enable it in the target world’s settings after installation.
Playing with friends? Godlike.Host runs hosted Hytale servers from 10 data-center locations, with free DDoS protection.
Hytale mod support is server-first. CurseForge projects may be Packs, Plugins, or Bootstrap/Early Plugins, and their file formats and client requirements differ. Use the project’s stated dependencies and installation notes rather than assuming every download is a plug-in or that every player must install the same file.
As an Amazon Associate I earn from qualifying purchases.
Do these 3 things before closing this tab:
1Repair Windows errors before they cause bigger problems2Scan for outdated or missing drivers - takes under a minute3Clear out junk files and repair common Windows errorsWhat you need before installing
Have these items ready before changing a live server:
- Access to the dedicated server’s files, including its
mods/directory. - Permission to stop and restart the server and to read its console or log files.
- A backup of the server and, at minimum, the
UserData/Savesdirectory. - The server’s exact Hytale build number or version.
- The CurseForge project file that supports that build, plus every dependency listed on its project page.
Hytale is in Early Access, so a plug-in or asset pack that worked on one build can be rejected by a later build. Do not test an unverified mod on your only copy of a world. Make a backup first, then use a separate test world or a staging server when possible.
#1 Best Overall
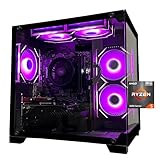
- Processor specifications: Adopting AMD Ryzen 5 5600 processor, with a basic clock speed of 3.5GHz and a turbo frequency of 4.4GHz, it can achieve fast response computing performance
- Graphics Card: Features GeForce RTX 3050 graphics card with 6GB dedicated video memory for gaming and multimedia applications
- Memory configuration: Equipped with 32GB DDR4 RAM (16GB * 2), providing sufficient memory capacity for multitasking and demanding applications
- Gaming Performance: Designed to handle modern gaming titles and graphics-intensive tasks with smooth frame rates and visual quality
- Desktop System: Complete gaming desktop computer system ready for setup and use out of the box
Understand Hytale’s mod categories and files
CurseForge support groups Hytale content into three broad categories. The category affects where the file runs and how much of the game it can change.
| Category | What it provides | Typical handling |
|---|---|---|
| Packs | Assets and other content used by a world or server. | Follow the project’s instructions for a .zip package or extracted folder. Some packs remain zipped; others require extraction. |
| Plugins | Java mods built against Hytale’s API. | Usually supplied as a .jar file placed in the applicable mods/ directory. |
| Bootstrap/Early Plugins | Lower-level changes, including early class transformations. | Use only when the project requires it. These files can be more sensitive to Hytale build changes. |
A loose .json file normally belongs inside a mod or asset-pack structure, not directly in the top level of Mods. If a download contains a manifest.json, keep the directory layout the author specifies. Renaming extensions or unpacking a file without instructions can make a valid project fail validation.
Crashes, No Sound, or Screen Glitches?
Random freezes, missing sound and display glitches usually trace back to one bad driver. Find and replace yours safely.Free scan · under a minutePC Slower Than It Used to Be?
A free scan shows the junk files, broken settings and background clutter dragging Windows down - then fixes them in one click.Free scan · Windows 10 & 11Choose app installation or manual installation
There are two CurseForge workflows. The app automates discovery and installation when a project is supported. Manual installation gives you control over the exact file and destination and is required for projects the app cannot install.
| Consideration | CurseForge app | Manual download |
|---|---|---|
| Download and updates | Find a supported project, click Install, and let the app place it. Updating is handled from the app when available. | Choose a file yourself from the project’s download list or Files tab and replace it yourself when updating. |
| Unsupported projects | Unavailable if the project is not supported by the app. | Works with projects that provide a downloadable file and manual instructions. |
| Placement control | The app manages the client mod location. | You decide whether a file goes in a global, world-specific, or dedicated-server mods/ folder. |
| Troubleshooting | Convenient, but the app can hide the actual file path. | More transparent: you can inspect the filename, extension, archive contents, and log output directly. |
These workflows are not interchangeable. Installing a project in a local Hytale profile does not copy it to a remote dedicated server. A server administrator must still upload the compatible file to the server’s own mods/ folder.
Install a supported project through the CurseForge app
Use this route for a Hytale project that the desktop app marks as supported.
- Install and open the CurseForge desktop app. Allow it to detect Hytale if it has not already done so.
- Open the Hytale page and choose Discover or Browse.
- In Browse, filter by the appropriate mod type and Hytale game version. Read the project page for dependencies and any server or client notes before installing.
- Select the project and click Install. Wait for the app to finish downloading the selected file and its supported dependencies.
- Launch Hytale through CurseForge or the official launcher, depending on the project’s instructions.
- Open Worlds. For an existing world, right-click it, select the mod or mods to enable, and click Save world settings.
- For a new world, choose Create World, open the settings cog, select the mods, apply the settings, and create the world.
The final enablement step matters. Installing a file in the profile does not activate it in every world automatically. World settings determine which installed content that world loads.
Free tools Windows power users keep installed
One-click scans. No signup required.
Download and install a project manually
Manual installation is the fallback when the app cannot install a project or when you need a particular file version.
Rank #2
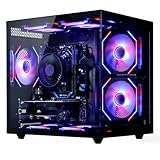
- 【6-Core Ryzen 5 Prebuilt Gaming PC | Smooth Large Game & Streaming Performance】 The Suevery prebuilt gaming PC features an Ryzen 5 6-Core processor (3.6GHz Base, 4.1GHz Boost) and Radeon RX 560 4GB Graphics Card. It delivers lag-free gameplay for large games, seamless high-definition streaming, and smooth creative software operation, meeting gamers and content creators' reliable performance needs.
- 【16GB DDR4 RAM + 512GB NVMe SSD | Blazing-Fast Boot & Load Speeds】 16GB DDR4 RAM supports simultaneous operation of multiple games, browser tabs and office apps without slowdowns. The 512GB NVMe SSD (up to 30x faster than traditional HDDs) enables fast boot-ups, instant game loads and quick file transfers, with ample storage for games, videos and work files.
- 【Wi-Fi 6 Gaming Tower | Versatile Connectivity for Multi-Scenarios】 This tower gaming desktop has Wi-Fi 6 for fast, stable wireless internet, ideal for online gaming and high-definition streaming. It also includes 2× USB 3.0 and 4× USB 2.0 ports to connect peripherals, storage and office devices, suitable for gaming, home and office use.
- 【RGB Cooling System | Stable Operation】 The advanced air cooling system with customizable RGB fans keeps the gaming tower PC cool and quiet during intense gaming. Optimized airflow maintains optimal component temperatures, preventing overheating and ensuring stable performance for long gaming sessions or heavy office workloads. Sleek RGB lighting adds a gaming-inspired aesthetic.
- 【Prebuilt Tower PC | Adapt to Gaming/Work/Home/Office】 This prebuilt tower gaming PC is versatile for streaming, work, home and office tasks—from video editing and design software to daily office work and browsing. Ready to use with no extra setup, it meets the needs of gamers, remote workers and home users.
- Open the project on the CurseForge website.
- Choose Install via app if you want to hand the project back to the desktop app, or use the download dropdown to choose Download file manually. The project’s Files tab also provides available downloads.
- Read the selected file’s game-version, dependency, and installation notes. Download the exact file that matches your Hytale build.
- Inspect the download before moving it. A Java plug-in is commonly a
.jar; an asset pack may be a.zipor a folder. Do not extract an archive unless the author requires it. - For a local client, place the file in the Hytale mod location described in the next section. For a dedicated server, upload the file to that server’s
mods/directory. - Restart Hytale or the server after adding, removing, or replacing files.
- Enable the mod in the intended world’s settings. Then inspect the client or server log for successful loading and warnings.
If a project supplies several files, do not copy every download blindly. Select the release for your Hytale build and install only the required dependencies and the main project file.
Find the correct Hytale mods folder
The safest way to locate a client folder is to open the Hytale Launcher, select the settings cog, and choose Open directory. From there, open UserData and then Mods. In CurseForge, open the Hytale tab menu and choose Open Mods Folder.
| Platform | Typical global client path |
|---|---|
| Windows | %APPDATA%HytaleUserDataMods |
| macOS | ~/Library/Application Support/Hytale/UserData/Mods |
| Linux | $XDG_DATA_HOME/Hytale/UserData/Mods |
UserData/Mods is the global client scope. A world-specific installation uses UserData/Saves/<worldname>/mods. Use the world-specific folder when a project’s instructions say it must apply only to one save; otherwise, the global folder is the normal client location.
A dedicated server has its own mods/ directory inside the server installation. It is not the same folder as a player’s local UserData/Mods. Uploading a file to your computer’s folder will not install it on a remote server.
Install a mod on a dedicated Hytale server
These steps cover the server-side workflow regardless of whether you downloaded the file through the app or the website.
- Stop the server cleanly. Do not replace files while Hytale is writing world data.
- Back up the server. Copy the server directory or at least
UserData/Savesto a separate location with a date in the backup name. - Check the release. Confirm that the mod supports the server’s current Hytale build and list every dependency shown on the project page.
- Copy the file. Put the plug-in
.jar, asset-pack archive, or instructed folder directly inside the server’smods/directory. Do not add an extra nesting level such asmods/ProjectName/ProjectName.jarunless the project explicitly requires it. - Install dependencies. Place each required dependency in the same server mod location or follow its own installation instructions.
- Start or restart the server. A restart is required after any file is added, removed, or changed.
- Read the startup log. Look for the mod’s load message, missing-dependency errors, duplicate-plugin warnings, validation failures, and compatibility messages.
- Test the intended world. Join with an administrator account, verify the feature, and watch the log while connecting and changing worlds.
CurseForge describes Hytale as server-side first, and many projects are server plugins or asset packs. That does not make every project server-only: the project page is the authority on whether players also need a client file or a particular pack enabled.
Do players need to install the same mods?
There is no single answer for every CurseForge project. A server plugin that changes server logic generally runs from the server and may not require a matching client download. A project that adds client assets, interface changes, or a pack intended for both sides can require players to install or enable additional content.
Rank #3

- 【Sleek Design & Efficient Cooling】 Features an A-pillar-free dual tempered glass design, showcasing a clean internal layout and RGB lighting. High-quality tempered glass offers durability and a stylish appearance for gaming and office environments. The optimized airflow system enhances ventilation, rapidly dissipating heat to maintain stable and quiet performance during long-term use.
- 【Powerful Processing & Smooth Multi-Tasking】 Equipped with AMD Ryzen 5 3500X 6-core 6-thread processor (32MB L3 cache, 3.6GHz base, 4.1GHz boost). Delivers responsive and stable performance for seamless multitasking, office work, HD streaming, and daily computing. Runs creative and productivity software smoothly, suitable for streamers, remote workers, and home users.
- 【Entry-Level Gaming Graphics for Esports & Online Games】 Powered by AMD Radeon RX 560 4GB GDDR5 discrete graphics card, supporting DirectX 12 and Vulkan API. Provides smooth gameplay for popular esports titles like League of Legends, CS:GO, and Overwatch. Handles light AAA games at medium-low settings, meeting the entertainment needs of casual gamers and students.
- 【16GB DDR4 + 512GB NVMe SSD: Ultra-Fast Speed】 16GB high-speed DDR4 RAM supports simultaneous operation of multiple games, browsers, and office apps without slowdowns or freezes. The 512GB NVMe PCIe SSD enables fast boot and instant loading of games/software, with file transfer speeds up to 30 times faster than traditional HDDs, offering ample storage for games, videos, and work files.
- 【WiFi 6 & Rich Interfaces: Ready-to-Use Prebuilt PC】 Features the latest WiFi 6 technology for fast and stable wireless connectivity, ideal for online gaming, HD live streaming, and remote work. Equipped with multiple USB 3.0, USB 2.0, HDMI, and LAN ports for easy connection of gaming peripherals, monitors, external storage, and office devices. Plug-and-play design requires no extra setup, adapting to gaming, live streaming, office work, online learning, and home entertainment scenarios.
Use this decision check:
- If the project is documented as a server plugin and lists no client installation, install it on the server and test with an unmodified client.
- If the project calls itself a pack, client mod, or required dependency for players, give every player the exact version and installation instructions from the project page.
- If players disconnect, see missing assets, or cannot see the feature while the server log is clean, compare the client and server files and verify the world’s enabled-mod list.
- Never distribute a different build to players than the one the server uses. Version alignment is especially important during Early Access.
Players must also launch the world with the relevant mod enabled. A file can exist in UserData/Mods and remain inactive until it is selected in world settings.
Enable a mod for an existing or new world
Existing world
- Open Hytale’s Worlds screen.
- Right-click the target world.
- Select the installed mods you want that world to load.
- Click Save world settings.
- Load the world and check for the mod’s expected behavior.
New world
- Choose Create World.
- Open the settings cog.
- Select the installed mods and apply the settings.
- Create the world.
World-specific scope is useful when you are evaluating a mod or protecting an established save from changes. Keep a backup before enabling new content on a world that contains important builds.
Compatibility, dependencies, and version discipline
Hytale’s server checks can reject a plug-in or asset pack when its build does not align with the server. A successful download is not proof of compatibility. Before each update, check:
Recommended Free Tools
- The Hytale version or build named by the project.
- The server’s actual running build, not merely the version shown in a launcher shortcut.
- Required libraries, APIs, packs, or other dependencies.
- Whether the release is for a dedicated server, client, or both.
- Whether the project requires a specific archive layout or extraction step.
Install updates in a controlled order: back up the world, update the dependency first when the project requires it, then update the main mod, restart, and review the log. Keep the previous working file until the new version has passed a test-world check.
Independent reader supportYour contribution helps us test, update, and keep practical guides available for everyone.Troubleshoot the most common failures
The server stops booting after one mod is added
Stop the server and remove the newest file from mods/, then start it again. If the server boots, the removed project or one of its dependencies is the likely trigger. Check the project’s supported Hytale build, install any missing dependency, and try a newer compatible file. Do not repeatedly restart a failing production world without restoring the backup.
The log reports a validation, duplicate, or compatibility warning
Confirm that only one copy of the plug-in is present and that an old version was not left beside the new one. Compare the file’s supported build with the server build. Validation failures can also come from an incorrectly extracted pack, an extra directory level, or a missing dependency.
The mod is not visible in the client
Use the launcher’s Open directory command or CurseForge’s Open Mods Folder command to verify the path. The file should be directly in UserData/Mods unless the project requires a world-specific folder. Restart Hytale, then enable the mod in the world’s settings. A file sitting in Downloads, a nested folder, or a server-only directory will not appear as an active client mod.
What’s actually slowing this PC down?
Pick the symptom - the matching free tool is one click away.
Rank #4

- System: Intel Core i5-13400F 2.5GHz 10 Cores | Intel B760 Chipset | 16GB DDR5 | 1TB PCIe 4.0 NVMe SSD | Windows 11 Home
- Graphics: NVIDIA GeForce RTX 5060 8GB Graphics | 1x HDMI | 2x DisplayPort
- Connectivity: 1 x USB-C 3.2 | 2 x USB-A 3.2 | 6 x USB-A 2.0 | 1 x LAN | WiFi 6 | Bluetooth 5.3 | 7.1 Channel Audio
- Tempered Side Case Panel | Custom RGB Lighting | Keyboard and Mouse
- 1 Year Parts & Labor Warranty, Free Lifetime Tech Support
A ZIP download fails
Read the project’s installation note before extracting it. Some asset packs are meant to stay zipped, while others must be extracted. If extraction is required, confirm that manifest.json is in the location expected by the project and that you did not create an unnecessary double folder. Loose JSON files generally belong inside the pack structure rather than directly in Mods.
The mod loads but players cannot join or see its content
Check whether the project requires a client-side file or a shared pack. Make sure every player has the same required version, that the server has all dependencies, and that the target world has the content enabled. Compare the client log with the server log instead of replacing files at random.
The app does not show the project
Use the project’s website download controls and install the file manually. The app supports only projects it can manage; an unsupported project can still provide a manual download. After downloading, follow the file-type and folder instructions rather than expecting the app to track the installation.
Backups and safe rollback
Routine backups are particularly important during Hytale Early Access. Before installing or updating a mod, copy UserData/Saves and record which mod files and versions were active. If a new file corrupts startup or changes a world unexpectedly:
Quick wins for a faster PC:
Scan for outdated or missing drivers - takes under a minuteDriver Scan →Repair Windows errors before they cause bigger problemsFix Now →- Stop the server or close Hytale.
- Remove the newly added or updated mod.
- Restore the previous working file if you replaced it.
- Restore the affected save from the backup if the world no longer loads correctly.
- Start a test copy first, confirm the log is clean, and only then return the change to the live world.
A backup is useful only if it is stored outside the live server directory and can be restored. Keep at least one known-good copy from before the change.
What to check with a hosted Hytale server
If a hosting control panel manages the machine, confirm these capabilities before installing a CurseForge project:
| Capability | Why it matters |
|---|---|
| Hytale build support | The host must run the build targeted by the mod. |
Server mods/ access |
You need to upload a .jar, archive, or required folder to the correct location. |
| Restart and log access | Compatibility and dependency failures are normally visible only during startup or in the server log. |
| Backups and restore controls | You need a recovery point before testing Early Access content. |
| Version and dependency management | Updating the main project without its required API or library can prevent the server from starting. |
Ask the host where its file manager exposes the server root and whether it preserves permissions and archive contents during upload. The exact panel labels vary, but the required result is the same: the mod must be directly discoverable by the server in its mods/ directory, followed by a restart and log review.
Quick Recap
Quick installation checklist
- Back up the server and world.
- Record the current Hytale build.
- Choose a CurseForge file that supports that build.
- Read the project’s dependency and client/server notes.
- Use the CurseForge app only when the project is app-supported; otherwise download manually.
- Place a dedicated-server file in the server’s
mods/directory. - Keep ZIP archives or extract them exactly as instructed.
- Restart after every file change.
- Read the startup log for load, duplicate, validation, and compatibility messages.
- Enable the mod in the intended world’s settings.
- Test with the required client files and the backed-up world before making the change live.
Product prices and availability are accurate as of the date/time indicated and are subject to change. Any price and availability information displayed on Amazon at the time of purchase will apply.




