Recommended Free Tools
Yes—you can build a handheld retro-gaming console inside an Altoids Classic tin with Pi Tin, an open-source project built around a Raspberry Pi Zero 2 W. The compact tin comes with real trade-offs: the project’s maintainers say it is harder to assemble, less ergonomic and has 40% less battery capacity than their 3D-printed version. They recommend the 3D-printed build for most people.
What Pi Tin is—and what it can play
Pi Tin is a DIY handheld, not a ready-to-use commercial console. It combines a Raspberry Pi Zero 2 W with a 2.8-inch, 320 × 240 TFT display, custom circuit boards, controls and a small speaker. The project says this is the largest readily available display size that fits inside the tin.
According to the Pi Tin project, the Zero 2 W can emulate most SNES, Game Boy Advance, PlayStation 1 and Genesis/Mega Drive games, as well as some Nintendo 64 games. That is a broad capability claim, not a guarantee that every game in those systems’ libraries will run well. The hardware guide says the original Raspberry Pi Zero is untested and probably will not work.
Choose between the Altoids tin and the 3D-printed case
The project offers two forms. The tin version prioritizes a familiar, compact metal enclosure; the 3D-printed version is the maintainers’ recommended option. The project describes the printed case as a clamshell measuring 93 × 66 × 26.5 mm.
#1 Best Overall

- 【3.0" IPS Display】Enjoy immersive gaming with a larger 640x480 high-pixel LCD screen, offering vibrant colors and crisp retro graphics.
- 【2800mAh Rechargeable Battery】Play your favorite classic games for up to 10 hours on a full charge; includes a DC charge port and power cable for uninterrupted gaming.
- 【No Tools Needed Assembly】Features POGO pins that require zero soldering; simply insert your Raspberry Pi Zero/2W and close the case for a secure, solderless connection.
- 【Enhanced Controls】Gain an edge with the added Extra Turbo Button and custom Hotkey, mapped for quick saves, reset, and smooth emulation performance.
- 【A Tribute to Retro Handhelds】Transform your Raspberry Pi into a portable classic gaming rig, perfect for on-the-go travel or reliving childhood memories.
| Build factor | Altoids tin | 3D-printed case |
|---|---|---|
| Enclosure | Altoids Classic 1.76 oz tin; the guide warns other brands and sizes will not work. | Clamshell case, 93 × 66 × 26.5 mm, according to the project maintainers. |
| Assembly | More difficult; requires extra tools and experience using them, according to the maintainers. | Less difficult than the tin build, according to the maintainers. |
| Ergonomics | Less ergonomic than the printed case, according to the maintainers. | More ergonomic than the tin build, according to the maintainers. |
| Battery | 1200 mAh listed for this build; the maintainers say its capacity is 40% lower than the printed version. | 2000 mAh listed for this build. |
| Additional enclosure work | Requires drilling and finishing the tin, plus tin-specific printed parts and assembly materials. | The tin-specific drilling and finishing work does not apply. |
The project README reports up to five hours of gaming, tested on the 3D-printed build with a 2000 mAh battery. That result does not establish runtime for the 1200 mAh tin build; actual battery life for that version is not stated in the cited project material.
Parts specific to the tin build
Both versions use the same core electronics, but the tin option adds enclosure constraints and hardware. The Pi Tin hardware guide lists the following core components:
Rank #2

- COMPACT CASE: The PocketTerm35 hand case provides a portable and robust solution for your Raspberry Pi 4B or Pi 5.
- 3.5-INCH IPS TOUCH SCREEN: The high-quality IPS display with touch function allows clear and responsive operation on the go.
- QWERTY KEYBOARD: The integrated QWERTY keyboard allows comfortable text input and efficient working directly on the device.
- Compatibility: Specially designed for Raspberry Pi 4B and Pi 5, the case ensures a perfect fit and optimal use.
- Mobile terminal: ideal for developers and hobbyists who need a portable terminal for their Pi projects.
- Raspberry Pi Zero 2 W
- Pi Tin Main PCB and display interconnect PCB
- 2.8-inch ILI9341 TFT with a 50-pin FPC connector, plus the display interconnect cable
- MicroSD card with at least 8 GB
- Speaker, faceplate, controls and printed button inserts
For the Altoids version, the guide additionally specifies:
- A 1200 mAh LiPo battery measuring either 5 × 35 × 62 mm or 5 × 34 × 60 mm. The dimensions matter because the enclosure is tightly constrained.
- An Altoids Classic 1.76 oz tin; the guide warns that other brands or sizes will not work.
- Six M2 × 8 socket-head screws and four 4 × 2 mm neodymium disc magnets.
- Printed parts: rear housing, display mount, lid stop, lid clip, rear buttons and drill guide.
Do not assume that a battery or display with a similar headline specification will fit. Check its connector and physical dimensions against the hardware guide and the exact parts you plan to use.
The Tool Desk
Outbyte PC Repair FREERepair Windows errors before they cause bigger problemsFix Now →Outbyte Driver Updater FREEFix the driver behind crashes, sound loss and screen glitchesFind Drivers →Rank #3
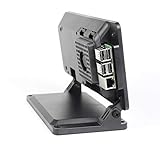
- Includes a cooling fan
- Works with Official 7" Raspberry Pi display and Raspberry Pi 3,4 or 5
- Works with Raspberry Pi HAT boards
- Two faceplate options included
- Mounting point for Raspberry Pi official camera V1,V2 or V3. Not compatible with HQ camera.
Skills, tools and enclosure work
The project rates the build as intermediate. Its custom PCBs demand advanced soldering skills if you assemble them by hand; the maintainers say a hot plate and hot-air station are ideal for that work. The hardware guide also lists a narrow-tip soldering iron, solder, flux, clamps, a multimeter with continuity mode, a 1.5 mm hex driver, tweezers, flush cutters and a microSD reader.
The tin version adds work that the printed enclosure avoids. Its listed tools and materials include 1/16-inch and 1/8-inch drill bits, a countersink bit, needle files or a rotary tool, 91% isopropyl alcohol, thin double-sided tape and cyanoacrylate adhesive. The drill guide and finishing tools help with the metal enclosure, but they do not remove the need to work accurately within its limited space.
Rank #4
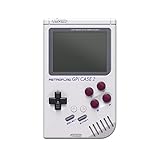
- 【Compatibility】Works with Raspberry Pi Compute Module 4 (CM4). CM4 Lite with WiFi is recommended for SD card access. eMMC models not supported.
- 【Handheld Design】Turns your CM4 into a portable retro gaming handheld with built-in controls and screen.
- 【DIY Friendly】Ideal for DIY projects — assemble your own classic game console using Raspberry Pi CM4.
- 【Built-in Battery】Includes a 4000mAh rechargeable battery inside the case for on-the-go play.
- 【Retro Gaming Display】Features a 3.0-inch TFT screen (640x480 resolution) , perfect for retro game visuals.
If you cannot source the custom boards or confidently assemble them, establish how you will obtain compatible boards before buying the other parts. The project discusses kits, but kit contents and availability can change; check the current project materials rather than assuming a kit includes every component.
Independent reader supportYour contribution helps us test, update, and keep practical guides available for everyone.Check the current files before starting
The hardware guide’s note dated 2025-06-07 says the STL files were updated, including a change to the Altoids display mount for compatibility with displays included in kits. If you are following an older set of instructions or sourcing parts separately, compare the current files and verify that your display and printed mount fit together before beginning the enclosure work.
Free tools Windows power users keep installed
One-click scans. No signup required.
Best Value

- Enclosure for the 7" Raspberry Pi Touch Display 2 (SC1635) and a Raspberry Pi 3,4, or 5
- Also compatible with Waveshare 7inch DSI LCD (H) and 7-DSI-TOUCH-A
- Extra room inside the case for HAT boards or other custom components
- Power, HDMI, and audio jack on the Raspberry Pi are accessible on the back of the case
- Micro SD card is accessible on the outside of the case
Power and charging claims
The project describes a soft power button for powering on or shutting down safely, and says the device is designed to be used while charging and to work with USB-C cables and chargers. These are design claims from the project, not independent safety or compatibility testing; follow its assembly and operating guidance for the build you make.
Quick Recap
Product prices and availability are accurate as of the date/time indicated and are subject to change. Any price and availability information displayed on Amazon at the time of purchase will apply.