
Do these 3 things before closing this tab:
1Clear out junk files and repair common Windows errors2Fix the driver behind crashes, sound loss and screen glitches3Repair Windows errors before they cause bigger problemsStart with route time, not tower count. Trace where enemies enter, where they must reach, and which corners, intersections, and chokepoints keep them inside a weapon’s range. Place one dependable damage tower on the section that gives it the longest practical firing window, keep at least one enemy route open, then add splash, single-target, slow, or support capabilities according to the next wave. Upgrade the defense that is actually failing instead of spreading resources across every available option.
What makes a tabletop tower-defense layout effective?
An effective defense does one job first: it prevents enemies from reaching the protected objective with the resources and rules available in your game. The Defendion manual describes the aim as building an effective defense so no enemy reaches the castle. In practical terms, that means every placement should be judged by the exposure, damage, control, and safety it creates—not by how many towers are on the board.
As an Amazon Associate I earn from qualifying purchases.
Four questions reveal whether a placement is valuable:
Recommended Free Tools
- Coverage time: How long does an enemy remain within the tower’s range?
- Target profile: Is the tower intended for one durable enemy or many weak enemies?
- Control value: Does it slow, stun, redirect, or otherwise increase the time other defenses can fire?
- Efficiency and safety: What survival benefit does the purchase provide, and can enemies attack the weapon because the route has been completely blocked?
Each weapon has its own range, shooting speed, and damage, so a nominally powerful tower can underperform if enemies pass it too quickly. Conversely, a modest tower at a corner or intersection may fire repeatedly as enemies traverse several connected sections.
#1 Best Overall

- BLUE LIGHT BLOCKING GLASSES: Our blue light glasses for women boast UV400 protection, blocking harmful blue rays from computer screens. With these bluelight glasses women, you can enjoy gaming, reading, or watching TV with no worries of eye strain.
- EYE RELIEF: Our blue light glasses are engineered to reduce blurry vision or strain caused by prolonged screen time. These womens blue light glasses aid in better sleep by preventing blue light from disrupting your natural sleep cycle, helping you fall asleep faster and enjoy a more restful night's sleep, making them the perfect christmas present.
- COMFORTABLE: Crafted from durable material, our trendy blue light glasses for woman or blue light glasses men ensure long-lasting comfort. The high-transmittance lenses accessories, gamer gifts for men, help keep your eyes relaxed. Perfect stocking stuffers, gifts for gamers men, christmas gifts for men, halloween costumes.
- LIGHTWEIGHT: These clear blue light glasses feature a lightweight frame, meaning they’ll stay comfy for long-term wear. Perfect as blue blockers glasses for women or mens blue light glasses, these non-prescription fake glasses for men can be worn throughout the day. The blue light blocking glasses women feature polycarbonate HD lenses, which are anti-reflective and restore true color.
- WORRY-FREE PURCHASE: If you experience any issues, our support team is ready to assist you quickly. These are the perfect costume glasses for cosplay dressing up.
Read the board before spending resources
Mark entries, exits, and the protected objective
Identify every enemy entry point, the objective they are trying to reach, and any rules that permit multiple routes. Do not assume the shortest visible line is the only meaningful route. In some tabletop systems, enemies can be redirected by construction, while in others their movement is determined by cards, dice, or a fixed map.
Trace route segments and repeated exposure
Follow the route one segment at a time. Mark corners, intersections, narrow passages, and sections enemies cross more than once. A tower covering two adjacent segments can gain more useful firing time than one with the same range placed beside a straight, one-pass lane.
Check range with the actual rules
Use the game’s measurement method—spaces, rulers, templates, or line-of-sight rules—before paying for a weapon. A tower’s printed range may be reduced by obstacles, elevation rules, blocked sight lines, or target restrictions. Place a token at the furthest relevant route point and verify that the tower can legally attack there.
What’s actually slowing this PC down?
Pick the symptom - the matching free tool is one click away.
Identify where a leak becomes dangerous
Not every route section has equal importance. A leak near the objective may leave too little time for another defense to respond. A leak at the entrance may still be recoverable if several later towers can fire. Prioritize positions where failure would remove the last practical chance to stop an enemy.
The beginner build sequence
1. Place one reliable damage source
Begin with a tower that can attack the largest amount of route time for a reasonable cost. Prefer broad or repeated coverage over a dramatic position that sees enemies for only a moment. If the game provides several damage weapons, choose the one whose range and firing speed match the opening wave rather than automatically selecting the weapon with the highest listed damage.
Place this first tower where it can keep targets in range through a corner, along a long lane, or across an intersection. Leave room for later towers and confirm that the first placement does not remove the only legal route.
2. Keep at least one route viable
Route shaping can be powerful. A partial funnel or short maze may force enemies past your strongest firing positions, and the Defendion rules allow players to change paths by building mazes. However, the same manual warns that if every path is blocked, enemies may attack the weapon blocking them. A maze that increases exposure is useful; a wall that leaves enemies with no route can turn the defense itself into a target.
Rank #2
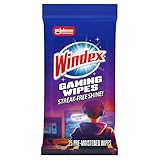
- WINDEX GAMING WIPES: effortlessly clean all your gaming gear and gaming electronics in one easy step with our new Windex Gaming Wipes
- AMMONIA FREE: our ammonia-free formula is safe to use on all of your favorite gaming equipment like consoles, headsets, controllers, screens, keyboards, and more
- PRE-MOISTENED WIPES: each wipe instantly removes dust, dirt, and stubborn smudges and fingerprints leaving a streak-free shine
- ANTI-STATIC: great for cleaning and wiping down your gaming gear and electronics leaving behind no visible residue
- COMPACT RESEALABLE PACKAGE: store your pack of Windex Gaming Wipes anywhere in your home for whenever a quick and easy wipedown is needed
After each construction, ask two questions: “Can an enemy still reach the objective by a legal route?” and “Can the enemy reach that route without first destroying a blocking defense?” If either answer is unclear, remove or reposition the latest piece before adding more.
3. Add a counter to the next wave
Choose the second role from the threat you expect next:
- Area or splash damage: Use it when several enemies arrive together or when a narrow route keeps them clustered.
- Single-target damage: Use it for durable enemies that survive ordinary shots.
- Slow or control: Use it where a delay allows existing damage towers to fire additional times.
- Support: Use it when the rules provide a buff, repair, range increase, resource effect, or another benefit that improves nearby defenses.
Do not buy a second copy of your opening role merely because it is familiar. A first splash tower may be more valuable than a third single-target weapon when the next wave is a swarm; the reverse is true when one heavy enemy is the immediate danger.
4. Upgrade with a purpose
Spend an upgrade when it addresses a known failure or improves the most valuable firing position. A damage upgrade is sensible when enemies consistently survive with a small amount of health. A range or control upgrade can be better when enemies leave the firing zone too quickly. If the game offers upgrades to rate of fire, compare the expected extra attacks with the benefit of simply adding another tower.
Free tools Windows power users keep installed
One-click scans. No signup required.
The design loop is straightforward: Place → Defend → Earn → Upgrade → Repeat. Resources from defeated enemies fund the next tower or improvement, so an upgrade that prevents a leak can protect the income needed for later rounds.
5. Reassess after every round or wave
Record what actually leaked, which tower fired most often, and which enemy required emergency attention. Then adjust the next purchase or placement. Tabletop systems may use rounds, random tower draws, merges, or other progression rules, so the best response is based on the board state you have—not on a fixed build order copied from another game.
Where should the first tower go?
Corners
A corner can let a tower cover the end of one segment and the beginning of another. This increases route time without requiring the weapon to have exceptional range. Place the tower far enough from the bend that both sections fall inside its legal attack area.
Rank #3

- Ergonomic & Adjustable Design: Fight "text neck" and improve your posture. Designed for comfort, it offers an adjustable height (7.1in-8.5in) (1.4in adjustable range) and angle (5°-85°) Please note: cell phone stand is only 9 inches tall—the length of a standard pencil
- Without blocking subtitles Perfect for office desk Tiktok Face Time Zoom video—this is the ultimate kitchen desk essential for phones! Perfect viewing experience while reducing neck back strain, A must-have for gamers streamers desk, and anyone who values both style and support!
- Sleek & Stable Design fits Otterbox Case: Say goodbye to bent cables, tangles, and tip-overs! LISEN’s stylish adjustable desk phone holder features a built-in charging hole and smart cable management, keeping your phone secure and your workspace clutter-free cool gadgets for men
- ANTI-SLIP DESIGN free hands: The under 10.00 items easy gadgets back and the bottom of this kitchen essentials for women are fully covered by anti-skid silicone, which LISEN stand up desk decor can provide maximum protection device from any scratches and slides
- Your Perfect Viewing Companion:If your product arrives damaged or breaks within 365 days, reach out to LISEN for a quick and hassle-free solution. Struggling with assembly, like tightening the screw? We’ve got your back! Your experience matters to us. (Product including: phone Holder stand*1, screw*1, hexagon screwdriver*1, specification*1)
Intersections
Intersections are high-value when enemies may use more than one branch or when a tower can attack multiple lanes from one position. They also provide flexibility: if later construction redirects enemies, the tower may continue to cover the new route.
Quick wins for a faster PC:
Fix the driver behind crashes, sound loss and screen glitchesFind Drivers →Repair Windows errors before they cause bigger problemsFix Now →Scan for outdated or missing drivers - takes under a minuteDriver Scan →Chokepoints
A chokepoint compresses enemy movement and is especially valuable for splash damage or control. The danger is overcommitting to a single narrow space. If an enemy can bypass it, or if the rules let blocked enemies attack the defense, leave a second route or use the chokepoint as a funnel rather than a complete seal.
Repeated-route sections
Some layouts make enemies pass the same area more than once. A tower there can gain several firing windows against each target. Treat repeated exposure as a premium placement even if the spot is not visually central.
Near the objective
A late defensive position is a safety net, not usually the best opening placement. It has less route time, but it can be worth reserving for a high-damage or single-target weapon that handles enemies surviving the first layers. Do not place every tower at the objective and surrender the earlier opportunities to damage or slow targets.
Match tower roles to enemy groups
| Enemy situation | Priority role | Why it helps | Placement cue |
|---|---|---|---|
| Many weak enemies arriving together | Area or splash damage | One attack can affect several targets, improving resource efficiency. | Place near a bend or chokepoint where groups overlap. |
| One durable or elite enemy | Single-target damage | Concentrated fire prevents a high-health target from surviving the route. | Use a long lane or repeated-exposure position. |
| Fast enemies or a crowded wave | Slow or control | Additional time in range lets existing damage towers fire more often. | Apply control before the main damage zone. |
| Several towers already cover the same lane | Support | A buff, repair, range effect, or other support benefit can amplify the existing network. | Keep the support piece within the rules’ required distance. |
| Mixed wave | Complementary combination | Different jobs prevent one enemy profile from bypassing the entire defense. | Layer control and splash, then reserve single-target fire for survivors. |
These roles are not mutually exclusive. A control tower may deal damage, and a support tower may contribute directly, but evaluate the effect that matters most for the current wave. The beginner guide’s recurring roles—damage per second, splash, slow or control, and support—are useful because they describe jobs rather than specific products or factions.
How to decide between another tower and an upgrade
Buy another tower when coverage is missing
Add a new tower when enemies are escaping an uncovered route section, when the current tower cannot legally target the threat, or when a second role is needed. A new splash tower can solve a swarm problem that a damage upgrade on a single-target weapon cannot. A control tower can solve a speed problem even if your existing damage is technically high enough.
Upgrade when the position is already excellent
Upgrade a tower that covers the most route time, fires at the enemies causing the leak, or sits in a location that would be expensive to duplicate. Improvements are especially attractive when the rules increase range enough to add another corner, raise firing speed enough to create an extra attack, or increase damage enough to remove an enemy in one fewer hit.
Rank #4

- Easy Installation: Our gaming lights have been designed to enhance your entertainment experience. Simply position the led light bar next to your TV or game console to create a game room environment with ease. They come with USB power and a 60 inch cord for direct mounting and mobility
- Audio Syncing & Extensive Mode: The built-in high-sensitivity music sensor allows you to sync the TV led lights to your favorite music. Lights react and move to the beat of music, film and game audio, creating an incredible immersive sound and light experience – and all without the need for an additional hub. You can choose from 64+ patterns, including strobe, illusion, jump, energy, gradient, running, chasing, fluttering mode etc. Each mode can be applied to different scenes
- 64+ Chasing IC+RGB & W Effect: The independent control design of IC+RGB and white all-in-one multifunctional rgbw led bar lights monitor backlight allows you to easily switch the led lights for desk between IC+RGB and white to enjoy a variety of lighting effects, you can choose white lighting mode with high brightness for better illumination when working, etc. Choose IC+RGB lighting mode when you need to create an entertaining atmosphere for the light show, 16 million colours of Color changing rgb light bar let you dance to the beat and create a dynamic party atmosphere
- Dynamic and Dimmable Lights: 1%-full brightness free brightness adjustment gives you the flexibility to adjust dimmable led light bar for room decorations or a variety of occasions
- USB Powered: USB light bars for room can be powered by powernank, usb charger, TV, Monitor, laptop PC mainframe, making behind TV led lighting bar easy to install in any location.TV led lights are powered by the TV usb interface / PC mainframe, can be turned on/off synchronously with TV / PC
Compare the immediate survival gain
Use this simple decision test:
- Identify the enemy most likely to reach the objective in the next wave.
- Estimate whether another tower or an upgrade changes the number of attacks, targets, or seconds available before that enemy exits the defense.
- Choose the option that directly removes the failure, while preserving enough resources for the following round.
Avoid upgrading every option a little. Scattered spending can leave you with several mediocre towers and no answer to the next threat. Concentrated spending is safer until the defense has reliable coverage of the major roles.
Using path shaping without exposing the defense
Build a funnel, not a dead end
Use walls or construction pieces to lengthen the route and steer enemies toward overlapping ranges. The route should remain obvious and legal. A funnel creates a preferred lane while preserving movement; a dead end removes movement and can trigger attacks against the blocking weapon.
The Tool Desk
Outbyte Driver Updater FREEFix the driver behind crashes, sound loss and screen glitchesFind Drivers →Outbyte PC Repair FREERepair Windows errors before they cause bigger problemsFix Now →Protect the pieces that shape the route
Place maze elements where they are not the first target unless the rules explicitly protect them. If enemies can attack defensive weapons, a fragile wall beside the objective may be a liability. Leave enough distance or alternate access that destroying one piece does not collapse the entire route.
Recheck after every merge or draw
Random tower draws and merge systems can change the value of a route. A new long-range weapon may make a previously weak corner important; a merge may remove the only splash option. Recalculate coverage after every rules-driven change rather than treating the original maze as permanent.
Economy: turn survival into a repeatable loop
Most tower-defense systems connect combat and spending: defeated enemies provide resources, and those resources fund further towers or upgrades. The practical objective is not to spend everything immediately, but to convert each purchase into enough additional survival and income to support the next decision.
- Protect income: A small early upgrade that stops a leak can be worth more than saving for an expensive late tower.
- Reserve for the known threat: If the next wave is announced or predictable, hold enough resources for its counter rather than buying a low-impact convenience upgrade.
- Value coverage per resource: A tower that attacks two route segments may outperform a stronger tower that attacks one short lane.
- Account for randomness: When towers are drawn randomly, keep a flexible route and avoid a plan that works only if one specific role appears.
There is no universal tower ratio or guaranteed opening spend. Costs, income, draw rules, merges, and enemy statistics differ by system, so judge efficiency inside the rules you are playing.
Rulesets change the correct build
“Tabletop tower defense” is a category, not one single ruleset. Ten Acre Games describes Tabletop Tower Defense as a complete yet flexible set of rules for running physical tower-defense games. Other games may use random tower draws, merges, cards, dice, fixed scenarios, or player-built maps. The principles of route time, role coverage, and path safety transfer between them; an identical build order does not.
Best Value

- Compatible with Wide Screens - To ensure compatibility with the dual monitor mount, your each monitor must meet three conditions at the same time: First, computer screens size range: 13 to 32 inches. Second, screen weight range: 4.4 to 19.8 lbs. Third, the back of the monitor screen must have VESA mounting holes with a pitch of 75x75mm or 100x100mm.
- Regarding the compatibility with desks - Your desk must meet three conditions at the same time: First, desk material: Only wooden desks are recommended, plastic or glass desks cannot be used. Second, desk thickness range: 0.59" - 3.54". Third, the bottom of the desk should not have any cross beams or panels, as this will interfere with installation. We recommend carefully checking that your desk and monitors meets all above conditions before purchasing.
- Dual C-Clamp Hold - Worried your dual monitors might wobble or slip? Our upgraded base uses a larger platform plus a dual C-clamp structure to lock the dual monitor arm firmly to your desk. Each arm safely keeps your screens steady while you type, click and game—no shaking, no sliding, just a clean and secure setup you can trust every day. It also provides Grommet Mounting installation choice, both options ensure stable and secure fixation for your 0.59" - 3.54" desk.
- Full-Motion Adjustment For Comfortable View - Pull the screen closer when you’re deep in a spreadsheet, push it back to watch videos, or rotate to portrait for coding — moving everything smoothly with just one hand. The monitor stand offers +85°/-50° tilt, ±90° swivel and 360° rotation. Raise your monitor up to 15.75″ to support a healthy sitting posture. Whether you’re working from home, gaming through the night, or switching between video calls and documents, getting the screens to your natural line of sight helps relieve neck, shoulder and back strain so you can stay focused longer with less fatigue.
- Keep Your Desk Organized: By lifting both screens off the desktop, this dual monitor stand opens up valuable space for your keyboard, notebook, docking station or a simple, clutter-free work area. Built-in cable management guides wires along the arms, keeping cords out of sight and out of the way. Enjoy a tidy, modern workstation that looks as good as it feels to use.
| Ruleset feature | What changes | How to adapt |
|---|---|---|
| Random tower draws | You cannot guarantee a particular role early. | Keep the route open and use the strongest available substitute until the missing role appears. |
| Merges or combinations | Several weak pieces may become one stronger piece, but the board loses bodies or coverage. | Merge only when the resulting range, damage, or control fixes a real problem. |
| Player-built mazes | Route length and target exposure are partly under your control. | Funnel enemies through overlapping ranges without sealing every path. |
| Fixed maps | Placement, not construction, determines most route time. | Prioritize corners, intersections, and repeated-route sections already present. |
| Variable rounds or waves | The next threat may be uncertain. | Build a complementary core instead of specializing too early. |
Common beginner mistakes and corrections
Putting the strongest-looking tower at the entrance
Problem: The tower may have high damage but only one brief firing window.
Correction: Compare total route time in range. A less dramatic weapon at a corner can attack more often.
Blocking every path
Problem: Enemies may attack the weapon that removes their route.
Correction: Leave at least one viable route and use partial funneling.
Building only one damage type
Problem: Swarms overwhelm single-target fire, while durable enemies outlast weak repeated shots.
Correction: Add the missing role—splash, single-target, slow/control, or support—based on the next wave.
Upgrading by habit
Problem: A general upgrade may not address the enemy currently leaking.
Correction: Upgrade the tower or position tied directly to the failure.
Ignoring line of sight and measurement
Problem: A printed range does not guarantee a legal attack through obstacles or around corners.
Correction: Check the actual measurement and targeting rules before committing resources.
Following a build order from another game
Problem: Random draws, merges, costs, and wave schedules can invalidate a fixed sequence.
Correction: Keep the principles, but make each purchase from the current board state.
A practical checklist for every round
- Where do enemies enter, and what objective are they pursuing?
- Which corners, intersections, chokepoints, or repeated sections provide the most coverage time?
- Does every planned construction leave at least one legal route?
- What enemy profile is most dangerous next: swarm, durable target, speed, or a mixed group?
- Which role answers that profile: splash, single-target, slow/control, or support?
- Would an upgrade fix the current failure more directly than a new tower?
- After the wave, which enemy leaked and which defense actually stopped threats?
Answering these questions in order produces a resilient defense without relying on a universal ratio or a supposedly perfect opening.
Outdated Drivers Are Slowing You Down
One free scan finds every outdated or missing driver and matches the right update for your exact hardware.Free scan · exact hardware matchWindows Errors? Fix Them Before They Spread
Repair common Windows errors and clear accumulated junk for a smoother, more stable PC - no reinstall needed.Free scan · no reinstallIs there a best defense build?
There is no single best build across tabletop tower-defense games. A strong general pattern is one reliable damage source, followed by a role that counters the next wave, then upgrades concentrated on the most valuable position. Add control when extra exposure time improves the whole network, add splash when enemies cluster, and add single-target fire when durable enemies survive the first layer. Keep the route open throughout.
The best defense is therefore a process rather than a fixed list: read the route, maximize legal exposure, preserve path safety, cover different enemy profiles, spend for the next threat, and revise after every round. That process remains useful whether your game uses fixed towers, random draws, merges, or a flexible rules framework.
Quick Recap
Product prices and availability are accurate as of the date/time indicated and are subject to change. Any price and availability information displayed on Amazon at the time of purchase will apply.

