What’s actually slowing this PC down?
Pick the symptom - the matching free tool is one click away.
The safest way to fix VALORANT not opening is to identify the failure before changing anything major. Restart Windows, close Riot Client completely, and note whether you see no response, a black screen, an immediate close, or a VAN error. Generic launch failures call for cache, clean-boot, security-software, and driver checks. A VAN message should send you to the matching Riot Vanguard requirements instead of a generic reinstall loop.
Work through the steps below in order. BIOS or UEFI changes, third-party repair tools, and a complete reinstall belong near the end because they carry more risk or consume more time.
As an Amazon Associate I earn from qualifying purchases.
If VALORANT will not open, do not start by changing BIOS settings or downloading replacement Vanguard files. First determine whether this is a general launch failure or a Vanguard restriction, then work through the least-destructive fixes in order: restart Windows, close Riot Client completely, clear the relevant local cache, test for background-software conflicts with a clean boot, check security software, update Windows and graphics drivers, and reinstall VALORANT and Vanguard only when those checks fail.
Quick wins for a faster PC:
Scan for outdated or missing drivers - takes under a minuteDriver Scan →Clear out junk files and repair common Windows errorsFree Scan →Start with the symptom: generic failure or a VAN error?
Restart Windows rather than merely closing and reopening the game. Then record exactly what happens:
#1 Best Overall

- 122 in 1 Precision Screwdriver Set: This precision screwdriver set contains 101 precision bits and 21 auxiliary tools—screwdriver handle, flexible shaft, extension rod, magnetizer, magnetic mat, spudgers, and more. It handles PC maintenance—RAM upgrades, SSD swaps, PC assembly—while also tackling teardowns and repairs of PS4, Xbox, other game consoles, drones, smartphones, tablets (battery and screen replacements), and other electronics. Rare and specialty bits are included for servicing specialized devices.
- Maximize Repair Efficiency: Engineered for efficient repairs, the handle is ergonomically designed and non-slip, fitting comfortably in your hand and spinning smoothly. A 4.56-inch alloy-steel extension shaft offers high hardness and resists bending, while the spring-constructed flexible shaft flexes up to 180° to reach and turn tiny screws deep inside a chassis with ease.
- Dual-Magnet Design: The kit includes two magnetic tools. A magnetizer boosts bit magnetism to pick up screws, and a magnetic mat holds and organizes every tiny screw you remove. Used together, they slash the risk of loss or mix-ups, keeping every teardown and reassembly neat and orderly.
- Quality First: The bits are forged from Cr-V steel and heat-treated to 60 HRC for exceptional hardness, strength, and deformation resistance—ideal for long-term electronic repairs. Spare bits in the most common sizes are also included, so a lost tip never leaves you short, keeping the kit fully functional and extending its service life.
- Compact Storage: Every component is neatly labeled and organized in the case—ready for home, office, or on-the-go use. This all-in-one kit saves money and eliminates service appointments. It’s the perfect household essential and an ideal gift for husbands, dads, sons, or friends who love electronics repair and DIY projects.
| What you see | Where to start |
|---|---|
| Nothing happens when you click Play | Use the generic launch path below: close Riot Client fully, clear the relevant cache, clean-boot Windows, then test firewall, antivirus, Windows, and graphics drivers. |
| Riot Client opens, but VALORANT does not | Exit Riot Client completely and retry after the cache and clean-boot checks. |
| A black screen appears or the game closes immediately | Follow the generic path, with extra attention to graphics-driver updates and overlays or background utilities. |
A message contains VAN |
Write down the complete code and use the Vanguard-specific branch. Do not treat every VAN message as an ordinary crash. |
| The message mentions TPM, Secure Boot, memory integrity, virtualization, or a system restriction | Check the exact Vanguard error guidance before changing firmware or Windows security settings. |
| The message refers to a dependency or anti-cheat installation failure | Update Windows, then use the clean uninstall and reinstall procedure later in this guide. |
Riot’s launch troubleshooting and Vanguard guidance are separate for a reason: a generic client failure often comes from corrupted local data or a software conflict, while a VAN restriction may indicate a required security or firmware configuration.
1. Close Riot Client completely and restart
Before clearing files or reinstalling anything:
- Exit VALORANT and Riot Client normally if either window is open.
- Press Ctrl + Shift + Esc to open Task Manager.
- End Riot Client, Riot Client Services, VALORANT, or other clearly related processes that are still running. Do not terminate unrelated Windows processes.
- Restart Windows.
- Open Riot Client and try VALORANT once, noting the exact result.
A restart matters because Vanguard includes system-level components and because it clears processes that may be stuck after an update. If the same error returns, continue rather than repeatedly clicking Play.
2. Clear only the relevant VALORANT and Riot Client cache
Riot’s generic launch-error guidance includes removing applicable game and Riot folders from the user’s local AppData area. This can clear damaged or stale launch data without immediately downloading the entire game again.
Do these 3 things before closing this tab:
1Clear out junk files and repair common Windows errors2Fix the driver behind crashes, sound loss and screen glitches3Repair Windows errors before they cause bigger problems- Close Riot Client completely, including any related process still visible in Task Manager.
- Press Win + R, enter
%localappdata%, and press Enter. - Look for the
VALORANTfolder and the relevantRiot Gamescache or client folders identified by Riot’s current support instructions. - Remove only the folders or cache locations covered by that guidance. If you have other Riot games installed, do not blindly delete a shared parent folder that contains their data.
- Restart Windows and test VALORANT again.
If you are unsure whether a folder is safe to remove, rename the specific VALORANT-related folder to something such as VALORANT.old instead of deleting the entire AppData directory. Do not delete unrelated folders under %localappdata%, and do not perform this step while Riot Client is running.
3. Use a Windows clean boot to find a software conflict
A clean boot is an isolation test, not a permanent gaming configuration. It starts Windows with Microsoft services and essential drivers while disabling many third-party services and startup applications. If VALORANT launches in that state, an overlay, security product, hardware utility, tuning tool, or another background program is probably interfering.
How to clean-boot Windows 10 or Windows 11
- Press Win + R, enter
msconfig, and press Enter. - Open the Services tab.
- Check Hide all Microsoft services. This safeguard is important.
- Choose Disable all, then select Apply.
- Open the Startup tab and select Open Task Manager.
- In Task Manager’s Startup apps section, disable the enabled third-party startup items. Do not disable Windows system components at random.
- Close Task Manager, select OK in System Configuration, and restart the computer.
- Try VALORANT once in the clean-boot state.
While clean boot is active, some audio controls, RGB software, cloud-sync tools, overlays, monitoring utilities, and security features may not work normally. Microsoft cautions that System Configuration is a powerful tool, so change only the items described above.
Rank #2

- 【Wide Application】STREBITO precision screwdriver set has 120 bits, complete with every driver bit you'll need to tackle any fix or DIY project. In addition, this PC tool kit comes with 22 accessories, such as magnetizer, magnetic mat, suction cup, spudger, cleaning brush, tweezers, etc. Whether you're a professional technician or a amateur, this essential electronics toolkit has what you need to repair all PC, iphone, laptop, PS5, switch, game controller, tablets, glasses, watch, etc
- 【Humanized Design】Our iphone repair tool kit has been designed with the professional in mind to maximize your repair capabilities. The screwdriver features a rubberized, ergonomic handle with swivel top, provides a comfort grip and smoothly spinning. Magnetic bit holder transmits magnetism through the bit, helping you handle small screws and parts. The blade can be extended for working in hard-to-reach areas. And flexible extension shaft is useful for removing screw in tight spots
- 【Magnetic Design】We put 2 magnetic tools in this computer repair tool kit that save your energy and time, make your fixing job easier. The 5.7 x 3.3" magnetic project mat can keep all tiny screws and parts organized, prevent from losing and messing up, make your repair work more efficient. Magnetizer demagnetizer tool helps strengthen the magnetism of the screw driver tips to grab screws, or weaken it to avoid damage to your sensitive electronics
- 【Organize & Portable】All screwdriver bits are stored in rubber bit holder which marked with type and size for fast recognizing. And the repair tools are held in a tear-resistant and shock-proof oxford bag, offering a whole protection and organized storage, no more worry about losing anything. The tool bag with nylon strap is light and handy, suit for your tool case, easy to carry out, or placed in the home, office, car, drawer and other places
- 【Lifetime Warranty】The precision bits are made of 60HRC Chromium-vanadium steel which is resist abrasion, oxidation and corrosion, sturdy and durable, ensure long time use. This computer screwdriver kit is covered by STREBITO lifetime warranty and 30 days money-back. If you have any issues with your phone repair tool kit, simply contact customer service for troubleshooting help, parts, replacement or refund. Buy the STREBITO electronic screwdriver set with confidence
If VALORANT works after a clean boot
Do not immediately re-enable everything at once. Open msconfig and Task Manager again, then re-enable services and startup applications systematically. Re-enable them in small groups, restarting and testing VALORANT between groups. Once the failure returns, narrow the group down to one item. Common suspects include overlays, aggressive hardware-monitoring or overclocking utilities, third-party antivirus components, and peripheral software, but the clean boot test—not the name of a program—should determine the culprit.
Restore normal startup afterward
When testing is finished, return to msconfig, select Normal startup, and re-enable the startup items you previously disabled in Task Manager. Restart Windows again. Leaving the computer in a partial clean-boot state can cause unrelated applications and services to appear broken.
4. Check firewall and antivirus interference without leaving Windows unprotected
Riot recommends reviewing firewall exceptions for VALORANT, Riot Client, and Vanguard-related components. Security software can block a newly updated executable or service, particularly after a game or client update.
- Use the firewall product’s allow-list or exceptions screen rather than opening broad inbound ports.
- Allow the installed VALORANT, Riot Client, and Vanguard components when the security product identifies them as blocked. Installation paths vary, so do not copy an executable path from a different PC.
- If you use third-party antivirus, perform a brief test with its protection paused only if you understand how to restore it immediately. Try launching VALORANT, then turn protection back on.
- Do not permanently disable antivirus, Windows Security, or the firewall.
- If the game works only while a security product is paused, contact that product’s vendor for a narrow exception instead of leaving protection disabled.
Windows Security and third-party security products use different labels. The goal is to identify a blocked component, not to weaken the whole computer’s security. A clean boot can also help confirm whether the security product or one of its services is the conflict.
5. Update Windows and the graphics driver
Out-of-date Windows components and graphics drivers can cause launch failures, black screens, or immediate exits. Install updates through supported sources:
Free tools Windows power users keep installed
One-click scans. No signup required.
- Open Settings > Windows Update and install available Windows updates. On Windows 11, check Advanced options > Optional updates for relevant driver updates; Windows 10 exposes optional updates through its Windows Update controls.
- Identify the GPU in Device Manager > Display adapters, or check the computer manufacturer’s specifications.
- Download the current driver from the graphics-card manufacturer or the PC manufacturer’s support page. Use the manufacturer’s model and operating-system selection rather than a random driver-download site.
- Restart Windows after installation and test VALORANT before changing another variable.
If you have trouble managing drivers across a wider Windows installation, optional driver updater for Windows software such as Outbyte Driver Updater may help identify outdated, corrupted, or missing drivers. It is third-party software, is not required by Riot, is not a Vanguard fix, and should remain secondary to Windows Update and the official hardware-manufacturer driver. Review every proposed update rather than installing drivers indiscriminately; availability and paid features may vary.
6. If there is a VAN error, follow the matching Vanguard branch
A VAN code is more useful than the fact that VALORANT failed to open. Copy the entire message, including any numbers or letters, and consult Riot’s current Vanguard error guidance for that exact code. The checks below explain the most common security-related branches, but they are not a reason to enable every firmware option on every PC.
Rank #3
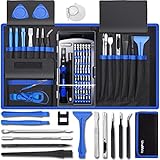
- [Professional Configuration] This set includes a precision screwdriver handle, 56 bits, 7 spudgers, opening picks, magnetizer, tweezers, brush, and Anti-static wrist strap and metal scraper. Designed for electronic equipment repair, it makes computer assembly, motherboard repair, hard disk replacement, memory upgrades, and cleaning and maintenance easy and efficien.
- [Wide Application] PH000 for Switch, PH00 for PS4/PS5/Xbox One X, T8H for PS5/Xbox 360, T9H for Xbox One/PS4 Slim, T10H for Xbox, Y2.5 for Wii/DS/GBA, Y00 for Switch Joycon, Gamebit 3.8 for 64/Virtual Boy, Gamebit 4.5 for Sega Master System/Game Cube
- [Sturdy and Durable] CRV steel bits with a hardness of 60HRC can withstand 851° quenching, are wear‑resistant, and resist deformation and breakage. The bits can handle any task, whether tightening screws or disassembling a computer case, with ease. The tear‑resistant Oxford cloth case ensures tools stay organized and secure.
- [Humanized Design] Textured handle for secure grip, 360° rotating top with a built-in bearing makes it easy to handle tasks such as removing a motherboard or installing a power supply. Magnetizer adjusts magnetism as needed for maintenance tasks
- [Gift For Gamers] Compact and versatile, perfect for electronics enthusiasts and gamers. A thoughtful gift for any occasion. Experience the UnaMela Upgraded Precision Screwdriver Set now
TPM-related message: check tpm.msc
- Press Win + R.
- Enter
tpm.mscand press Enter. - Check whether Windows reports that the TPM is present and ready for use. Where the interface provides a specification or version field, check the version requested by the applicable Riot guidance, such as TPM 2.0.
If the TPM is missing, disabled, or not ready, do not download a replacement TPM utility. TPM availability and firmware labels vary by motherboard and PC manufacturer. Use the manufacturer’s instructions for your exact model, and stop if you cannot identify the correct setting.
Secure Boot or platform-restriction message: check msinfo32
- Press Win + R, enter
msinfo32, and press Enter. - In System Information, locate BIOS Mode.
- Locate Secure Boot State.
- Compare both values with the requirements for the exact Vanguard code.
A configuration that supports Secure Boot generally uses UEFI rather than Legacy BIOS mode, with Secure Boot enabled where the applicable restriction requires it. If the computer is in Legacy mode or uses an MBR disk layout, changing it to UEFI/GPT can affect whether Windows boots. Back up important files, identify the exact motherboard or PC model, and follow the manufacturer’s conversion instructions. Do not switch a Legacy/MBR system to UEFI because a generic video or forum post suggested it.
Memory integrity, virtualization, and IOMMU/DMA checks
Some Vanguard restriction guidance discusses Windows memory integrity, virtualization, IOMMU, DMA protection, or related security conditions. These are error-specific and hardware-dependent:
- On supported Windows versions, memory integrity is under Windows Security > Device security > Core isolation details.
- Virtualization and IOMMU-related options are usually firmware settings, but their names and locations differ between Intel, AMD, laptop, and desktop systems.
- Change these settings only when Riot’s guidance for the exact error calls for it and you understand the effect on other software.
- If a temporary test requires lowering a security feature, restore it afterward. Never use a security change to bypass Vanguard requirements.
Windows 10 and Windows 11 can show different menus and may be subject to different Riot restrictions. The operating-system version alone does not prove that TPM, Secure Boot, or a particular virtualization setting is required for every player.
7. Treat BIOS and UEFI changes as a last-resort, model-specific operation
Firmware menus are not standardized. The same feature may be called Secure Boot, Intel Platform Trust Technology, AMD fTPM, TPM Device, IOMMU, or something else, and the wrong change can cause boot or stability problems.
Before entering firmware setup:
- Record the exact computer model or motherboard model and revision.
- Back up important files and make sure you have a way to recover Windows if the machine fails to boot.
- Read the manufacturer’s current instructions for that specific model.
- Confirm whether the system disk uses GPT or MBR before attempting a boot-mode change.
- Change one setting at a time, take note of the original value, and stop if the instructions do not match your screen.
Do not edit firmware settings merely because a generic Vanguard checklist mentions them. The exact VAN code and the manufacturer’s documentation should justify the change.
Recommended Free Tools
Rank #4
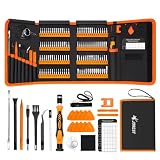
- 【120 Precision Bits & Wide Application】This screwdriver set contains 120 bits covering Torx, Phillips, Hex, Pentalobe, Tri-Wing, Square, Gamebit and more. From iPhones and Samsungs to MacBooks, Kindles, Ring doorbells, PS5, Nintendo Switch – even glasses, jewelry, drones, and furniture. Basically, if it has a screw, this kit can handle it. Whether you're a professional or DIYer, you'll have the right bit ready.
- 【Ergonomic Feel & Premium CRV Steel】The non-slip, ergonomic handle offers efficient and convenient operation, and the adjustable extension rod reaches deep-set screws with ease. Every bit is forged from hardened 60HRC chromium-vanadium steel, resisting wear, rust, and deformation for long-lasting sharpness.
- 【Magnetic Tools & No‑More‑Lost Screws】Includes two practical magnetic tools that make repairs and operations easier and quicker. The magnetic work mat securely holds screws and small parts in place, preventing them from getting lost or damaged. The magnetiser/demagnetiser can increase or decrease the magnetic force at the tip of the screwdriver.
- 【Anti-Static Protection & Multi-Purpose Accessories】The included anti-static wrist strap safely dissipates body static electricity, protecting your computer and sensitive components from ESD damage — an exclusive feature that adds extra reliability. The universal flexible hose enables multi-angle disassembly, while the pry bar, tweezers, suction cups and cleaning brush cover a wide range of repair needs.
- 【Portable Oxford Bag & Lifetime Warranty】The entire set is stored in a tear‑resistant, impact‑proof Oxford fabric bag with a nylon handle for lightweight portability. All bits are neatly organized in a rubber holder with clear size and type markings, so you can grab the right one in seconds. And we stand behind this kit with a lifetime warranty – if any quality issue occurs during normal use, just reach out.
8. Reinstall VALORANT and Vanguard only after the earlier checks
A reinstall takes time and may require downloading the game again, so it is an escalation step—not the first response to every launch problem. It is especially relevant for dependency or anti-cheat installation errors.
- Close Riot Client and confirm in Task Manager that related processes have stopped.
- Open Settings > Apps > Installed apps on Windows 11. On Windows 10, use Settings > Apps > Apps & features.
- Uninstall Riot Vanguard and VALORANT, following Riot’s current uninstall instructions if either component does not remove normally.
- Confirm that both entries have been removed. Do not download unofficial Vanguard files or use random command-line removal instructions.
- Restart Windows. This restart between removal and installation is important for Vanguard components.
- Reinstall VALORANT from Riot’s official distribution channel. If Riot’s dependency guidance specifically calls for administrative installation, run the installer with the required administrative permission.
- Allow the installation to finish, restart again if prompted, and then launch the game from Riot Client.
If the reinstall produces the same restriction, repeating it without addressing TPM, Secure Boot, a blocked service, or a background conflict is unlikely to add useful information. Record the error and move to escalation.
Independent reader supportYour contribution helps us test, update, and keep practical guides available for everyone.9. Use Windows Repair or Reset only when Riot Client itself looks damaged
Some Windows applications expose Repair and Reset controls. If Riot Client appears in Windows’ installed-app settings with those options, you can try Repair first. Reset is more disruptive and may clear application data or settings.
These controls are under Settings > Apps > Installed apps on current Windows 11 versions, or the corresponding app settings in Windows 10. They are not a substitute for Riot’s Vanguard-specific instructions, and Riot Client may not expose the same controls on every installation.
For readers who also have broad Windows instability, damaged shared components, or problems affecting many unrelated applications, a general Windows repair utility such as Outbyte PC Repair is an optional third-party consideration—not a Riot-authorized Vanguard remedy. Do not use a system-maintenance tool as a reason to skip official Windows repair, clean-boot isolation, manufacturer drivers, or Riot Support.
10. Escalate with evidence instead of trying random fixes
If VALORANT still will not open, submit a ticket through Riot Support. Include enough detail for the support agent to distinguish a client failure from a Vanguard restriction:
- The complete error message and code, including every
VANnumber or suffix. - Whether Riot Client opens, whether the game window appears, and whether the failure is silent, a black screen, or an immediate close.
- Your Windows version, which you can check with
winver. - The computer or motherboard model, processor, graphics card, and—when relevant—the TPM, BIOS Mode, and Secure Boot values.
- Recent Windows, graphics-driver, game, antivirus, or BIOS changes.
- Whether VALORANT launched in a clean boot.
- Whether a narrow antivirus or firewall test changed the result, and whether protection was restored.
- Whether Vanguard and VALORANT were both removed, Windows was restarted, and the game was freshly installed.
Riot may request diagnostic files or additional steps. Follow the current instructions in the ticket rather than uploading unofficial Vanguard files or changing registry entries without a specific supported procedure.
Best Value

- Built for Laptop, Console, and PC Disassembly: Designed for opening bottom covers, releasing tight clips, and separating plastic housings during laptop, MacBook, computer, PS4, PS5, Xbox, Switch, and controller repair.
- Plastic Where Safety Matters, Metal Where Force Is Needed: ESD-safe plastic spudgers help around clips, connectors, and delicate internal parts, while the metal pry tool and double-sided metal spatula add leverage for stubborn covers, shields, and tightly fitted components.
- Great for Game Consoles and Controllers: Ideal for opening PS4, PS5, Xbox, Switch, and controller shells for deep cleaning, fan access, battery replacement, internal maintenance, and general repair work.
- Anti-Static Tools for Internal Work and Cleaning: Anti-static spudgers and the anti-static brush are useful for disconnecting battery and flex connectors, guiding cables, removing dust, and cleaning sensitive electronics during console, laptop, and PC maintenance.
- Compact 12-in-1 Professional Opening Kit: Includes essential pry and disassembly tools for everyday repairs, upgrades, shell opening, clip release, fan cleaning, and internal access across laptops, game consoles, computers, controllers, and small electronics.
What not to do when VALORANT will not open
- Do not download unofficial Vanguard DLLs, drivers, or replacement installers.
- Do not bypass TPM, Secure Boot, or other Vanguard requirements.
- Do not leave antivirus, Windows Security, or the firewall disabled after a test.
- Do not install random driver packages from third-party download sites.
- Do not edit the registry without a precise, current, supported procedure.
- Do not change BIOS settings based on instructions for a different motherboard or laptop.
- Do not assume that every
VANerror requires TPM, Secure Boot, virtualization, or a complete reinstall. - Do not treat a general driver or PC-repair utility as a guaranteed fix or as an official Riot solution.
The shortest safe decision tree
- No error: restart, close Riot Client completely, clear the relevant local cache, clean-boot Windows, test security-software interference, update Windows and graphics drivers, then reinstall if necessary.
VANerror: capture the exact code and follow its Vanguard-specific requirements before changing firmware.- TPM message: check
tpm.mscand use model-specific manufacturer instructions if TPM is unavailable. - Secure Boot or restriction message: check
msinfo32; do not casually convert Legacy/MBR systems to UEFI/GPT. - Dependency or anti-cheat installation error: update Windows, uninstall both Vanguard and VALORANT, restart between removal and installation, and reinstall.
- Works in clean boot: re-enable services and startup applications in groups until the conflicting item is identified.
- Still broken: send Riot Support the error, system details, and results of each test.
Source note: This troubleshooting path follows Riot Support guidance for VALORANT launch failures, Vanguard error restrictions, and Vanguard/game reinstall procedures, together with Microsoft’s clean-boot and Windows app-repair guidance. Riot’s security requirements and error-specific instructions can change after patches, so use the current Riot page for the exact code shown on your PC.
Crashes, No Sound, or Screen Glitches?
Random freezes, missing sound and display glitches usually trace back to one bad driver. Find and replace yours safely.Free scan · under a minuteWindows Errors? Fix Them Before They Spread
Repair common Windows errors and clear accumulated junk for a smoother, more stable PC - no reinstall needed.Free scan · no reinstallFrequently Asked Questions
Is every VALORANT launch failure a Vanguard problem?
Not necessarily. A generic failure can come from a damaged local cache, a blocked executable, an incompatible background program, or an outdated driver. A message containing VAN should be handled through Riot’s matching Vanguard error guidance because it may indicate a security or firmware restriction.
Do I need TPM 2.0 and Secure Boot to play VALORANT?
Not for every player or every error. Check the exact Vanguard code first. If it is TPM-related, open tpm.msc and verify that the TPM is present and ready for use. If it concerns Secure Boot, open msinfo32 and inspect BIOS Mode and Secure Boot State. Requirements can vary by error, Windows version, and Riot’s current security policy.
Should I disable my antivirus or firewall to fix VALORANT?
Only as a brief diagnostic test, and only if you can restore protection immediately. A narrow firewall or antivirus exception is safer than disabling security globally. Turn protection back on after testing and ask the security-software vendor for a supported exception if it is confirmed as the cause.
When should I reinstall Riot Vanguard and VALORANT?
Use reinstalling as an escalation step, especially for dependency or anti-cheat installation errors. Close Riot Client, uninstall both Riot Vanguard and VALORANT, restart Windows, reinstall from Riot’s official channel, and restart again if prompted. Reinstalling will not solve a firmware restriction by itself.
Why does VALORANT open after a clean boot?
A clean boot disables many third-party services and startup applications temporarily. If VALORANT works then, re-enable the disabled items in small groups until the conflict returns, identify the specific program, and then restore Normal startup. Do not leave Windows in the reduced clean-boot state permanently.
The Bottom Line
The reliable VALORANT launch fix is a decision tree, not a one-click utility: separate ordinary client failures from VAN restrictions, isolate background conflicts, verify Windows and graphics drivers, inspect TPM or Secure Boot only when the error requires it, reinstall Vanguard and VALORANT when warranted, and give Riot Support the evidence if the problem remains.
Quick Recap
Product prices and availability are accurate as of the date/time indicated and are subject to change. Any price and availability information displayed on Amazon at the time of purchase will apply.




