Free tools Windows power users keep installed
One-click scans. No signup required.
When a controller button stops responding, the first question that separates a game problem from a controller problem is simple: does the button fail everywhere, or only in one game? If it fails in the console’s own input test, the controller is the likely suspect and the manufacturer’s service route becomes relevant. If it passes the console test and fails only in one game, the cause is more often that game’s controls, its controller support, or a changed button mapping.
Start by finding out where the button fails
Before changing any settings, narrow the failure to one of three places: the console’s menus and other games, a single game, or a PC or other device that is not the console you normally use. Note whether the controller is wired, wireless, or attached to a Joy-Con rail, and whether you have changed any button mapping or profile. A failure in one game does not on its own prove that the hardware is damaged.
Run the built-in input test on Nintendo Switch
Nintendo Switch includes a test that checks whether the console recognizes each button outside any game. Use it first.
- Open System Settings from the HOME Menu.
- Select Controllers and Sensors, then Test Input Devices.
- Select Test Controller Buttons.
- Press the affected button and watch for the matching icon on screen.
The test does not cover the HOME, Capture, POWER, Volume, or SYNC buttons. If one of those is unresponsive, the test cannot clear or confirm it, so move to the service guidance for that controller.
The Tool Desk
Outbyte PC Repair FREEClear out junk files and repair common Windows errorsFree Scan →Outbyte Driver Updater FREEScan for outdated or missing drivers - takes under a minuteDriver Scan →#1 Best Overall

- Brand NEW and ORIGINAL from OEM Factory that has never been used, NOT a Cheap third-party accessories. (NO Manuals, NO Packaging, Guides or Tutorials).
- Full Button set for Switch or Switch OLED JC Left & Right controllers, Ideal for refurbishment or modding controllers.
- Includes A B X Y buttons, Direction arrow buttons, + & - buttons, home & capture button, SR SL buttons x2, L R ZL ZR trigger buttons.
- NOTE: This is the SAME and Specification BUTTONS used by Ninten in the Switch console IF you order from DEAL4GO.
- This item is supplied to professionals, Therefore, Technical disassembly and installation required.
Match the test result to the next step
The result of the test points to a different next step. Use this table as the decision point.
| Where the button fails | Input test result | Most likely area | Next step |
|---|---|---|---|
| One game only | Passes | Game controls, game support, or mapping | Check the game’s control instructions and controller support, then restore standard mapping (see below) |
| Several games or menus | Passes | Mapping or a settings change | Restore standard mapping, confirm the system is up to date, then retest |
| Any game or menu | Fails on a recognized controller | Controller hardware | Follow the manufacturer’s cleaning and reset guidance for that exact model, then use its service route if the failure persists |
| Any game or menu, on a PC or other device | Not applicable | Device or game support | Check the specific game’s listed controller support for that device |
Check the game and the button mapping first
Game compatibility and controls
Nintendo identifies game or app compatibility as a possible reason that a button works in the system test but not in one title. Open the game’s own control instructions or its listed controller support and confirm that the action you want is assigned to the button you are pressing. Some games use button combinations or different defaults, so an input can appear dead when the game is simply mapped elsewhere.
Restoring a changed mapping on Switch
Nintendo advises restoring standard mapping before troubleshooting a Pro Controller. A wrench icon beside the controller indicates that a custom mapping is active. If you see it, reset the mapping to the standard inputs and retest. A remapped button can look broken because it now performs a different action.
Rank #2
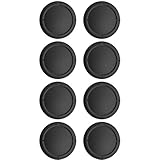
- Easiest way for repalcement, It will be very easy to install and get no fussy
- 8 Pcs is for repairing the orginal cover while the rest
- Remember the original skin can be take off and DIY the color. But the origin one may difficult to re-install
- Comfortable material enhances your gaming experience
- A variety of colors for you to choose
Nintendo Switch: Joy-Con attached to the console
Nintendo’s guidance for Joy-Con buttons that are unresponsive or behave unexpectedly while attached follows a fixed sequence. Work through it in order.
- Power off the console.
- If a button is sticky or stuck, clean the area around it gently with a soft, dry toothbrush. Clean only the external surface around the button.
- Power the console back on and install the latest console update.
- Run the Test Controller Buttons test described above.
Nintendo’s support document states, “Important: Avoid using any cleaners or fluids.” Keep cleaning to dry brushing of the exterior. Nintendo does not describe any internal cleaning or disassembly as part of this process.
If the test fails for a Joy-Con that the console recognizes as attached, Nintendo says that Joy-Con needs service. A button that fails only in one game or app may instead reflect that title’s compatibility, as covered above.
Rank #3

- Complete replacement Trigger Buttons kit for Switch Pro Controller (model: HAC-010), it is a Third-party parts.
- Includes: L R ZL ZR Trigger buttons (Black), NOT included other buttons.
- Restore or mod your controller buttons with this replacement set, Ideal for replacing worn or damaged buttons or modding controllers.
- This product will require technical fitting, we cannot provide support for the fitting of this part. (NO Manuals, NO Packaging, Guides or Tutorials.)
- These small buttons replace the face buttons on the Switch Pro controller to give it a refreshed look.
Nintendo Switch: Pro Controller
Use this order for a Pro Controller:
- Restore standard button mapping if a wrench icon appears beside the controller.
- Confirm the console has its latest system update.
- Reset the controller by pressing the SYNC button once, then press another button to wake it.
- Run the Test Controller Buttons test and press the affected button.
If the test fails, or the problem seriously affects how you use the controller, Nintendo says it can inspect and service the Pro Controller.
PlayStation DualSense
PlayStation’s controller support guidance describes a reset and update sequence for the DualSense. Follow these steps in order.
- Turn off the PS5.
- Press the small reset button on the back of the controller with a pin or similar thin tool.
- Connect the DualSense to the PS5 with a USB cable.
- Press the PS button to pair and test the controller.
DualSense software updates arrive with PS5 system software updates. To check manually, go to Settings > Accessories > Controller (General). On a PC, PlayStation directs users to PlayStation Accessories for controller updates.
Rank #4

- Compatible with NS & Switch OLED& Switch Lite Controller: Replace your sticky, missing or damaged original joystick caps with Ferkurn replacement joystick thumb grips.
- Easiest way for replacement controller joystick accessories, It will be very easy to install and get no fussy.
- 8 PCS: 8 Pcs caps is for repairing the orginal thumbstick grips
- Comfortable material enhances your gaming experience. A variety of colors for you to choose
- Replace the original caps Instead of putting it on top.***
If the problem persists after the reset and updates, PlayStation’s guidance routes the controller to PlayStation Repairs. Outside the console, PlayStation warns that DualSense support varies by game, so check the specific game’s listed controller support before concluding that a one-game button failure is hardware damage.
Xbox and other controllers
The official guidance behind this article covers Nintendo Switch Joy-Con and Pro Controller, and PlayStation DualSense only. Xbox controllers and third-party pads are not covered by these instructions, so the steps above should not be applied to them as if they were universal. Check the manufacturer’s own support pages for those models.
Independent reader supportYour contribution helps us test, update, and keep practical guides available for everyone.When to stop troubleshooting and use a repair route
Move to the manufacturer’s service route in three situations: a Switch input test fails on a recognized controller, a button is physically broken, or a button stays unresponsive after the official reset and update steps. Nintendo and PlayStation both direct persistent or tested hardware failures to their support channels.
Do these 3 things before closing this tab:
1Clear out junk files and repair common Windows errors2Scan for outdated or missing drivers - takes under a minute3Repair Windows errors before they cause bigger problemsBest Value

- COMPATIBILITY: Perfectly fits Nintendo Switch, Switch OLED, Switch Lite, and Joycon controllers for enhanced gaming experience.Not compatible with PS4/5, Switch Pro or X/-box one controllers.
- PRECISION CONTROL: Silicone thumb grips provide improved accuracy and responsiveness during gameplay
- PROTECTION: Covers shield your original analog sticks from wear and tear while maintaining smooth operation
- GRIP ENHANCEMENT: Textured surface offers better thumb control and prevents slipping during intense gaming sessions
- EASY INSTALLATION: Simply slip these analog stick covers over your existing joysticks for instant improvement
Do not take a controller apart or apply solvents to its buttons. The official Nintendo and PlayStation guidance does not provide internal repair steps for any model, and a home repair can affect eligibility for service. Repair eligibility can depend on region, warranty status, and current manufacturer policy, so confirm coverage with the maker before sending a controller in.
Summary of the diagnostic path
- Determine whether the button fails in every context or only in one game.
- On Switch, run the Test Controller Buttons test, remembering it does not cover HOME, Capture, POWER, Volume, or SYNC.
- If the test passes, check the game’s controls and controller support, and remove any custom mapping.
- If the test fails on a recognized controller, follow the model-specific cleaning or reset guidance, then use the manufacturer’s service route.
- For a DualSense, use the reset button, update through the PS5 or PlayStation Accessories, and contact PlayStation Repairs for persistent problems.
Once you know which branch applies, the fix is usually a settings change or a service request rather than a repair you attempt yourself.
Quick Recap
Product prices and availability are accurate as of the date/time indicated and are subject to change. Any price and availability information displayed on Amazon at the time of purchase will apply.



