What’s actually slowing this PC down?
Pick the symptom - the matching free tool is one click away.
To enable G-SYNC on Windows 11, turn on Adaptive-Sync or VRR in the monitor’s on-screen menu, connect the display directly to a compatible NVIDIA GPU, then open NVIDIA Control Panel → Display → Set up G-SYNC and enable G-SYNC, G-SYNC Compatible. Windows 11 does not have a universal G-SYNC switch; the main configuration is handled by NVIDIA Control Panel.
Quick setup
- Enable Adaptive-Sync, FreeSync, VRR, or G-SYNC in the monitor’s on-screen display.
- Connect the monitor directly to the NVIDIA GPU. DisplayPort is the safest general-purpose option for G-SYNC Compatible displays.
- Install a current NVIDIA GeForce driver.
- Open NVIDIA Control Panel → Display → Set up G-SYNC.
- Check Enable G-SYNC, G-SYNC Compatible.
- Choose Enable for full screen mode or Enable for windowed and full screen mode.
- Select the intended display and, if shown, check Enable settings for the selected display model.
- Click Apply.
- Open Manage 3D settings and confirm the appropriate Monitor Technology option.
- Under Change resolution, select the monitor’s native resolution and highest supported refresh rate.
What G-SYNC does
G-SYNC is NVIDIA’s variable refresh rate technology. Instead of refreshing at a fixed timing while the GPU produces frames at changing intervals, a compatible monitor adjusts its refresh timing to better match the game’s frame rate. This can reduce tearing and judder when frame rates fluctuate. NVIDIA describes the technology and its requirements in its variable refresh rate documentation.
As an Amazon Associate I earn from qualifying purchases.
G-SYNC does not make a graphics card render more frames, increase a game’s performance, or guarantee perfectly smooth motion at very low or unstable frame rates. It also does not automatically select the correct resolution or refresh rate.
There are three broad categories of G-SYNC display:
#1 Best Overall
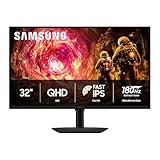
- Samsung’s 32” Odyssey G5 QHD Gaming Monitor delivers brilliant visuals for exhilarating gameplay that’s more immersive than ever before.
- QHD resolution (2560 x 1440) boasts incredibly detailed, pin-sharp images.
- With a wide 178° viewing angle, the IPS panel consistently delivers crisp, clear hues from various viewpoints.
- 180Hz Refresh Rate and 1ms response time (GtG) allow fast reactions for ultra-smooth gaming, plus G-Sync compatibility syncs the GPU and panel to reduce choppiness, screen lag, and image tearing.
- HDR10 provides brighter highlights and nuanced shadows for added depth.
- G-SYNC ULTIMATE: higher-end displays using NVIDIA G-SYNC processors and premium features such as advanced HDR capabilities.
- G-SYNC: displays with an NVIDIA G-SYNC hardware module.
- G-SYNC Compatible: Adaptive-Sync displays validated by NVIDIA for a basic VRR experience without an NVIDIA G-SYNC processor.
See NVIDIA’s G-SYNC monitor overview for the distinctions and current product categories.
Check compatibility first
GPU
For G-SYNC Compatible displays, NVIDIA’s published requirements identify Pascal-class GeForce GPUs or newer, generally covering GeForce GTX 10-series and later. HDMI 2.1 VRR has a separate published path covering suitable GeForce GTX 16-series, RTX 20-series, and newer GPUs.
Original hardware-module G-SYNC monitors have a lower historical requirement listed by NVIDIA—GeForce GTX 650 Ti BOOST or higher—but the exact monitor, port, and connection still matter. There is no single GPU cutoff that applies to every G-SYNC display.
Recommended Free Tools
Monitor
The monitor must support NVIDIA G-SYNC, NVIDIA G-SYNC Compatible certification, or a compatible Adaptive-Sync/FreeSync implementation that the NVIDIA driver can expose. “Gaming monitor,” “high refresh rate,” or “FreeSync” branding alone does not guarantee reliable G-SYNC operation.
Use NVIDIA’s official G-SYNC monitor directory to check certified models. An uncertified Adaptive-Sync monitor may work, work only partially, or fail altogether, as NVIDIA explains in its support guidance.
Cable and port
- DisplayPort: the preferred troubleshooting path for G-SYNC Compatible monitors. NVIDIA’s requirements refer to native DisplayPort 1.2/1.2a or higher for Adaptive-Sync operation.
- HDMI 2.1: can support VRR when the GPU, monitor, port, cable, and firmware all support the required implementation.
- HDMI 1.x or HDMI 2.0: do not assume G-SYNC Compatible support. HDMI behavior is model-specific.
- Adapters and intermediaries: docks, USB-C hubs, KVM switches, AV receivers, and adapters can prevent VRR from appearing or operating correctly. Bypass them during testing.
A monitor connected to the motherboard video output instead of the NVIDIA GPU will not be fixed by changing NVIDIA settings. Connect it to the graphics card’s output whenever possible.
Step 1: Enable VRR in the monitor menu
Open the monitor’s on-screen display and look for a setting named Adaptive-Sync, FreeSync, Variable Refresh Rate, VRR, or G-SYNC. Menu names vary by manufacturer.
Do these 3 things before closing this tab:
1Fix the driver behind crashes, sound loss and screen glitches2Repair Windows errors before they cause bigger problems3Scan for outdated or missing drivers - takes under a minuteRank #2
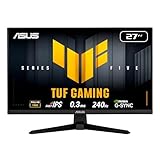
- 27-inch Full HD Fast IPS Display: Features a 1920 x 1080 resolution Fast IPS panel with 240Hz refresh rate for fast paced gameplay
- Ultra-Fast Response Time: ASUS Fast IPS technology enables a 0.3ms (min) response time for sharp gaming visuals with high frame rates
- Adaptive Sync Technology: FreeSync Premium and G-Sync compatible delivers a seamless, tear-free gaming experience
- Advanced Motion Blur Reduction: ASUS Extreme Low Motion Blur Sync (ELMB SYNC) technology enables ELMB together with variable refresh rate, eliminating ghosting and tearing for sharp gaming visuals with high frame rates
- Convenient Monitor Control: DisplayWidget Center enables easy OSD access and monitor settings adjustments with a mouse
- Enable the monitor’s VRR or Adaptive-Sync setting.
- If using DisplayPort, set the port mode to DisplayPort 1.2, 1.4, or a higher available mode rather than an older 1.1 mode.
- Temporarily disable blur-reduction or strobing modes that cannot operate alongside VRR.
- Disable monitor overclocking while troubleshooting.
- Save the setting and power-cycle the monitor if necessary.
Some Adaptive-Sync monitors ship with VRR disabled, and some default to an older DisplayPort mode. NVIDIA specifically identifies both as possible causes of setup problems.
Step 2: Set the refresh rate in Windows 11
- Press Win + I.
- Open System → Display.
- Select the monitor you want to configure, especially if multiple displays are connected.
- Open Advanced display.
- Choose the monitor’s highest appropriate refresh rate.
Microsoft’s Advanced display instructions also show detected display capabilities and, on supported hardware, whether variable refresh rate is available.
Do not confuse Windows 11’s Dynamic Refresh Rate with G-SYNC. DRR is a Windows display-management feature, not the NVIDIA G-SYNC switch. Microsoft says DRR requires a VRR-capable display and at least 120 Hz, and it can limit the maximum refresh rate in some games. It is not required for G-SYNC. If a game appears unexpectedly capped, disabling DRR is a reasonable troubleshooting test.
Step 3: Enable G-SYNC in NVIDIA Control Panel
- Right-click an empty area of the Windows desktop.
- Select NVIDIA Control Panel.
- Expand Display in the left navigation pane.
- Select Set up G-SYNC.
- Check Enable G-SYNC, G-SYNC Compatible.
- Choose an operating mode:
- Enable for full screen mode: the more conservative choice for troubleshooting.
- Enable for windowed and full screen mode: useful for borderless-windowed and windowed games, but potentially more sensitive to overlays, Windows’ compositor, and multi-monitor configurations.
- Select the intended monitor.
- If available, check Enable settings for the selected display model.
- Click Apply.
Start with full screen mode if G-SYNC is not working or a game flickers. Once that works, switch to windowed and full screen mode if you need VRR in borderless games. NVIDIA documents both modes in its G-SYNC setup instructions.
Step 4: Select Monitor Technology
Open NVIDIA Control Panel → Manage 3D settings → Global Settings. Find Monitor Technology and choose:
- G-SYNC for a display with an NVIDIA G-SYNC hardware module.
- G-SYNC Compatible for a certified or manually enabled Adaptive-Sync display.
Click Apply. You can use the Program Settings tab instead if you want a particular game to use different monitor-technology behavior.
Step 5: Set native resolution and refresh rate
In NVIDIA Control Panel, open Display → Change resolution, select the correct monitor, then choose its native resolution and highest refresh rate supported by the monitor and connection. Click Apply.
Rank #3

- High-Resolution QHD Gaming Display: 27-inch QHD (2560 x 1440) gaming monitor with 180Hz refresh rate designed for professional gamers and immersive gameplay
- ASUS Extreme Low Motion Blur Sync Technology: ELMB Sync technology enables ELMB and variable-refresh-rate technologies to work simultaneously to eliminate ghosting and tearing for sharp gaming visuals with high frame rates
- Advanced Synchronization Technologies: FreeSync Premium, G-Sync compatible and AdaptiveSync technology delivers a seamless, tear-free gaming experience by enabling VRR (variable refresh rate) by default
- High Dynamic Range Support: HDR technology supports HDR-10 format to enhance bright and dark areas for improved visual depth and contrast
- Package Contents: DisplayPort cable, L-shaped Screwdriver, Power cord, Power adapter, Quick start guide, Warranty Card
You can verify the same result in Windows Settings → System → Display → Advanced display. Keep these terms separate:
- Refresh rate: the monitor’s selected operating speed, measured in Hz.
- Frame rate: the number of frames the game and GPU render, measured in frames per second.
- VRR range: the range over which the monitor can vary its refresh timing to follow the GPU.
G-SYNC coordinates refresh rate and frame rate within the display’s supported VRR range. It does not force a game to run at the monitor’s maximum Hz.
Using an uncertified FreeSync or Adaptive-Sync monitor
An uncertified display can sometimes work, but NVIDIA does not guarantee it. It may have flicker, brightness changes, a narrow usable range, black screens, or no VRR operation at all.
To test one:
- Open NVIDIA Control Panel → Display → Set up G-SYNC.
- Enable G-SYNC.
- Select the display.
- Check Enable settings for the selected display model.
- Click Apply.
If the normal option is unavailable, open Manage 3D settings → Global Settings, set Monitor Technology to G-SYNC Compatible, and apply the change. If the display remains unreliable, treat that as a compatibility limitation rather than assuming another Windows toggle will solve it.
How to verify that G-SYNC is working
NVIDIA’s on-screen indicator
On supported driver and Control Panel versions, look for a G-SYNC Compatible Indicator option in NVIDIA’s display-related menus. If available, enable it and launch a game. The indicator should appear while G-SYNC is active. NVIDIA’s labels can vary slightly between driver releases.
The Tool Desk
Outbyte Driver Updater FREEFix the driver behind crashes, sound loss and screen glitchesFind Drivers →Outbyte PC Repair FREEClear out junk files and repair common Windows errorsFree Scan →Windows display information
Check Settings → System → Display → Advanced display. This confirms that Windows detects the expected monitor and refresh-rate capabilities, but it does not by itself prove that a game is actively varying the refresh rate.
Real game test
Test a game with changing frame rates and camera movement. Look for reduced tearing and less judder as performance changes. If the monitor has a refresh-rate counter, check whether it changes in response to the game’s frame rate.
Rank #4

- 27” FULL HD IPS DISPLAY: Experience crisp 1920x1080 resolution and vibrant colors on a 27-inch widescreen IPS panel with wide 178° viewing angles and a 16:9 aspect ratio.
- 240Hz Native / 260Hz Overclocked Refresh Rate & 0.5ms MPRT Response Time: Dominate fast-paced games with ultra-smooth motion and razor-sharp visuals, thanks to a 240Hz native refresh rate with up to 260Hz overclocking over both HDMI and DisplayPort, plus an ultra-fast 0.5ms (MPRT) response time.
- ADAPTIVE-SYNC TECHNOLOGY: Enjoy tear-free, stutter-free gameplay with Adaptive-Sync support that keeps visuals fluid and synchronized with your GPU.
- ILT-ADJUSTABLE & VESA COMPATIBLE: Customize your setup with tilt functionality (-3° ~ 21°) and 100x100mm VESA mount support for ergonomic flexibility.
- FLICKER-FREE + LOW POWER USAGE: Flicker-Free technology helps reduce eye strain during long sessions, and Eco Mode keeps power usage efficient (22W typical).
A static Windows desktop or a game locked permanently at the monitor’s maximum refresh rate is not a definitive G-SYNC test.
Independent reader supportYour contribution helps us test, update, and keep practical guides available for everyone.Troubleshooting G-SYNC problems
“Set up G-SYNC” is missing
- Confirm the cable is connected to the NVIDIA GPU, not the motherboard.
- Enable Adaptive-Sync, FreeSync, or VRR in the monitor’s menu.
- Try a direct DisplayPort connection.
- Try another compliant cable and another GPU port.
- Check that the monitor is not stuck in DisplayPort 1.1 mode.
- Make the monitor the primary display in Windows.
- Select the intended display explicitly in NVIDIA Control Panel.
- Confirm that the GPU supports the relevant G-SYNC path.
- Install or clean-install a current NVIDIA driver, then reboot.
- Bypass any dock, adapter, KVM, USB-C hub, or receiver.
NVIDIA’s troubleshooting guidance also recommends enabling the selected-display checkbox, checking Monitor Technology, and trying another resolution or refresh rate.
Quick wins for a faster PC:
Fix the driver behind crashes, sound loss and screen glitchesFind Drivers →Clear out junk files and repair common Windows errorsFree Scan →Scan for outdated or missing drivers - takes under a minuteDriver Scan →The option or checkbox is greyed out
First confirm that the monitor is detected, enabled, and connected directly to the GPU. Then enable VRR in the monitor menu and try DisplayPort. With an uncertified display, the Enable settings for the selected display model checkbox may be required. Multiple displays can also complicate detection; temporarily disconnect other monitors and test the G-SYNC display as the primary screen.
G-SYNC works only in full-screen mode
That can be expected if Enable for full screen mode is selected. To test borderless or windowed games, select Windowed and full screen mode. If flickering or inconsistent behavior starts, return to full-screen mode and test the game’s display setting, overlays, recording software, and other monitors.
The game still tears
Confirm that the game is using the G-SYNC display and the intended display mode. Check that Monitor Technology is correct and that the frame rate is not exceeding the monitor’s maximum refresh rate. Also test without overlays and recording tools, with HDR temporarily disabled, and with other monitors disconnected.
Frame caps and V-SYNC are optional tuning tools, not universal requirements. The best combination depends on the game, refresh rate, latency target, GPU performance, and the monitor’s VRR range.
Free tools Windows power users keep installed
One-click scans. No signup required.
Flicker, brightness changes, or black screens
These symptoms are more common with uncertified Adaptive-Sync displays, marginal cables, very wide VRR ranges, low frame rates, HDR/VRR interactions, overclocked refresh modes, DisplayPort mode mismatches, intermediaries, and driver changes.
Best Value
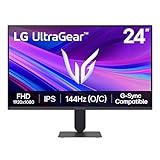
- Vivid Color, Fast Response, Total Control - The 24" UltraGear FHD gaming monitor delivers vivid HDR10 color, ultra-smooth 120Hz speed, and 1ms MBR clarity. G-SYNC compatibility & FreeSync keep gameplay tear-free. The sleek, slim design keep you focused and in control.
- Vivid Color That Puts You in the Action - Step onto the battlefield with HDR10 visuals and up to 99% sRGB color gamut coverage. The IPS display delivers rich, vivid tones, so every explosion, shadow, and landscape appears exactly as the developers intended.
- 120Hz Native Speed (144Hz Overclock) - Enjoy fluid, crystal-clear gameplay with a 120Hz native refresh rate, boosted to 144Hz when overclocked. Minimized motion blur keeps every frame sharp, so you can stay locked in on the action.
- 1ms MBR: Fast-Paced Speed to Victory - 1ms Motion Blur Reduction (MBR) keeps gameplay smooth and sharp, cutting blur and ghosting so fast-moving action stays clear—helping you stay competitive when every millisecond counts.
- NVIDIA G-SYNC Compatible & AMD FreeSync - NVIDIA G-SYNC Compatible and AMD FreeSync deliver smooth, tear-free, low-latency gaming with high refresh rates—so every frame stays sharp.
- Disable G-SYNC temporarily.
- Return the monitor to its default refresh mode.
- Disable monitor overclocking and blur-reduction/strobing modes.
- Use direct DisplayPort if supported.
- Test a lower refresh rate.
- Try another cable.
- Check for monitor firmware updates using the manufacturer’s procedure.
- If the problem began immediately after a driver update, reinstall or roll back the driver.
- Re-enable G-SYNC in full-screen mode only.
Firmware updates are model-specific and can carry risk. Follow the monitor manufacturer’s instructions; NVIDIA warns that an interrupted or unsuccessful firmware update can damage or disable hardware. Its G-SYNC Pulsar update tool also includes relevant warnings.
HDMI does not work
Do not assume that every HDMI connection supports G-SYNC Compatible. Confirm that both the monitor and GPU support VRR over the exact HDMI standard in use. HDMI 2.1 VRR is the clearest supported path on suitable GTX 16-series, RTX 20-series, and newer systems. Otherwise, test a direct DisplayPort connection.
G-SYNC disappears after reboot
Recheck the monitor’s VRR setting, selected refresh rate, primary-display assignment, and cable path. Reboot after reinstalling the NVIDIA driver. If the setting disappears after a monitor firmware or driver change, restore the monitor’s standard refresh mode and test again before enabling overclocking or special display modes.
Laptop external monitor is not detected as G-SYNC
Laptop display outputs can be routed through the integrated GPU rather than directly through the NVIDIA GPU. A MUX switch, Advanced Optimus mode, USB-C implementation, or manufacturer-specific port wiring may determine whether G-SYNC appears. Check the laptop maker’s documentation for the exact port and GPU-routing mode, then test a direct DisplayPort-compatible output where possible. There is no universal laptop menu path.
Multiple monitors behave inconsistently
Select the correct display in Set up G-SYNC and make it the primary monitor. If the option is missing or behavior changes between games, temporarily disconnect other displays. Borderless-windowed operation can also interact with Windows, overlays, and mixed-refresh-rate monitors differently from exclusive full-screen mode.
Should you buy a different monitor, cable, or GPU?
Do not buy hardware before checking the connection and monitor VRR setting. If you already have a compatible NVIDIA GPU, a missing G-SYNC option is more likely to be caused by display routing, a disabled monitor feature, an incompatible port, an intermediary device, a driver problem, or an uncertified display.
- Choosing a monitor: prefer an officially validated G-SYNC Compatible model if predictable setup matters. Also check resolution, refresh rate, VRR range, HDR quality, firmware support, and whether VRR works over the port you plan to use.
- Choosing hardware G-SYNC: a G-SYNC or G-SYNC ULTIMATE monitor may suit enthusiasts who value a validated display path, variable overdrive, or premium HDR features. The module does not automatically make every panel’s image quality better; resolution, panel quality, HDR implementation, and refresh rate still matter.
- Choosing a GPU: upgrade only if the existing card lacks the relevant compatibility or cannot drive the desired resolution and refresh rate. NVIDIA’s product and marketplace pages include current generations, but announced MSRP and product availability are not guaranteed street prices.
- Choosing a cable: buy the correct connector and bandwidth for the intended resolution and refresh rate. A compliant cable is more important than premium branding.
For drivers and first-party management software, use NVIDIA’s NVIDIA App and official driver download page. A paid PC-optimization service or third-party driver utility is not necessary for this setup.
Windows Errors? Fix Them Before They Spread
Repair common Windows errors and clear accumulated junk for a smoother, more stable PC - no reinstall needed.Free scan · no reinstallCrashes, No Sound, or Screen Glitches?
Random freezes, missing sound and display glitches usually trace back to one bad driver. Find and replace yours safely.Free scan · under a minuteOptional game-level tuning
Once G-SYNC works in a basic full-screen test, use Manage 3D settings → Program Settings to configure individual games. You can then decide whether a game should use G-SYNC behavior globally or have its own setting.
Frame-rate limits and V-SYNC settings can help keep rendering within the monitor’s VRR range, but they involve trade-offs between latency, tearing protection, and performance. Configure them for the particular game and display rather than applying a universal recommendation.
Quick Recap
Product prices and availability are accurate as of the date/time indicated and are subject to change. Any price and availability information displayed on Amazon at the time of purchase will apply.




