Free tools Windows power users keep installed
One-click scans. No signup required.
The safest way to find missable content in Tales of Eternia Remastered is to turn on every destination indicator and treat the Katrine-and-Pierre storyline as a hard deadline. Open Menu > Custom > Destination Icons and enable the yellow objective markers, star markers for valuable items, hourglasses for time-limited events, and blue exclamation marks for events that teach artes. Before the party crosses Mt. Farlos, finish all six Katrine and Pierre encounters. After the story returns from Celestia, visit Inferia’s Royal Observatory to see the result and collect the associated reward.
There is not yet a single authoritative remaster-specific catalogue listing every missable chest, recipe, title, monster-book entry, or brief NPC scene. The indicators are therefore your broadest in-game safety net, while the Katrine/Pierre route is the clearest documented chain with a firm cutoff. Use a manual save before major story transitions, inspect towns after each new destination opens, and do not assume that New Game+ will restore a missed event.
As an Amazon Associate I earn from qualifying purchases.
What the remaster marks for you
The remaster adds a set of map and destination aids that make optional content easier to spot than in the original release. They are not merely navigation conveniences: one of the icons specifically identifies events whose availability is limited.
The Tool Desk
Outbyte PC Repair FREEClear out junk files and repair common Windows errorsFree Scan →Outbyte Driver Updater FREEFix the driver behind crashes, sound loss and screen glitchesFind Drivers →| Icon | What it indicates | How to use it |
|---|---|---|
| Yellow destination icon | The current main-story objective | Use it to distinguish the required route from optional stops. Clear nearby optional markers before following the yellow marker through a major gate. |
| Star | A valuable-item location | Visit the marked location before leaving a town, dungeon, or route. A star is the remaster’s prompt to investigate an item rather than continue directly. |
| Hourglass | An event with limited availability | Prioritize it before advancing the story. Bandai Namco’s Japanese description says hourglasses cover events tied to titles and items whose acquisition period is limited. |
| Blue exclamation mark | An event that teaches a new arte | Speak to the marked character or investigate the marked spot before moving on so the new technique is not overlooked. |
Turn the indicators on
- Open the in-game menu.
- Select Custom.
- Choose Destination Icons.
- Enable the yellow, star, hourglass, and blue-exclamation categories you want displayed.
- Recheck the setting after loading a different save. Keeping all categories visible is the safest choice for a first completion run.
The icons do not replace exploration. A marker tells you that the game considers a destination important, but it does not tell you whether the reward is a title, an item, an arte lesson, or a scene. Read the context of each marker and make a manual save before a story step that could close access.
#1 Best Overall

- BLUE LIGHT BLOCKING GLASSES: Our blue light glasses for women boast UV400 protection, blocking harmful blue rays from computer screens. With these bluelight glasses women, you can enjoy gaming, reading, or watching TV with no worries of eye strain.
- EYE RELIEF: Our blue light glasses are engineered to reduce blurry vision or strain caused by prolonged screen time. These womens blue light glasses aid in better sleep by preventing blue light from disrupting your natural sleep cycle, helping you fall asleep faster and enjoy a more restful night's sleep, making them the perfect christmas present.
- COMFORTABLE: Crafted from durable material, our trendy blue light glasses for woman or blue light glasses men ensure long-lasting comfort. The high-transmittance lenses accessories, gamer gifts for men, help keep your eyes relaxed. Perfect stocking stuffers, gifts for gamers men, christmas gifts for men, halloween costumes.
- LIGHTWEIGHT: These clear blue light glasses feature a lightweight frame, meaning they’ll stay comfy for long-term wear. Perfect as blue blockers glasses for women or mens blue light glasses, these non-prescription fake glasses for men can be worn throughout the day. The blue light blocking glasses women feature polycarbonate HD lenses, which are anti-reflective and restore true color.
- WORRY-FREE PURCHASE: If you experience any issues, our support team is ready to assist you quickly. These are the perfect costume glasses for cosplay dressing up.
The best-documented missable chain: Katrine and Pierre
Katrine and Pierre’s storyline consists of six encounters spread across Inferia and the later story route. Completing every encounter produces the good ending for this subplot and gives Farah the title 愛のネゴシエーター, rendered in the remaster guide as Love Negotiator. Missing one or more encounters changes the ending and prevents that title reward.
The chain’s practical deadline is crossing Mt. Farlos. The remaster guide places the six required conversations before that crossing, then directs you to Inferia’s Royal Observatory after the party returns from Celestia. Treat Mt. Farlos as your point of no return even if an icon remains elsewhere on the map.
Six-step Katrine and Pierre checklist
Follow this order when possible. Two middle steps can be swapped, but the opening Mintche conversation and the later Regulus Dojo visit are tied to specific story progress.
1. Mintche: start the chain at the exercise field
In Mintche, go to the exercise field near the university entrance and trigger the opening conversation. This is the first encounter in the sequence. Do it as soon as the area is available rather than assuming that reaching the university automatically starts the event.
- Location: Mintche exercise field, near the university entrance.
- Action: Walk into the conversation trigger and speak with the characters.
- Checkpoint: Make a manual save after the scene so you have a clear record that the chain has begun.
2. Morle: help at the food shop
In Morle, visit the food shop and speak with Katrine. The encounter involves helping her with directions. Complete the conversation rather than simply entering and leaving the shop; the interaction is the second progression point.
Rank #2
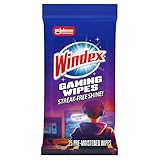
- WINDEX GAMING WIPES: effortlessly clean all your gaming gear and gaming electronics in one easy step with our new Windex Gaming Wipes
- AMMONIA FREE: our ammonia-free formula is safe to use on all of your favorite gaming equipment like consoles, headsets, controllers, screens, keyboards, and more
- PRE-MOISTENED WIPES: each wipe instantly removes dust, dirt, and stubborn smudges and fingerprints leaving a streak-free shine
- ANTI-STATIC: great for cleaning and wiping down your gaming gear and electronics leaving behind no visible residue
- COMPACT RESEALABLE PACKAGE: store your pack of Windex Gaming Wipes anywhere in your home for whenever a quick and easy wipedown is needed
- Location: Morle food shop.
- Action: Talk to Katrine and finish the directions exchange.
- Checkpoint: Confirm that the dialogue has concluded before leaving Morle.
3. Regular ship from Inferia Harbor: dining-area encounter
After clearing the Forest of Temptation, board the regular ship from Inferia Harbor. Find Katrine in the ship’s dining area and speak with her. This is not the same as using a ship merely as transportation: you must enter the dining area and trigger the conversation.
- Story requirement: The Forest of Temptation must be cleared.
- Boarding point: Inferia Harbor, regular ship.
- Interaction point: Dining area.
4. Barole: bookstore conversation
In Barole, go to the bookstore and speak with Katrine. The remaster guide states that the ship encounter and the Barole bookstore encounter may be completed in either order, so a missed order between those two locations does not by itself invalidate the chain.
Do these 3 things before closing this tab:
1Scan for outdated or missing drivers - takes under a minute2Clear out junk files and repair common Windows errors3Fix the driver behind crashes, sound loss and screen glitches- Location: Barole bookstore.
- Action: Speak with Katrine and finish the scene.
- Order note: This step and the regular-ship step are interchangeable, provided both are completed before Mt. Farlos.
5. Chambard: armor-shop fitting room
In Chambard, enter the armor shop and check the fitting room. Speak with Katrine there to register the fifth encounter. The fitting-room location is easy to miss if you only visit the shop counter, so search the interior before leaving town.
- Location: Chambard armor shop, fitting room.
- Action: Locate Katrine and complete the conversation.
- Timing: Finish it before crossing Mt. Farlos.
6. Regulus Dojo: resolve the final encounter
After clearing the Valley of Fire Spirits, visit Regulus Dojo and resolve the Katrine and Pierre encounter there. This is the sixth and final pre-Celestia event in the chain.
- Story requirement: The Valley of Fire Spirits must be cleared.
- Location: Regulus Dojo.
- Action: Enter the dojo and complete the encounter.
After Celestia: collect the outcome
When the story returns from Celestia, go to Inferia’s Royal Observatory. The scene there reflects how many of the six encounters you completed. Finishing all six gives the good ending and Farah’s Love Negotiator title; an incomplete route changes the outcome and does not award the title.
Rank #3

- Ergonomic & Adjustable Design: Fight "text neck" and improve your posture. Designed for comfort, it offers an adjustable height (7.1in-8.5in) (1.4in adjustable range) and angle (5°-85°) Please note: cell phone stand is only 9 inches tall—the length of a standard pencil
- Without blocking subtitles Perfect for office desk Tiktok Face Time Zoom video—this is the ultimate kitchen desk essential for phones! Perfect viewing experience while reducing neck back strain, A must-have for gamers streamers desk, and anyone who values both style and support!
- Sleek & Stable Design fits Otterbox Case: Say goodbye to bent cables, tangles, and tip-overs! LISEN’s stylish adjustable desk phone holder features a built-in charging hole and smart cable management, keeping your phone secure and your workspace clutter-free cool gadgets for men
- ANTI-SLIP DESIGN free hands: The under 10.00 items easy gadgets back and the bottom of this kitchen essentials for women are fully covered by anti-skid silicone, which LISEN stand up desk decor can provide maximum protection device from any scratches and slides
- Your Perfect Viewing Companion:If your product arrives damaged or breaks within 365 days, reach out to LISEN for a quick and hassle-free solution. Struggling with assembly, like tightening the screw? We’ve got your back! Your experience matters to us. (Product including: phone Holder stand*1, screw*1, hexagon screwdriver*1, specification*1)
When to stop and make a safety save
Use the following save routine if you want a reliable completion file:
- At the start of each new town: Create a rotating manual save before exploring. This gives you a recovery point if an hourglass event disappears after story progress.
- Before a dungeon clear: Save before entering a dungeon whose completion unlocks a later encounter, such as the Forest of Temptation or Valley of Fire Spirits.
- Before Mt. Farlos: Stop the main route and verify all six Katrine/Pierre locations. This is the most important checkpoint in the known missable-content route.
- Before leaving Celestia’s sequence: Keep a separate save so you can check the Royal Observatory outcome without overwriting your pre-return file.
- After the Observatory scene: Save again if you received the ending and title you wanted.
Keep at least two alternating manual saves rather than relying only on autosaves. The purpose is recovery: if a conversation did not trigger, you can reload a point before the relevant story transition and try the location again.
How to use stars, hourglasses and blue exclamation marks in practice
Prioritize hourglasses over ordinary exploration
An hourglass is the strongest warning in the remaster’s interface because it identifies an event whose availability is limited. Visit the location before following the next major yellow objective. If several hourglasses are visible, handle the one in the current town or reachable route first, then revisit the map after every major story scene.
Clear stars before changing regions
Star markers identify valuable-item locations, but the available evidence does not establish one universal list of every star’s contents or a complete remaster-specific chest inventory. Treat each star as a personal checklist item: visit it, confirm the item interaction has completed, and only then move on. Do not infer that an unmarked chest is safe to ignore or that every marked item is permanently missable.
Use blue exclamation marks to build your artes set
Blue exclamation marks point to events that teach new artes. They are optional for story completion but important for a broader character and combat collection. Speak to every blue-marked event before leaving its area, particularly when a town is about to become inaccessible or the story is about to force travel.
Quick wins for a faster PC:
Repair Windows errors before they cause bigger problemsFix Now →Scan for outdated or missing drivers - takes under a minuteDriver Scan →Clear out junk files and repair common Windows errorsFree Scan →Rank #4

- Easy Installation: Our gaming lights have been designed to enhance your entertainment experience. Simply position the led light bar next to your TV or game console to create a game room environment with ease. They come with USB power and a 60 inch cord for direct mounting and mobility
- Audio Syncing & Extensive Mode: The built-in high-sensitivity music sensor allows you to sync the TV led lights to your favorite music. Lights react and move to the beat of music, film and game audio, creating an incredible immersive sound and light experience – and all without the need for an additional hub. You can choose from 64+ patterns, including strobe, illusion, jump, energy, gradient, running, chasing, fluttering mode etc. Each mode can be applied to different scenes
- 64+ Chasing IC+RGB & W Effect: The independent control design of IC+RGB and white all-in-one multifunctional rgbw led bar lights monitor backlight allows you to easily switch the led lights for desk between IC+RGB and white to enjoy a variety of lighting effects, you can choose white lighting mode with high brightness for better illumination when working, etc. Choose IC+RGB lighting mode when you need to create an entertaining atmosphere for the light show, 16 million colours of Color changing rgb light bar let you dance to the beat and create a dynamic party atmosphere
- Dynamic and Dimmable Lights: 1%-full brightness free brightness adjustment gives you the flexibility to adjust dimmable led light bar for room decorations or a variety of occasions
- USB Powered: USB light bars for room can be powered by powernank, usb charger, TV, Monitor, laptop PC mainframe, making behind TV led lighting bar easy to install in any location.TV led lights are powered by the TV usb interface / PC mainframe, can be turned on/off synchronously with TV / PC
Keep the yellow marker as the final step
The yellow icon shows where the main objective is. A useful routine is to clear hourglasses, stars, and blue exclamations in the current area, make a manual save, and then follow the yellow marker. This order reduces the chance that a story advance closes an optional event.
Optional content that is not the same as a one-time quest
Not every completionist target has a permanent missable deadline. The official remaster information distinguishes several replay and challenge features from limited-period events.
| Target | Timing or access | Reward or purpose | Indicator or carry-over information |
|---|---|---|---|
| Katrine and Pierre chain | Six encounters before crossing Mt. Farlos; outcome checked after returning from Celestia | Good ending and Farah’s Love Negotiator title when all six are completed | Use hourglass indicators and manual saves; the available guide does not state that a missed encounter can be restored by New Game+. |
| Valuable-item events | Timing varies by location; the remaster marks relevant destinations with stars | Item acquisition | Star-marked locations are trackable in the interface; no complete published inventory is established. |
| Arte-teaching events | Timing varies by event | New artes | Blue exclamation icons identify them; the evidence does not provide a complete list of every such event. |
| New Game+ carry-over options | Available when starting a new playthrough | Selected progress or bonuses can carry forward according to the remaster’s options | The official page documents carry-over choices but does not establish that every missed side quest automatically becomes available. |
| Nereid’s Labyrinth | Earlier access is available in the remaster | Optional dungeon and challenge content | This is an access change, not evidence of a one-time event. |
| Mania difficulty | Available on the first playthrough | Higher-difficulty challenge | It is a playthrough option rather than a missable item or scene. |
| Unknown difficulty | Available on the second playthrough | Additional difficulty challenge | Its second-playthrough requirement is separate from the Katrine/Pierre deadline. |
| Inferia Coliseum historical battles | Repeatable | Combat challenges based on historical battles | Repeatability means a single missed visit is not equivalent to missing a limited-period event. |
New Game+ is therefore best viewed as a way to pursue replay bonuses and challenge access, not as a guarantee that a missed title or side-quest scene will be retroactively awarded. If a specific title matters to you, complete its hourglass-marked event in the current playthrough and verify the result in your save.
Independent reader supportYour contribution helps us test, update, and keep practical guides available for everyone.A region-by-region completion routine
When entering a town
- Open the map or destination display and note every non-yellow marker.
- Visit hourglass locations first.
- Check stars in shops, side rooms, inns, and other accessible interiors.
- Speak with blue-exclamation characters before leaving.
- Save in a rotating slot after all visible markers are cleared.
When a dungeon unlocks a new town or scene
- Record the dungeon’s completion in your own checklist.
- Revisit previously visited towns if the game exposes new destinations or markers.
- For the Katrine/Pierre chain, use the Forest of Temptation and Valley of Fire Spirits clears as reminders to complete the ship and Regulus Dojo steps when they become available.
- Do not cross Mt. Farlos until the six named encounters are checked off.
When an event seems absent
- Confirm that you are in the exact sub-location: the dining area, bookstore, fitting room, exercise field, food shop, or dojo—not merely the surrounding town.
- Check the story prerequisite for that encounter.
- Leave and re-enter the area after completing the prerequisite scene.
- Reload the most recent manual save made before the relevant story transition.
- If the event still does not appear, continue from an earlier rotating save rather than overwriting every slot.
These checks address the most common practical mistake—being in the right town but the wrong room—without claiming that every absent marker is a bug.
What is still unknown about the full missable list
The currently documented material does not publish a definitive count of all missable items, side quests, titles, monster-book entries, recipes, chests, or short NPC events in the remaster. That means a guide claiming a precise total would be presenting information not established by the available official and guide evidence.
Best Value

- Compatible with Wide Screens - To ensure compatibility with the dual monitor mount, your each monitor must meet three conditions at the same time: First, computer screens size range: 13 to 32 inches. Second, screen weight range: 4.4 to 19.8 lbs. Third, the back of the monitor screen must have VESA mounting holes with a pitch of 75x75mm or 100x100mm.
- Regarding the compatibility with desks - Your desk must meet three conditions at the same time: First, desk material: Only wooden desks are recommended, plastic or glass desks cannot be used. Second, desk thickness range: 0.59" - 3.54". Third, the bottom of the desk should not have any cross beams or panels, as this will interfere with installation. We recommend carefully checking that your desk and monitors meets all above conditions before purchasing.
- Dual C-Clamp Hold - Worried your dual monitors might wobble or slip? Our upgraded base uses a larger platform plus a dual C-clamp structure to lock the dual monitor arm firmly to your desk. Each arm safely keeps your screens steady while you type, click and game—no shaking, no sliding, just a clean and secure setup you can trust every day. It also provides Grommet Mounting installation choice, both options ensure stable and secure fixation for your 0.59" - 3.54" desk.
- Full-Motion Adjustment For Comfortable View - Pull the screen closer when you’re deep in a spreadsheet, push it back to watch videos, or rotate to portrait for coding — moving everything smoothly with just one hand. The monitor stand offers +85°/-50° tilt, ±90° swivel and 360° rotation. Raise your monitor up to 15.75″ to support a healthy sitting posture. Whether you’re working from home, gaming through the night, or switching between video calls and documents, getting the screens to your natural line of sight helps relieve neck, shoulder and back strain so you can stay focused longer with less fatigue.
- Keep Your Desk Organized: By lifting both screens off the desktop, this dual monitor stand opens up valuable space for your keyboard, notebook, docking station or a simple, clutter-free work area. Built-in cable management guides wires along the arms, keeping cords out of sight and out of the way. Enjoy a tidy, modern workstation that looks as good as it feels to use.
For a first run, the defensible strategy is to combine the game’s own markers with conservative saving:
- Assume an hourglass event can close when the story advances.
- Investigate every star before leaving its region.
- Complete every blue-exclamation event while its destination is available.
- Use the six-location Katrine/Pierre checklist as a mandatory pre-Mt.-Farlos audit.
- Keep a separate save before major gates and before the post-Celestia Observatory visit.
This approach catches the documented limited-period chain and gives you the best available coverage for other optional content without inventing an unsupported master list.
Quick pre-Mt. Farlos audit
Before crossing Mt. Farlos, pause the main story and answer “yes” to every line:
- Mintche exercise field near the university entrance completed.
- Morle food-shop directions conversation completed.
- Regular ship from Inferia Harbor, dining-area conversation completed after the Forest of Temptation.
- Barole bookstore conversation completed.
- Chambard armor-shop fitting-room conversation completed.
- Regulus Dojo encounter completed after the Valley of Fire Spirits.
- All visible hourglass events in the current route completed.
- All reachable star and blue-exclamation destinations checked.
- A separate manual save exists before the mountain crossing.
If any Katrine/Pierre line is unchecked, do not advance through Mt. Farlos. The ship and Barole steps may be done in either order, but all six must be finished before the cutoff.
What to do after returning from Celestia
Once the story returns from Celestia, travel to Inferia’s Royal Observatory. This visit is the resolution point for the Katrine and Pierre chain, not an optional epilogue you can safely postpone indefinitely. The scene reflects the number of completed encounters. A full six-step route produces the good ending and Farah’s Love Negotiator title; fewer encounters produce a different outcome and no title reward.
After viewing the Observatory scene, preserve the save if the result matches your goal. If it does not, reload the pre-Mt.-Farlos or pre-return save and use the checklist to identify the missing location.
Quick Recap
Product prices and availability are accurate as of the date/time indicated and are subject to change. Any price and availability information displayed on Amazon at the time of purchase will apply.
What’s actually slowing this PC down?
Pick the symptom - the matching free tool is one click away.




