To make a playermodel in Garry’s Mod, create or convert a model for the Source engine, compile it with a .qc file into .mdl, .vvd, and .vtx files, place the model and materials in a correctly structured addon, and test it in GMod. A usable player model also needs a compatible skeleton, animations or animation references, hitboxes, ragdoll data, procedural-bone data when required, and level-of-detail settings.
What you are actually making
A GMod playermodel is not a Blender file. It is a compiled Source model. The finished asset normally includes:
As an Amazon Associate I earn from qualifying purchases.
| File | Purpose |
|---|---|
.smd |
Reference geometry, physics geometry, or animation data used during compilation. |
.qc |
Compiler instructions: model paths, materials, bones, hitboxes, physics, animations, and other settings. |
.mdl |
Main compiled model file. |
.vvd |
Vertex, normal, tangent, UV, and bone-weight data. |
.vtx |
Hardware-optimized mesh, material, and LOD data. A DirectX 9 build normally includes .dx90.vtx. |
.phy |
Collision and ragdoll physics data, when the model uses it. |
.vtf |
Compiled texture data. |
.vmt |
Material definition and shader settings that reference textures. |
The model compiler produces the Source files from your mesh, animations, physics mesh, textures, and QC instructions. The editable source assets may be made in Blender or another 3D package, but GMod loads the compiled Source output, not the project file.
Do these 3 things before closing this tab:
1Repair Windows errors before they cause bigger problems2Fix the driver behind crashes, sound loss and screen glitches3Clear out junk files and repair common Windows errorsFacepunch’s Source model file-type reference explains the role of each format.
#1 Best Overall

- HERO Gaming Sensor: Next generation HERO mouse sensor delivers precision tracking up to 25600 DPI with zero smoothing, filtering or acceleration
- 11 programmable buttons and dual mode hyper-fast scroll wheel: The Logitech wired gaming mouse gives you fully customizable control over your gameplay
- Adjustable weights: Match your playing style. Arrange up to five 3.6 g weights for a personalized weight and balance configuration
- LIGHTSYNC technology: Logitech G LIGHTSYNC technology provides fully customizable RGB lighting that can also synchronize with your gaming (requires Logitech Gaming Software)
- Mechanical Switch Button Tensioning: A metal spring tensioning system and metal pivot hinges are built into left and right computer gaming mouse buttons for a crisp, clean click feel with rapid click feedback
Plan the model before compiling
Decide whether you are making a general Sandbox player model or one for a restricted gamemode. A general player model needs the activities used by the normal player animation system. A custom skeleton is possible, but then the model must provide its own animations and the activities that the gamemode expects. Using the conventional ValveBiped skeleton is usually simpler because it is designed around the existing player animation setup; it is not, however, an absolute engine requirement.
Your model should also be prepared for:
- Correct scale and orientation.
- A complete, consistently named skeleton.
- Bone weights that allow the body, hands, and limbs to deform correctly.
- Separate or clearly assigned material groups.
- A physics mesh if you want a ragdoll.
- Level-of-detail meshes or settings for performance.
- Animations, or animation data compatible with the activities your target gamemode uses.
LOD data is not merely an optional polish step for a production player model. The official player-model compilation documentation marks LOD settings as an important part of the compilation setup.
Build the QC file
The QC file tells the Source compiler where to find the model data and how to turn it into a player model. A player-model QC must include the standard bone, ragdoll, hitbox, and inverse-kinematics definitions:
What’s actually slowing this PC down?
Pick the symptom - the matching free tool is one click away.
$include "commonbones.qci"
$include "ragdoll.qci"
$include "hitbox.qci"
$include "standardikchains.qci"
Use the male or female versions of commonbones.qci and ragdoll.qci as appropriate for the skeleton. hitbox.qci is always the male version.
A simplified QC outline might look like this:
$modelname "player/example/example.mdl"
$body "Body" "example_reference.smd"
$cdmaterials "models/player/example"

$include "commonbones.qci"
$include "ragdoll.qci"
$include "hitbox.qci"
$include "standardikchains.qci"

// Add animation and activity definitions here.
// Add LOD settings here.
// Add a $collisionmodel when the model has physics data.
This is an outline rather than a complete universal QC: the exact animation, physics, material, bone, and LOD commands depend on the asset and the compiler setup.
Model and material paths matter
The $modelname value determines where the compiled .mdl is written and therefore the path used by Lua. The $cdmaterials value tells the engine where to search for the model’s .vmt files. Keep these paths consistent with the final addon layout.
For example, this model path:
$modelname "player/example/example.mdl"should eventually produce files under:
models/player/example/example.mdl
models/player/example/example.vvd
models/player/example/example.dx90.vtx
Its materials would normally be placed under a matching materials directory, such as:
Outdated Drivers Are Slowing You Down
One free scan finds every outdated or missing driver and matches the right update for your exact hardware.Free scan · exact hardware matchPC Slower Than It Used to Be?
A free scan shows the junk files, broken settings and background clutter dragging Windows down - then fixes them in one click.Free scan · Windows 10 & 11Rank #2

- The next-generation optical HERO sensor delivers incredible performance and up to 10x the power efficiency over previous generations, with 400 IPS precision and up to 12,000 DPI sensitivity
- Ultra-fast LIGHTSPEED wireless technology gives you a lag-free gaming experience, delivering incredible responsiveness and reliability with 1 ms report rate for competition-level performance
- G305 wireless mouse boasts an incredible 250 hours of continuous gameplay on just 1 AA battery; switch to Endurance mode via Logitech G HUB software and extend battery life up to 9 months
- Wireless does not have to mean heavy, G305 lightweight mouse provides high maneuverability coming in at only 3.4 oz thanks to efficient lightweight mechanical design and ultra-efficient battery usage
- The durable, compact design with built-in nano receiver storage makes G305 not just a great portable desktop mouse, but also a great laptop travel companion, use with a gaming laptop and play anywhere
materials/models/player/example/example.vmt
materials/models/player/example/example.vtf
Helper bones and procedural bones
If the model has helper bones—for example, wrist helpers—and those bones are correctly weight-mapped, the QC also needs a $proceduralbones line pointing to the appropriate .vrd file. Omitting that procedural-bone data can leave helper bones behaving incorrectly even when the mesh and weights appear correct.
Compile the model
Compile the QC with a Source model compiler compatible with the GMod workflow you are using. The compiler should generate the model files in the location specified by $modelname. Check the compiler log rather than assuming that a successful-looking output folder means the model is valid.
Before moving on, verify that:
- The expected
.mdl,.vvd, and.vtxfiles exist. - The relevant
.dx90.vtxfile was generated. - A
.phyfile exists if the model requires ragdoll or collision physics. - The model’s
.vmtfiles point to valid.vtftextures. - The compiled paths match the paths in your addon.
- The QC log contains no missing-bone, missing-animation, missing-material, or invalid-physics errors.
Use the correct addon layout
For local testing, put an unpacked addon folder in:
<Steam installation>/steamapps/common/GarrysMod/garrysmod/addons/A model-only addon can be organized like this:
my_playermodel/
├── addon.json
├── models/
│   └── player/
│       └── example/
│           ├── example.mdl
│           ├── example.vvd
│           ├── example.dx90.vtx
│           └── example.phy
└── materials/
    └── models/
        └── player/
            └── example/
                ├── example.vmt
                └── example.vtf
Use the folder name sound, not sounds, if the addon also contains audio. Current accepted addon folders include models, materials, lua, gamemodes, maps, particles, scenes, sound, and several other documented content directories.
Modern Workshop addons use addon.json. The older info.txt and addon.txt files are obsolete and are not needed in the addon folder.
{
  "title": "Example Playermodel",
  "type": "model",
  "tags": ["roleplay", "realism"],
  "ignore": ["*.psd", "*.vcproj", "*.svn*"]
}
The documented type values include model, npc, entity, ServerContent, gamemode, map, weapon, vehicle, tool, and effects. An addon can have at most two tags.
Test it in GMod
Launch GMod with the unpacked addon installed and test the compiled model in-game. The current official Spawn Menu documentation confirms that the menu opens by holding Q, or by using the key assigned in Game Options. Do not rely on old instructions that claim every current installation has a universal Q menu → Options → Player Model path; menu layout and gamemode behavior can differ.
Rank #3

- ICONIC ERGONOMIC DESIGN WITH THUMB REST — PC gaming mouse favored by millions worldwide with a form factor that perfectly supports the hand while its buttons are optimally positioned for quick and easy access
- 11 PROGRAMMABLE BUTTONS — Assign macros and secondary functions across 11 programmable buttons to execute essential actions like push-to-talk, ping, and more
- HYPERSCROLL TILT WHEEL — Speed through content with a scroll wheel that free-spins until its stopped or switch to tactile mode for more precision and satisfying feedback that’s ideal for cycling through weapons or skills
- 11 RAZER CHROMA RGB LIGHTING ZONES — Customize each zone from over 16.8 million colors and countless lighting effects, all while it reacts dynamically with over 150 Chroma integrated games
- OPTICAL MOUSE SWITCHES GEN 2 — With zero unintended misclicks these switches provide crisp, responsive execution at a blistering 0.2ms actuation speed for up to 70 million clicks
For deterministic testing, assign the model from a gamemode:
The Tool Desk
Outbyte Driver Updater FREEFix the driver behind crashes, sound loss and screen glitchesFind Drivers →Outbyte PC Repair FREEClear out junk files and repair common Windows errorsFree Scan →function GM:PlayerSetModel(ply)
ply:SetModel("models/player/example/example.mdl")
endGM:PlayerSetModel is called when a player spawns and the gamemode chooses a model. A custom GM:PlayerSpawn can prevent the expected behavior if it replaces the base implementation without calling self.BaseClass.PlayerSpawn or explicitly invoking the relevant hook.
Check the model from first person and third person, then test spawning, walking, running, crouching, jumping, swimming if relevant, weapon holding, death, ragdoll behavior, and camera clipping. Look for stretched limbs, invisible materials, incorrect hand position, broken IK, missing hitboxes, and an oversized or undersized collision shape.
Make the hands match
Viewmodel hands are separate from the world player model. A custom body does not automatically provide matching first-person hands. Use player_manager.AddValidHands to associate a hands definition with the player model. If no matching hands definition exists, player_manager.TranslatePlayerHands returns citizen hands by default.
This means a model can look correct in third person while still displaying default citizen hands in first person. Treat hands as a separate compatibility task.
Register or assign the model in Lua
player_manager.AddValidModel associates a simplified name with a model path:
player_manager.AddValidModel(
    "Example",
    "models/player/example/example.mdl"
)
However, the current API documentation describes player_manager.AddValidModel as “Only used internally.” It should not be treated as verified documentation for adding a model to every current Sandbox player-model selection interface. If a gamemode controls model selection, use that gamemode’s supported registration or selection method, or assign the model through GM:PlayerSetModel.
Rank #4
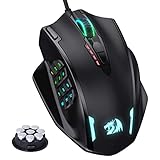
- Professional Gaming Mouse - Redragon M908 optical gaming mouse is designed with up to 12400 DPI, 5 adjustable DPI levels (500/1000/2000/3000/6200 DPI) meet your multiple needs, either for daily work or gaming. DPI can be adjusted freely by ±100 from 200 to 12400 via software. 1000 Hz polling rate, 30G acceleration and high-precision Pixart PAW3327 Sensor giving you a greater edge over your competition.
- RGB Backlight & Programmable Buttons - 16.8 million RGB LED color options (LED Backlight can be disabled). 18 programmable buttons, 5 memory profiles each with a dedicated light color for quick identification. Comes with 8-piece weight tuning set (2.4g x8), easy to change the weight to suit your games.
- Comfort & Precision At Your Hands - Redragon M908 gaming mouse is an essential computer accessory for die-hard with its aggressive design for hands! You will be amazed by the unmatched comfort, lethal accuracy and killer precision of our durable, desktop and laptop pro gaming mouse!
- High-end Design - Redragon M908 Mouse features 6 buttons and 12 MMO programmable side buttons. Durable smooth TEFLON feet pads for ultimate gaming control. 6ft braided-fiber cable with gold-plated USB connector ensures greater durability.
- Die-hard Players Choice - Whether you are targeting, aiming, slashing or attacking, a professional gaming mouse is your basic weapon! The mouse will be your ideal partner. Compatible with Windows 2000/ME/XP/03/VISTA/7/8/10 system for programmable using and Mac OS for normal using.
Distribute it through the Workshop
Test the unpacked addon first. When it works, package the addon with GMad. On Windows, gmad.exe is in:
<Steam location>/steamapps/common/garrysmod/binRun:
gmad.exe create -folder "<FULL PATH TO ADDON FOLDER>" -out "<FULL PATH TO OUTPUT .GMA FILE>"You can also drag the addon folder onto GMad. Do not move GMad out of the game’s bin directory.
GMad enforces a file whitelist. Restricted files include .dll, .exe, .htm, .html, .css, and .js. Ordinary .txt files are also restricted except for vehicle scripts. A forbidden file, wrong input folder, or incorrect structure can produce:
Files does not pass whitelistUpload the resulting .gma with gmpublish.exe. The documented Windows drag-and-drop batch command is:
"C:Program Files (x86)SteamsteamappscommonGarrysModbingmpublish.exe" create -addon "%~dpn1.gma" -icon "%~dpn1.jpg"The .gma and icon must have the same base filename. The icon must be a 512×512 Baseline JPEG using 4:2:0 chroma. Progressive JPEG, PNG, and some 4:2:2 or 4:4:4 JPEG files can be rejected.
After uploading, open Garry’s Mod Workshop → My Shared Files and change the item’s visibility to Public if you want other users to find it.
Quick wins for a faster PC:
Clear out junk files and repair common Windows errorsFree Scan →Scan for outdated or missing drivers - takes under a minuteDriver Scan →Troubleshoot the common failures
Couldn't parse json
Check that addon.json exists at the addon root and is valid JSON. Remove comments, trailing commas, and improperly escaped characters.
Best Value

- Pentakill, 5 DPI Levels - Geared with 5 redefinable DPI levels (default as: 500/1000/2000/3000/4000), easy to switch between different game needs. Dedicated demand of DPI options between 500-8000 is also available to be processed by software.
- Any Button is Reassignable - 11 programmable buttons are all editable with customizable tactical keybinds in whatever game or work you are engaging. 1 rapid fire + 2 side macro buttons offer you a better gaming and working experience.
- Comfort Grip with Details - The skin-friendly frosted coating is the main comfort grip of the mouse surface, which offers you the most enjoyable fingerprint-free tactility. The left side equipped with rubber texture strengthened the friction and made the mouse easier to control.
- 5 Decent Backlit Modes - Turn the backlit on and make some kills in your gaming battlefield. The hyped dynamic RGB backlit vibe will never let you down when decorating your gaming space, it would be better with other Redragon accessories with lights on.
- Fatigue Killer with Ergonomic Design - Solid frame with a streamlined and general claw-grip design offers a satisfying and comfortable gaming experience with less fatigue even though after hours of use.
Compression Failed
The addon is too large or contains difficult-to-compress content. Oversized textures are a common cause. The official documentation notes that some video cards do not support 4096×4096 textures and lists 1024×1024 or 512×512 as usual working sizes. For texture-heavy addons, use DXT5 rather than uncompressed RGBA or BGRA where appropriate.
PublishWorkshopFile failed! (8)
This indicates invalid UTF-8 in addon.json. A batch file or command script that writes the JSON using the wrong character encoding is a common cause. Re-save the file as valid UTF-8 and avoid writing it through tools that silently use a legacy encoding.
PublishWorkshopFile failed! (9)
The icon is missing. Confirm that the icon exists, is next to the expected package, and has the same base filename as the .gma.
Recommended Free Tools
libsteam_api.so: cannot open shared object file: No such file or directory
On Linux, gmpublish cannot find the Steam API library. The official Workshop documentation lists copying libsteam_api.so from the game’s bin/ directory to /usr/lib/, or configuring LD_LIBRARY_PATH, as possible fixes.
Multiplayer distribution is a separate requirement
A model installed only on your computer is not automatically available to everyone on a multiplayer server. The server must provide or mount the model content so that other clients can download or access it. Otherwise, other players may see missing content, or the gamemode may select a fallback.
For a server addon, package the compiled model, materials, and any required hands or animation content together, publish or host that content through the server’s normal distribution setup, and test with a clean client that does not already have the files.
Practical completion checklist
- Compiled Source files exist:
.mdl,.vvd, and.vtx, normally including.dx90.vtx. - A
.phyfile exists when ragdoll or collision physics is needed. - Materials contain valid
.vmtand.vtffiles. $modelnameand$cdmaterialsmatch the final addon paths.- The QC includes the required bone, ragdoll, hitbox, and IK includes.
- The appropriate
$proceduralbonesentry is present for helper bones. - Animations and activities cover the target gamemode.
- LOD settings are included for a production model.
- The addon root contains valid
addon.json. - The unpacked addon works from the GMod
addons/folder. - First-person hands, third-person animation, ragdoll, and multiplayer distribution have been tested.
For the authoritative file, compilation, addon, and publishing details, consult Facepunch’s documentation for player-model compilation, important file types, Workshop addon creation, GM:PlayerSetModel, and player_manager.
Quick Recap
Product prices and availability are accurate as of the date/time indicated and are subject to change. Any price and availability information displayed on Amazon at the time of purchase will apply.




