What’s actually slowing this PC down?
Pick the symptom - the matching free tool is one click away.
To overclock a graphics card reliably, establish a stock baseline, update the driver, use the card maker’s automatic tuning where available, then raise the core and memory clocks separately in small steps. Test after every change, monitor temperature and artifacts, and immediately return to the last stable setting when something fails. A benchmark pass is not proof that every game is stable.
What overclocking actually changes
A graphics-card overclock raises one or more operating targets: the GPU core clock, VRAM clock, power limit, voltage, or fan behavior. It does not guarantee a particular frame-rate increase. The result depends on the GPU model, cooler, case airflow, power supply, driver, game engine, resolution, and whether your system is limited by the CPU, GPU power limit, temperature, or something else.
As an Amazon Associate I earn from qualifying purchases.
NVIDIA cards add another layer of complexity because GPU Boost already raises and lowers clock speeds dynamically. A manual overclock usually gives the card more clock-speed headroom rather than forcing one constant frequency. AMD and Intel cards also adjust behavior according to model-specific power, temperature, voltage, and firmware limits.
The sensible goal is not “the highest number that boots.” It is the highest repeatable setting that remains stable in the games and applications you actually use, at an acceptable temperature and noise level.
#1 Best Overall

- 2 x 92mm fans combined into one interface, can be connected to the motherboard's 3-pin or 4-pin interface and you only need to access one interface to run all the fans
- This cooling fan's total size is 7.36in(L) x 4.72in(W) x 1.18in(H), designed for most universal graphic card video card VGA cooling,just please check the size to make sure your pc has enough space
- D-type interface cable included four interfaces, three voltages: 5V, 7V and 12V; different voltages with different airflow, speed and noise. You can select the appropriate voltage interface to start the fan
- The double ball bearing has a service life of 65,000 hours, and the 7 blades produce strong airflow to keep the computer case cool
- packing list: 2 x 92mm fans (PCI bracket screwed), 1 x multi-voltage cable ,1 x mini screwdriver,1 x fixing screw
Before you overclock
1. Identify the exact graphics card
Record the GPU manufacturer, model, desktop or laptop status, cooling design, and current driver. A factory-overclocked board may already have less headroom than a reference-clocked model, while a compact card or laptop may be limited primarily by cooling.
Desktop and laptop controls are not interchangeable. Laptop firmware often restricts voltage, power, and fan adjustments. Intel specifically makes Arc overclocking available only on desktop Arc graphics; mobile Arc graphics cannot be overclocked. OEM desktops can also use locked firmware or proprietary cooling profiles.
2. Update the graphics driver first
Install the current driver through Windows Update or directly from NVIDIA, AMD, Intel, or the computer manufacturer. AMD provides an official Radeon driver download and auto-detect utility. Use the manufacturer’s driver channel rather than treating a third-party driver updater as equivalent.
Recommended Free Tools
Updating first gives you a known starting point. If a crash begins immediately after a driver update, do not assume the overclock is responsible: return to stock settings and investigate the driver separately.
3. Record a stock baseline
Before changing anything, run the same repeatable benchmark or game scene you will use later. Record:
- Average frame rate and 1% low frame rate, if your overlay or benchmark reports them
- GPU temperature and, where available, hotspot temperature
- GPU clock behavior, fan speed, and power draw
- Resolution, graphics preset, ray-tracing settings, frame-rate cap, and upscaling settings
- The benchmark score and the number of passes completed
Keep the test conditions identical. A higher score caused by a different resolution or a cooler room is not evidence that the overclock worked.
4. Prepare for a rollback
Keep the tuning utility’s Reset, Default, or Restore control visible and do not automatically apply an untested profile at Windows startup. Save your work and close unnecessary applications before running an automatic scanner or benchmark. Background tasks can change the result, and automatic scans may take roughly 10–20 minutes; MSI’s OC Scanner can take about 30 minutes.
Choose the right tuning tool
| GPU platform | Beginner starting point | Important limitation |
|---|---|---|
| NVIDIA GeForce | NVIDIA App automatic tuning in the Performance panel | GPU Boost remains dynamic; a scanner result still needs game testing. |
| AMD Radeon | AMD Adrenalin Performance Tuning, starting with Default or an automatic GPU preset | Available controls vary by Radeon generation and model. |
| Intel Arc | Intel Arc Control performance controls on a supported desktop Arc card | Mobile Arc graphics cannot be overclocked; avoid positive voltage offsets as a beginner. |
| Any supported desktop GPU | MSI Afterburner for manual controls or OC Scanner | Download it only from MSI or Guru3D. Avoid impersonating download sites and modified installers. |
NVIDIA GeForce: automatic tuning first
Open the NVIDIA App and select the Performance panel. Its automatic GPU-tuning feature tests the card, applies a tuning profile, and can perform additional checks periodically. The panel also exposes voltage, power, temperature, and fan targets for users who understand those controls.
Rank #2
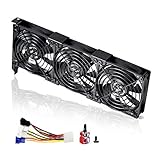
- 3 x 92mm fans combined into one interface, can be connected to the motherboard's 3-pin or 4-pin interface and you only need to access one interface to run all the fans
- This cooling fan's total size is 11in(L) x 4.72in(W) x 1.18in(H), designed for most universal graphic card video card VGA cooling,just please check the size to make sure your pc has enough space
- D-type interface cable included four interfaces, three voltages: 5V, 7V and 12V; different voltages with different airflow, speed and noise. You can select the appropriate voltage interface to start the fan
- The double ball bearing has a service life of 65,000 hours, and the 7 blades produce strong airflow to keep the computer case cool
- packing list: 3 x 92mm fans (PCI bracket screwed), 1 x multi-voltage cable ,1 x mini screwdriver,1 x fixing screw
For a first attempt, use automatic tuning rather than immediately changing voltage. When the scan finishes, record the resulting clock behavior and benchmark score, then test the games you actually play. A profile that passes the scanner is a starting point, not a universal stability certificate.
AMD Radeon: use Adrenalin’s staged controls
In AMD Software: Adrenalin Edition, open Performance and then Tuning. Begin with the Default setting or an automatic GPU-overclock preset if your model offers one. AMD’s tuning page may expose GPU frequency, voltage, VRAM frequency, fan behavior, and a power-limit control. The exact options depend on the Radeon generation.
Move to Custom only when you understand which control you are changing. Adrenalin supports global and per-game tuning profiles, so a demanding game can have a separate profile instead of forcing one compromise across every application.
The Tool Desk
Outbyte Driver Updater FREEScan for outdated or missing drivers - takes under a minuteDriver Scan →Outbyte PC Repair FREERepair Windows errors before they cause bigger problemsFix Now →Intel Arc: stay conservative with voltage
On a supported desktop Arc card, Intel Arc Control provides controls such as GPU Performance Boost, voltage offset, power limit, and temperature limit. Start with a modest Performance Boost or a cautious power and temperature adjustment. Intel warns that overvoltage can damage the GPU, shorten its lifespan, or reduce system stability, so a positive voltage offset should not be the default next step.
MSI Afterburner: manual control and OC Scanner
MSI Afterburner can adjust core and memory clocks, power and temperature targets, fan curves, and monitoring overlays. It also includes OC Scanner on supported configurations. If you use manual tuning, change one variable at a time and test after every change.
MSI’s documented starting procedure is to raise the core clock by approximately 20–30 MHz per step, apply the setting, and test it. For memory, increases of approximately 50–100 MHz per step are a starting point. These are procedures, not universal targets: a particular GPU may tolerate less, more, or a different effective clock behavior.
The conservative manual overclocking procedure
Step 1: Return to stock and run the baseline
Reset the tuning utility, reboot if necessary, and run your baseline benchmark. Save the score and sensor readings. Do not compare a tuned result with a stock result taken under different graphics settings.
Step 2: Set a reasonable power and temperature target
If your card exposes a power-limit control, a small increase can provide additional headroom when the GPU is power-limited. It can also increase power consumption, heat, and fan noise. Maximum slider values are not mandatory and are not automatically appropriate.
Rank #3
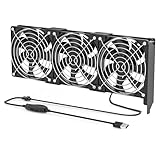
- 【Durable & Compact Design】This cooling fan is built with high-quality materials for enhanced durability. Its compact size makes it easy to install in tight spaces, providing reliable active cooling for graphics cards or server components
- 【Broad Compatibility for High-Performance Hardware】Ideal for graphics cards and other server hardware that require additional cooling. Perfect for use in consumer chassis with limited airflow to improve system stability and performance
- 【Adjustable Fan Speed for Custom Airflow】With a speed range of 1500–3000 RPM, the fan allows you to fine-tune airflow based on your cooling needs. Whether you prioritize silent operation or maximum cooling, this fan gives you full control
- Flexible Power Options with USB & 4-Pin Support】Comes with a USB to 4-PIN PWM cable for easy 12V power connection. The fan can be turned on or off manually, offering flexible control
- 【Complete Kit, Ready to Install】Includes 1 x cooling fan, 1 x USB to 4-PIN cable, and 1 x mounting screw. Everything you need for a quick and hassle-free installation—no additional parts required
Set a temperature target that remains within the card’s configured limits. Do not copy a universal “safe temperature” from a different GPU. Temperature limits depend on architecture, board design, firmware, cooler, ambient temperature, and whether the reading is GPU edge temperature or hotspot temperature.
Step 3: Tune the core clock first
- Increase the core clock by a small increment. With Afterburner, approximately 20–30 MHz is a conservative starting step.
- Apply the setting.
- Run a repeatable benchmark or demanding game test.
- Watch the image, frame rate, clock behavior, temperature, fan speed, and power.
- Repeat only if the result remains stable and the temperature and noise are acceptable.
Stop at the first sign of trouble. Warning signs include a driver reset, application crash, black screen, freeze, flickering, corrupted geometry, colored speckles, missing textures, or a benchmark score that becomes lower despite a higher reported clock.
Step 4: Back down instead of adding voltage
When an increment fails, return to the last stable value and reduce the failed setting slightly. Do not immediately add voltage to rescue an unstable beginner overclock. A lower clock at stock or reduced voltage is generally a better result than a higher clock that produces intermittent errors, excess heat, or shortened hardware life.
Do these 3 things before closing this tab:
1Scan for outdated or missing drivers - takes under a minute2Repair Windows errors before they cause bigger problems3Fix the driver behind crashes, sound loss and screen glitchesStep 5: Tune VRAM second
After the core is stable, return to the last stable core value and raise the memory clock in small increments. MSI suggests approximately 50–100 MHz per step as a starting procedure. Test after every change.
Memory instability often appears as shimmering, flashing textures, colored speckles, corrupted surfaces, or sudden application crashes. If artifacts appear, reduce the memory frequency in small steps. Do not assume that a higher memory number is helping: some cards lose performance when memory errors trigger correction or when timings become less efficient.
Step 6: Treat voltage as an advanced control
Voltage is the highest-risk control for a beginner. More voltage can sometimes support a higher clock, but it also raises heat and power, and excessive voltage can damage hardware or reduce its useful life. Try to find a stable clock at stock or reduced voltage before considering any increase.
Do not copy a voltage value from another GPU, even if the model name looks similar. Board partner designs, firmware, silicon quality, and cooling can differ.
Outdated Drivers Are Slowing You Down
One free scan finds every outdated or missing driver and matches the right update for your exact hardware.Free scan · exact hardware matchWindows Errors? Fix Them Before They Spread
Repair common Windows errors and clear accumulated junk for a smoother, more stable PC - no reinstall needed.Free scan · no reinstallStep 7: Adjust the fan only when necessary
A more aggressive fan curve can reduce temperature, but it increases noise and may accelerate fan wear. Use the card’s own monitoring readouts, and remember that laptop fan behavior may be firmware-controlled. MSI notes that laptop GPUs cannot use custom fan curves in Afterburner.
Rank #4
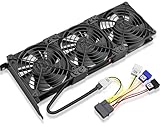
- Package include: 1 Piece Graphic Card Fans ( 3-Fans connected ) with 1*Power D-type Interface cable
- Dimension: 92mm(L) x 92mm(W) x 25mm(H) / 3.62in(L) x 3.62in(W) x 1in(H) in per fan. Totally Size: 276mm(L) x 120mm(W) x 30mm(H) / 10.86in(L) x 4.72in(W) x 1.18in(H)
- Rated Voltage: DC 12V; Rated Current: 0.45Amp; Rated Speed: 3x 1800 RPM; Air flow: 3x 39.8 CFM; Noise: 3x 24.8 dBA
- D-type interface cable included four interfaces, three voltages: 5V 7V and 12V; Different voltages with different airflow, speed, and noise. you can select the appropriate voltage interface to start the fan.
- 3 fans combined into one interface, Can be connected to the motherboard's 3-pin or 4-pin interface and you only need to access one interface to run all the fans.
Cooling and airflow: what helps and what does not
Overclocking can increase heat and fan noise. First check whether the existing case has a clear intake and exhaust path, clean filters, unobstructed GPU fans, and reasonable cable routing. A case fan is useful only when airflow is actually inadequate; it is not a guaranteed frame-rate upgrade or a substitute for a cooler that is already saturated.
For a graphics-card-specific replacement fan, heatsink, or cooler, identify the exact board model first. Cards with the same GPU chip can use different mounting holes, shrouds, fan connectors, and firmware. A model-specific cooling part should not be recommended generically.
Quick wins for a faster PC:
Scan for outdated or missing drivers - takes under a minuteDriver Scan →Clear out junk files and repair common Windows errorsFree Scan →Fix the driver behind crashes, sound loss and screen glitchesFind Drivers →How to test whether the overclock is really stable
Testing should proceed from repeatable and short to realistic and extended:
- Repeat the baseline benchmark. Confirm that the tuned result is genuinely faster under identical settings and that temperatures remain acceptable.
- Run a dedicated 3DMark stress test or another repeatable GPU stress workload. Crashes, hangs, or visual artifacts indicate a reliability or stability problem. Overheating or shutdowns can indicate inadequate cooling.
- Use a second workload such as UNIGINE Heaven. Heaven is designed as a GPU stability and cooling workload that can monitor temperature and clock behavior.
- Test several demanding games. Include the games you actually play, especially if they use ray tracing, large textures, shader compilation, VR, or unusual frame-pacing behavior.
- Perform a normal-session test. Use the computer long enough for heat soak and ordinary background activity to expose problems that a short benchmark may miss.
A benchmark pass proves stability only for that workload and duration. It does not prove that every game, API, shader, ray-tracing scene, or application will remain stable. Keep the overclock if it survives the tests that matter to you, not merely because one score increased.
How to interpret the result
| Result | Likely interpretation | What to do |
|---|---|---|
| Higher score and higher average FPS, no errors | The workload benefited from the extra GPU headroom. | Continue testing other workloads and check 1% lows, temperature, and noise. |
| Higher core clock but no meaningful FPS gain | The game may be CPU-limited, frame-rate capped, power-limited elsewhere, or insensitive to the change. | Keep the stock setting or use the smallest setting that provides a measurable benefit. |
| Higher average FPS but worse 1% lows | The overclock may be unstable, thermally constrained, or interacting poorly with frame pacing. | Reduce the last clock change and retest. |
| Artifacts or texture corruption | Memory instability is a common possibility, though core instability is also possible. | Reduce the VRAM clock first, then retest. |
| Black screen, driver reset, or crash | The current core, memory, voltage, temperature, or power combination is not stable under that workload. | Reset to stock, then lower the last changed setting. |
| Temperature or noise becomes unacceptable | The performance gain is costing more cooling capacity than it is worth. | Lower the clock or power target, improve airflow if needed, or return to stock. |
Troubleshooting and rollback
If the game crashes or the screen shows artifacts
- Close the game if possible and use the tuning utility’s Reset or Default control.
- Reboot if the driver has stopped responding or the desktop remains unstable.
- Run the benchmark at stock settings to confirm that the card and driver behave normally.
- Restore the last stable profile.
- Lower the last changed core or memory setting and test again.
If the problem occurs only after Windows starts, disable automatic profile loading before testing again. If the desktop cannot remain usable long enough to reset the utility, use Windows recovery or Safe Mode to disable the tuning program’s startup behavior or uninstall it, then reinstall only from a trusted source if necessary.
If the problem began after a driver update
Reset the overclock first and test at stock. Then obtain the driver from Windows Update, the GPU manufacturer, or the system manufacturer. A driver rollback or clean reinstall may be appropriate when the timing clearly points to the driver rather than the tuning change.
Free tools Windows power users keep installed
One-click scans. No signup required.
A driver-maintenance product is not an overclocking tool and cannot create higher GPU clocks. If you consider a third-party utility for backup and restore, verify its current features and policy first; official NVIDIA, AMD, Intel, OEM, and Microsoft driver sources should remain the primary recommendation.
Best Value

- Suitable for ASUS RTX 3050 PHOENIX / RTX 3060 PHOENIX
- Incompatible with other Graphics Card
- Fan diameter:95mm
- Power connector: 6 Pin
Warranty and hardware risk
Do not assume that overclocking either automatically voids every warranty or is covered without conditions. Warranty terms are specific to the product, add-in-board partner, country, and purchase channel. NVIDIA states that partner-sold GeForce cards are generally warranted by the add-in-board partner, while Founders Edition cards are covered directly by NVIDIA. Its warranty language also excludes issues associated with misuse, negligence, or software; that language should not be generalized to every manufacturer or jurisdiction.
Check the exact card manufacturer’s warranty and support terms before changing clocks. Software safeguards do not make overclocking risk-free. Excessive heat, voltage, unstable power delivery, poor airflow, and repeated crashes can all create problems even if the tuning application accepts the setting.
When not to overclock
- Your laptop already runs close to its thermal limit or its firmware does not expose the required controls.
- The case has poor airflow and the GPU is already throttling.
- You need maximum reliability for work, streaming, competitions, or long unattended sessions.
- The game is CPU-limited or frame-rate capped, so a GPU overclock cannot address the bottleneck.
- The improvement is too small to justify the extra heat, fan noise, power consumption, and testing time.
In these situations, reducing graphics settings, adjusting resolution or upscaling, improving CPU performance, cleaning airflow, or replacing an aging card may produce a more predictable result than overclocking.
A practical stable-profile checklist
- Exact GPU model and desktop/laptop status recorded
- Current driver installed from Windows Update or an official manufacturer source
- Stock benchmark, temperature, clock, power, FPS, and 1% lows recorded
- Core tuned before memory, with small increments and a test after each change
- Voltage left at stock or reduced unless there is a specific, informed reason to change it
- No crashes, freezes, driver resets, black screens, artifacts, or score regressions
- Dedicated stress test completed
- Several real games or applications tested, including the reader’s main workloads
- Temperature and fan noise acceptable during a long normal session
- Stock and stable-overclock profiles both saved
- Automatic startup application disabled until the profile has been thoroughly validated
Frequently Asked Questions
Is overclocking a graphics card safe?
Usually, yes—but “safe” does not mean risk-free. A conservative overclock that stays within the card’s configured limits and uses stock or reduced voltage is generally lower risk than aggressive voltage tuning. It can still increase heat, power use, fan noise, and the chance of crashes. Check the exact manufacturer warranty terms for your card.
Can you overclock a laptop graphics card?
A laptop may have locked firmware, restricted power controls, or inadequate cooling for overclocking. Intel Arc overclocking is available only on desktop Arc graphics, and MSI Afterburner does not provide custom fan curves for laptop GPUs. Check the exact laptop model before changing anything.
Does passing a GPU stress test prove an overclock is stable?
A successful benchmark demonstrates stability only under that benchmark and its test duration. Game engines, shaders, ray tracing, VRAM use, and frame-pacing behavior can expose instability that a synthetic test misses. Test several demanding games and a long normal session before saving an automatic profile.
What should I do if my overclock causes crashes or artifacts?
Reduce the last changed setting first. Memory instability often causes colored speckles, flickering, or corrupted textures, so lower the VRAM clock if artifacts began during memory tuning. For crashes or driver resets, lower the core clock or return to stock and retest.
Will overclocking my GPU increase FPS in every game?
No. A GPU overclock helps only when the graphics card is limiting performance and the workload benefits from additional GPU headroom. CPU-limited games, frame-rate caps, power limits, thermal throttling, and inefficient game engines can produce little or no improvement.
The Bottom Line
The best graphics-card overclock is a measured, reversible improvement—not the largest clock number. Establish a stock baseline, use the official automatic tuner when available, increase core and memory clocks separately in small steps, test after every change, and back down at the first sign of instability. Validate with both stress tests and the games you actually play, and keep stock settings available for instant rollback.
Quick Recap
Product prices and availability are accurate as of the date/time indicated and are subject to change. Any price and availability information displayed on Amazon at the time of purchase will apply.




