Yes. Core Keeper has a separate, free dedicated-server package on Steam (AppID 1963720) that can run on Linux without a Steam account. For the least setup work, use the documented Docker image with a persistent data volume. A native SteamCMD installation also works, but a headless Linux host generally needs Xvfb and the project’s supplied launcher rather than a blindly copied -batchmode command.
Playing with friends? Godlike.Host runs hosted Core Keeper servers from 10 data-center locations, with free DDoS protection.
What you are installing
The dedicated server is not the game client. Steam distributes it as its own free package, AppID 1963720. SteamCMD can download it anonymously, so the server account does not need to own Core Keeper or remain logged in to a personal Steam account.
As an Amazon Associate I earn from qualifying purchases.
You have two practical Linux deployments:
| Deployment | Runtime and headless operation | Updates | Persistence | Architecture | Networking starting point |
|---|---|---|---|---|---|
| Native SteamCMD | Uses the Linux server files directly; a headless machine may need Xvfb, and the project launcher should be used because direct -batchmode invocation may not work on Linux. |
You run SteamCMD and choose when to validate or update the package. | Keep the server directory and the configured data path under the same dedicated account and back them up. | Best suited to a conventional x86-64 Linux host. | Omit the port for Steam Datagram Relay; selecting a port changes to Direct Connect. |
| Docker | The image packages the runtime and its expected directory layout, which usually makes headless operation simpler. | Container/image startup follows the image project’s update behavior; recreation is safe only when host volumes are mounted. | The project requires a persistent server-data mount. A server-files mount is optional but preserves the downloaded server files. |
The maintained image documents ARM64 variants for generic devices, Raspberry Pi 5, M1, and Ampere Altra, as well as ordinary desktop/server deployments. | Leave SERVER_PORT empty or unset for relay networking; set it only when you intentionally want Direct Connect. |
Neither the reviewed project documentation nor the server reference supplies an independent player-capacity benchmark for Linux or ARM hardware. The Docker README’s 1–8-player description is a product description, not a measured guarantee.
Prepare a Linux host
- Use a supported 64-bit Linux installation and keep the server off your daily user account. For native hosting, plan around an x86-64 machine; for Docker, select a documented ARM64 variant when using ARM hardware.
- Allow the host to make outbound Steam connections. Relay mode does not require inbound router or firewall forwarding, but it still depends on outbound access.
- Reserve a directory for the server files and another for persistent world data. Treat the world directory as the valuable part of the installation.
- Create a dedicated, non-root Linux account. It limits the damage from a compromised process and prevents root-owned files from making later updates difficult.
On a system using standard account-management tools, an administrator can create the account and working directory like this:
#1 Best Overall

- DISCOVER 50+ GAMES — Explore a curated library of more than 50 games playable across XBOX consoles, PC, and supported devices, with new favorites ready to discover.
- PLAY ACROSS YOUR FAVORITE DEVICES — Enjoy included games across supported XBOX consoles, PC, and other compatible devices for more ways to play wherever you are.
- PLAY TOGETHER ONLINE — Connect with friends and communities with online console multiplayer included with XBOX Game Pass Essential.
- STREAM WITH XBOX CLOUD GAMING — Enjoy up to 5 hours of cloud playtime per month and stream supported games to compatible devices with XBOX Cloud Gaming.
- EARN REWARDS WHILE YOU PLAY — Earn Rewards points by playing games, completing eligible activities, and shopping in the Store with your XBOX Game Pass membership.
sudo adduser --disabled-password --gecos "" corekeeper
sudo -iu corekeeper
mkdir -p ~/corekeeper-server
cd ~/corekeeper-server
Use the equivalent commands for your distribution if its account tools differ. Keep ownership of the installation and data directories with this account; do not alternate between root and the server user when downloading or launching files.
Install the native server with SteamCMD
1. Install SteamCMD from your distribution
Install SteamCMD using the package method supported by your Linux distribution, then confirm that the steamcmd command starts. Distribution packaging can differ, so follow the package’s own multilib or repository requirements rather than copying a command intended for another release.
Do these 3 things before closing this tab:
1Repair Windows errors before they cause bigger problems2Scan for outdated or missing drivers - takes under a minute3Clear out junk files and repair common Windows errors2. Download and validate AppID 1963720
From the dedicated server account, run the current download sequence:
steamcmd +login anonymous +app_license_request 1963720 +app_update 1963720 validate +quitThe +app_license_request 1963720 step is part of the current reference sequence. Older community instructions sometimes omit it; if an older command fails to acquire the package, use the complete sequence above before troubleshooting anything else. SteamCMD places the files in the library location configured for that installation. Change into the directory containing the supplied Linux launcher or the CoreKeeperServer executable before continuing.
3. Launch it correctly on a headless machine
A Linux server without a graphical session may need a virtual X display. Install Xvfb through your distribution and start the supplied Linux launcher under that display. The Linux reference specifically warns that adding -batchmode directly may not work as expected; use the invocation shipped with the current package or project launcher rather than assuming the Windows-style command line is valid on Linux.
Keep the process running in a service manager, terminal multiplexer, or another supervisor appropriate to your host. Start without a custom port first so you can verify the installation using relay networking before introducing firewall and router variables.
What’s actually slowing this PC down?
Pick the symptom - the matching free tool is one click away.
Rank #2

- System: Intel Core i5-13400F 2.5GHz 10 Cores | Intel B760 Chipset | 16GB DDR5 | 1TB PCIe 4.0 NVMe SSD | Windows 11 Home
- Graphics: NVIDIA GeForce RTX 5060 8GB Graphics | 1x HDMI | 2x DisplayPort
- Connectivity: 1 x USB-C 3.2 | 2 x USB-A 3.2 | 6 x USB-A 2.0 | 1 x LAN | WiFi 6 | Bluetooth 5.3 | 7.1 Channel Audio
- Tempered Side Case Panel | Custom RGB Lighting | Keyboard and Mouse
- 1 Year Parts & Labor Warranty, Free Lifetime Tech Support
4. Wait for the first startup
Allow the process to finish initialization. When startup succeeds, the server writes GameID.txt beside the executable. That Game ID is the credential players use for relay-style joining. If the file is not created, stop guessing at paths and inspect CoreKeeperServerLog.txt in the server directory; it normally identifies a missing runtime, permission problem, malformed argument, or failed initialization.
5. Choose a data path deliberately
Set -datapath to a directory you can back up independently of the downloaded binaries. An explicit data path makes upgrades safer because you can replace or validate the server files without touching worlds. The worlds directory may not exist immediately: the Wiki notes that it can appear only after the first save, roughly after a player joins. Do not interpret its absence immediately after installation as proof that the server failed.
Run the server in Docker Compose
Docker is usually the easier choice when the host is headless or you do not want to assemble the runtime yourself. The documented image is escaping/core-keeper-dedicated:latest. Create a project directory, save the following as compose.yaml, and replace the two host paths with directories on your machine:
services:
  core-keeper:
    image: escaping/core-keeper-dedicated:latest
    container_name: core-keeper-dedicated
    restart: unless-stopped
    stop_grace_period: 2m
    volumes:
      - /srv/corekeeper/server-files:/home/steam/core-keeper-dedicated
      - /srv/corekeeper/server-data:/home/steam/core-keeper-data
    env_file:
      - path: core.env
        required: false
Why both mounts matter
The project documents server-data as mandatory for persistence. It contains the data and worlds that must survive an image update or container recreation. The server-files mount is optional, but mounting it preserves the downloaded server files and gives you a stable location for GameID.txt and logs. Without the data mount, a container that is removed and recreated can start with an empty world.
Recommended Free Tools
Start and inspect the container
From the directory containing compose.yaml, start it in the background:
docker compose up -dAfter startup, read the generated Game ID with:
docker exec -it core-keeper-dedicated cat /home/steam/core-keeper-dedicated/GameID.txtIf that file is missing, inspect the container output instead:
Rank #3

- Intel Core i7 14700F, NVIDIA GeForce RTX 5070 12GB, 32GB DDR5 RGB 4800MHz 16x2 1TB NVMe SSD, WIFI Ready, Windows 11 Home
- Connectivity: 6 x USB 3.1 | 1x RJ-45 Network Ethernet 10/100/1000 | Audio: On board audio
- Special Add-Ons: Tempered Glass RGB Gaming Case | 802.11AC Wi-Fi Included | 16 Color RGB Lighting Case | Free iBUYPOWER Gaming Keyboard & RGB Gaming Mouse | No Bloatware | AI Workstation PC ready
docker logs core-keeper-dedicated
docker compose logs
The image’s environment controls are supplied through core.env. Put one KEY=value setting per line; omit a setting when you want the image or server default.
| Environment variable | Controls |
|---|---|
WORLD_INDEX |
Selects the world index used by the image. |
WORLD_NAME |
Sets the world name. |
WORLD_SEED |
Sets the world seed for a new or selected world. |
WORLD_MODE |
Sets the world mode exposed by the image. |
GAME_ID |
Supplies a Game ID instead of relying only on generated output. |
MAX_PLAYERS |
Sets the player limit. |
SERVER_IP |
Sets the bind or advertised server IP when direct networking is configured. |
SERVER_PORT |
Selects a direct-connect UDP port. Leave it empty or unset for relay mode. |
PASSWORD |
Requires a password in addition to the Game ID. |
When changing images or recreating the container, stop it cleanly and retain both host directories. The two-minute stop_grace_period in the example gives the server time to shut down and flush data; it is not a substitute for periodic backups.
Configure worlds, identity, and player access
The native launcher uses command-line arguments corresponding to the Docker variables. The current reference documents these controls:
| Native argument | Purpose and supported values |
|---|---|
-worldname |
Selects the world name. |
-worldseed |
Sets the seed used when creating a world. |
-worldmode |
Accepts Normal, Hard, Creative, or Casual. |
-datapath |
Moves server data and world storage to a path you control and back up. |
-gameid |
Uses a manually supplied Game ID. It must be 15–28 alphanumeric characters and cannot contain Y, y, x, 0, or O. |
-password |
Adds password protection to the server. |
-port |
Enables Direct Connect on the selected UDP port instead of relay-only operation. |
-ip |
Sets the IP address to use when binding or advertising a direct server. |
-maxplayers |
Sets the maximum player count. In the current package, omitting it defaults to 8. |
Use the current argument reference shipped with the package when assembling a launch command. Examples copied from older community posts can contain obsolete flags or omit required initialization steps. A manually chosen Game ID is still a secret-like join credential: do not publish it casually, and make a backup before posting a code publicly so you can recover the world if unwanted players join.
Choose relay networking or Direct Connect
Steam Datagram Relay: the low-effort option
Start in relay mode by omitting -port on native Linux, or leaving SERVER_PORT empty or unset in Docker. Steam’s relay infrastructure carries the traffic, so the documented Docker setup does not require inbound router or firewall forwarding as long as outbound Steam access is allowed. Players join with the Game ID generated in GameID.txt.
Relay mode is the best first test because it separates server startup problems from home-router configuration. If players can join through the Game ID, the process, world selection, and basic permissions are working.
The Tool Desk
Outbyte PC Repair FREEClear out junk files and repair common Windows errorsFree Scan →Outbyte Driver Updater FREEScan for outdated or missing drivers - takes under a minuteDriver Scan →Rank #4
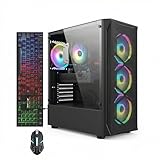
- This Gaming PC Desktop is well-suited for a variety of tasks including gaming, study, business, photo and video editing, streaming, day trading, crypto trading, and so on,ideal for Home, Office, School work
- This high-performance Gaming Computer Desktop is capable of running a wide range of popular PC games for pc gamer, including Fortnite, Call of Duty Warzone, Escape from Tarkov, GTA V, World of Warcraft, LOL, Valorant, Apex Legends, Roblox, Overwatch, CSGO, Battlefield V, Minecraft, Elden Ring, Rocket League, The Division 2, and Hogwarts Legacy with 60+ FPS
- PC Gaming System: This gaming computer desktop is loaded with Intel Core i7 up to 3.9GHz | 16GB Memory | 512GB Solid State Drive | Genuine Windows 11 Home 64-bit
- Gaming Desktop Connectivity: This gaming pc comes with RGB Fan x 4 | 1x RJ-45 | Wi-Fi 6 | Bluetooth 5.0 | Radeon RX 580 8G | HDMI | DisplayPort
- Gaming Computer Special Feature: This gaming pc equips with RGB Gaming Mouse & Keyboard |1 Year parts & labor | Free lifetime tech support,ARGB lighting that brings your gaming setup to life, with easy plug-and-play setup that gets you started in minutes. Built for long-lasting performance, it holds up well over time, while secure packaging ensures it arrives in perfect condition. Backed by reliable customer support for quick issue resolution
Direct Connect: when you need an exposed UDP endpoint
Setting -port or SERVER_PORT switches the server to Direct Connect. Players then connect to the host’s reachable IP, and that IP is exposed to them. Select a UDP port deliberately, allow it through the host firewall, and forward the same UDP port from the router to the Linux machine when the host is behind NAT. Set -ip or SERVER_IP if the machine has multiple interfaces or the image requires an explicit bind address.
The Codex reference uses UDP port 27015 as a same-LAN example. Treat that as an example rather than a universal external-port requirement; confirm the current image’s port mapping before publishing a Docker command or opening a firewall rule. The external port, internal port, bind address, and router forward must agree.
- For a home server, give the Linux host a stable LAN address before creating a router forward.
- Open only the selected UDP port, not a broad range.
- Test from outside the LAN, because a local client can sometimes connect through a router path that remote players cannot use.
- If you do not need direct IP connections, remove the port setting and return to relay mode instead of leaving an unnecessary public endpoint exposed.
Back up worlds and survive updates
Back up the data path, not just the executable. For native hosting, include the directory selected by -datapath and the worlds beneath it. For Docker, back up the host directory mounted at /home/steam/core-keeper-data; also retain the optional server-files directory if you want a reproducible copy of the downloaded package and logs.
- Stop the native process or run
docker compose downso the server is no longer writing world files. - Copy the complete data directory to storage that is not the live server disk.
- Keep dated backup generations rather than overwriting the only copy.
- Start the server again and verify that the expected world appears before deleting an older backup.
The worlds folder can be created only after the first save, often after a player joins. Schedule the first backup after that initial save, then continue backing up after meaningful building or progression sessions. A container update cannot protect data that was never mounted on the host.
Independent reader supportYour contribution helps us test, update, and keep practical guides available for everyone.ARM64 and small-device hosting
The maintained Docker image documents ARM64 variants for generic ARM devices, Raspberry Pi 5, M1, and Ampere Altra. Select the image’s documented ARM64_DEVICE variant when required by that project, and verify that your Docker installation can run the chosen architecture.
There is no independent capacity, thermal, storage-endurance, or player-load benchmark in the available documentation. A Raspberry Pi 5 or another ARM board may be a convenient low-power host, but do not promise a particular number of simultaneous players from the image label alone. Use conservative player limits, monitor the host, and keep world backups on separate storage.
Best Value

- This Gaming PC Desktop is well-suited for a variety of tasks including gaming, study, business, photo and video editing, streaming, day trading, crypto trading, and so on,ideal for Home, Office, School work
- This high-performance Gaming Computer Desktop is capable of running a wide range of popular PC games for pc gamer, including Fortnite, Call of Duty Warzone, Escape from Tarkov, GTA V, World of Warcraft, LOL, Valorant, Apex Legends, Roblox, Overwatch, CSGO, Battlefield V, Minecraft, Elden Ring, Rocket League, The Division 2, and Hogwarts Legacy with 60+ FPS
- PC Gaming System: This gaming computer desktop is loaded with Intel Core i7 up to 3.9GHz | 16GB Memory | 512GB Solid State Drive | Genuine Windows 11 Home 64-bit
- Gaming Desktop Connectivity: This gaming pc comes with RGB Fan x 6 | 1x RJ-45 | Wi-Fi 6 | Bluetooth 5.0 | GeForce RTX 3050 6G | HDMI | DisplayPort
- Gaming Computer Special Feature: This gaming pc equips with RGB Gaming Mouse & Keyboard |1 Year parts & labor | Free lifetime tech support,ARGB lighting that brings your gaming setup to life, with easy plug-and-play setup that gets you started in minutes. Built for long-lasting performance, it holds up well over time, while secure packaging ensures it arrives in perfect condition. Backed by reliable customer support for quick issue resolution
Troubleshoot the common failure points
SteamCMD cannot download the server
Run the complete current sequence, including the license request, from the server account:
Quick wins for a faster PC:
Scan for outdated or missing drivers - takes under a minuteDriver Scan →Repair Windows errors before they cause bigger problemsFix Now →steamcmd +login anonymous +app_license_request 1963720 +app_update 1963720 validate +quitCheck outbound connectivity and make sure the target directory is writable by the account that will launch the server. Do not mix a root-owned SteamCMD library with a non-root runtime.
The Linux process starts but no Game ID appears
First check the directory beside the executable for GameID.txt. If it is absent, read CoreKeeperServerLog.txt for native hosting, or run docker logs core-keeper-dedicated and docker compose logs for Docker. A missing file is an initialization symptom; the log is the source for the actual cause.
The process exits on a headless native host
Confirm that Xvfb is installed and that you are using the supplied Linux launcher under a virtual display. Remove assumptions copied from Windows launch scripts, especially a direct -batchmode flag, and follow the invocation tested by the current package.
Players cannot connect through Direct Connect
- Confirm that you intentionally selected
-portorSERVER_PORT; relay mode does not use an inbound port. - Verify that the host firewall allows the selected UDP port.
- Verify that the router forwards the identical UDP port to the server’s current LAN address.
- Check the bind setting if the machine has multiple interfaces, and test from a network outside the server’s LAN.
- If the image’s container port mapping does not match the host port you opened, correct the mapping or return to relay mode.
A world disappears after a Docker update
Inspect the Compose file and confirm that the host’s server-data directory is mounted to /home/steam/core-keeper-data. Check that the host path contains the worlds directory and that the container account can read and write it. Restore the most recent backup before allowing new sessions to continue if files were deleted.
Free tools Windows power users keep installed
One-click scans. No signup required.
An ARM image fails to start
Check the selected ARM64_DEVICE variant, Docker’s architecture support, and the container logs. The documented variants establish compatibility targets, not a performance guarantee; lower the expected player count and test with a disposable world before moving an established save.
The worlds directory is missing after installation
Wait for a successful startup and the first save. The directory may not be created until approximately after a player joins. If a player has joined and the directory is still missing, inspect the configured data path and the server log for a permissions or path error.
A safe first-run checklist
- Create and use a non-root account.
- Install SteamCMD through the Linux distribution’s supported method.
- Download AppID 1963720 with the current anonymous command and validate it.
- For native hosting, start the supplied launcher under Xvfb; for Docker, mount persistent host directories before running
docker compose up -d. - Start without a port and obtain
GameID.txt. - Join once, confirm the world saves, and back up the data path.
- Set world mode, seed, name, password, or player limit only after the basic server works.
- Use Direct Connect only when you need it, then configure one deliberate UDP forward and firewall rule.
- Keep the Game ID private enough for your intended group and inspect logs whenever startup or joining fails.
For most Linux operators, Docker is the shortest path to a repeatable headless server because the image supplies the runtime layout and makes persistence explicit. Native SteamCMD is the better fit when you want direct control over package updates and process management. In either case, relay mode, a protected Game ID, and a verified backup provide the least fragile starting configuration.
Quick Recap
Product prices and availability are accurate as of the date/time indicated and are subject to change. Any price and availability information displayed on Amazon at the time of purchase will apply.




