
Quick wins for a faster PC:
Scan for outdated or missing drivers - takes under a minuteDriver Scan →Clear out junk files and repair common Windows errorsFree Scan →Fix the driver behind crashes, sound loss and screen glitchesFind Drivers →To set up Ryujinx on a Windows PC, download the current build from the Ryujinx download page, extract its publish folder, add your legally dumped prod.keys and firmware, then add your game directory in Ryujinx settings. The current documentation identifies the maintained project as Ryubing, with separate Stable and Canary channels.
Stable is the safer choice for most players. Canary receives features sooner but may include regressions. Because the release links embedded in the setup documentation currently return 404, use the project’s functioning download or release location rather than relying on an old direct GitHub link.
As an Amazon Associate I earn from qualifying purchases.
What you need before installing Ryujinx
- Windows 10 version 1803 (build 10.0.17134) or newer.
- At least 8 GB of RAM.
- A graphics processor supporting OpenGL 4.5 or Vulkan 1.2 or newer.
- Current graphics drivers. On a laptop with integrated and dedicated graphics, update both GPU drivers.
- Your legally dumped
prod.keysfile. - Dumped Switch firmware, or an untrimmed XCI cartridge dump from a recent game.
- Legally dumped Switch games or homebrew.
The documented recommended baseline for native resolution and framerate is a Ryzen 5 3600, 16 GB of DDR4 RAM, and an NVIDIA GTX 1060 with 6 GB of VRAM. These are recommendations, not minimum requirements.
Recommended Free Tools
Ryujinx does not provide Switch keys, firmware, or commercial games. Use only material dumped from hardware and software you own and are permitted to use.
#1 Best Overall

- The next evolution of Nintendo Switch
- One system, three play modes: TV, Tabletop, and Handheld
- Larger, vivid, 7.9” LCD touch screen with support for HDR and up to 120 fps
- Dock that supports 4K when connected to a compatible TV*
- GameChat** lets you voice chat, share your game screen, and connect via video chat as you play
For the current workflow, follow the project’s official setup guide. Do not assume older guides are accurate: the current menu paths use Tools for firmware installation, and the normal setup specifically requires prod.keys, not title.keys.
1. Download and extract Ryujinx
- Open the current download page and choose the available Windows Stable or Canary build.
- Extract the downloaded archive.
- Open the archive’s
publishfolder and extract its contents to a normal writable folder, such as a dedicated folder under your user profile. - Avoid placing the installation on the Desktop or at the root of a drive, where Windows protection can interfere with file access.
- Launch
Ryujinx.exe. If Windows displays a security warning, select Run anyway only if you obtained the files from the project’s current download location.
2. Add your prod.keys file
- In Ryujinx, select File > Open Ryujinx Folder.
- Open the
systemsubfolder. - Copy your legally dumped
prod.keysfile into that folder. - Close Ryujinx completely and reopen it.
Ryujinx stores permanent Windows data—including firmware, save files, shader caches, and configuration—in %appdata%/Ryujinx by default.
If Ryujinx still reports that keys are missing, verify that the file is in the system folder opened through File > Open Ryujinx Folder, then close and reopen the emulator again. Your keys must be at least as new as the firmware you plan to install.
3. Install Switch firmware
- Select Tools > Install Firmware > Install from XCI/ZIP.
- Choose either your compiled dumped-firmware
.zipfile or an untrimmed XCI cartridge dump. - Confirm the installation by clicking Yes.
- Click OK when installation finishes.
The installed firmware version appears as System Version in the lower-right corner of the main Ryujinx window. An outdated prod.keys set can cause firmware installation or decryption failures, so update your legally dumped keys when necessary.
Rank #2

- 6.2” LCD screen
- Three play modes: TV, tabletop, and handheld
- Local co-op, online, and local wireless multiplayer
- Detachable Joy-Con controllers
- Nintendo Switch is the home of Mario & friends
4. Add your games
- Select Options > Settings. The settings window opens on the User Interface tab.
- Enter the absolute path to the folder containing your dumped games and click Add. Alternatively, leave the path field blank, click Add, select the folder in the file browser, and click Add there.
- Click Save.
Your games should now appear in the main Ryujinx window. They do not need to be copied into the Ryujinx installation folder; the documented setup uses an external game directory.
5. Configure a controller
- Connect the controller before opening its configuration.
- Go to Options > Settings > Input.
- Enable Docked Mode if you are configuring a docked Switch profile. Otherwise, configure the Handheld profile.
- Select Player 1.
- Choose the controller from the Input Device dropdown.
- Map the controls, then select Apply and OK.
The default joystick deadzone is 0.10. If the stick registers movement while untouched, try increasing it to at least 0.20. Leave Direct Keyboard Access and Direct Mouse Access disabled unless you specifically need to emulate a physical USB keyboard or mouse connected to the Switch.
If an XInput controller does not appear, the setup guide lists an XInput wrapper or translator such as x360ce as a possible workaround.
The Tool Desk
Outbyte PC Repair FREERepair Windows errors before they cause bigger problemsFix Now →Outbyte Driver Updater FREEScan for outdated or missing drivers - takes under a minuteDriver Scan →Motion controls
Supported controllers use native motion controls by default. Go to Options > Settings > Input, enable Motion, select Configure, and save the settings.
Rank #3

- Play your way with the Nintendo Switch gaming system. Whether you’re at home or on the go, solo or with friends, the Nintendo Switch system is designed to fit your life. Dock your Nintendo Switch to enjoy HD gaming on your TV. Heading out? Just undock your console and keep playing in handheld mode
- This model includes battery life of approximately 4.5 - 9 hours.
- The battery life will depend on the games you play. For instance, the battery will last approximately 5.5 hours for The Legend of Zelda: Breath of the Wild (games sold separately)
- Model number HAC 001( 01)
For unsupported controllers, use a Cemuhook-compatible motion server such as BetterJoy or DS4Windows. In Options > Settings > Input > Motion > Configure, enable Use CemuHook compatible motion. The usual endpoint is 127.0.0.1 on port 26760.
6. Add game updates and DLC
Since Ryujinx 1.2.0, automatic discovery is documented under Options > Settings > Autoadd DLC/Game Updates. If multiple updates are added, Ryujinx automatically selects the highest version.
To manage an individual game, right-click it in the main window:
- Manage Title Updates: click Add, select the update file, choose the desired version, and click Save.
- Manage DLC: click Add, select the DLC files, and click Save.
Recommended graphics settings
Ryujinx is pre-optimized by default, so leave settings unchanged unless a game or the project’s documentation requires an adjustment.
Rank #4
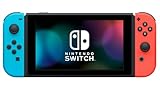
- This pre-owned product is not Apple certified, but has been professionally inspected, tested and cleaned by Amazon-qualified suppliers.
- 6.2” LCD screen.
- Three play modes: TV, tabletop, and handheld
- Local co-op, online, and local wireless multiplayer
- Detachable Joy-Con controllers
Resolution scaling
Open Options > Settings > Graphics > Resolution Scale. Available choices include native, 2×, 3×, 4×, and custom ratios. The guide recommends 2× on a standard 1080p display, but the best setting depends on your GPU and game. Higher scaling improves image clarity while increasing GPU load, and scaling can cause graphical glitches in some games.
Anisotropic filtering and aspect ratio
Adjust anisotropic filtering under Options > Settings > Graphics > Anisotropic Filtering. Like resolution scaling, it can produce glitches in some games.
Change the aspect ratio under Options > Settings > Graphics > Aspect Ratio, or use the aspect-ratio button in the bottom status toolbar while a game is running. Avoid Stretch to Fit Window or Stretched; the documentation marks these modes as not recommended because they can distort the image.
What’s actually slowing this PC down?
Pick the symptom - the matching free tool is one click away.
Do not disable shader cache by default
Shader caching is enabled by default and helps reduce repeated shader compilation, stutter, and framerate drops. Disabling it is generally discouraged. If a corrupted shader cache causes a crash during shader compilation at boot, right-click the game and select Cache Management > Purge Shader Cache, then launch the game again.
Best Value

- One player can use a Joy-Con in each hand
- Two players can each take one
- Multiple Joy-Con can be employed by numerous people for a variety of gameplay options (additional Joy-Con sold separately)
- Slip a set of Joy-Con into a Joy-Con grip accessory, mirroring a more traditional controller. Or, select an optional Nintendo Switch Pro Controller.
PPTC and the first few launches
PPTC (Profiled Persistent Translation Cache) is enabled by default. It does not deliver its full loading-time benefit immediately: launch the game at least twice and reach the title screen or beyond. The improvement is available from the third launch onward.
To disable PPTC, open Options > Settings > CPU and clear PPTC (Profiled Persistent Translation Cache). To inspect or remove its data, right-click a game and choose Cache Management > Open the PPTC directory.
Optional: portable mode
Portable mode keeps keys, firmware, saves, PPTC data, shader caches, and related files with the program instead of using the default AppData location.
Free tools Windows power users keep installed
One-click scans. No signup required.
The simplest documented method is to create a folder named portable inside the Ryujinx program directory before launching the emulator. If you use a custom data directory, create it manually and copy any existing keys, saves, firmware, and other data you want to preserve from %appdata%/Ryujinx.
From Command Prompt, the documented syntax is:
ryujinx.exe -r d:ryujinxdataYou can also append -r d:ryujinxdata to the executable’s Windows shortcut Target field, preceded by a space. Launching with the command-line method leaves the Command Prompt console window visible.
Launch games in fullscreen
To use the graphical setting, open Options and enable Start Games in Fullscreen Mode. From the command line, add the --fullscreen option when launching Ryujinx.
Quick Recap
Quick troubleshooting checklist
- Missing keys: confirm
prod.keysis in thesystemfolder opened from File > Open Ryujinx Folder, then restart Ryujinx. - Firmware will not install: check that the keys are at least as new as the firmware and that the source is a dumped firmware ZIP or untrimmed XCI.
- Games do not appear: revisit Options > Settings, add the folder containing the dumps, and click Save.
- Controller drift: raise the deadzone from 0.10 to at least 0.20 and retest.
- Controller is absent: connect it before configuration; for XInput devices, consider an XInput wrapper such as x360ce.
- Boot crash during shader compilation: use Cache Management > Purge Shader Cache for that game.
- Stutter or long later loads: keep shader cache and PPTC enabled unless troubleshooting a specific compatibility problem.
- Performance problems: update both integrated and dedicated GPU drivers on hybrid-graphics laptops, then reduce resolution scaling if necessary.
Product prices and availability are accurate as of the date/time indicated and are subject to change. Any price and availability information displayed on Amazon at the time of purchase will apply.

