Quick wins for a faster PC:
Scan for outdated or missing drivers - takes under a minuteDriver Scan →Clear out junk files and repair common Windows errorsFree Scan →Hytale server commands let an operator control access, moderate players, test content, move players, change world state, and maintain the server without editing files. The dependable way to use them is to run /help on the server you are actually operating, then check a family with /help <family> when that subcommand is available. Documentation currently labeled Release 0.7.2 is the useful baseline, but Hytale is still changing, so a command copied from an older guide may have different syntax or may not exist on your build.
Prefer not to run the server on your own PC? Godlike.Host offers hosted Hytale servers with free DDoS protection and up to three free backups a day.
This guide maps the commonly documented commands, explains where they run, shows how to become an operator safely, and marks commands that can disconnect players, alter inventories, or affect the whole universe.
As an Amazon Associate I earn from qualifying purchases.
What’s actually slowing this PC down?
Pick the symptom - the matching free tool is one click away.
The current Hytale command baseline
Release context
Hypixel Studios’ official documentation currently labels its server documentation Release 0.7.2. That label identifies the documentation context, not a promise that every future server binary will retain identical syntax. Hytale.game’s searchable index, updated 19 January 2026, reports 159 command results across areas such as Hytale Server, Builder Tools, Command Macro, Universe, Teleport, Permissions, NPC, Inventory, Spawn, and Spawning. The index is useful for discovering families; it is not a guarantee that every indexed entry is enabled on your installation.
/help is the build-aware reference
Before using a command from any guide, enter /help. The server should show commands available to your account, along with subcommands and parameters exposed by that build. If supported, use a narrower query such as /help tp, /help gamemode, /help inventory, or /help whitelist. If the result differs from an example below, follow the live server’s syntax.
#1 Best Overall
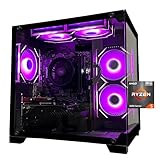
- Processor specifications: Adopting AMD Ryzen 5 5600 processor, with a basic clock speed of 3.5GHz and a turbo frequency of 4.4GHz, it can achieve fast response computing performance
- Graphics Card: Features GeForce RTX 3050 graphics card with 6GB dedicated video memory for gaming and multimedia applications
- Memory configuration: Equipped with 32GB DDR4 RAM (16GB * 2), providing sufficient memory capacity for multitasking and demanding applications
- Gaming Performance: Designed to handle modern gaming titles and graphics-intensive tasks with smooth frame rates and visual quality
- Desktop System: Complete gaming desktop computer system ready for setup and use out of the box
How notation in this guide works
- Text in angle brackets, such as
<player>, is a value you replace; do not type the brackets. - Options beginning with two hyphens are named arguments, for example
--quantity=100. - Examples are documented forms, not an exhaustive list of every item ID, permission node, or subcommand.
- Use a leading slash in in-game chat. The server console is a separate execution surface; use the console’s command format and restrict console access as carefully as you would operator access.
How to become an administrator
Most management commands require operator or administrator permission. PC Gamer documents the in-game command input as the Enter key, while HypeServ describes both chat and the server console as execution surfaces and notes that the console has full permissions. That makes the console powerful but also dangerous: anyone who can reach it may be able to bypass ordinary player restrictions.
Granting your own access
- Join the server and press Enter to open the command input.
- Run
/help opfirst if the command family is not familiar on your build. - Run
/op selfto grant or remove your own administrative permission according to the behavior exposed by the current server. - Run
/helpagain. Commands that were hidden or rejected before should now appear if your permission changed successfully.
If /op self is unavailable or you are locked out, use an authenticated server-console session. Do not paste credentials or console access into public chat.
Do these 3 things before closing this tab:
1Repair Windows errors before they cause bigger problems2Scan for outdated or missing drivers - takes under a minute3Clear out junk files and repair common Windows errorsGranting and revoking another player
Use /op add <player> to add a player to the operator list and /op remove <player> to remove that administrative access. Confirm the exact player name before executing either command. Removing access is preferable to banning a trusted helper when the problem is simply that their administrative role has ended.
Use /perm for permission management
/perm opens the permissions-management family. Its available subcommands and argument names can vary, so inspect /help perm rather than assuming a syntax copied from another server. Keep day-to-day moderators on the narrowest permission set your build supports; reserve operator-level access for people who need server-wide controls.
Rank #2
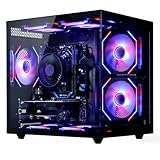
- 【6-Core Ryzen 5 Prebuilt Gaming PC | Smooth Large Game & Streaming Performance】 The Suevery prebuilt gaming PC features an Ryzen 5 6-Core processor (3.6GHz Base, 4.1GHz Boost) and Radeon RX 560 4GB Graphics Card. It delivers lag-free gameplay for large games, seamless high-definition streaming, and smooth creative software operation, meeting gamers and content creators' reliable performance needs.
- 【16GB DDR4 RAM + 512GB NVMe SSD | Blazing-Fast Boot & Load Speeds】 16GB DDR4 RAM supports simultaneous operation of multiple games, browser tabs and office apps without slowdowns. The 512GB NVMe SSD (up to 30x faster than traditional HDDs) enables fast boot-ups, instant game loads and quick file transfers, with ample storage for games, videos and work files.
- 【Wi-Fi 6 Gaming Tower | Versatile Connectivity for Multi-Scenarios】 This tower gaming desktop has Wi-Fi 6 for fast, stable wireless internet, ideal for online gaming and high-definition streaming. It also includes 2× USB 3.0 and 4× USB 2.0 ports to connect peripherals, storage and office devices, suitable for gaming, home and office use.
- 【RGB Cooling System | Stable Operation】 The advanced air cooling system with customizable RGB fans keeps the gaming tower PC cool and quiet during intense gaming. Optimized airflow maintains optimal component temperatures, preventing overheating and ensuring stable performance for long gaming sessions or heavy office workloads. Sleek RGB lighting adds a gaming-inspired aesthetic.
- 【Prebuilt Tower PC | Adapt to Gaming/Work/Home/Office】 This prebuilt tower gaming PC is versatile for streaming, work, home and office tasks—from video editing and design software to daily office work and browsing. Ready to use with no extra setup, it meets the needs of gamers, remote workers and home users.
Moderation and access control
The commands in this section affect who can connect and who can remain connected. They are the first tools to use when a player is disruptive or when a private test server must be closed to unapproved users.
| Command | Primary scope | Effect | Risk and reversibility |
|---|---|---|---|
/kick <player> |
One player | Disconnects the named player | Immediate but normally reversible; the player may reconnect |
/ban <player> |
One player | Blocks the player from joining | Disruptive; reverse with /unban |
/unban <player> |
One player | Reverses a ban | Reversible, but verify the exact account name |
/whitelist list |
Access list | Shows entries on the whitelist | Read-only |
/whitelist enable |
Whole server | Restricts joins to approved entries | Server-wide; can lock out ordinary players |
/whitelist disable |
Whole server | Turns off whitelist enforcement | Server-wide; opens access |
/whitelist add <player> |
Access list | Adds a player to the whitelist | Low risk if the name is correct |
/whitelist remove <player> |
Access list | Removes a player from the whitelist | Can prevent that player from joining while enforcement is enabled |
/plugin |
Installed plugins | Opens the plugin-management family | Build- and installation-dependent; plugin changes can affect server behavior |
/sudo |
Another player’s command context | Runs a command as another player | High privilege and easy to misuse; inspect /help sudo first |
A safe whitelist change
- Run
/whitelist listand record the current entries. - Add the intended account with
/whitelist add <player>. - Confirm the name appears in the list.
- Only then use
/whitelist enableif the server should become private. - Keep an operator account on the list before enabling enforcement, or be prepared to use the console if the build treats operators separately from whitelist entries.
To reopen a public server, use /whitelist disable. For a single offender, /kick is temporary, while /ban persists until an administrator uses /unban.
Player, inventory, and testing commands
These commands are useful for moderation support, bug reproduction, and creative testing. They can also destroy progress or create misleading test results, so use them on a test world whenever possible.
| Command | Documented use | Typical scope | Operational caution |
|---|---|---|---|
/heal |
Restores health and stamina | Usually the executing player | Changes survival state; permission may be required |
/fillsignature |
Fills signature energy | Usually the executing player | Testing convenience, not a normal progression action |
/inventory backpack --size=<number> |
Resizes a backpack | Inventory of the executing player | Changing capacity can affect test conditions or stored items |
/inventory clear |
Clears an inventory | Inventory of the executing player unless the build exposes another target | Potentially destructive; confirm the target and back up first |
/inventory see <player> |
Views another player’s inventory | One player | Privacy and moderation implications |
/memories unlockall |
Unlocks all memories | Player progression | Permanent-looking progression change; use a test account |
/memories clear |
Clears memories | Player progression | Destructive; verify the current target behavior |
/kill <player> |
Kills the named player | One player | Disruptive and may cause item loss or respawn consequences |
/neardeath |
Invokes the near-death state or test behavior | Usually the executing player | Testing command; exact behavior can change |
/damage <player> --amount=<number> |
Applies a specified damage amount | One player | Can kill a player; use a controlled test target |
Inventory troubleshooting
If a command changes only your own inventory, that may be intentional rather than a syntax error. Check the command’s live help for a target argument before trying to append a player name. For a destructive operation such as /inventory clear or /memories clear, take a universe backup first and ask the affected player to log out if your procedure requires a stable state.
Rank #3

- 【Sleek Design & Efficient Cooling】 Features an A-pillar-free dual tempered glass design, showcasing a clean internal layout and RGB lighting. High-quality tempered glass offers durability and a stylish appearance for gaming and office environments. The optimized airflow system enhances ventilation, rapidly dissipating heat to maintain stable and quiet performance during long-term use.
- 【Powerful Processing & Smooth Multi-Tasking】 Equipped with AMD Ryzen 5 3500X 6-core 6-thread processor (32MB L3 cache, 3.6GHz base, 4.1GHz boost). Delivers responsive and stable performance for seamless multitasking, office work, HD streaming, and daily computing. Runs creative and productivity software smoothly, suitable for streamers, remote workers, and home users.
- 【Entry-Level Gaming Graphics for Esports & Online Games】 Powered by AMD Radeon RX 560 4GB GDDR5 discrete graphics card, supporting DirectX 12 and Vulkan API. Provides smooth gameplay for popular esports titles like League of Legends, CS:GO, and Overwatch. Handles light AAA games at medium-low settings, meeting the entertainment needs of casual gamers and students.
- 【16GB DDR4 + 512GB NVMe SSD: Ultra-Fast Speed】 16GB high-speed DDR4 RAM supports simultaneous operation of multiple games, browsers, and office apps without slowdowns or freezes. The 512GB NVMe PCIe SSD enables fast boot and instant loading of games/software, with file transfer speeds up to 30 times faster than traditional HDDs, offering ample storage for games, videos, and work files.
- 【WiFi 6 & Rich Interfaces: Ready-to-Use Prebuilt PC】 Features the latest WiFi 6 technology for fast and stable wireless connectivity, ideal for online gaming, HD live streaming, and remote work. Equipped with multiple USB 3.0, USB 2.0, HDMI, and LAN ports for easy connection of gaming peripherals, monitors, external storage, and office devices. Plug-and-play design requires no extra setup, adapting to gaming, live streaming, office work, online learning, and home entertainment scenarios.
Using /give for items and creative work
/give grants an item to a player. Item identifiers are tied to the content available in a particular build, so the examples below are useful demonstrations rather than a complete catalog.
| Example | What it supplies | Why you might use it |
|---|---|---|
/give Tool_Pickaxe_Cobalt |
Cobalt pickaxe | Mining or tool testing |
/give Tool_Hatchet_Cobalt |
Cobalt hatchet | Gathering-tool testing |
/give Bench_Alchemy |
Alchemy bench | Testing a crafting station |
/give Bench_Arcane |
Arcane bench | Testing a crafting station |
/give Bench_Memories |
Memories bench | Testing a progression station |
/give Ingredient_Bar_Iron --quantity=100 |
100 iron bars | Material or recipe testing |
Reliable /give workflow
- Open command suggestions or run
/help giveto confirm the argument order on your server. - Enter the item ID exactly as the current build exposes it; capitalization and underscores may matter.
- Start with a quantity of one. Use a named quantity such as
--quantity=100only after a single-item test succeeds. - Check the recipient’s inventory before repeating the command. Repeated retries can create duplicate stacks if the first command worked but its feedback was missed.
- Record the item ID in your server’s build notes because content identifiers can change with updates.
If an ID is rejected, do not substitute a display name or assume the item was removed. Query /help give, inspect the server’s suggestions, and check whether the content belongs to a module that is disabled on that installation.
Teleportation, game modes, and world state
Teleport and world-state commands are ideal for builders and moderators, but they can move a player into hazards or alter the shared experience for everyone online.
| Command | Documented purpose | Scope | Risk |
|---|---|---|---|
/tp |
Teleports to a player or coordinates, using the arguments exposed by the build | Player position | Can strand a player or place them in danger |
/tp home |
Returns to a home destination | Player position | Destination behavior is build-dependent |
/spawn |
Moves a player to spawn | Player position | May interrupt active play |
/gamemode |
Changes the current game mode | Player or mode context exposed by the build | Changes available abilities and progression conditions |
/warp set <name> |
Creates or records a named warp | World destination list | Persistent shared-world change |
/warp go <name> |
Travels to a named warp | Player position | Destination can be unsafe or inaccessible |
/warp list |
Lists named warps | World destination list | Read-only |
/noon |
Sets the world to noon | World time | Changes the shared environment for all players |
Coordinate and warp checks
Use /help tp and /help warp before entering coordinates or creating a destination. Confirm a warp with /warp list, then test it with a moderator account before advertising it. Use /spawn as the recovery route if a test teleport puts you somewhere unsafe. Treat /gamemode and /noon as shared-state changes when other players are online, and announce them first on a live community server.
Rank #4

- System: Intel Core i5-13400F 2.5GHz 10 Cores | Intel B760 Chipset | 16GB DDR5 | 1TB PCIe 4.0 NVMe SSD | Windows 11 Home
- Graphics: NVIDIA GeForce RTX 5060 8GB Graphics | 1x HDMI | 2x DisplayPort
- Connectivity: 1 x USB-C 3.2 | 2 x USB-A 3.2 | 6 x USB-A 2.0 | 1 x LAN | WiFi 6 | Bluetooth 5.3 | 7.1 Channel Audio
- Tempered Side Case Panel | Custom RGB Lighting | Keyboard and Mouse
- 1 Year Parts & Labor Warranty, Free Lifetime Tech Support
Backups, shutdown, and server diagnostics
Lifecycle commands affect the entire universe or the server process. Schedule them during a maintenance window and announce disruptive actions before executing them.
Free tools Windows power users keep installed
One-click scans. No signup required.
| Command | Purpose | When to use it | Risk |
|---|---|---|---|
/backup |
Creates a universe backup | Before major administrative or world changes | May consume time and storage; verify completion in the server feedback |
/stop |
Performs a server shutdown | Planned maintenance or emergency isolation | Disconnects everyone; never use casually |
/server dump |
Writes a server-state text dump | Diagnostics and support records | Can expose operational details; protect the output |
/server gc |
Requests memory cleanup | Controlled troubleshooting | Can cause a pause; it is not a substitute for finding a leak |
/server stats CPU |
Reports CPU statistics | Investigating server load | Read-only, but values are snapshots rather than a benchmark |
/server stats memory |
Reports memory statistics | Investigating memory pressure | Read-only snapshot |
/server stats GPU |
Reports GPU statistics | Investigating rendering or host load where applicable | Read-only; availability depends on the server environment |
A safe maintenance sequence
- Tell connected players when maintenance will begin and what they should save or avoid doing.
- Run
/backupand wait for the server’s completion message. - Capture
/server stats CPU,/server stats memory, or/server stats GPUif you are diagnosing performance. - Use
/server dumpwhen a text snapshot will help your troubleshooting record. - Apply the planned change, or run
/server gconly as a controlled diagnostic step. - Use
/stopfor a planned shutdown, then confirm the process has actually exited before replacing files or restarting the host.
If you use managed hosting, verify that the provider supports the Hytale release you run, exposes an authenticated console, and offers an independent backup or restore path. Do not assume a provider’s control panel exposes every command listed here.
Practical administrator playbooks
Opening a new private test server
- Use the console or an existing operator account to confirm
/helpand the permission family. - Grant only the required testers with
/op add <player>or the narrower permissions exposed by/perm. - Add testers with
/whitelist add <player>. - Run
/whitelist listto verify the names. - Enable restrictions with
/whitelist enable. - Use
/warp set <name>only after choosing a safe, documented location.
Handling a disruptive player
- Record the exact player name and, if relevant, the time and behavior.
- Use
/kick <player>for an immediate temporary disconnect. - Use
/ban <player>when a persistent block is justified under your server rules. - Review the access list if the server is private; whitelist enforcement and bans solve different problems.
- Use
/unban <player>when an appeal is upheld, then add the player to the whitelist if the server remains restricted.
Running a controlled creative test
- Take a
/backupof the test universe. - Use
/gamemodeto select the mode needed for the test. - Use
/givewith one item first, then a named quantity if required. - Use
/heal,/fillsignature, or the inventory and memories tools only on the designated test account. - Return to a known location with
/spawnor a verified warp when the test ends.
Recovering from an unsafe teleport or world-state change
- Stop issuing further movement commands until you know which account was affected.
- Use
/spawnor a confirmed/warp go <name>destination. - If the issue affects multiple players or the world, announce a pause and create a
/backup. - Do not use
/stopas the first response to a single-player mistake; reserve it for a planned shutdown or a server-wide emergency.
When a command fails
- Unknown command: Run
/help. The command may be unavailable in this build, supplied by a missing module, or named differently. - Permission denied: Confirm your operator status with the account that granted it, then inspect
/perm. Console access may have broader rights than chat. - Wrong arguments: Run the family-specific help, such as
/help giveor/help inventory, and copy the parameter order shown there. - Item not found: Treat the ID as build- or content-dependent. Use command suggestions and test one item before requesting a stack.
- Command appears to do nothing: Check the server console output, the target name, and whether the command applies to the executing player rather than another player.
- Player was unexpectedly disconnected: Review whether a moderation, teleport, or lifecycle command was executed, and check the server log before repeating it.
- World change is not visible: Confirm that the command changed shared world state rather than only your player state, and ask another connected player to verify.
- Syntax from an old guide conflicts with the server: Prefer the live
/helpresult. Hytale is under active release development, and documented examples can move between releases.
Administrator quick checklist
- Run
/helpbefore relying on a copied command. - Use
/help <family>where the server supports family-specific help. - Keep console credentials private; HypeServ describes the console as a full-permission surface.
- Use
/op addand/op removedeliberately, and prefer narrower permissions where available. - Use
/whitelist listbefore enabling or changing access restrictions. - Back up with
/backupbefore clearing inventories, changing progression, editing shared destinations, or making major administrative changes. - Test
/givewith one item before using a large quantity. - Announce shared-state commands such as
/gamemode,/noon, and/stopon a live server. - Record the Hytale release and item IDs used by your procedures so the next update can be checked quickly.
What will change as Hytale develops
The official documentation’s Release 0.7.2 label and the 19 January 2026 command index provide a dated reference point, not a permanent contract. Early-access command families, permission requirements, item identifiers, and argument names can change. PC Gamer specifically notes that some commands are finicky or not very useful without additional context. Date your server’s internal runbook, include the output of /help for critical procedures, and re-test destructive commands after every server update.
The safest operating habit is simple: discover the command on the live build, confirm the required permission, test it on the smallest possible scope, and create a backup before any operation that can alter shared data.
Quick Recap
Product prices and availability are accurate as of the date/time indicated and are subject to change. Any price and availability information displayed on Amazon at the time of purchase will apply.




