Yes—the Intel Core i5-4690K can still be overclocked. For an existing PC, a sensible target is usually a stable 4.2–4.5 GHz all-core overclock, provided you have a Z87 or Z97 motherboard, adequate cooling, and a healthy power supply. There is no universal safe setting: chip quality, motherboard voltage behavior, cooling, and memory stability all matter more than copying somebody else’s BIOS profile.
The best daily overclock is the lowest-voltage setting that remains stable and cool, not the highest frequency your system can briefly boot.
As an Amazon Associate I earn from qualifying purchases.
What the i5-4690K offers
The i5-4690K is a fourth-generation Haswell “Devil’s Canyon” desktop processor launched in Q2 2014. It has four cores, four threads, a 3.5 GHz base clock, up to 3.9 GHz stock Turbo Boost, 6 MB cache, an 88 W TDP, and an LGA1150 socket. Its official memory support is DDR3/DDR3L-1333 or 1600. The K suffix means its CPU multiplier is unlocked, making multiplier-based overclocking possible.
| Specification | i5-4690K |
|---|---|
| Cores / threads | 4 / 4 |
| Base frequency | 3.5 GHz |
| Maximum stock Turbo | Up to 3.9 GHz |
| Cache | 6 MB Intel Smart Cache |
| Architecture | 22 nm Haswell |
| Socket | LGA1150 |
| TDP | 88 W |
| Official memory | DDR3/DDR3L-1333/1600 |
Those stock figures come from Intel’s specifications. Stock Turbo is not the same as a sustained all-core overclock: Turbo behavior depends on workload, temperature, power, and the number of active cores. For example, 100 MHz × 44 produces a 4.4 GHz core clock.
#1 Best Overall

- 4 cores, 4 threads
- Intel HD Graphics 4600 (1200 MHz)
- Intel Turbo Boost Technology 2.0
- Dynamic Acceleration/Turbo Boost
- 6MB Intel Smart Cache
What you need before overclocking
A suitable motherboard
Use a motherboard with a Z87 or Z97 chipset and accessible CPU multiplier and voltage controls. Intel’s normal desktop pairing for unlocked processors is a Z-series board. H81, B85, H97, and similar boards may restrict multiplier, voltage, or power controls, so an LGA1150 socket alone is not enough.
Look for adequate VRM heatsinks, a working BIOS recovery or clear-CMOS procedure, and a BIOS version appropriate for the processor. BIOS labels vary between ASUS, MSI, Gigabyte, and ASRock; use the categories below rather than assuming your menus will match a screenshot.
Cooling, airflow, and power
- Do not use the Intel stock cooler as a blanket recommendation for sustained overclocking.
- A competent tower air cooler is the usual minimum for experimentation. A larger tower or 240 mm-class liquid cooler can reduce temperatures, but cannot guarantee a higher clock.
- Confirm that the cooler has LGA1150 mounting support and fits the case.
- Clean dust, replace dried thermal paste, and ensure the case has clear intake and exhaust airflow.
- Provide airflow across the motherboard VRM, especially in a compact case.
- Use a reliable PSU with sufficient capacity for the complete system, including the graphics card.
On a system this old, also check for aging fans, damaged socket pins, unstable memory, degraded motherboard components, and an aging PSU before adding voltage.
Free tools Windows power users keep installed
One-click scans. No signup required.
Safety rules
Overclocking operates the processor outside Intel’s default specifications and can affect reliability, support, or warranty decisions. Intel describes voltage or frequency changes as detectable during issue investigations; see its overclocking hardware guidance.
- Do not treat another i5-4690K’s voltage as a recipe for yours.
- More Vcore increases power, heat, and the risk of long-term degradation.
- Prefer the lowest stable voltage.
- Watch actual voltage under load, not just the number entered in BIOS.
- Stop if the CPU throttles, produces WHEA errors, crashes, or remains excessively hot.
Intel’s current general overclocking guidance advises avoiding more than 1.4 V with traditional cooling and keeping extended workloads around or below 80°C. These are broad guidance points, not a Haswell-specific guaranteed 24/7 limit. As a conservative editorial guideline, treat roughly 1.20–1.30 V Vcore as an exploratory range—not a promise—and stop well before the broad 1.4 V ceiling unless you deliberately accept higher enthusiast-level risk.
Rank #2
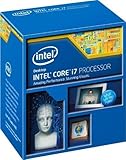
- Compatible with Z87 and Z97 motherboards. Z87 motherboard users may need to apply a BIOS update for compatibility. Not compatible with Intel Motherboards.
- LGA 1150
- Intel Rapid Storage Technology
- Quick Sync Video enabling faster video conversion
- Intel Device Protection with Boot Guard Intel IPT with PKI Intel Turbo boost technology
Record a stock baseline
Before changing BIOS settings, write down:
- Idle and sustained-load temperatures.
- CPU frequency and multiplier under load.
- Vcore under load.
- Memory speed and whether XMP is enabled.
- Benchmark performance.
- CPU package power, if reported.
CPU-Z can show frequency, multiplier, memory, and basic motherboard information. HWiNFO is useful for detailed sensor logging. Core Temp or another reputable monitor can display temperatures.
Use a repeatable benchmark such as Cinebench for quick comparisons. A single successful run is not proof of stability.
Quick wins for a faster PC:
Repair Windows errors before they cause bigger problemsFix Now →Scan for outdated or missing drivers - takes under a minuteDriver Scan →BIOS settings to understand
- CPU ratio/core multiplier: Determines the core clock with BCLK. 100 MHz × 42 equals 4.2 GHz.
- BCLK: Leave it near 100 MHz initially. Changing it can affect other buses and makes troubleshooting harder.
- Vcore: The CPU core voltage. Use manual or adaptive control rather than blindly accepting aggressive Auto behavior.
- CPU input voltage/VCCIN: A separate Haswell input rail. Leave it on Auto initially unless a specific stability problem justifies changing it.
- Load-Line Calibration: Controls how voltage changes under load. Excessive LLC can create overshoot; moderate settings are generally easier to manage.
- Ring/cache ratio: Keep it at stock initially. Tune it only after core stability is established.
- XMP: Applies the memory kit’s rated profile. Test it separately from the CPU overclock.
- Power and current limits: Check these if the board throttles despite acceptable temperatures.
Save a known-good BIOS profile before experimenting. Disable automatic multi-core enhancement or equivalent motherboard auto-overclocking features so the board does not secretly change ratios or voltage.
Step-by-step conservative overclock
1. Start from a known state
Enter UEFI/BIOS, load optimized defaults if the previous settings are unknown, and save your baseline profile. Keep BCLK at approximately 100 MHz. If troubleshooting becomes difficult, use JEDEC memory settings rather than XMP during initial CPU testing.
2. Set a modest multiplier
Set an all-core ratio of 40x or 42x. Leave Vcore at stock or use a conservative manual value if your motherboard’s Auto setting is clearly excessive. Keep the ring/cache ratio at stock or below the core ratio.
Rank #3

- Core i5-4690 Processor (6M Cache, 3.50 GHz)
3. Perform a quick screen
Boot into the operating system, confirm the requested and observed voltage with CPU-Z or HWiNFO, and run a short Cinebench loop or equivalent. Watch temperatures, clock stability, crashes, freezes, reboots, and WHEA hardware errors.
Windows Errors? Fix Them Before They Spread
Repair common Windows errors and clear accumulated junk for a smoother, more stable PC - no reinstall needed.Free scan · no reinstallOutdated Drivers Are Slowing You Down
One free scan finds every outdated or missing driver and matches the right update for your exact hardware.Free scan · exact hardware match4. Increase gradually
If stable, raise the multiplier one step at a time. After each meaningful change, repeat the short test. When instability appears, either return to the previous multiplier or add a very small Vcore increment—about 0.01–0.025 V where the BIOS allows it. Intel gives +0.05 V as a generic example, but smaller steps are easier to control on this older platform.
5. Find the lowest stable voltage
Once you have a frequency that appears stable, reduce Vcore gradually and retest after every change. This “voltage hunt” usually produces a better daily profile than simply increasing voltage until the system boots.
6. Tune other components separately
After the core is stable, re-enable XMP and test the memory. Then, if desired, raise the ring/cache ratio modestly. Change only one variable at a time so you can identify the cause of an error.
Realistic frequency targets
- 4.0–4.2 GHz: A conservative starting range.
- 4.3–4.5 GHz: A plausible daily target for many systems, but dependent on the individual chip, motherboard, cooling, and voltage.
- 4.6 GHz and above: Increasingly sample-dependent; voltage and heat may rise disproportionately.
- 4.8 GHz or higher: An enthusiast or outlier result, not an expected target.
Community results around 4.4 GHz at approximately 1.25 V, along with reports requiring materially different settings, illustrate silicon variation rather than a universal recipe. A 4690K that once ran well may also require more voltage after years of use.
Recommended Free Tools
Rank #4

- 10 cores (6 P-cores plus 4 E-cores) and 16 threads
- Performance hybrid architecture integrates two core microarchitectures, prioritizing and distributing workloads to optimize performance
- Up to 4.7 GHz unlocked. 20MB Cache
- Compatible with Intel 600-series (with potential BIOS update) and 700-series chipset-based motherboards
- PCIe 5.0 and 4.0 support. DDR4 and DDR5 Memory support. RM1 thermal solution included. Discrete graphics required.
Temperature targets and thermal warning signs
Do not confuse three different concepts:
- The processor’s official thermal specification, which is not permission to run continuously at that number.
- Thermal throttling or emergency protection, which protects hardware but is not a desirable operating target.
- A practical daily-use target. Following Intel’s general guidance, aim for sustained heavy-load temperatures around or below 80°C when practical.
Back down or stop if you see persistent high-80s or 90s Celsius, thermal throttling, rapid unexplained spikes, or unusually large core-to-core temperature differences. Those differences can indicate poor cooler contact or thermal-paste application. Results also depend on ambient temperature, case airflow, cooler mounting, workload, motherboard voltage behavior, and whether the processor has been modified.
Stability testing: screening is not validation
Quick screening
After each change, use a short Cinebench loop or comparable workload to catch obvious failures. Confirm that the clock remains where expected and that temperatures do not immediately become unacceptable.
Longer validation
For a system intended for regular use, combine:
- OCCT CPU testing.
- Prime95, with the test type and AVX behavior recorded.
- A repeated workload you actually use, such as a game, encoder, compiler, or simulation.
- Several hours of testing for a machine that must run continuously.
Intel’s XTU guide uses three to five hours or longer as an example for validating a 24/7 overclock, but no duration proves stability for every workload. AVX-heavy tests can produce substantially more heat than many games. A gaming-stable setting may fail during encoding or compilation, and memory errors can look like CPU errors. WHEA errors count as instability even when the desktop appears usable.
Failure symptoms and fixes
| Symptom | Likely cause | Response |
|---|---|---|
| No POST | Ratio or voltage too aggressive | Clear CMOS or use the board’s recovery feature, then load defaults. |
| Immediate load crash | Insufficient Vcore, excessive temperature, or aggressive LLC | Reduce the multiplier, add a small voltage increment, improve cooling, or moderate LLC. |
| Crash after minutes or hours | Marginal voltage, heat soak, or memory instability | Log temperatures, test longer, and separate CPU and RAM testing. |
| WHEA errors | Marginal core, cache, or memory settings | Treat the profile as unstable; reduce the ratio or tune voltage. |
| High idle voltage or temperature | Auto voltage, LLC, background load, or poor mounting | Check observed voltage, use sensible manual/adaptive controls, and remount the cooler if needed. |
| Unexpectedly high load voltage | Auto rules or LLC overshoot | Compare set and observed voltage, then reduce LLC or Vcore. |
| USB, SATA, or device problems | BCLK or motherboard instability | Return BCLK to stock and retest. |
| Stable CPU but memory errors | XMP or memory-controller limits | Test at JEDEC settings, then re-enable XMP separately. |
Recovery procedure
- Power the system down fully.
- Use the motherboard’s clear-CMOS button or jumper, following its manual. Some boards require removing power first.
- Boot with default settings.
- Load the previously saved stable profile.
- Reapply only the last known-good change.
- Keep a written log of every ratio, voltage, temperature, and test result.
Memory, cache, and advanced tuning
Ring/cache ratio
The cache multiplier is not the first tuning target. Keep it at stock, stabilize the CPU core, and raise it only if the small potential gain is worth additional testing. Do not add substantial voltage merely to achieve a higher cache ratio.
DDR3 and XMP
The processor officially supports DDR3-1333/1600, while some Z87/Z97 boards and memory kits expose higher XMP profiles. Intel’s XMP documentation includes compatible examples above DDR3-1600, but compatibility depends on the exact kit, board, BIOS, and DIMM configuration.
Best Value

- SSE2 / Streaming SIMD Extensions 2
- SSSE3 / Supplemental Streaming SIMD Extensions 3
- SSE4 / SSE4.1 + SSE4.2 / Streaming SIMD Extensions 4
Test CPU stability at default memory settings first. Then enable XMP and validate it separately. Four-DIMM configurations can be less forgiving than two-DIMM configurations, so do not assume an advertised XMP profile is guaranteed on every system.
Adaptive versus manual voltage
Manual voltage is useful while finding a stable setting because it makes testing predictable. Adaptive voltage can preserve lower idle behavior after the final frequency is known, but motherboard implementation varies. Verify both idle and load behavior rather than trusting the requested value.
Delidding
Delidding may reduce temperatures on some Haswell processors by replacing the internal thermal interface material, but it can damage the die, package, socket, or surrounding components. Liquid metal is electrically conductive and requires careful application. It does not improve a poor silicon sample’s frequency-voltage characteristics.
It is unnecessary for a mild overclock and is difficult to justify on a low-value used platform unless the work itself is the hobby. Historical Devil’s Canyon testing, such as AnandTech’s review, provides context rather than a guaranteed temperature reduction for every surviving 4690K.
Is an i5-4690K overclock worthwhile in 2026?
If you already own the PC: Usually yes, provided the motherboard, cooler, PSU, and platform are healthy. A modest overclock can extend the useful life of a CPU-limited gaming system at little additional cost.
If you are buying the platform used: Only consider it at a very low total cost and with realistic expectations. Used Z97 boards may have unknown VRM condition, damaged socket pins, outdated BIOS support, or no return protection.
If you are building a new PC: Do not choose LGA1150 and DDR3 as a forward-looking foundation. The four-core, four-thread CPU is limited in modern workloads, and newer platforms offer substantially better performance and upgrade paths. In 2026, overclocking the 4690K is primarily a low-cost extension, salvage project, or hobby—not a sensible new-system recommendation.
A practical final profile
Record your finished settings in this format:
- Core ratio: The highest value that passed your chosen tests.
- BCLK: Approximately 100 MHz.
- Vcore: The lowest individually stable value, including observed load voltage.
- Ring/cache: Stock or separately validated.
- Memory: XMP only after CPU stability is established.
- Temperature: Preferably around or below 80°C during sustained heavy workloads.
- Validation: Named workloads, duration, AVX status, and no WHEA errors.
That method produces a repeatable overclock without pretending that every i5-4690K can reach the same frequency or voltage.
Quick Recap
Product prices and availability are accurate as of the date/time indicated and are subject to change. Any price and availability information displayed on Amazon at the time of purchase will apply.




