Yes, RetroArch can play PlayStation 2 games—but RetroArch itself is not the emulator. You need the LRPS2 libretro core, a genuine PlayStation 2 BIOS dumped from your own console, and a legally created backup of your game. This guide covers installation, BIOS placement, game loading, controllers, saves, graphics, playlists, and recovery from common errors.
What RetroArch uses to play PS2 games
RetroArch is the frontend. The actual emulator is the LRPS2 core, which is based on PCSX2 and runs inside RetroArch. The BIOS is the PlayStation 2 system software required by the core, while your ISO or other supported image is the game content.
As an Amazon Associate I earn from qualifying purchases.
LRPS2 is not identical to standalone PCSX2. It uses the libretro interface and RetroArch’s input, directory, playlist, shader, screenshot, and save-state systems. For documentation, see the official LRPS2 guide.
The Tool Desk
Outbyte PC Repair FREERepair Windows errors before they cause bigger problemsFix Now →Outbyte Driver Updater FREEFix the driver behind crashes, sound loss and screen glitchesFind Drivers →RetroArch or standalone PCSX2?
| Choose RetroArch + LRPS2 if you want… | Choose standalone PCSX2 if you want… |
|---|---|
| One frontend for multiple consoles | A dedicated PS2 emulator with fewer layers |
| Unified controller profiles, playlists, shaders, and screenshots | Direct access to PCSX2’s PS2-specific configuration |
| RetroArch’s content and library management | A simpler troubleshooting path when PS2 is your only target |
Neither option is universally faster or more compatible. Performance depends on the game, hardware, renderer, resolution, drivers, and emulator build. The rest of this guide assumes you want RetroArch integration.
#1 Best Overall

- Perfect Compatible with PS 2: Upgraded joysticks, 360 degree positioning with ultra accuracy, perfect PS 2 Accessories for all P2 games; Excellent third party controller compatible with PS 2 console
- Suppress Interfering Signals: Built-in oxygen magnetic ring, which filter out high frequency noise pulses, ensure transmission of the quality audio and video signals, improve audio and video quality; giving you an excellent gaming experience
- Enhanced Vibration Experience: PS 2 gamepad provides better vibration, has more realistic gaming experience, Ergonomic design with comfortable feel, fully enjoy the fun of game
- More Stable Signal: Cipon ps2 wired controller use higher quality cable, the connection between controller and ps2 console is more stable, no signal input delay; 71 IN cable length more convenient to play games
- What You Get: PS2 controller, exquisite packaging, user manual
What you need
- An official RetroArch installation for Windows, macOS, Linux, Steam, or another supported desktop platform.
- The LRPS2 core.
- A BIOS dumped from your own PlayStation 2.
- A legally obtained backup of your own PS2 game.
- A controller with two analog sticks, shoulder buttons, Start, and Select.
- Enough storage for game images, BIOS backups, memory cards, and save states.
- Current graphics drivers where applicable. PCSX2’s documentation specifically notes that Vulkan requires current drivers.
There is no single official hardware threshold that guarantees every PS2 game will run well. Results vary by title, internal resolution, renderer, and computer.
Step 1: Install RetroArch and verify its directories
Install RetroArch from its official distribution and documentation, rather than an unknown repack. Your installation method affects where cores, BIOS files, saves, and playlists are stored.
- Open RetroArch.
- Go to Settings → Directory.
- Record the paths for System/BIOS, Save Files, Save States, and File Browser.
Do not assume that the system directory is always a folder named retroarch/system/. Package-managed and portable installations can use different locations. The official directory guide explains how to change or identify them.
Step 2: Install the LRPS2 core
- Open Online Updater.
- Choose Core Downloader or Select Core Downloader.
- Find the PlayStation 2 entry, listed depending on the build as Sony – PlayStation 2 (PCSX2) or LRPS2.
- Install it.
- Open Load Core and confirm that it appears.
Menu wording can vary by RetroArch version, operating system, interface driver, and distribution. Look for the equivalent core-download option if the label differs.
If the core is missing, check Settings → Directory for the core directory, confirm that the installation is writable, and restart RetroArch. Some package-managed installations control core files or restrict downloading them.
Step 3: Dump your PS2 BIOS legally
LRPS2 requires a real PS2 BIOS. RetroArch does not provide one, and a downloaded BIOS is not a substitute for a personal dump. Follow applicable law and use the official PCSX2 BIOS-dumping guide.
The official guide describes methods involving tools such as FreeMcBoot, FreeDVDBoot, Fortuna, uLaunchELF, and biosdrain. The exact method depends on your console model and available homebrew route. Back up important USB data before formatting a drive. An active modchip can also produce an incomplete or corrupted dump.
Recommended Free Tools
LRPS2 does not require a particular BIOS filename. The dump must be extracted rather than left inside a ZIP archive. A single 4 MB .bin file can work, or the dump may include companion files such as .EROM, .NVM, .ROM1, and .ROM2. Avoid SCPH-10000 BIOS dumps for compatibility reasons.
Step 4: Put the BIOS in the correct folder
Use the System/BIOS path shown in RetroArch, then create this structure beneath it:
system/
└── pcsx2/
    └── bios/
        ├── YOUR_BIOS.bin
        ├── YOUR_BIOS.EROM
        ├── YOUR_BIOS.NVM
        ├── YOUR_BIOS.ROM1
        └── YOUR_BIOS.ROM2
Companion files should share the same base filename as the main BIOS. On case-sensitive systems, use lowercase directory names: pcsx2 and bios.
Rank #2

- 【Product Compatibility】: Compatibility with Sony Playstation 1,PSX and Playstation 2 controllers to PS3/PC Controller. support Win98, Win98SE, Win Me, Win2000 & the newly announced Win XP, Win 7 together with the direct X 7.0a or above.
- 【Easy to Use】: Just connect PS2 controller Converter, then plug the USB cable into an available port on your PS3 or PC, Uses this with a guitar hero device for the PS2 and it works flawlessly. Windows 10 recognizes the adapter and will automatically set it up, Didn’t need to install any drivers , Compatible with only original PS2 Controllers, PS3 console, and desktops/laptops with an USB Port.
- 【Enhance Game Experience】:Supports Double shock real vibration function on supported games and digital/analog mode.Supports most of PC games,can be directly used with PC computer.
- 【Perfect Design】:USB Controller adapter Converter Cable for Saved you lots of cash being able to use a PS2 controller instead of buying a new PS3 controller or Wireless controller
- 【After Sales Support】:Our product 100% extremely strictly before selling, You can give it as a gift to your family, friends, classmates and anyone, especially your children.If you have any issues for this product, please contact us by Amazon message, we will provide you satisfied solution at first time.
To validate the dump, calculate its SHA-1 hash and compare it with a trusted BIOS hash database:
Outdated Drivers Are Slowing You Down
One free scan finds every outdated or missing driver and matches the right update for your exact hardware.Free scan · exact hardware matchWindows Errors? Fix Them Before They Spread
Repair common Windows errors and clear accumulated junk for a smoother, more stable PC - no reinstall needed.Free scan · no reinstallGet-FileHash "C:pathtobios.bin" -Algorithm SHA1shasum "/path/to/bios.bin"sha1sum "/path/to/bios.bin"These commands are for Windows PowerShell, macOS, and Linux respectively.
Step 5: Check LRPS2 system files
Current LRPS2 documentation says GameIndex.yaml, which contains per-game fixes and compatibility settings, is embedded in the core and is no longer strictly required. Older guides may incorrectly describe it as mandatory.
You can still use RetroArch’s downloader:
- Open Online Updater → Core System Files Downloader.
- Select
LRPS2.zip, if it is available. - Allow RetroArch to install the files.
If the downloader creates the structure, it may look like this:
system/
└── pcsx2/
    └── resources/
        └── GameIndex.yaml
Missing GameIndex.yaml alone should not be treated as the cause of every boot failure.
Step 6: Create a legal game backup
For RetroArch, the practical route is a legally created backup file from a game you own. The official PCSX2 disc guide explains that PS2 CDs and DVDs can be dumped with a suitable optical drive. Verify the dump when possible.
LRPS2 documents support for these extensions:
.elf  .iso  .ciso  .chd  .cso  .bin  .mdf  .nrg
.dump .gz   .img   .m3u
ISO is the simplest format to troubleshoot. CHD can reduce storage use, but support and behavior should be confirmed for the LRPS2 build you use. M3U files are useful for multi-disc games because they point to the individual disc images.
Do not put disc images inside arbitrary ZIP archives. Libretro’s guidance generally recommends leaving disc-based content unzipped for RetroArch. A bad dump can cause boot failures, freezes at the same point, missing audio or video, and crashes. If a disc is difficult to read, PCSX2 recommends trying a lower optical-drive speed while dumping.
Step 7: Launch your first game manually
- Choose Load Core and select LRPS2.
- Choose Load Content.
- Browse to your game backup.
- Select it and choose Run, if prompted.
Manual loading is the best first test because it separates emulation problems from playlist-scanning problems. The BIOS may show its normal boot sequence before the game starts.
Quick wins for a faster PC:
Scan for outdated or missing drivers - takes under a minuteDriver Scan →Clear out junk files and repair common Windows errorsFree Scan →If RetroArch reports that no BIOS is available, check the System/BIOS directory, the pcsx2/bios/ subfolders, extraction status, filename matching, case, and BIOS hash. Restart RetroArch after moving files.
Rank #3

- 【High Stable Signal】: Our wired ps2 controller has a premium cable, making the connection between the wired controller and your ps2 console having more stable signal and without any delay.
- 【Plug and Play Wired PS2 Controller】: This controller is designed with cable, plug and play, without needing extra wireless receiver for connection, save your time at learning how to connect the controller and ps2 console.
- 【Ergonomic Design】:Our wired controller for PS2 is perfectly suitable for human beings palms, all the buttons are complied with your hands and make you not feel fatigue when you handhold the controller for a long time.
- 【Double Vibration Motors】: This PS2 controller is built in double vibration motors, every motions and each game steps,as if put yourself into a realistic game world and providing you with more comfortable and more exciting gaming experience.
- 【Compatible with PS2/PS2 Slim/PS1】: Our wired ps2 controller is compatible with PS2/PS2 Slim/PS1, and we provide 2pcs wired ps2 controllers for you, suitable for playing ps2 games together with your friends and family, relaxing your life now!
Step 8: Configure a DualShock 2 controller
- Connect the controller before launching the game.
- Open Settings → Input → RetroPad Binds → Port 1 Controls.
- Map the D-pad, face buttons, analog sticks, shoulder buttons, Start, and Select.
- In LRPS2’s core or quick-menu options, choose the appropriate PlayStation device, normally DualShock 2.
- Test both sticks and rumble before saving a remap.
Rumble requires support from the game, RetroArch, the controller, and the selected device type. Some PS2 games use pressure-sensitive face or shoulder buttons. A digital-only modern controller cannot reproduce that input exactly; use the closest mapping or a controller with suitable analog-pressure capability.
Step 9: Tune graphics conservatively
Start with default settings. If you are unsure, leave the renderer on Automatic, use hardware rendering, and begin at native or modestly increased internal resolution.
If a game has visual errors or poor performance, make one change at a time:
Free tools Windows power users keep installed
One-click scans. No signup required.
- Restore core options to defaults.
- Lower internal resolution.
- Try another renderer.
- Disable widescreen patches and enhancements.
- Save changes as a per-game configuration.
- Compare the result with standalone PCSX2 if necessary.
PCSX2’s documentation describes Vulkan as generally fast and accurate but potentially unstable on some Intel integrated GPUs, while OpenGL may be slower in that environment. Those are PCSX2-specific observations, not guarantees for every LRPS2 build or operating system. Do not begin with global speed hacks: a setting that helps one game can damage another.
Widescreen patches
LRPS2 includes many widescreen patches, and additional patches can be placed in its cheats_ws directory. These patches may change how a game renders rather than simply stretching the picture. They can introduce geometry, HUD, or missing-object problems, so enable them only after the unmodified game works.
Step 10: Configure saves and memory cards
Use normal in-game memory-card saves as your primary progress. LRPS2 documents an optional legacy memory-card location at:
system/pcsx2/memcards/Back up your memory-card files before changing cores, updating RetroArch, or experimenting with major settings.
What’s actually slowing this PC down?
Pick the symptom - the matching free tool is one click away.
Save states are temporary checkpoints, not reliable backups. They can preserve a corrupted state and may stop working after an emulator update. PCSX2 recommends normal memory-card saves for long-term storage. If a state requires an older emulator version, use that version to load it and then create a normal in-game save.
For beginners, regular file-based memory cards are the safest default. Standalone PCSX2 also documents folder memory cards, but some games may not support them and their contents cannot be managed through the PS2 BIOS in the same way.
Independent reader supportYour contribution helps us test, update, and keep practical guides available for everyone.Step 11: Add playlists after the game works
- Update Core Info Files and Databases under Online Updater.
- Use Import Content or the playlist scanner.
- Scan the folder containing your PS2 backups.
- Associate the playlist with LRPS2 if automatic association fails.
A strict scan expects a database match, often using information such as a CRC or disc serial. A loose scan can add content that does not match the database, though thumbnails and Explore-menu integration may be missing. A game absent from a playlist is not necessarily unplayable: use Load Content manually.
Rank #4
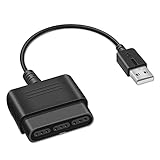
- Product Compatibility : Compatibility with Sony Playstation 1,PSX and Playstation 2 controllers to PS3/PC Controller. support Win98, Win98SE, Win Me, Win2000 & the newly announced Win XP, Win 7 together with the direct X 7.0a or above
- Easy to Use: Connect your original PS2 controller to the converter, then plug the USB into a PS3 or PC. Works perfectly with PS2 Guitar Hero devices. Windows 10 auto-installs the adapter—no drivers are needed. Compatible only with original PS2 controllers, PS3 consoles, and USB-enabled PCs/laptops. Ensure the controller is securely connected and the USB port functions properly. If issues occur, try another port or restart the system
- Enhance Game Experience : Supports Double shock real vibration function on supported games and digital/analog mode. Supports most of PC games,can be directly used with PC computer
- Perfect Design : USB Controller adapter Converter Cable for Saved you lots of cash being able to use a PS2 controller instead of buying a new PS3 controller or Wireless controller
- After Sales Support : Our product 100% extremely strictly before selling, You can give it as a gift to your family, friends, classmates and anyone, especially your children. If you have any issues for this product, please contact us by Amazon message, we will provide you satisfied solution at first time
Troubleshooting checklist
The LRPS2 core is missing
Check the core directory under Settings → Directory, verify that the installation can write core files, confirm repository or internet access, and restart RetroArch. A package-managed build may restrict core downloads.
Do these 3 things before closing this tab:
1Repair Windows errors before they cause bigger problems2Scan for outdated or missing drivers - takes under a minute3Clear out junk files and repair common Windows errors“No BIOS found”
- Confirm the BIOS came from your own PS2.
- Extract it from any archive.
- Confirm RetroArch’s System/BIOS path.
- Check
pcsx2/bios/beneath that path. - Use lowercase folder names on case-sensitive systems.
- Ensure companion files share the main BIOS base name.
- Verify the SHA-1 hash.
- Restart RetroArch.
The game is not in a playlist
Try Load Content manually, update databases, use a loose scan, confirm the extension is supported, and ensure the image is not still inside an archive. Manually associate the playlist with LRPS2 if required.
The game freezes or will not boot
Test a verified dump, restore core settings to defaults, confirm the BIOS, and try the game without patches or enhancements. A bad or incomplete image can freeze at the same point every time.
Graphical glitches appear
Lower internal resolution, change renderer, disable widescreen enhancements, and create a per-game configuration. Avoid copying a global “best settings” profile from another title. If needed, test the same game in standalone PCSX2 to determine whether the problem is specific to LRPS2 or RetroArch.
Audio crackles or the game slows down
Return to defaults, lower resolution and enhancements, check drivers and background load, and test another renderer. The correct fix may be title-specific; there is no universal speed setting.
The controller works in menus but not in the game
Confirm that Port 1 is assigned, the LRPS2 device type is correct, analog mode is enabled where required, the controller was connected before launch, and a per-game remap has not overridden the global mapping. Also check whether the game expects pressure-sensitive input.
Saves have disappeared
Check RetroArch’s Save Files directory, confirm that you launched the same content with the same core, inspect the memory-card configuration, and ensure a save state did not overwrite the newer in-game state. Back up memory-card files before changing configurations.
When standalone PCSX2 is the better choice
Use standalone PCSX2 when PS2 is your only system, you want the most direct dedicated configuration, or you need to isolate whether a problem comes from RetroArch’s frontend layer. PCSX2 also supports a portable mode: place an empty portable.txt or portable.ini beside the executable, or use its -portable option.
RetroArch remains the better fit when you value one library, shared controller profiles, playlists, shaders, screenshots, and a common interface across systems. RetroArch also includes the separate Play! core, but it is a different emulator with different BIOS requirements, options, and compatibility. It is not a drop-in replacement for LRPS2.
Quick Recap
Final setup checklist
- LRPS2 is installed and visible under Load Core.
- The System/BIOS directory is verified under Settings → Directory.
- Your personal BIOS dump is extracted into
system/pcsx2/bios/. - The BIOS has been checked against a trusted hash database.
- A legally created game backup is in a supported format.
- The game launches manually through LRPS2.
- Port 1 and the DualShock 2 mapping are tested.
- A normal in-game save has been created.
- Memory-card files are backed up.
- Playlists are added only after manual launching works.
Product prices and availability are accurate as of the date/time indicated and are subject to change. Any price and availability information displayed on Amazon at the time of purchase will apply.




