DIY joystick and HOTAS projects are real, but “kit” can mean anything from downloadable CAD files to a complete force-feedback base. The most practical starting point for most builders is a custom button box, throttle quadrant or auxiliary panel using a dedicated USB controller. Building a genuinely good joystick is harder: the gimbal, centering force, sensor alignment and structural stiffness matter far more than the number of buttons.
Choose a DIY route for customization, repairability or the satisfaction of building your own controls—not because it is guaranteed to cost less than a commercial HOTAS.
As an Amazon Associate I earn from qualifying purchases.
What HOTAS and HOSAS mean
HOTAS means “Hands On Throttle And Stick”: one hand operates a joystick and the other operates a throttle. A typical stick provides pitch and roll, with yaw handled by a twist axis or rudder pedals. A throttle normally adds a forward/back axis, friction adjustment, detents, buttons, hats and sometimes sliders or mode controls.
What’s actually slowing this PC down?
Pick the symptom - the matching free tool is one click away.
HOSAS means “Hands On Stick And Stick.” It is particularly useful in six-degrees-of-freedom space games, where two sticks can distribute translation and rotation across six axes. Aircraft simulators more often benefit from HOTAS plus rudder pedals, especially when differential braking or independent yaw control matters. A joystick kit containing only a gimbal and grip is not a complete HOTAS; a complete system needs a second throttle-like control unit.
#1 Best Overall

- OFFICIAL XBOX CONSOLE INTEGRATION - Access your favorite social features, switch seamlessly between your game and the console dashboard, and navigate menus effortlessly using dedicated Guide, View, and Menu buttons designed specifically for Xbox Series X|S, so you never have to reach for a separate controller during intense flight simulator sessions.
- IMMERSIVE HOTAS FLIGHT CONTROLS - Dominate every flight scenario from epic space combat to civil aviation with a complete hands on throttle and stick system that delivers high precision inputs across all flight sim genres, giving you the realistic cockpit feel that transforms casual gaming into a truly immersive flight simulation experience you can feel in every maneuver.
- SMOOTH TFRP RUDDER PEDALS INCLUDED - Take command of yaw with the first flight simulator pedals featuring Thrustmaster's S.M.A.R.T slide rail system, delivering ultra smooth steering that eliminates jerky inputs so you can execute coordinated turns, taxi with precision, and maintain perfect directional control during critical landing approaches.
- ERGONOMIC FULL FOOT DESIGN - Fly comfortably for hours with pedals engineered to support your entire foot on each surface, thanks to convenient removable heel rests that reduce fatigue and let you maintain steady, relaxed pressure throughout long flight simulation sessions, whether you are dogfighting or cruising at altitude.
- VERSATILE COMBAT READY LAYOUT - Command any aircraft with a large detachable throttle quadrant, five responsive axes, fourteen programmable buttons, a rapid fire trigger, and a multidirectional hat switch for panoramic views, giving you complete flight sim controls and total situational awareness from takeoff to touchdown.
VIRPIL’s space-simulation guide describes the practical difference between traditional throttle-and-stick layouts and dual-stick HOSAS systems.
DIY “kits” are not all the same
| Type | Usually includes | Best for | Main compromise |
|---|---|---|---|
| Digital-only project | CAD files, firmware and instructions | Makers with tools and sourcing experience | You buy or make every physical part |
| USB controller board | Input board and USB connection | Button boxes, panels, pedals and conversions | No gimbal, grip, enclosure or centering mechanism |
| Printed joystick project | Printable mechanical designs, sometimes firmware | Intermediate builders | Print quality, bearing fit and tuning determine the result |
| Component kit | Some combination of sensors, switches, bearings and hardware | Builders who want fewer sourcing tasks | Contents and compatibility vary widely |
| Force-feedback project | Motorized mechanism, electronics and a bill of materials | Advanced builders | Power, firmware, mechanical-load and safety complexity |
| Finished commercial HOTAS | Complete tested controller | Immediate use and support | Less customization and repair freedom |
Before buying, determine whether a listing is digital-only, a BOM, a component kit, partially assembled hardware or a finished product. Calling CAD files a “kit” can make a project appear much more complete than it is.
The four sensible DIY routes
1. Start with a button box or throttle quadrant
This is the lowest-risk entry point. A 3D-printed, laser-cut, wooden or repurposed enclosure can hold toggles, push buttons, encoders, potentiometers and hats. The controls are comparatively easy to mount, and the finished panel can complement an existing commercial stick.
Do these 3 things before closing this tab:
1Repair Windows errors before they cause bigger problems2Fix the driver behind crashes, sound loss and screen glitches3Clear out junk files and repair common Windows errorsA dedicated USB interface such as the Leo Bodnar BU0836X exposes eight 12-bit analog axes, 32 button inputs and a POV-hat input as a USB HID device. The manufacturer lists it for custom button boxes, pedals, joysticks, flight panels and throttle quadrants. It does not provide the enclosure, detents, grip or mechanical resistance; it only translates your inputs into a controller device.
This route is ideal for trim wheels, autopilot panels, landing-gear controls, helicopter collectives, auxiliary throttles and simulator-specific button layouts.
2. Build a joystick from an open-source design
An open-source printed design can provide the mechanical starting point, but expect to source bearings, shafts, springs, magnets, sensors, fasteners, wiring, a grip and a USB controller yourself. The 3D-Printable DIY Joystick project is a representative example: it uses Hall sensors for the primary axes, bearings for pitch and roll, a steel pivot for yaw and a potentiometer for throttle or trim.
Rank #2
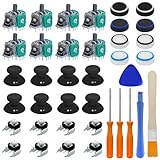
- Complete Repair Kit – Includes 8 joystick thumb grips, 8 thumbstick protectors, 8 replacement analog sticks, 8 bumper buttons (LB/RB), 3 torque screwdrivers (T6/T8/T10), 1 cleaning brush, and 2 prying tools.
- Fix Common Controller Issues – Easily repair stick drift, unresponsive buttons, misalignment, dead zones, or broken joysticks. Save money by fixing instead of replacing your controller!
- Premium Durability – Thumbsticks made from high-grade plastic & metal; silicone caps for anti-slip grip. Wear-resistant, impact-proof, and built for long-lasting performance.
- Ergonomic & Comfortable – Soft silicone covers enhance grip and reduce fatigue during long gaming sessions. Smooth, responsive buttons for precise gameplay.
- Perfect Gift for Gamers – A must-have for joystick players, DIY enthusiasts, and esports lovers. Great as a birthday, holiday, or friendship gift!
Printed parts can work well, but print orientation, layer strength, bearing seats, shaft alignment and fastener compression are critical. Print test parts first. A bearing that is slightly loose, a sensor bracket that flexes or a pivot that binds at the corners will be felt more than any upgrade to the button count.
Outdated Drivers Are Slowing You Down
One free scan finds every outdated or missing driver and matches the right update for your exact hardware.Free scan · exact hardware matchPC Slower Than It Used to Be?
A free scan shows the junk files, broken settings and background clutter dragging Windows down - then fixes them in one click.Free scan · Windows 10 & 113. Convert existing hardware
A USB controller board can modernize an old joystick, gameport throttle or custom control enclosure. You may be able to retain the grip, switches and mechanical assembly while replacing a failed interface board or worn sensors.
Do not assume that old wire colors or sensor connectors are standardized. Identify power, ground and signal with a multimeter, confirm the replacement sensor’s voltage range and check the controller board’s pinout before connecting anything. Leo Bodnar documents its boards as suitable for converting older gameport devices and other real-world controls into USB devices; the manufacturer’s sensor guidance also discusses compatible 0–5 V inputs.
4. Build a force-feedback stick
Force feedback is a separate engineering project, not simply a spring-centered joystick with a motor added. It requires motors, motor drivers, position sensing, firmware, power supplies, a rigid frame, current and thermal management, mechanical stops and a safe way to disconnect power.
FFBeast’s documentation covers a force-feedback ecosystem that includes finished devices and DIY construction. Its DIY documentation includes bills of materials, construction information and wiring guidance. Treat its compatibility descriptions as project-specific: documented native support or pass-through compatibility for selected equipment is not a universal standard between VKB, VIRPIL, Thrustmaster and DIY bases.
A motorized grip can apply unexpected force, pinch fingers or damage a weak enclosure. Test with power isolated, secure the mechanism firmly, use an emergency disconnect and never begin testing with your hand on the grip.
Rank #3
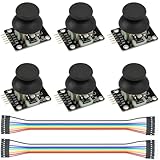
- Dual-axis XY Joystick Module:6Pcs Dual-axis XY Joystick Module
- Size:34*26*32mm
- Types:5 PIN
- Connector:+5Vcc - GND - VRx - VRy - SW
- Compatible with for Arduino Raspberry
What a complete DIY HOTAS requires
A usable system has several independent layers:
- Mechanical structure: gimbal, pivots, bearings, shafts, springs, cams, dampers, throttle rails or detents.
- Sensors: potentiometers or Hall-effect sensors for each analog axis.
- Controls: buttons, hats, toggles, encoders, sliders and switches.
- USB controller: a board that reads the inputs and enumerates as a USB game controller.
- Firmware: either built into the board or configured through project-specific firmware.
- Enclosure and mount: a rigid housing that does not flex under normal use.
- Calibration: operating-system and simulator configuration, including direction, range, deadzone and response curves.
A generic USB board does not provide centering, ergonomics, detents, sensor alignment, mounting or force feedback. Those are mechanical and software responsibilities.
Controller-board choices
Leo Bodnar BU0836 family
BU0836 boards are attractive when you want a no-code or low-code USB interface. The official product pages describe generic USB HID operation for custom controls, making them suitable for button boxes, pedals, panels, throttles and straightforward joystick conversions.
Observed official-store prices in the supplied research were £33.00 for the BU0836A and BU0836B, £29.40 for the BU0836A-NC, £42.00 for the BU0836-LC and approximately $89.08 for the BU0836X listing. These are dated price signals, not universal current prices; tax, shipping, currency and availability vary by destination. Check the official store before budgeting.
Choose the board based on input count, connector style, available space, sensor voltage and whether you need load-cell inputs. None of these boards solves the gimbal or enclosure problem.
FreeJoy
FreeJoy is open-source STM32-based USB HID firmware for game devices including HOTAS controllers, pedals and rudder systems. It can expose common joystick destinations such as X, Y, Z, Rx, Ry, Rz and slider axes.
This is a flexible choice for builders comfortable flashing firmware and troubleshooting hardware. “STM32 Blue Pill” boards are not all identical, however: clone quality, USB circuitry and firmware compatibility can vary. Verify the project documentation against the exact board before buying parts.
Rank #4
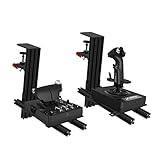
- WIDE ADAPTABILITY-Fully Support With Almost All of Flight Game Hand-Control Devices. Our table mount compatible with Turtle Beach VelocityOne Flightstick/Winwing orion/X56/X56 Rhino/X55/x52/X52 Pro/T.16000M/TCA Officer Pack Airbus/Warthog Stick /VKB Gunfighter Mk.lll/VKB Gladiator/Pro/Airrow/VPC Mongoos T-50 Throttle/T.Flight Hotas 4/TSSH Handbrake.
- Super Easy Installation: By Helping with 91N.m Force Clamp. Adjustable in Height(-175mm ~ +175mm) and Position Back and Forth. (80mm ~ 300mm)
- Excellent Compatibility: Fully Support With Almost All of Flight Game Hand-Control Devices.
- Game Comfortably: Control your plane with comfort and ergonomics. This joystick desk mount is stable when set up and can be installed easily.
- Prepare For Gaming: Ready Your Cockpit And Take Flight.The Hikig Flight Joystick Controller Mount Is The Ideal Addition To Your Battle Station For That Immersive Flight Simulation Gaming Experience.
Arduino-compatible boards
Arduino-style hardware can be useful for custom panels and prototypes, but not every Arduino board can present itself as a USB joystick. Native USB capability, the exact board model, bootloader, firmware library and operating-system enumeration all matter. A board intended only for serial communication may need different hardware or a different firmware approach.
Potentiometers versus Hall-effect sensors
| Potentiometer | Hall-effect sensor | |
|---|---|---|
| Strengths | Cheap, familiar and easy to source | Contactless sensing and no wiper wear |
| Weaknesses | Wiper wear, dirt, oxidation and possible noise | Alignment, magnet orientation and voltage requirements are critical |
| Important qualification | Works only as well as the mechanical assembly | Does not fix backlash, flex, jitter or poor calibration |
“Hall sensors never wear out” is too broad. The sensing element is contactless, but magnets, wiring, bearings, mounts and electronics can still fail. A Hall sensor also needs the correct supply voltage, output range and alignment.
Thrustmaster’s HOTAS Warthog page describes that commercial product’s H.E.A.R.T. Hall-effect sensing and claimed 16-bit precision. That specification should not be transferred automatically to a DIY build. Mechanical resolution, noise, calibration, sensor alignment and simulator input processing all affect the result.
The gimbal determines whether the stick feels good
The gimbal is usually the hardest part of a joystick build. It must provide smooth travel, consistent centering force, minimal backlash, repeatable sensor movement and no binding at the corners. It must also be stiff enough that the sensor moves with the axis instead of flexing independently.
Common designs include cross-axis or cardanic gimbals, cam-and-follower mechanisms, separate pitch-and-roll pivots, bearing-supported printed assemblies, metal gimbals and motorized direct-drive or belt-driven mechanisms.
- Springs are simple and inexpensive, but provide a conventional return-to-center feel.
- Cams can vary resistance through the travel, including a firmer or softer center.
- Dampers can reduce oscillation but may make rapid corrections feel sluggish.
- Soft centering can suit helicopter control, while a firmer center may suit fixed-wing snap movements.
Use mechanical stops before the sensor reaches its electrical limit. Support shafts on both sides where possible, prevent printed bearing seats from spreading and route grip wiring so it cannot tug the mechanism. A consistent return to center is more valuable than a large button count.
Best Value

- Military-grade Space and Flight Sim Precision. Customizable options including all the control surface options required to achieve the exact level of performance that aspiring combat pilots demand.System Requirements : Windows 11,10,8.1,7, 2x USB 2.0 Port
- New Mini Analog Stick Control Surfaces: Control pitch, roll, yaw, backwards, forwards, up, down, left and right as well as gimballed weapons that are controlled separately from the space craft
- RGB Backlighting: Many PC peripherals now feature RGB backlighting and the X-56 is no exception. Use the software to set the color of the lighting to match the rest of your gaming rig
- Ideal for VR: The X-56 places controls perfectly under your fingers where subtle distinctions in button feel and shape help you navigate the control set with ease
- Fully Featured HOTAS: Accurate 16-bit aileron and elevator axis with hall-effect sensors. Adjustable Stick Force via Advanced 4-Spring System. Twin Throttles with Friction Adjuster and Throttle Lock
A practical build sequence
- Choose the target simulator and control layout. DCS may reward many reachable hats and modifiers; Microsoft Flight Simulator and X-Plane may prioritize trim, autopilot and civilian throttle controls; space games may favor HOSAS; helicopter users may need a collective and pedals.
- Create an input map. List every axis, button, hat, encoder and switch before designing the enclosure.
- Select the controller board. Confirm input count, sensor voltage, connector type, firmware and USB behavior.
- Bench-test the electronics. Connect sensors and switches before permanently installing them.
- Build the mechanical assembly. Check bearing fits, travel, centering, detents and stops without electronics attached.
- Install and align the sensors. Make mounts rigid and leave adjustment access where possible.
- Wire and label everything. Label both ends of every wire and add strain relief.
- Configure or flash firmware. Save the firmware version, wiring diagram and configuration.
- Test as a USB controller. Check every axis, button, hat and encoder independently.
- Calibrate. Correct direction and range before adding simulator curves or deadzones.
- Close the enclosure and test again. Ensure the enclosure does not introduce binding or cable tension.
- Create simulator profiles. Export or document profiles before changing USB ports or device names.
Calibration and troubleshooting
Connect the controller before installing it permanently. Open the operating system’s game-controller test panel or the board vendor’s tester, then move one axis at a time through its complete range. Check the center after releasing the grip. Only after the hardware reaches both endpoints consistently should you configure deadzones, curves or saturation inside the simulator.
| Symptom | Likely causes | Recovery |
|---|---|---|
| Axis stays at minimum or maximum | Open signal wire, incorrect ground or wrong pin | Test continuity and verify the board pinout |
| Jitter near center | Poor grounding, noisy sensor, loose mount or worn potentiometer | Improve grounding, stiffen the mount or replace the sensor |
| Full travel is unavailable | Incorrect sensor range or magnet alignment | Reposition the sensor or magnet and inspect the linkage |
| Axis direction is reversed | Sensor orientation or firmware setting | Invert it in firmware or the simulator |
| Buttons trigger together | Matrix wiring error, missing diodes or incorrect common | Recheck the wiring against the board instructions |
| Controller is not detected | Charge-only USB cable, wrong firmware or bootloader issue | Try a data-capable cable and reflash the correct firmware |
| Stick feels rough | Misaligned shaft, poor bearing seat or print interference | Deburr, realign, reinforce or replace the affected part |
| Center is inconsistent | Spring asymmetry, friction, backlash or weak structure | Fix the mechanism before adding a software deadzone |
| Force-feedback motor moves unexpectedly | Incorrect motor order, unsafe wiring or firmware | Disconnect power and verify motor mapping before retesting |
FFBeast specifically documents the importance of preserving motor and encoder order and identifying pitch and roll connections. Force-feedback builds therefore need a dedicated wiring and safety plan, not just ordinary USB joystick calibration.
Compatibility: USB, grips and simulators
A generic USB HID controller is often easier to use across simulators than hardware requiring proprietary software, but individual games can impose limits on controller count, axis count, button numbering, hat behavior, device names and force-feedback support. Windows recognizing a controller does not prove that every simulator will expose every input.
The Tool Desk
Outbyte Driver Updater FREEFix the driver behind crashes, sound loss and screen glitchesFind Drivers →Outbyte PC Repair FREEClear out junk files and repair common Windows errorsFree Scan →Do not assume a VKB, VIRPIL or Thrustmaster grip can be connected electrically to an arbitrary DIY base. Connector pinouts, communication protocols, power requirements and firmware support differ. FFBeast documents specific compatibility paths for selected Thrustmaster and VIRPIL equipment and describes VKB support as a pass-through arrangement using the original controller; these are project-specific methods, not universal cross-brand compatibility.
Commercial modular hardware is a serious alternative. VIRPIL’s cockpit guide presents an expansion path from stick and throttle to pedals, mounts and panels, with replaceable grips, cams and springs. VKB’s downloads page provides firmware, configuration and testing tools for its own ecosystem.
The real cost of DIY
Budget for the complete project, not just the controller board:
- USB interface or microcontroller
- Sensors and magnets
- Buttons, hats, encoders and switches
- Bearings, shafts, springs, cams and fasteners
- Printed, laser-cut, machined or repurposed parts
- Wire, connectors, heat-shrink and strain relief
- Power supply and motor drivers for force feedback
- Shipping, failed parts, tools and consumables
- Your design, assembly and troubleshooting time
DIY can be excellent value when you already own a printer and tools, are reusing hardware or need a layout commercial products do not offer. A commercial base may be better value when you need reliable centering immediately, lack fabrication tools, require warranty support or are approaching the cost of a rigid machined gimbal.
Recommended Free Tools
As a dated benchmark, Thrustmaster’s U.S. product page showed the HOTAS Warthog at $599.99 during the supplied research, while its non-U.S. page showed $499.99. Those figures are geography-specific and should not be treated as a universal current price.
Which route should you choose?
- Choose a button box or throttle quadrant if you are new to DIY controls or mainly want extra simulator inputs.
- Choose an open-source printed joystick if you have a printer, can tune mechanical parts and want to learn CAD and electronics.
- Choose a conversion if you already own a useful grip, enclosure or mechanism.
- Choose a modular commercial base if you want customization without designing a precision gimbal. VKB and VIRPIL are relevant alternatives, while a finished system such as the Thrustmaster HOTAS Warthog is a useful aircraft-oriented benchmark.
- Choose a force-feedback project only if you are comfortable with motors, power electronics, firmware, rigid mechanical construction and safety procedures.
The best first DIY project is usually a custom panel using a dedicated USB controller. Once you understand input mapping, wiring and calibration, a complete stick or throttle becomes a manageable second project rather than an expensive troubleshooting exercise.
Quick Recap
Product prices and availability are accurate as of the date/time indicated and are subject to change. Any price and availability information displayed on Amazon at the time of purchase will apply.




