
You can build a first playable Python shooter with Pygame using one file and no downloaded art or sound. The essential design is a loop that reads events, updates objects using elapsed time, draws the frame, flips the display, and limits timing. The complete example below adds keyboard movement, cooldown-based shooting, timed enemies, collisions, score, lives, and restart behavior.
What you will build
By the end of this guide, you will have a small, playable 2D shooter made with Python and Pygame. The game will include:
As an Amazon Associate I earn from qualifying purchases.
- A player-controlled ship moved with the keyboard
- Automatically spawned enemies
- Bullets fired with the Space bar
- Rectangle-based collision detection
- A score and three lives
- A game-over screen and restart controls
This is a first playable vertical slice, not a complete commercial game or a general-purpose game engine. The intentionally simple design lets you understand the complete program: input, updating, drawing, timing, spawning, collisions, and state changes.
Before you start
You need Python 3, a text editor or IDE, and a terminal or command prompt. If Python is not installed, use the appropriate installer and beginner documentation from Python.org. Readers completely new to programming may find Python’s beginner resources more suitable than the language tutorial, which assumes some general programming experience.
#1 Best Overall

- With broad game support, the Logitech Gamepad F310 works with old standbys to today's biggest titles, so it's easy to set up and use with your favorite games.
- Profiler software allows the gamepad to be programmed to perform keyboard and mouse commands for games without gamepad support.* * Requires software installation.
- A familiar control layout that doesn't require a learning curve to be able to use, with all the same buttons as on an Xbox 360.
- The unique floating D-pad rests on four switches-instead of a single pivot point-making it responsive to quick changes in direction.
- The six-foot cord lets you lean back and play a comfortable distance from your PC monitor.
Pygame is a Python library for multimedia and game development. It gives your program direct control over the main game loop rather than hiding that structure behind a large editor. The release record researched for this guide lists Pygame 2.6.1, released on September 29, 2024; check the current PyPI record when installing because Python and Pygame compatibility can change.
Install Pygame
Use python -m pip where possible. It installs Pygame into the Python interpreter associated with the python command, reducing the chance that you install the package into one Python installation and run the program with another.
| Platform | Command to try |
|---|---|
| Windows | py -m pip install -U pygame |
| macOS or Linux | python3 -m pip install -U pygame --user |
Any system where python points to Python 3 |
python -m pip install -U pygame |
The official Pygame documentation also shows pip install pygame and pip3 install pygame. The exact command varies with your operating system, Python installation, and whether you are using a virtual environment.
Verify the installation before writing the game:
python -c "import pygame; print(pygame.version.ver)"On macOS or Linux, replace python with python3 if that is the command that launches Python 3. Pygame’s getting-started guidance also suggests running its included Aliens example:
python -m pygame.examples.aliensIf the import fails, install Pygame using the same interpreter that runs your program. For example, if you start the game with python3 shooter.py, install with python3 -m pip ....
Understand the Pygame game loop
A Pygame program normally repeats five jobs:
- Read events: process keyboard input and the window-close request.
- Update state: move the player, bullets, and enemies.
- Draw: render the current state to the window.
- Present: use
pygame.display.flip()to show the completed frame. - Control timing: call
Clock.tick()once per frame.
The event queue must be processed regularly. If it is ignored, the operating system may consider the window unresponsive. Clock.tick(60) limits the loop to approximately 60 iterations per second and returns the elapsed time in milliseconds. It does not guarantee perfectly precise frame pacing on every platform, so the game below converts that elapsed time into seconds and uses it for movement.
Create the first playable shooter
Create a file named shooter.py and paste in the complete program below. It uses colored rectangles instead of downloaded artwork, so there are no asset files, licenses, or folder paths to configure.
What’s actually slowing this PC down?
Pick the symptom - the matching free tool is one click away.
import random
import pygame

# Window and gameplay constants
WIDTH, HEIGHT = 800, 600
FPS = 60
PLAYER_SPEED = 420          # pixels per second
BULLET_SPEED = 650          # pixels per second
ENEMY_SPEED = 140           # pixels per second
SHOT_COOLDOWN = 0.22        # seconds between shots
SPAWN_ENEMY = pygame.USEREVENT + 1


class Player:
    def __init__(self):
        self.rect = pygame.Rect(WIDTH // 2 - 25, HEIGHT - 70, 50, 32)
        self.cooldown = 0.0

    def update(self, dt):
        keys = pygame.key.get_pressed()
        direction = 0

        if keys[pygame.K_LEFT] or keys[pygame.K_a]:
            direction -= 1
        if keys[pygame.K_RIGHT] or keys[pygame.K_d]:
            direction += 1

        self.rect.x += round(direction * PLAYER_SPEED * dt)
        self.rect.clamp_ip(pygame.Rect(0, 0, WIDTH, HEIGHT))
        self.cooldown = max(0.0, self.cooldown - dt)

    def shoot(self):
        if self.cooldown > 0:
            return None

        self.cooldown = SHOT_COOLDOWN
        return pygame.Rect(self.rect.centerx - 3, self.rect.top - 14, 6, 14)


class Enemy:
    def __init__(self, x, y=-35):
        self.rect = pygame.Rect(x, y, 36, 28)

    def update(self, dt):
        self.rect.y += round(ENEMY_SPEED * dt)


def draw_text(surface, font, text, position, color=(255, 255, 255)):
    image = font.render(text, True, color)
    surface.blit(image, position)


def reset_game():
    return Player(), [], [], 0, 3, "PLAYING"


pygame.init()
screen = pygame.display.set_mode((WIDTH, HEIGHT))
pygame.display.set_caption("First Pygame Shooter")
clock = pygame.time.Clock()
font = pygame.font.Font(None, 32)
large_font = pygame.font.Font(None, 72)

# A timer repeatedly posts SPAWN_ENEMY events to the event queue.
pygame.time.set_timer(SPAWN_ENEMY, 700)

player, bullets, enemies, score, lives, state = reset_game()
running = True

while running:
    # Clock.tick returns milliseconds since the previous frame.
    dt = clock.tick(FPS) / 1000.0

    for event in pygame.event.get():
        if event.type == pygame.QUIT:
            running = False

        elif event.type == SPAWN_ENEMY and state == "PLAYING":
            x = random.randint(0, WIDTH - 36)
            enemies.append(Enemy(x))

        elif event.type == pygame.KEYDOWN:
            if state == "PLAYING" and event.key == pygame.K_SPACE:
                bullet = player.shoot()
                if bullet is not None:
                    bullets.append(bullet)
            elif state == "GAME_OVER" and event.key == pygame.K_r:
                player, bullets, enemies, score, lives, state = reset_game()

    if state == "PLAYING":
        player.update(dt)

        # Holding Space fires whenever the cooldown allows it.
        if pygame.key.get_pressed()[pygame.K_SPACE]:
            bullet = player.shoot()
            if bullet is not None:
                bullets.append(bullet)

        for bullet in bullets:
            bullet.y -= round(BULLET_SPEED * dt)

        for enemy in enemies:
            enemy.update(dt)

        # Remove bullets that have left the screen.
        bullets = [bullet for bullet in bullets if bullet.bottom > 0]

        # Bullet/enemy collisions. A rectangle is an approximation of each object.
        remaining_enemies = []
        for enemy in enemies:
            destroyed = False
            for bullet in bullets[:]:
                if enemy.rect.colliderect(bullet):
                    bullets.remove(bullet)
                    score += 10
                    destroyed = True
                    break
            if not destroyed:
                remaining_enemies.append(enemy)
        enemies = remaining_enemies

        # Enemies that reach the player cost a life. Enemies below the window
        # also cost a life, preventing an unlimited off-screen object buildup.
        remaining_enemies = []
        for enemy in enemies:
            if enemy.rect.colliderect(player.rect):
                lives -= 1
            elif enemy.rect.top > HEIGHT:
                lives -= 1
            else:
                remaining_enemies.append(enemy)
        enemies = remaining_enemies

        if lives <= 0:
            state = "GAME_OVER"

    # Draw the current frame.
    screen.fill((10, 14, 35))
    pygame.draw.rect(screen, (60, 190, 255), player.rect)

    for bullet in bullets:
        pygame.draw.rect(screen, (255, 235, 90), bullet)

    for enemy in enemies:
        pygame.draw.rect(screen, (240, 75, 90), enemy.rect)

    draw_text(screen, font, f"Score: {score}", (15, 15))
    draw_text(screen, font, f"Lives: {lives}", (WIDTH - 105, 15))

    if state == "GAME_OVER":
        overlay = pygame.Surface((WIDTH, HEIGHT), pygame.SRCALPHA)
        overlay.fill((0, 0, 0, 155))
        screen.blit(overlay, (0, 0))
        message = large_font.render("GAME OVER", True, (255, 255, 255))
        screen.blit(message, message.get_rect(center=(WIDTH // 2, HEIGHT // 2 - 35)))
        draw_text(screen, font, "Press R to restart", (WIDTH // 2 - 100, HEIGHT // 2 + 25))

    pygame.display.flip()

pygame.quit()
Run it from the directory containing the file:
python shooter.pyUse python3 shooter.py on systems where that is the Python 3 command. Move with the Left/Right arrow keys or A/D, hold Space to fire, and press R after game over.
Rank #2

- Wired Controller, USB cable: 1.8M.
- Compatible with Switch (version 3.0.0 or above), Windows, Raspberry Pi devices.
- Rumble vibration.
- Support turbo function.
How the code works
1. The player is a rectangle
The player has a pygame.Rect containing its position and size. This is enough for drawing with pygame.draw.rect() and for collision checks with colliderect(). Starting with geometry avoids the distraction of image files while you learn the architecture.
pygame.key.get_pressed() reports which keys are currently held. Each frame, the program turns the held Left/Right keys into a direction of -1, 0, or 1. The position changes by speed * dt, where dt is the time since the previous frame. This is more dependable than moving a fixed number of pixels per frame: a slower frame receives a larger movement step, while a faster frame receives a smaller one.
clamp_ip() keeps the player rectangle inside the window. Without that boundary check, the ship could disappear beyond the left or right edge.
Recommended Free Tools
2. Bullets use a cooldown
A bullet is another rectangle stored in the bullets list. The player’s shoot() method refuses to create a new bullet while cooldown is above zero. The cooldown is reduced by dt every update. The result is a controllable firing rate rather than one bullet per frame while Space is held.
The program checks Space both when it receives a key-down event and while the key is held. The held-key check is what makes continuous fire work. The event check makes the code’s response to an individual press clear, although the cooldown means it will not create duplicate bullets immediately.
3. Enemies arrive through a timer event
pygame.time.set_timer(SPAWN_ENEMY, 700) repeatedly places a custom event in Pygame’s event queue approximately every 700 milliseconds. The main loop creates an enemy when it receives that event. A Pygame timer can post events repeatedly, but a given event type can have only one active timer at a time. Calling set_timer() again with the same event type replaces its existing schedule.
The spawn interval, enemy speed, bullet speed, window size, and cooldown are ordinary constants. Change them to tune the feel of the prototype; none is a Pygame requirement, and these values do not represent balanced game design.
The Tool Desk
Outbyte Driver Updater FREEFix the driver behind crashes, sound loss and screen glitchesFind Drivers →Outbyte PC Repair FREERepair Windows errors before they cause bigger problemsFix Now →4. Collisions remove objects and award points
The collision code compares each enemy with the current bullets. When two rectangles overlap, the bullet is removed, the enemy is discarded from the next enemy list, and the score increases by 10. The code iterates over bullets[:] when removing bullets so it does not modify the list being traversed.
Rank #3
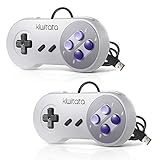
- ✅【Compatibility】Compatible with Raspberry Pi, Windows PC, Linux ,Mac. Specifically designed for playing classic old school retro snes games on computer or laptop.This is the USB controller what has a USB plug for PC, NOT compatible for Original SNES super Nintendo console
- ✅ 【Ergonomic Design】Super precise cross key and function buttons,the cross direction key adopts frosted concave design,anti-sweat and anti-slip.The shape of the controller is designed to fit the contour of your hands,easy and comfortable to hold.
- ✅ 【Advanced Game Experience】PC running operating system:Windows 98/2000/ ME/XP/Vista/Win7/8/8.1/11 or later,or Mac running OS X 10.0/Mac OS X or above.It works with most of emulators you wish to download and use,such as VirtuaNES(PC),sens9x,Zsens,sensgt,Uosnesw,RetroArch,OpenEmu(MAC),NESEmu and Jnes etc.
- ✅ 【Wired USB Connection】Standard USB 2.0 port with a 1.5 meters (5ft) cable, don't need to install any drivers, you must manually set the buttons and directionals within the emulator you're using, and the controller not automatically assigns buttons/directional axes. Notice: please download the game emulator first before start the games, you can download the emulator “VirtuaNES” on PC and “OpenEmu”on MAC.
- ✅【Satisfaction】Third party controller(USB Version), not for original snes console and not support for switch. If there is an incompatibility on MAC or Raspberry Pi , please contact the seller for a support.
Rectangle collisions are fast and easy to understand, but they are approximations. If you later replace the rectangles with irregular artwork, the collision box may include transparent corners or miss the exact visible outline. That is acceptable for this first game. More elaborate games can use smaller collision rectangles, masks, or custom rules.
5. Lives create a game state
An enemy costs one life when it touches the player or passes below the window. Once lives reaches zero, state changes from "PLAYING" to "GAME_OVER". The update code then stops moving objects and spawning gameplay effects, while the drawing code displays the restart message.
The reset_game() function creates fresh lists, resets the score and lives, and constructs a new player. Pressing R replaces the old game data with that reset state. A larger project might represent states with an enumeration or separate screen classes; three strings are enough to demonstrate the idea here.
Windows Errors? Fix Them Before They Spread
Repair common Windows errors and clear accumulated junk for a smoother, more stable PC - no reinstall needed.Free scan · no reinstallOutdated Drivers Are Slowing You Down
One free scan finds every outdated or missing driver and matches the right update for your exact hardware.Free scan · exact hardware matchRecommended build milestones
If you prefer to understand the game incrementally rather than paste the whole file, build and test it in this order:
- Open a window and close it cleanly.
- Draw the player rectangle.
- Move the player and clamp it to the window.
- Create one bullet and remove it after it leaves the screen.
- Spawn enemies and move them downwards.
- Detect bullet-versus-enemy collisions.
- Draw the score and lives.
- Stop gameplay on game over and implement restart.
- Add images and sound only after the geometry-only version works.
- Split the one-file project into modules after you understand its responsibilities.
Testing one milestone at a time makes it much easier to identify whether a problem is in input, movement, drawing, timing, or collision handling.
Independent reader supportYour contribution helps us test, update, and keep practical guides available for everyone.Optional improvements after the prototype works
Use Pygame sprites and groups
Ordinary lists are sufficient for this small example. As the number of objects grows, Pygame’s pygame.sprite.Sprite and pygame.sprite.Group provide a more structured alternative. A sprite generally exposes an image and a rect; groups can update collections and Pygame supplies group collision helpers.
A sensible refactoring would give Player, Bullet, and Enemy sprite classes, then store them in groups such as all_sprites, bullets, and enemies. Do this after the list-based version is understandable. Sprite groups are organizational tools, not a reason to introduce threading; Pygame’s sprite reference does not describe sprites as thread-safe.
Make enemies more interesting
- Choose from several enemy speeds.
- Spawn waves instead of one enemy at a time.
- Move enemies in a sine-wave or zigzag pattern.
- Add an enemy that takes multiple hits.
- Increase difficulty gradually by reducing the spawn interval.
Keep the spawn area bounded and remove every object that can no longer affect play. Otherwise, lists can grow indefinitely during a long session.
Rank #4

- 【Supported Operating System】The Game Controller is specifically designed for playing classic old school retro snes games on computer or laptop. Compatible with Windows 98 / ME / Vista / 2000/2003 / XP / 7 / 8 / 8.1 / 10/11, Mac OS X/ OS X 10.0 and beyond, Raspberry Pi, Raspberry PI 2 model B,Model A, Raspberry Pi 1 Model B+, Raspberry Pi 2,Raspberry Pi OS, Raspberry Pi 3 Model B+, Raspberry Pi 3, Raspberry Pi Zero.
- 【Simple USB Plug and Play】If your program or application accepts USB controller input, this classic game controller do not need install drivers or patches. 1.5 meter external cable(approx. 5 ft. Long). Notice: Please download the game emulator first before start the games, and then you must manually set the buttons and directionals within the emulator you're using, and the controller not automatically assigns buttons/directional axes. If on the Steam platform, you need to first enable Steam's "Universal Controller Configuration Support" and then restart Steam. After entering the game, you also need to manually bind key positions in the game
- 【High Sensitivity without Delay】Super sensitive buttons for precision control: 6 fire buttons, a 'Start' button and a 'Select' button, motion control cross. Play your favorite old school games with classic retro feel. Fits perfectly in the hand and also perfect for two player action.Note: Not applicable to Switch/PS games. Not Compatible with TV/ TV Box, third Mini Games Box and Tesla Model 3
- 【Supported Game Emulators】The game controller works with most emulators. Download any emulator you wish to download and use from Google and do the same with ROMS. Notice:Third party controller, not original controller. But it works phenomenal with the Raspberry Pi game emulation and so on
- 【Product Service】If you have any problem during use, send message to us and we will help you to solve the problem soon
Add images and audio
Once the loop works, replace rectangles with pygame.image.load() surfaces and add sound through Pygame’s mixer module. Keep asset paths relative to the project rather than depending on the terminal’s current directory:
from pathlib import Path

ASSET_DIR = Path(__file__).parent / "assets"
ship_image = pygame.image.load(ASSET_DIR / "ship.png").convert_alpha()
Missing files should produce a clear error while you are developing; silently ignoring them makes a broken installation harder to diagnose. Any third-party artwork, music, or sound effects must have a license that permits your intended use, and you must follow its attribution requirements. An image found through a search engine is not automatically free to reuse.
Add pause and a title screen
You can add a PAUSED state and switch to it when the user presses P. A title screen can wait for a key press before calling reset_game(). Keep input handling, updating, and drawing separate so each additional state has a predictable place in the program.
Free tools Windows power users keep installed
One-click scans. No signup required.
Troubleshooting Pygame games
- “No module named pygame”: confirm the interpreter with
python --version, then install using that same interpreter:python -m pip install -U pygame. On macOS or Linux, usepython3consistently if required. - The window does not close: make sure
pygame.event.get()runs every frame and that thepygame.QUITevent setsrunningtoFalse. - The screen stays blank: draw your objects before calling
pygame.display.flip(). The display is not updated merely because you changed a rectangle in memory. - Movement speed changes between computers: use elapsed time, as this example does, rather than assuming every computer renders the same number of frames per second.
- Timing feels inconsistent: call
clock.tick(FPS)once per frame. It limits the loop and returns elapsed milliseconds, but its delay accuracy varies by platform. - Images or sounds cannot be found: check the working directory and use a path based on
Path(__file__).parent. - Memory or object counts keep rising: remove bullets and enemies after they leave the play area or are destroyed.
- Objects disappear or collisions behave strangely: avoid removing items from a list while directly iterating over that same list. Iterate over a copy or build a filtered replacement list.
- Font, display, or mixer operations fail: call
pygame.init()before using modules that require initialization.
Where to go next
Read the official Pygame documentation alongside your experiments. Its quick-start material covers initialization, the display surface, event polling, drawing, display flipping, and frame-rate limiting; its reference documents modules such as Surface, Rect, fonts, images, sound, keyboard input, and timing.
If you prefer a longer project-based reference after finishing this shooter, Making Games with Python & Pygame is an optional resource to look for. The book’s publisher page describes its Pygame coverage and 11 example games, but it should not be treated as required, as current API documentation, or as a replacement for the official Pygame references. Check the edition and availability at publication time.
The most useful next project is usually a small variation: a top-down space game with enemy bullets, a fixed number of waves, a boss, or a high-score file. Change one system at a time, keep the game playable, and use the working rectangle version as your safety net while adding art and complexity.
Frequently Asked Questions
Is Pygame a game engine?
Pygame is a Python library for multimedia and game development. It provides display, event, drawing, timing, keyboard, image, font, and sound functionality, but it is not a full visual game engine.
Why does Python say that Pygame is not installed?
Use the Python interpreter that will run the game. For example, install with python -m pip install -U pygame and run with python shooter.py; use python3 consistently on systems where that is the Python 3 command.
How does collision detection work in this shooter?
The example uses rectangle overlap through pygame.Rect.colliderect(). It is easy to understand and sufficient for simple geometric objects, but it is an approximation for irregular images.
Can Pygame spawn enemies automatically?
Yes. The example uses pygame.time.set_timer() to post a custom spawn event every 700 milliseconds. You can change that interval or replace it with an elapsed-time accumulator.
The Bottom Line
A first Pygame shooter only needs a controlled loop, a few rectangles, timed updates, collections for moving objects, collision rules, and a small game-state system. Get that geometry-only version working before adding assets, sound, modules, or more elaborate architecture.
Quick wins for a faster PC:
Repair Windows errors before they cause bigger problemsFix Now →Fix the driver behind crashes, sound loss and screen glitchesFind Drivers →Clear out junk files and repair common Windows errorsFree Scan →Quick Recap
Product prices and availability are accurate as of the date/time indicated and are subject to change. Any price and availability information displayed on Amazon at the time of purchase will apply.

