Quick wins for a faster PC:
Fix the driver behind crashes, sound loss and screen glitchesFind Drivers →Repair Windows errors before they cause bigger problemsFix Now →Scan for outdated or missing drivers - takes under a minuteDriver Scan →The dependable way to install a game-server panel on a gaming VPS is to deploy Pterodactyl Panel as the control plane and Wings as the node service that runs Docker containers. You can place both on one VPS for a small private server, or run the Panel on one machine and add one or more Wings nodes as your hosting operation grows. The VPS must provide a supported Linux distribution, root or sudo access, and virtualization that permits Docker; KVM is the safest choice.
This guide follows the documented native installation on Ubuntu 24.04, Ubuntu 22.04, or Debian 12/13, then explains the Docker-based Panel option, node registration, first server creation, and the failures that most often stop an installation.
As an Amazon Associate I earn from qualifying purchases.
The Tool Desk
Outbyte Driver Updater FREEFix the driver behind crashes, sound loss and screen glitchesFind Drivers →Outbyte PC Repair FREEClear out junk files and repair common Windows errorsFree Scan →What you are installing
Pterodactyl has two distinct components:
- Panel: the web application where you create users, nodes, allocations, servers, eggs, databases, schedules, and backups.
- Wings: the daemon installed on each node. It communicates with Docker and runs the game-server containers for the Panel.
Every game server runs in its own Docker container. The Panel does not run the game process itself. Game files and backups are stored on the Wings node, rather than in the Panel’s application container. This separation matters when you plan storage, backups, firewall rules, and future nodes.
For a single small community server, Panel and Wings can share one VPS. Separating them is more useful when you need several nodes, want the web interface isolated from game workloads, or expect to move games between machines.
#1 Best Overall
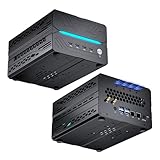
- [Powerful PC] Mini Gaming PC equipped with Core i9-14900F, 24 Cores 32 Threads, 36M Cache, Max Turbo Frequency: 5.8GHz, Windows 11 pro (64 Bit). With GeForce RTX 50 Series GPUs. supporting ray tracing and AI cores. Delivering AI-acceleration in top creative apps. Whether you’re rendering complex 3D scenes, editing 4K video, AI Applications, Multitasking, video server or Gaming livestreaming with the best encoding and image quality, GeForce RTX GPUs give you the performance to create your best.
- [Storage Expansion] Mini computer is equipped with Dual-DDR5 RAM slots which can support up to 96G RAM(2*48G), 1 x M.2 2280 PCIE4.0 high-speed SSD, and support add 1 x 2.5-inch SATA HDD/SSD(not include) is enough to accommodate system files and massive games, Equipped with high-capacity memory, this machine powers through demanding AI applications — from generating stunning images to rendering smooth AI videos. More memory means faster responses, seamless multitasking.
- [8K@60Hz Four-Display] Mini PC equipped with GeForce RTX5060Ti 16GB GDDR7 discrete graphics card, supporting ray tracing and AI cores. easy connect 4 monitors, 1×HDMI 2.1b and 3×DisplayPort 2.1b(All Support 8K@60Hz display), It can provide you with a first-class TV experience and realistic picture quality, for your visual home entertainment, streaming video, web browsing, work design and 3D games create a very smooth experience.
- [Functional Interfaces] Mini computer is equipped with 4 x USB 3.2, 4 x USB2.0, 1 x HDMI2.1 port, 3 x DP2.1 ports, 2xRJ-45 Gigabit Network Ethernet, 1 x Fiber Optic PORT, 1 x Audio in/out. Built-in Bluetooth 5.4 and IEEE 802.11be wifi 7, Higher transfer rates and lower latency. Mini PC supports multiple device connection and can be used with servers, monitoring equipment, office equipment, projectors, televisions, etc, Mini desktop computer support automatic power on and Wake On Lan.
- [Warranty & heat dissipation] Warrant: 2 year/24 months. The compact computer size: 8.6*6.6*4.5in, 5.5lb, Inside the chassis are four all-copper turbo fans and eight vacuum heat pipes for powerful cooling performance. Make it can work smoothly and will not cause too much noise.
Check the VPS before installing anything
Choose a supported operating system
The current native documentation recommends Ubuntu 24.04. Ubuntu 22.04 and Debian 12 or 13 are also documented native choices. Wings supports Ubuntu 22.04 and 24.04 plus Debian 11, 12, and 13. Use a clean 64-bit image and keep the Panel and Wings distributions within those support ranges.
Confirm virtualization can run Docker
Run this check on the proposed node before committing to a VPS:
systemd-detect-virtKVM is expected to work. OpenVZ, Virtuozzo, and LXC can prevent Wings from starting unless the provider explicitly supports nested Docker and supplies the required kernel features. A container VPS that looks inexpensive can therefore be unusable for Pterodactyl. If the command reports one of those technologies, ask the provider whether Docker, cgroups, and nested virtualization are supported before you install the Panel.
Plan resources around the games
There is no universal CPU or RAM minimum published for every Pterodactyl installation. Demand depends on the game, mod loader, view distance, player count, Java or native runtime, scheduled jobs, and the amount of storage reserved for backups. Size the VPS for the games and concurrent players you actually intend to host, and leave headroom for the operating system, Docker, the Panel, databases, and monitoring. Treat storage as two separate requirements: active game data on the node and backup capacity, which can quickly exceed the live installation.
Prepare access and naming
- Obtain root access or a sudo-capable account.
- Choose a domain name for the Panel and ensure its DNS points to the Panel VPS.
- Decide which machine will be a Wings node. It may be the same VPS or a separate KVM VPS.
- Keep provider firewall controls and the VPS firewall available so you can permit web, Wings, game, and file-transfer traffic deliberately.
Native installation versus Docker deployment
Both deployment styles still require Wings as a separate node service. The difference is how the Panel and its supporting services are packaged.
| Decision point | Native Panel | Docker Panel |
|---|---|---|
| Base systems documented for the Panel | Ubuntu 24.04 recommended; Ubuntu 22.04 and Debian 12/13 are documented | Uses the Pterodactyl Panel image; the host still needs a supported environment for the surrounding services |
| PHP, NGINX, queue worker, scheduler | Installed and maintained directly on the host | Packaged in the Panel image |
| Database and Redis | Installed as host services | Still required separately |
| Wings | Installed separately on each node | Installed separately on each node |
| Operational caution | Version compatibility and service configuration are your responsibility | Use a specific image tag or digest, run migrations explicitly, and back up the database with /app/var/.env |
Native deployment is the most direct route on Ubuntu 24.04 or Debian. Docker deployment can make Panel upgrades and dependency packaging more consistent, but it does not turn the Panel image into a game node and does not remove database, Redis, HTTPS, or backup responsibilities.
Install the Panel natively
1. Provision and update the host
Deploy the selected Ubuntu or Debian image, log in with root or sudo, and apply the distribution’s current updates. Do this before adding application repositories or installing PHP so that the kernel, package metadata, and security fixes are current.
Rank #2

- RYZEN 7 H 255 CPU - The Ryzen 7 H 255 is a chip from the Hawk Point family and is an upgraded version of the older Ryzen 7 8745H and has 8 cores (16 threads thanks to SMT support) that run at up to 4.9 GHz, together with the powerful Radeon 780M iGPU. Unlike Zen 3, Zen 4 offers AVX512 support along with other improvements such as larger caches/registers/buffers across the board.
- GAMING PC - The Radeon 780M (12 CUs / 768 shaders, up to 2,600 MHz) can drive multiple displays simultaneously with a resolution of up to 8K. Hardware encoding and hardware decoding of the most common video codecs (AV1, AVC, HEVC) is also no problem; playing the latest games on FSR settings without issues.
- WHY CHOOSE DDR5 5600MHz DUAL CHANNEL (2×16GB): With a 5600MHz clock—a 17% frequency uplift over 4800MHz—this kit delivers massive bandwidth gains that elevate real-world performance. Gamers enjoy higher minimum FPS and less stutter in open-world and sim titles for a smoother competitive experience. Video editors and 3D creators benefit from faster 4K/8K timeline scrubbing, quicker renders in DaVinci Resolve and Premiere, and swifter asset loading. For AI/LLM workloads, the superior throughput reduces I/O bottlenecks, cuts token generation latency, and accelerates model fine-tuning by keeping processing cores fed with data—so you wait less and create more.
- 32GB DDR5 RAM + 512GB SSD - The K12 mini computer is equipped with Dual 16GB (Total 32GB) SO-DIMM DDR5 5600MHz memory sticks. 512GB PCIE 4.0 SSD Drive with 3x M.2 2280 Expansion slots. Each slot capable of reading up to 8TB. (24TB MAX)
- QUAD SCREEN 4K DISPLAY SUPPORT - K12 Mini PC support 4-screen 4K/8K output via HDMI 2.1 (8K@60Hz), DisplayPort 1.4 (4K@60Hz), and USB Type-C Transfer speed (supporting PD3.0/DP1.4/DATA). Ideal for gaming, video editing, and multitasking, it provides expansive and crisp multi-display support.
2. Install the Panel prerequisites
The Panel requires PHP 8.3 or 8.4, Composer 2, MariaDB 10.11/11 or MySQL 8/9, Redis, a web server such as NGINX, a queue worker, and a scheduler cron entry. Install the exact versions and PHP extensions listed for your operating system in the official Pterodactyl requirements and getting-started documentation. Do not substitute an older PHP release simply because it is the default in an older distribution image.
At this stage, verify that each service starts cleanly and that the database and Redis credentials you intend to use are recorded securely. The Panel’s queue and scheduler are not optional extras: without the worker, queued jobs such as server actions can stall; without the scheduler, scheduled tasks and recurring maintenance do not run.
3. Deploy the Panel files and environment
Download the Panel release described by the current installation guide, place it in the directory specified there, install its Composer dependencies, and create the environment file. Configure the application key, database connection, Redis connection, mail settings, URL, and timezone as required by the guide. Protect the environment file because it contains credentials and the application secret.
Free tools Windows power users keep installed
One-click scans. No signup required.
4. Create the database and administrator
Create a dedicated MariaDB or MySQL database and user, grant that user only the privileges required by the Panel, and run the documented migrations and seed steps. Then create the first administrator account. Use a unique password and an address you control for operational mail; password resets and alerts depend on correctly configured mail delivery.
5. Configure NGINX and HTTPS
Point the Panel domain at the VPS, create the NGINX server configuration from the Pterodactyl guide, and confirm that the web root and PHP handler point to the Panel installation. Obtain an HTTPS certificate for the domain and configure NGINX to serve the Panel over HTTPS. The node connection and browser login should not be left on plain HTTP when credentials and server-control requests are crossing the network.
6. Enable the queue and scheduler
Configure the documented queue worker as a persistent service so it starts after a reboot. Add the required scheduler entry to cron and confirm that it runs under the account and directory expected by the Panel. A successful web login alone does not prove these background components are working, so test a queued action and a scheduled task before adding production servers.
Install Wings on the game node
1. Install Docker on a supported node
Use a supported Ubuntu or Debian image, confirm virtualization again with systemd-detect-virt, and install Docker using the Wings documentation for that operating system. Enable Docker at boot. If Docker cannot start, stop here and inspect the provider image and kernel rather than continuing with Wings; modified kernels can lack Docker features that Wings needs.
Recommended Free Tools
Rank #3

- Office Gaming Mini PC - UPGRADED GMKtec Nucbox M5 Ultra Series is equipped with the powerful AMD Ryzen 7 7730U processor, 8 Cores/16 Threads, Base 2.00GHz (Power Saving Quiet Mode) with Turbo Boost up to 4.50GHz (Performance Mode) in BIOS settings, Based on the ZEN 3+ architecture, this small but powerful mini pc delivers satisfying results in productivity, office work, and gaming. 35% Performance increase over AMD Ryzen 5 7430U/ Ryzen 7 5700U, 5600U, 5560U, 5500U.
- 32GB DDR4 RAM & 1TB PCIe SSD - Installed with DDR4 32GB RAM Dual Channel (2x16GB), the Nucbox M5 Ultra mini pc support expansion to 64GB RAM. Featured with 1TB M.2 2280 PCIe 3.0 SSD, support dual slot expansion each can be up to 8TB SSD. (Upgrades not included)
- DUAL NIC LAN 2.5G RJ45 - Fast Network Speeds: Enjoy up to 2500Mbps data transmission speed without worrying about lagging. Ideal for working, gaming, and surfing the internet. Great for Untangle, Pfsense or as a server office PC.
- Mini Desktop Computer with 4K Triple Screen Display - Nucbox M5 Ultra integrates AMD Radeon Graphics 8 Cores 2000 MHz GPU to deliver powerful graphics processing power to easily handle the demands of complex design software, 4K@60Hz UHD video editing, and playback. It can connect to 3 display screens simultaneously.
- Fast Internet WiFi 6E + BT5.2 Connection - GMKtec Mini PC with WiFi-6E Wireless, have 2.5G/5G/6G triple band, more faster and lower latency. Bluetooth 5.2 allowing you more quickly to connect other wireless devices (headset, mouse, keyboard, etc.) Interface features 2*USB3.2 ports, 2*USB2.0 ports, 1*HDMI 2.0 port(4K@60Hz), 1*USB-C port(PD/DP/DATA), 1*DP Port, 1*Audio 3.5mm (HP&MIC), 1*DC Power Port.
2. Create the Wings directory and binary
Create /etc/pterodactyl, download the Wings binary specified for your architecture, and make it executable. Keep the binary and configuration owned and readable in the way shown by the current Wings guide. Do not assume that a Panel image for one CPU architecture makes every game image available for that architecture.
3. Create the node in the Panel
- Sign in to the Panel as an administrator.
- Open Admin → Nodes and choose the option to create a node.
- Enter the node name, FQDN or IP, scheme, resource limits, and allocation settings appropriate for the VPS.
- Open the node’s Configuration tab.
- Use the auto-deploy command or copy the generated configuration file into
/etc/pterodactyl/config.ymlon the node.
The generated file binds the node to the Panel. Treat it as a secret: it contains credentials that allow Wings to authenticate to the control plane.
4. Test Wings in the foreground
Start Wings in debug mode first:
sudo wings --debugWatch the output for Docker, DNS, certificate, permission, and port errors. Keep the process in the foreground until the node connects successfully and reports no fatal configuration problems. Resolve those errors before creating a game server; otherwise a failed node can leave allocations and installations in a confusing partial state.
5. Convert the test into a persistent service
After the debug run is clean, install Wings as the persistent system service described in the official guide, enable it at boot, and start it. Reboot or restart the service once and verify that the node returns online in the Panel. This confirms that the service account, binary path, configuration path, Docker dependency, and network access all survive a restart.
What’s actually slowing this PC down?
Pick the symptom - the matching free tool is one click away.
Create and test your first game server
Select an egg and allocate resources
In the Panel, choose an egg that matches the game and its runtime. Select the Wings node, assign an IP and port allocation, set CPU and memory limits, and reserve storage appropriate for the world, mods, logs, and updates. A game can appear to install correctly and still fail later if its allocation or memory limit is too restrictive.
Install and verify the server
- Create the server from the selected egg and start the installation.
- Watch the console for image-pull, dependency, and game-runtime errors.
- Confirm that the game files are written on the Wings node.
- Connect from a real client on the intended game port.
- Stop and restart the server, then confirm that the world and configuration persist.
- Test file transfer, console commands, scheduled tasks, and a backup restore before inviting players.
Backups are node data, not Panel data. Include the Wings storage path in your backup plan and test restoration to a spare allocation or node. Backing up only the Panel database preserves users and settings but not the game worlds.
Using the Docker deployment for the Panel
The Docker method packages NGINX, PHP, the queue worker, and the scheduler in the Panel image. Database and Redis remain required, and Wings is still installed independently on every node. This makes the Panel container easier to reproduce, but it does not eliminate the need to understand persistent storage and upgrades.
Do these 3 things before closing this tab:
1Fix the driver behind crashes, sound loss and screen glitches2Repair Windows errors before they cause bigger problems3Scan for outdated or missing drivers - takes under a minuteRank #4

- 【AMD Ryzen 3 5300U CPU: Outperforms N150 & 3500U】 BOSGAME E5 mini PC is powered by the TSMC 7nm FinFET architecture AMD Ryzen 3 5300U processor (4 Cores, 8 Threads, up to 3.8GHz boost, 6MB total cache). Compared to low-end Intel N150 or 3500U chips which only have 4 single threads and throttle under load, the 5300U delivers over 30% faster multi-core speed. Run 30+ browser tabs, large Excel sheets, and Zoom meetings simultaneously without system lag.
- 【8GB DDR4 RAM & 256GB NVMe SSD Storage】 Installed with high-speed 8GB DDR4 dual-channel memory and a fast 256GB M.2 2280 SSD, eliminating slow boot times and application loading delays. To accommodate growing data requirements, the upgradeable hardware design features dual SODIMM slots that allow you to expand memory up to 64GB RAM, ensuring smooth operation during heavy multitasking.
- 【High-Capacity Dual M.2 SSD Storage Expansion】 Never worry about running out of space for your business files. In addition to the pre-installed 256GB system drive, the motherboard houses an extra empty internal M.2 2280 NVMe PCIe 3.0 slot. This allows you to easily add a second solid-state drive for up to an additional 2TB of storage capacity (upgrades not included) without needing to remove or reinstall the original operating system.
- 【Radeon 6-Core Graphics & Triple 4K Displays】 Integrated with official AMD Radeon Graphics (6 Graphics Cores, 1500 MHz frequency) for casual gaming, photo editing, and crisp 4K media decoding. Featuring 1x HDMI 2.0 port, 1x DisplayPort, and 1x Full-Function Type-C port, the E5 outputs true 4K@60Hz resolution to three monitors at once. This multi-screen setup eliminates constant window-switching for traders, programmers, and office workers.
- 【Dual 2.5GbE LAN Ports for Advanced Networking】 Experience fast wired network transmission speeds up to 2500Mbps without lagging or buffering. The integration of dual 2.5 Gigabit Ethernet ports (powered by Realtek RTL8125 controller) makes this compact computer an exceptional hardware choice for tech enthusiasts. Easily configure it into software routers, hardware firewalls (pfSense, OpnSense), home NAS servers, or local homelabs.
Use a pinned image
Choose a specific Panel image tag or digest rather than an unqualified rolling tag. A pinned image lets you correlate an upgrade with a known application version and roll back deliberately if a migration or extension change causes trouble.
Persist the right data
Persist the Panel data required by the deployment, including the environment file at /app/var/.env. Back up the Panel database together with that environment file so a restore retains both application state and the credentials and key material needed to interpret it.
Run migrations deliberately
Follow the Docker deployment instructions to run migrations explicitly during an upgrade. Start the queue worker and scheduler as documented, verify their logs, and check that the web container can reach the database and Redis before attempting a node action. Remember that game files and their backups remain on Wings nodes, not in the Panel container’s volumes.
Independent reader supportYour contribution helps us test, update, and keep practical guides available for everyone.Firewall, DNS, and certificate checks
Most Panel-to-Wings failures are connectivity or identity failures rather than game failures. Check these in order:
PC Slower Than It Used to Be?
A free scan shows the junk files, broken settings and background clutter dragging Windows down - then fixes them in one click.Free scan · Windows 10 & 11Crashes, No Sound, or Screen Glitches?
Random freezes, missing sound and display glitches usually trace back to one bad driver. Find and replace yours safely.Free scan · under a minute- The node address in Admin → Nodes resolves to the intended VPS.
- The DNS record has propagated and resolves correctly from the Panel host and from an external network.
- The HTTPS certificate name matches the node address used by the Panel and is valid at the time of connection.
- The provider firewall and the operating-system firewall permit the web, Wings, game, and file-transfer ports you configured.
- The generated
/etc/pterodactyl/config.ymlbelongs to the node you created and has not been copied from another node.
Use the narrowest practical firewall rules. Opening every port can hide an allocation mistake and exposes unrelated services; allowing only the Panel, Wings, administration, and assigned game ranges makes later diagnosis easier.
Troubleshooting by symptom
The VPS reports OpenVZ, LXC, or Virtuozzo
Do not continue on assumptions. Ask the provider whether nested Docker and the required kernel features are supported. If the answer is unclear, migrate the node to a KVM-based VPS. Changing Panel settings cannot compensate for a virtualization layer that blocks Docker.
Docker will not start
Check the distribution kernel, provider image, and Docker service logs. The Wings documentation warns that modified kernels may lack required Docker features. Fix the host first; installing or re-downloading Wings will not repair a kernel-level limitation.
Best Value
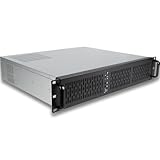
- [CPU] Intel Core Ultra 7 270K Plus Processor (24 Cores, 24 Threads, 3.2 GHz Base Clock Speed up to 5.5 GHz Max Boost Clock Speed) for Elite Gaming and Content Creation | [STORAGE] 1TB PCIe NVMe M.2 SSD - Experience Hyper-Fast Bootup and Data Transfer thats up to 30x Faster Performance than a Traditional Hard Drive.
- [ Graphics ] Integrated Intel UHD Graphics | [RAM] 64GB DDR5 RAM 5600 Gaming Memory for Seamless Multitasking from Multiple Web Pages to Playing Games Online Simultaneously | [OS] Windows 11 Pro x64
- [BUY WITH CONFIDENCE] Empowered PCs are Assembled in the USA, Rigorously Stress-Tested Before Shipping, and Supported with Lifetime Technical and Diagnostic Support and 3-Year Limited Hardware Warranty.
The Panel cannot reach Wings
Recheck the node URL, DNS, HTTPS certificate, firewall rules, and the generated config.yml. Run Wings with sudo wings --debug and read the first fatal error rather than repeatedly restarting the service. A certificate mismatch, wrong hostname, blocked port, or configuration copied to the wrong node each produces a different failure point.
A game image fails on the node
Confirm that the container image supports the node’s CPU architecture. An ARM64 Panel image does not make every game image ARM64-compatible. Check the egg’s image choice and the node architecture before changing memory limits or reinstalling the server.
The server installs but scheduled work does not run
Check the queue worker and scheduler independently. A web interface can remain available while the worker is stopped or the cron entry points at the wrong installation. Verify service status, log output, execution user, and the Panel timezone, then trigger a small test action.
When to add another node
Add a second Wings node when one VPS no longer provides enough CPU, RAM, storage, or geographic proximity for the games you host. Keep the Panel as the central control plane and register the new machine through Admin → Nodes. Each node needs its own supported operating system, Docker installation, Wings binary, generated configuration, firewall rules, and backup plan. The Panel does not copy game files between nodes automatically; plan migrations and restores as node-level operations.
For a single private server, one KVM VPS running both components is usually the least complex arrangement. For a multi-node hosting operation, separating the Panel from game workloads makes maintenance and capacity changes safer, but it adds DNS, HTTPS, monitoring, and backup coordination.
Operational checklist
- Supported Ubuntu or Debian release installed and updated.
systemd-detect-virtconfirms a Docker-capable virtualization layer.- Root or sudo access, a Panel domain, and planned allocations are ready.
- PHP, Composer, database, Redis, NGINX, queue worker, and scheduler match the documented versions.
- Panel HTTPS works before node registration.
- Docker starts at boot and Wings runs cleanly in debug mode.
- Node configuration is generated in the Panel and stored at
/etc/pterodactyl/config.yml. - Game files and backups are included in node storage backups.
- At least one game server has passed install, console, connection, restart, file-transfer, and restore tests.
Bottom line
Install the Panel on a supported Linux host, install Docker and Wings on a Docker-capable node, register that node in Admin → Nodes, and test Wings in debug mode before deploying games. Ubuntu 24.04 on KVM is the clearest starting point. Native installation exposes more services to maintain, while Docker packages the Panel but still requires separate database, Redis, Wings, HTTPS, and backup work. Treat virtualization, node storage, CPU architecture, and backups as first-class requirements rather than afterthoughts.
Quick Recap
Product prices and availability are accurate as of the date/time indicated and are subject to change. Any price and availability information displayed on Amazon at the time of purchase will apply.




