
To start The Deserter, read the Wanted Notice inside the shack near the Under the Bridge lantern. Complete it by finding the three safe Anubis Figurine Parts in unmarked square beehives, then the third part assembles the figurine and completes the quest.
What The Deserter is
The Deserter is a Chapter 5 side quest in the Vale of Wrath. It follows Private Henri Dufour, an Eternal Guard deserter who fled with a stolen Anubis relic. William must reconstruct that relic by recovering three figurine parts hidden in beehives along the route.
As an Amazon Associate I earn from qualifying purchases.
The quest is easy to miss because its trigger is an interactable notice rather than a character who gives you a conventional quest conversation. The beehives also use two visual types: hives marked with a red X are dangerous, while the unmarked square hives contain the quest items.
Quick wins for a faster PC:
Scan for outdated or missing drivers - takes under a minuteDriver Scan →Repair Windows errors before they cause bigger problemsFix Now →Quest essentials at a glance
- Region: Vale of Wrath
- Chapter: 5
- Starting landmark: Under the Bridge lantern
- Quest trigger: Wanted Notice in the nearby shack
- Objective: Recover three Anubis Figurine Parts
- Safe hive rule: Interact only with unmarked square hives
- Completion trigger: Picking up the third part assembles the Anubis Figurine
- Named character: Private Henri Dufour
How to start The Deserter
1. Find the shack at Under the Bridge
Travel to the Under the Bridge lantern. Cross beneath the stone bridge and enter the small shack beside the route. Inside, interact with the Wanted Notice. Reading that notice starts The Deserter; there is no separate activation step at the beehive area.
#1 Best Overall

- BLUE LIGHT BLOCKING GLASSES: Our blue light glasses for women boast UV400 protection, blocking harmful blue rays from computer screens. With these bluelight glasses women, you can enjoy gaming, reading, or watching TV with no worries of eye strain.
- EYE RELIEF: Our blue light glasses are engineered to reduce blurry vision or strain caused by prolonged screen time. These womens blue light glasses aid in better sleep by preventing blue light from disrupting your natural sleep cycle, helping you fall asleep faster and enjoy a more restful night's sleep, making them the perfect christmas present.
- COMFORTABLE: Crafted from durable material, our trendy blue light glasses for woman or blue light glasses men ensure long-lasting comfort. The high-transmittance lenses accessories, gamer gifts for men, help keep your eyes relaxed. Perfect stocking stuffers, gifts for gamers men, christmas gifts for men, halloween costumes.
- LIGHTWEIGHT: These clear blue light glasses feature a lightweight frame, meaning they’ll stay comfy for long-term wear. Perfect as blue blockers glasses for women or mens blue light glasses, these non-prescription fake glasses for men can be worn throughout the day. The blue light blocking glasses women feature polycarbonate HD lenses, which are anti-reflective and restore true color.
- WORRY-FREE PURCHASE: If you experience any issues, our support team is ready to assist you quickly. These are the perfect costume glasses for cosplay dressing up.
If the quest is not appearing in your journal, return to this shack and make sure the notice itself has been read. Simply passing the shack or entering the area does not activate the objective.
Reach the Beekeeper’s Hut
2. Follow the route from the shack
Leave the shack and follow the path forward. At the fork, stay straight. Continue until you reach the grapple points that lead up to a clearing. This route is the intended approach to the beekeeper’s area; taking the wrong branch can leave you searching the surrounding terrain without reaching the hut.
3. Defeat the guard and take the hut key
A guard stands outside the Beekeeper’s Hut. Defeat that guard and collect the Beekeeper’s Hut Key. The key is obtained from this encounter, so searching for it elsewhere will not open the hut.
4. Read the hut’s desk paper or diary
Use the key to open the hut. Inside, read the paper or diary on the desk. This document provides the local context for the beehives and confirms that the hut is part of the investigation rather than an optional detour.
Understand the red-X warning before touching a hive
Outside the hut, pick up the Beekeeper’s Note. Its important instruction is visual: a hive marked with a red X is dangerous. Do not interact with marked hives.
Rank #2

- WINDEX GAMING WIPES: effortlessly clean all your gaming gear and gaming electronics in one easy step with our new Windex Gaming Wipes
- AMMONIA FREE: our ammonia-free formula is safe to use on all of your favorite gaming equipment like consoles, headsets, controllers, screens, keyboards, and more
- PRE-MOISTENED WIPES: each wipe instantly removes dust, dirt, and stubborn smudges and fingerprints leaving a streak-free shine
- ANTI-STATIC: great for cleaning and wiping down your gaming gear and electronics leaving behind no visible residue
- COMPACT RESEALABLE PACKAGE: store your pack of Windex Gaming Wipes anywhere in your home for whenever a quick and easy wipedown is needed
Quest-relevant hives are the unmarked, square-shaped ones. The shape and the marking must both match. An unmarked hive that is not square is not the documented target, and a square hive carrying a red X is not safe to use. When several hives are grouped together, inspect them rather than interacting at random.
- Safe: an unmarked square hive.
- Dangerous: a hive with a red X.
- Objective progress: each correct unmarked square hive gives one Anubis Figurine Part.
Find all three Anubis Figurine Parts
Part one: the Beekeeper’s Hut apiary
Stay in the apiary outside the hut after reading the Beekeeper’s Note. Look for the square hive farthest from the hut. It is the unmarked hive in that first group. Interact with it to collect the first Anubis Figurine Part.
Do not choose a hive merely because it is closest to the hut. The relevant clue is the combination of position and appearance: the target is the farthest square hive and it must be unmarked.
Part two: the roadside hive by the dead horses and carriage
Leave the hut area and continue down the route toward the wooden military encampment. Before entering the encampment, use the dead horses and carriage as your landmark. A group of hives is on the right side of this roadside area.
Inspect the group and interact with the unmarked square hive on the right. That hive contains the second Anubis Figurine Part. The nearby marked hives are hazards, not alternate ways to obtain the item.
Rank #3

- Ergonomic & Adjustable Design: Fight "text neck" and improve your posture. Designed for comfort, it offers an adjustable height (7.1in-8.5in) (1.4in adjustable range) and angle (5°-85°) Please note: cell phone stand is only 9 inches tall—the length of a standard pencil
- Without blocking subtitles Perfect for office desk Tiktok Face Time Zoom video—this is the ultimate kitchen desk essential for phones! Perfect viewing experience while reducing neck back strain, A must-have for gamers streamers desk, and anyone who values both style and support!
- Sleek & Stable Design fits Otterbox Case: Say goodbye to bent cables, tangles, and tip-overs! LISEN’s stylish adjustable desk phone holder features a built-in charging hole and smart cable management, keeping your phone secure and your workspace clutter-free cool gadgets for men
- ANTI-SLIP DESIGN free hands: The under 10.00 items easy gadgets back and the bottom of this kitchen essentials for women are fully covered by anti-skid silicone, which LISEN stand up desk decor can provide maximum protection device from any scratches and slides
- Your Perfect Viewing Companion:If your product arrives damaged or breaks within 365 days, reach out to LISEN for a quick and hassle-free solution. Struggling with assembly, like tightening the screw? We’ve got your back! Your experience matters to us. (Product including: phone Holder stand*1, screw*1, hexagon screwdriver*1, specification*1)
Part three: the town apiary beyond the Stasis gate
Continue through the wooden military encampment and cross the long bridge. At the gate, use Stasis on the gear mechanism to open the way.
Go through the nearby door. Enter the first town house on the right, pass through it, and leave via the back. You will reach another group of hives.
For the final part, use the square hive to the left of the visible group. This is the partially hidden fourth hive, so it can be overlooked if you only inspect the hives that are immediately in front of you. Interact with it to obtain the third and final Anubis Figurine Part.
How the quest completes
The third part does not require a separate return trip or turn-in interaction. Picking it up assembles the Anubis Figurine and triggers completion of The Deserter. If the quest remains active after the third pickup, verify that you selected the partially hidden square hive to the left of the final group rather than one of the visible hives.
Three hive locations in route order
- Hut apiary: the square hive farthest from the Beekeeper’s Hut, with no red X.
- Roadside by the dead horses and carriage: the unmarked square hive on the right side of the hive group.
- Town apiary after the bridge: the square hive left of the visible group, identified as the partially hidden fourth hive.
This order follows the normal route from the hut to the encampment and then through the Stasis-operated gate. Keeping the stops in order makes it easier to identify which part is missing if your quest tracker does not clearly show a count.
Outdated Drivers Are Slowing You Down
One free scan finds every outdated or missing driver and matches the right update for your exact hardware.Free scan · exact hardware matchWindows Errors? Fix Them Before They Spread
Repair common Windows errors and clear accumulated junk for a smoother, more stable PC - no reinstall needed.Free scan · no reinstallRank #4

- Easy Installation: Our gaming lights have been designed to enhance your entertainment experience. Simply position the led light bar next to your TV or game console to create a game room environment with ease. They come with USB power and a 60 inch cord for direct mounting and mobility
- Audio Syncing & Extensive Mode: The built-in high-sensitivity music sensor allows you to sync the TV led lights to your favorite music. Lights react and move to the beat of music, film and game audio, creating an incredible immersive sound and light experience – and all without the need for an additional hub. You can choose from 64+ patterns, including strobe, illusion, jump, energy, gradient, running, chasing, fluttering mode etc. Each mode can be applied to different scenes
- 64+ Chasing IC+RGB & W Effect: The independent control design of IC+RGB and white all-in-one multifunctional rgbw led bar lights monitor backlight allows you to easily switch the led lights for desk between IC+RGB and white to enjoy a variety of lighting effects, you can choose white lighting mode with high brightness for better illumination when working, etc. Choose IC+RGB lighting mode when you need to create an entertaining atmosphere for the light show, 16 million colours of Color changing rgb light bar let you dance to the beat and create a dynamic party atmosphere
- Dynamic and Dimmable Lights: 1%-full brightness free brightness adjustment gives you the flexibility to adjust dimmable led light bar for room decorations or a variety of occasions
- USB Powered: USB light bars for room can be powered by powernank, usb charger, TV, Monitor, laptop PC mainframe, making behind TV led lighting bar easy to install in any location.TV led lights are powered by the TV usb interface / PC mainframe, can be turned on/off synchronously with TV / PC
Common mistakes and fixes
The quest never started
Return to the shack under the stone bridge and read the Wanted Notice. The notice is the activation trigger. Reaching the hut first does not substitute for reading it.
The hut will not open
Defeat the guard outside the Beekeeper’s Hut and collect the Beekeeper’s Hut Key. The key is tied to that guard encounter.
You interacted with the wrong hive
Use the Beekeeper’s Note as the rule for every apiary: avoid red-X hives and select only unmarked square hives. At the first stop, the correct hive is farthest from the hut; at the second, it is the unmarked square hive on the right; at the final stop, it is the partially hidden square hive to the left of the visible group.
You cannot find the second part
Leave the hut and continue toward the wooden military encampment. The correct landmark is the area with dead horses and a carriage. The hive group is on the right side of that route, before you proceed through the encampment.
Do these 3 things before closing this tab:
1Clear out junk files and repair common Windows errors2Fix the driver behind crashes, sound loss and screen glitches3Repair Windows errors before they cause bigger problemsYou cannot find the final part
Make sure you crossed the long bridge and used Stasis on the gear to open the gate. Then enter the nearby door, pass through the first town house on the right, and exit at the back. In the resulting apiary, check left of the visible hive group for the partially hidden fourth hive.
Best Value
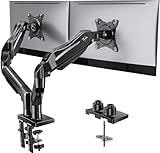
- Compatible with Wide Screens - To ensure compatibility with the dual monitor mount, your each monitor must meet three conditions at the same time: First, computer screens size range: 13 to 32 inches. Second, screen weight range: 4.4 to 19.8 lbs. Third, the back of the monitor screen must have VESA mounting holes with a pitch of 75x75mm or 100x100mm.
- Regarding the compatibility with desks - Your desk must meet three conditions at the same time: First, desk material: Only wooden desks are recommended, plastic or glass desks cannot be used. Second, desk thickness range: 0.59" - 3.54". Third, the bottom of the desk should not have any cross beams or panels, as this will interfere with installation. We recommend carefully checking that your desk and monitors meets all above conditions before purchasing.
- Dual C-Clamp Hold - Worried your dual monitors might wobble or slip? Our upgraded base uses a larger platform plus a dual C-clamp structure to lock the dual monitor arm firmly to your desk. Each arm safely keeps your screens steady while you type, click and game—no shaking, no sliding, just a clean and secure setup you can trust every day. It also provides Grommet Mounting installation choice, both options ensure stable and secure fixation for your 0.59" - 3.54" desk.
- Full-Motion Adjustment For Comfortable View - Pull the screen closer when you’re deep in a spreadsheet, push it back to watch videos, or rotate to portrait for coding — moving everything smoothly with just one hand. The monitor stand offers +85°/-50° tilt, ±90° swivel and 360° rotation. Raise your monitor up to 15.75″ to support a healthy sitting posture. Whether you’re working from home, gaming through the night, or switching between video calls and documents, getting the screens to your natural line of sight helps relieve neck, shoulder and back strain so you can stay focused longer with less fatigue.
- Keep Your Desk Organized: By lifting both screens off the desktop, this dual monitor stand opens up valuable space for your keyboard, notebook, docking station or a simple, clutter-free work area. Built-in cable management guides wires along the arms, keeping cords out of sight and out of the way. Enjoy a tidy, modern workstation that looks as good as it feels to use.
The third pickup did not finish the quest
The completion item is the third part, not an additional object after it. Recheck the final hive’s shape and marking. The documented target is the unmarked square hive to the left of the group; selecting another hive will not assemble the figurine.
Rewards and achievement information
Published guides do not present identical reward data for this quest. The differences matter if you are checking your inventory against a guide or using extracted quest data.
| Source | Reported result |
|---|---|
| AllThingsHow | Completed Anubis Figurine, Bountiful Harvest Amber, Secreted Toxin, and the Hand in the Jar achievement |
| PowerPyx | Bountiful Harvest as the quest reward and Hand in the Jar as the achievement |
| MetaBot quest-data page | Hand in the Jar listed, with no item or Catalyst reward recorded |
The safest conclusion is that Hand in the Jar is consistently associated with completion, while the item reward is reported differently. Bountiful Harvest is guide-reported, and AllThingsHow additionally names the completed figurine and Secreted Toxin. MetaBot’s quest-data record does not list an item or Catalyst reward, so an inventory or quest-data mismatch does not necessarily mean the quest failed.
Completion checklist
- Read the Wanted Notice in the shack near Under the Bridge.
- Follow the straight route from the fork and use the grapple points to reach the clearing.
- Defeat the guard outside the Beekeeper’s Hut and take the Beekeeper’s Hut Key.
- Open the hut and read the paper or diary on the desk.
- Read the Beekeeper’s Note outside.
- Take the unmarked square hive farthest from the hut.
- Take the unmarked square hive on the right near the dead horses and carriage.
- Cross the long bridge and use Stasis on the gear.
- Go through the first town house on the right and exit at the back.
- Take the partially hidden unmarked square hive to the left of the final group.
- Confirm that the third part assembles the Anubis Figurine and completes the quest.
Fastest reliable route
For a clean run, begin at Under the Bridge, activate the notice, and move directly to the hut rather than exploring side paths. Secure the key, read both hut clues, and collect the first part before leaving. On the way to the encampment, use the dead horses and carriage to identify the second apiary. After crossing the bridge, solve the gear with Stasis, cut through the first house on the right, and inspect the hidden left-side hive before touching the visible group. This route follows every documented landmark and minimizes the chance of confusing the three apiaries.
Quick Recap
Product prices and availability are accurate as of the date/time indicated and are subject to change. Any price and availability information displayed on Amazon at the time of purchase will apply.

