The Tool Desk
Outbyte Driver Updater FREEFix the driver behind crashes, sound loss and screen glitchesFind Drivers →Outbyte PC Repair FREEClear out junk files and repair common Windows errorsFree Scan →Open Photo Mode with U on PC, L3 + R3 on PlayStation, or LS + RS on Xbox. Compose the scene with the camera and Photo Mode options, then use the capture action shown in your installed version. On PC, find in-game Photo Mode screenshots in %userprofile%DocumentsThe Witcher 3screenshots; on consoles, look in the system’s capture gallery or recent captures.
The main improvement comes from making deliberate choices before saving: decide what the viewer should notice, frame it clearly, and use any scene controls available in your version to remove distractions or set the mood. The official feature notes do not promise identical menus on every platform, so treat the controls in your own game as the final guide.
As an Amazon Associate I earn from qualifying purchases.
Build the shot before opening Photo Mode
A stronger screenshot usually starts with a clearer moment, not a filter. Before pausing the action, look for a scene in which Geralt’s outline is easy to read and the foreground and background help explain where he is. A recognizable landscape, a doorway, a road leading into the distance, or a nearby object can give the frame a point of reference. These are composition choices rather than automatic Photo Mode effects: the game will not arrange the scene for you.
Choose a subject and a visual path
Decide what the viewer should notice first: Geralt, a monster, a landscape, or a detail such as a weapon or a landmark. Then frame the other elements to support that subject. A foreground shape can add depth, while an uncluttered area behind the subject makes its silhouette easier to distinguish. If the scene is busy, try a different camera angle or wait for a moment when characters and effects do not overlap the subject.
#1 Best Overall

- BLUE LIGHT BLOCKING GLASSES: Our blue light glasses for women boast UV400 protection, blocking harmful blue rays from computer screens. With these bluelight glasses women, you can enjoy gaming, reading, or watching TV with no worries of eye strain.
- EYE RELIEF: Our blue light glasses are engineered to reduce blurry vision or strain caused by prolonged screen time. These womens blue light glasses aid in better sleep by preventing blue light from disrupting your natural sleep cycle, helping you fall asleep faster and enjoy a more restful night's sleep, making them the perfect christmas present.
- COMFORTABLE: Crafted from durable material, our trendy blue light glasses for woman or blue light glasses men ensure long-lasting comfort. The high-transmittance lenses accessories, gamer gifts for men, help keep your eyes relaxed. Perfect stocking stuffers, gifts for gamers men, christmas gifts for men, halloween costumes.
- LIGHTWEIGHT: These clear blue light glasses feature a lightweight frame, meaning they’ll stay comfy for long-term wear. Perfect as blue blockers glasses for women or mens blue light glasses, these non-prescription fake glasses for men can be worn throughout the day. The blue light blocking glasses women feature polycarbonate HD lenses, which are anti-reflective and restore true color.
- WORRY-FREE PURCHASE: If you experience any issues, our support team is ready to assist you quickly. These are the perfect costume glasses for cosplay dressing up.
It can help to think of the frame as a short visual route. What should the viewer look at first, and where should the eye travel afterward? If the subject is Geralt, a road or a line in the landscape can lead toward him; if the subject is a location, Geralt can provide scale and a clear point of focus. Avoid letting several bright or visually busy elements compete for the same attention. You do not need to remove every detail: keep the ones that support the story of the image and reconsider the ones that obscure it.
Pick the moment, not just the location
Consider whether the image is meant to feel calm, tense, or dramatic. A pose, expression, weather condition, or time of day can change the mood even when the location stays the same. If the current scene does not offer the moment you want, use the environment and staging options available in your version rather than trying to fix every distraction with camera movement.
Take a moment to identify what is actually making the shot feel wrong. The subject may be poorly separated from the background, the camera may be too close to an obstruction, or a nearby character may be pulling attention away. These problems call for different remedies: adjust framing for separation, check collision settings for an obstruction, or hide or reposition scene elements if your version provides those controls. Choosing the problem first is more useful than changing several options at random.
Compose the image with Photo Mode
Once you have a promising scene, open Photo Mode and work through the frame before capturing it. The expanded Photo Mode described in CD PROJEKT RED’s 2026 Remastered notes includes camera presets, camera lock, aspect-ratio changes, a first-person camera, and an optional rule-of-thirds overlay with cinematic bars. Options shown can depend on the installed version and platform; use the controls displayed in your own game if a feature described here is absent.
CD PROJEKT RED Support summarizes the purpose simply: “Photo Mode lets you take screenshots in The Witcher 3: Wild Hunt.” Its support instructions establish how to open the mode and where captures are saved. The later Remastered notes describe a broader set of creative options. Read those as complementary guidance, not as a guarantee that every control listed in the expanded feature notes appears in every installed version.
Set the camera and aspect ratio
Move and orient the camera until the subject reads clearly and the background contributes context without competing for attention. Try a camera preset if it gives you a useful starting position, then adjust the framing. Camera lock can help keep attention on a chosen subject while you refine the view. A first-person camera offers a different perspective when a conventional view does not convey the scene you want.
As you move the camera, check both the subject and what the camera reveals around it. A new angle may separate Geralt from the background, but it may also bring an unwanted object into the frame or hide a landmark that identifies the location. Recheck the whole image after each substantial camera change instead of concentrating only on the center. The camera controls help you position the image; they do not decide which details belong in it.
Free tools Windows power users keep installed
One-click scans. No signup required.
Choose the aspect ratio with the image’s destination in mind. A wider frame can preserve more of a landscape; a less wide frame can make a single character or detail more prominent. Check the edges after changing ratios: a crop may remove a useful landmark, cut off a character, or leave an important object too close to the border.
Rank #2
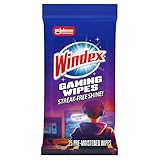
- WINDEX GAMING WIPES: effortlessly clean all your gaming gear and gaming electronics in one easy step with our new Windex Gaming Wipes
- AMMONIA FREE: our ammonia-free formula is safe to use on all of your favorite gaming equipment like consoles, headsets, controllers, screens, keyboards, and more
- PRE-MOISTENED WIPES: each wipe instantly removes dust, dirt, and stubborn smudges and fingerprints leaving a streak-free shine
- ANTI-STATIC: great for cleaning and wiping down your gaming gear and electronics leaving behind no visible residue
- COMPACT RESEALABLE PACKAGE: store your pack of Windex Gaming Wipes anywhere in your home for whenever a quick and easy wipedown is needed
When comparing ratios, ask whether extra width adds useful context or simply adds more competing scenery. For a landscape, the broader view may help show the setting; for a close view of a character or prop, a tighter shape may make the subject easier to read. The notes confirm that aspect-ratio changes are available in the expanded mode, but do not prescribe a single ratio or describe one as universally best. Make the choice based on the composition you want and inspect the edges before capture.
Use guides as aids, not rules
The optional rule-of-thirds overlay can help you judge how the subject sits in the frame. It is a guide for making deliberate choices, not a requirement to put every subject on a grid line. Centering can be effective when the scene is symmetrical or the subject should feel direct and imposing; an off-center position can leave room for a landscape, a direction of travel, or a contrasting element.
The expanded notes also mention cinematic bars with the composition guide. Use the guide to compare possible placements, then decide whether the final arrangement serves the shot. A grid can make it easier to notice when the main subject is crowded against an edge or when an empty part of the frame has no purpose. It cannot tell you whether a composition is emotionally right, and a deliberate centered composition may work better than a formulaic one.
What’s actually slowing this PC down?
Pick the symptom - the matching free tool is one click away.
Check obstructions and camera collisions
The updated Photo Mode includes a setting to enable or disable camera collisions with walls and objects. If a wall or object prevents the intended camera position, try changing that setting and repositioning the camera. Then inspect the entire frame again: moving past an obstruction can reveal unwanted geometry or place the camera at an angle that changes the composition.
Collision controls are a practical fix for a specific problem, not a general image-quality switch. If the camera already has a clear view, changing collision behavior may not improve the shot. If it does let you move past a wall or object, verify that the result still looks intentional and that the subject remains visible. The official feature notes describe the setting but do not provide a universal camera setup for every location.
Control the scene when your version allows it
CD PROJEKT RED’s 2026 Remastered notes describe expanded scene-staging tools. These include selectable characters, poses and expressions, environment presets, weather and time-of-day adjustments, weather intensity, options to hide nearby NPCs, and placeable characters or props. The notes do not provide a platform-by-platform list for every feature, so do not assume each control is present in every build.
This is the largest difference between the basic workflow and a more staged image. The basic workflow is to open Photo Mode, compose the scene, capture it, and find the file. Where the newer options are present, you can also alter the scene’s presentation: select a character, adjust a pose or expression, change environmental conditions, hide nearby NPCs, or place characters and props. If one of those controls is missing, the support and release notes do not establish that it should be available on your particular platform or build. Check the in-game menu before assuming the feature is broken.
Quick wins for a faster PC:
Fix the driver behind crashes, sound loss and screen glitchesFind Drivers →Repair Windows errors before they cause bigger problemsFix Now →Reduce distractions
If an NPC or prop draws attention away from the subject, use the NPC-hiding or scene-staging options available in your Photo Mode. If you want a populated scene, placeable characters can help arrange the frame where the installed version supports them. Check that a staged character or prop does not block a face, silhouette, or landmark.
Rank #3

- Ergonomic & Adjustable Design: Fight "text neck" and improve your posture. Designed for comfort, it offers an adjustable height (7.1in-8.5in) (1.4in adjustable range) and angle (5°-85°) Please note: cell phone stand is only 9 inches tall—the length of a standard pencil
- Without blocking subtitles Perfect for office desk Tiktok Face Time Zoom video—this is the ultimate kitchen desk essential for phones! Perfect viewing experience while reducing neck back strain, A must-have for gamers streamers desk, and anyone who values both style and support!
- Sleek & Stable Design fits Otterbox Case: Say goodbye to bent cables, tangles, and tip-overs! LISEN’s stylish adjustable desk phone holder features a built-in charging hole and smart cable management, keeping your phone secure and your workspace clutter-free cool gadgets for men
- ANTI-SLIP DESIGN free hands: The under 10.00 items easy gadgets back and the bottom of this kitchen essentials for women are fully covered by anti-skid silicone, which LISEN stand up desk decor can provide maximum protection device from any scratches and slides
- Your Perfect Viewing Companion:If your product arrives damaged or breaks within 365 days, reach out to LISEN for a quick and hassle-free solution. Struggling with assembly, like tightening the screw? We’ve got your back! Your experience matters to us. (Product including: phone Holder stand*1, screw*1, hexagon screwdriver*1, specification*1)
Hiding nearby characters can simplify a frame, especially when they overlap the subject or make the scene feel accidental. But emptying the scene is not always an improvement: other characters can communicate scale, activity, or a sense of place. Decide whether the image should feel solitary or populated, and use the available controls accordingly. If you stage a character or prop, revisit the camera framing afterward, since adding an element can change the balance of the entire image.
Adjust weather and time of day
Where the relevant controls are available, use environment presets or adjust weather, weather intensity, and time of day to support the image’s mood. Recheck visibility and contrast after any change: an atmospheric effect may suit the scene but can also obscure the subject or make the background harder to read. Keep the final choice tied to what the frame needs rather than assuming a particular preset is best.
These controls are useful for shaping the scene’s character, but CD PROJEKT RED’s 2026 Remastered notes do not identify a best weather setting, intensity, or time of day for screenshots. Treat each change as a comparison: does the new condition make the subject clearer or the atmosphere more appropriate, or does it hide the detail you wanted to show? Reassess the same composition after changing the environment so you are judging the image, not just the novelty of a new effect.
Crashes, No Sound, or Screen Glitches?
Random freezes, missing sound and display glitches usually trace back to one bad driver. Find and replace yours safely.Free scan · under a minuteWindows Errors? Fix Them Before They Spread
Repair common Windows errors and clear accumulated junk for a smoother, more stable PC - no reinstall needed.Free scan · no reinstallTry poses, expressions, and props selectively
Selectable characters, poses, expressions, and placeable props can turn a simple view into a staged scene. Add only what helps communicate the image’s idea. A prop that is too close to the camera can dominate the frame, and a pose can look awkward if it conflicts with the surroundings. Take time to review the whole composition after staging rather than judging each element in isolation.
Staging is optional. If the image already works as a captured moment, there is no need to add characters or props simply because the controls exist. If you do use them, consider whether the pose, expression, and setting tell the same story. A dramatic expression may feel out of place in a quiet scene; an extra prop can compete with the intended subject. The goal is not to use every option but to make the key idea of the image easier to understand.
Capture and find the screenshot
CD PROJEKT RED’s support instructions give the Photo Mode activation controls and platform-specific destinations for screenshots. They do not provide a complete button-by-button map of the capture controls. Once the image is composed, use the capture action displayed in your Photo Mode interface, then check the relevant location below.
| Platform | Open Photo Mode | Where to find the screenshot |
|---|---|---|
| PC | Press U. | %userprofile%DocumentsThe Witcher 3screenshots |
| PlayStation | Press L3 + R3 together. | Settings → Storage → System Storage → Capture Gallery → The Witcher 3 |
| Xbox | Press LS + RS together. | Xbox button → Capture & share → Recent captures |
The support page does not distinguish console generations, and system menu labels can change with console software. If the listed route does not match your system, look in its Capture Gallery or Recent captures area for The Witcher 3. On PC, the folder above is the documented destination for in-game Photo Mode screenshots; it is separate from any other location you may use for platform-level captures.
Keep the two parts of the process distinct: the button combination listed above opens Photo Mode, while the capture action is the control presented inside that mode. CD PROJEKT RED’s support instructions do not provide a universal capture-button map, so avoid relying on a button sequence that may belong to a different platform or version. After capturing, verify the file in the documented location. On consoles, the official directions point to the console’s capture interface rather than a PC-style folder path.
Rank #4

- Easy Installation: Our gaming lights have been designed to enhance your entertainment experience. Simply position the led light bar next to your TV or game console to create a game room environment with ease. They come with USB power and a 60 inch cord for direct mounting and mobility
- Audio Syncing & Extensive Mode: The built-in high-sensitivity music sensor allows you to sync the TV led lights to your favorite music. Lights react and move to the beat of music, film and game audio, creating an incredible immersive sound and light experience – and all without the need for an additional hub. You can choose from 64+ patterns, including strobe, illusion, jump, energy, gradient, running, chasing, fluttering mode etc. Each mode can be applied to different scenes
- 64+ Chasing IC+RGB & W Effect: The independent control design of IC+RGB and white all-in-one multifunctional rgbw led bar lights monitor backlight allows you to easily switch the led lights for desk between IC+RGB and white to enjoy a variety of lighting effects, you can choose white lighting mode with high brightness for better illumination when working, etc. Choose IC+RGB lighting mode when you need to create an entertaining atmosphere for the light show, 16 million colours of Color changing rgb light bar let you dance to the beat and create a dynamic party atmosphere
- Dynamic and Dimmable Lights: 1%-full brightness free brightness adjustment gives you the flexibility to adjust dimmable led light bar for room decorations or a variety of occasions
- USB Powered: USB light bars for room can be powered by powernank, usb charger, TV, Monitor, laptop PC mainframe, making behind TV led lighting bar easy to install in any location.TV led lights are powered by the TV usb interface / PC mainframe, can be turned on/off synchronously with TV / PC
If you are taking several versions of a composition, check each saved image in the relevant gallery or folder rather than assuming that an adjustment was recorded. This is also a useful way to distinguish an in-game Photo Mode screenshot from a capture made through a separate system tool. The support instructions specifically identify the folder for in-game Photo Mode screenshots on PC and console capture interfaces for PlayStation and Xbox.
Choose graphics settings for the image you want
Graphics options can change how a scene looks, but CD PROJEKT RED does not prescribe a universal screenshot preset. On PC, the official ULTRA+ notes identify settings affecting the number of background characters, shadows, grass density, texture quality, foliage visibility range, terrain, water, and detail. These are potential image variables, not a guarantee that selecting ULTRA+ will improve every shot. Choose settings according to the scene and your system, then inspect the result in Photo Mode.
Those ULTRA+ categories point to different considerations rather than a single quality slider. Background-character count can affect how populated a scene appears; shadows and detail can affect how shapes read; grass density, foliage visibility range, terrain, and water can change the environment visible in a landscape composition; texture quality can affect the appearance of surfaces. The official notes list these affected areas but do not specify a screenshot-focused value for each one. Do not infer a recommended setting or assume that raising every option is necessary.
Do these 3 things before closing this tab:
1Scan for outdated or missing drivers - takes under a minute2Repair Windows errors before they cause bigger problems3Fix the driver behind crashes, sound loss and screen glitchesOn PlayStation 5 and Xbox Series X, the version 4.0 notes describe Ray Tracing Mode with a 30 FPS target and Performance Mode with a 60 FPS target. On Xbox Series S, ray-tracing features are not available; Quality Mode targets 30 FPS and prioritizes image fidelity, while Performance Mode targets 60 FPS and prioritizes smoothness. These are documented game modes and targets, not proof that one mode always produces a better still image in every scene. If you are choosing a mode for a screenshot, base the choice on the particular scene and the image you see rather than treating a frame-rate target as a still-image quality rating.
The console comparison is about documented priorities and targets: on PlayStation 5 and Xbox Series X, Ray Tracing Mode is described with a 30 FPS target and Performance Mode with a 60 FPS target; on Xbox Series S, Quality Mode prioritizes image fidelity at a 30 FPS target and Performance Mode prioritizes smoothness at 60 FPS, without ray-tracing features. CD PROJEKT RED’s version 4.0 notes do not say that one mode yields a better still in every scene. Choose based on the mode and image available on your system, and judge the actual frame rather than assuming a mode label guarantees a particular screenshot result.
What to do if an option or screenshot is missing
- A Photo Mode option is not there: Check the controls and menus shown by your installed game. The expanded feature list is not mapped to every platform and build in the official notes.
- The console menu path differs: Search the system’s Capture Gallery or Recent captures area for The Witcher 3; menu labels may vary with system software.
- The PC screenshot is not in the expected folder: Check
%userprofile%DocumentsThe Witcher 3screenshotsfor in-game Photo Mode captures, and confirm that you used the Photo Mode capture action rather than a separate system capture tool. - The composition still feels cluttered: Revisit camera position, background separation, and any NPC-hiding or staging options available in your version. Check the frame edges after each adjustment.
- A wall blocks the camera: Try the camera-collision setting, then verify that the new position has not introduced another obstruction or unwanted angle.
A useful troubleshooting order is to confirm that you opened Photo Mode with the correct platform shortcut, use the capture action shown in the mode, and then look in the official destination for that platform. If an item in the expanded feature list is unavailable, that is a separate question from whether capture itself works: the official material reviewed does not give a complete platform-by-platform feature matrix. Likewise, a changed console menu label does not necessarily mean the screenshot is absent; search the named capture area on the system.
For a composition problem, change one thing at a time where practical. Reposition the camera, inspect the frame, then consider hiding nearby NPCs or adjusting weather and time if those controls are available. This makes it easier to identify which change helped. If a collision setting allows a new camera position, check for newly visible geometry and confirm that the image still communicates the scene you intended.
Should you use NVIDIA Ansel?
NVIDIA’s 2016 guide describes Ansel features for The Witcher 3, including free-camera movement, framing, filters, and high-resolution capture. Its setup instructions refer to the game’s 1.24-era update and software from that period. Present-day availability and compatibility are not established by that guide, so treat it as historical context rather than the default current workflow. The in-game Photo Mode and the platform’s documented capture destination are the straightforward starting point.
Best Value

- Compatible with Wide Screens - To ensure compatibility with the dual monitor mount, your each monitor must meet three conditions at the same time: First, computer screens size range: 13 to 32 inches. Second, screen weight range: 4.4 to 19.8 lbs. Third, the back of the monitor screen must have VESA mounting holes with a pitch of 75x75mm or 100x100mm.
- Regarding the compatibility with desks - Your desk must meet three conditions at the same time: First, desk material: Only wooden desks are recommended, plastic or glass desks cannot be used. Second, desk thickness range: 0.59" - 3.54". Third, the bottom of the desk should not have any cross beams or panels, as this will interfere with installation. We recommend carefully checking that your desk and monitors meets all above conditions before purchasing.
- Dual C-Clamp Hold - Worried your dual monitors might wobble or slip? Our upgraded base uses a larger platform plus a dual C-clamp structure to lock the dual monitor arm firmly to your desk. Each arm safely keeps your screens steady while you type, click and game—no shaking, no sliding, just a clean and secure setup you can trust every day. It also provides Grommet Mounting installation choice, both options ensure stable and secure fixation for your 0.59" - 3.54" desk.
- Full-Motion Adjustment For Comfortable View - Pull the screen closer when you’re deep in a spreadsheet, push it back to watch videos, or rotate to portrait for coding — moving everything smoothly with just one hand. The monitor stand offers +85°/-50° tilt, ±90° swivel and 360° rotation. Raise your monitor up to 15.75″ to support a healthy sitting posture. Whether you’re working from home, gaming through the night, or switching between video calls and documents, getting the screens to your natural line of sight helps relieve neck, shoulder and back strain so you can stay focused longer with less fatigue.
- Keep Your Desk Organized: By lifting both screens off the desktop, this dual monitor stand opens up valuable space for your keyboard, notebook, docking station or a simple, clutter-free work area. Built-in cable management guides wires along the arms, keeping cords out of sight and out of the way. Enjoy a tidy, modern workstation that looks as good as it feels to use.
That distinction matters if you find older instructions while searching for a way to take a screenshot. The Ansel guide is evidence that those features were described in 2016, not evidence that a current player can rely on the same setup or compatibility. The reviewed sources do not establish a present-day requirement, supported hardware list, or current installation process for Ansel. Begin with the game’s own Photo Mode instead of assuming an older vendor guide applies to your version.
Do you need extra equipment?
No additional physical product is required for the documented workflow. Photo Mode uses the controls already available on the platform, and the support instructions describe where to find captures without requiring a capture card, upgraded controller, external storage device, or separate camera. Start with the game’s camera and scene options before looking for a separate tool.
This is an instruction-led task, not a shopping decision. The official workflow does not call for buying a controller, graphics card, monitor, capture card, camera, storage device, editing program, or book. Existing platform controls are enough to open Photo Mode and use its capture action. A separate product may be useful for other purposes, but the available official instructions do not support presenting one as necessary to take better Witcher 3 screenshots.
Frequently Asked Questions
What button opens Photo Mode in The Witcher 3?
Press U on PC, L3 + R3 together on PlayStation, or LS + RS together on Xbox. These are the activation shortcuts listed by CD PROJEKT RED Support.
Where are The Witcher 3 Photo Mode screenshots saved?
On PC, the documented in-game Photo Mode folder is %userprofile%DocumentsThe Witcher 3screenshots. PlayStation captures are listed under Settings → Storage → System Storage → Capture Gallery → The Witcher 3. On Xbox, check Xbox button → Capture & share → Recent captures. Console menu names can vary with system software.
How do I take the screenshot after opening Photo Mode?
Use the capture action shown in the Photo Mode controls in your installed version. CD PROJEKT RED’s support instructions specify how to open Photo Mode and where captures are found, but do not provide a complete button-by-button capture-control map for every platform.
Why is a Photo Mode option missing from my game?
The 2026 Remastered notes list expanded options, including weather and time adjustments, camera features, NPC hiding, poses, and props, but do not map every option to each platform and build. Check the menus in your installed version; the available controls may differ.
Recommended Free Tools
Which graphics mode is best for a Witcher 3 screenshot?
The official notes do not prescribe one universally best mode. PlayStation 5 and Xbox Series X list Ray Tracing Mode at a 30 FPS target and Performance Mode at a 60 FPS target. Xbox Series S has no ray-tracing features; Quality Mode prioritizes image fidelity at a 30 FPS target and Performance Mode smoothness at 60 FPS. Judge the scene you want rather than assuming the mode label guarantees a better still.
Do I need NVIDIA Ansel or extra hardware?
No extra equipment is required for the documented Photo Mode workflow. NVIDIA’s 2016 Ansel guide describes historical features such as free-camera movement, filters, and high-resolution capture, but current availability and compatibility are not established by that source. The in-game Photo Mode is the straightforward starting point.
The Bottom Line
For a better Witcher 3 screenshot, choose a clear moment, compose with the camera and available scene controls, then capture using the action shown in your installed Photo Mode. Open it with U on PC, L3 + R3 on PlayStation, or LS + RS on Xbox. Find PC Photo Mode images in %userprofile%DocumentsThe Witcher 3screenshots and console images in the system’s Capture Gallery or Recent captures. Feature availability varies by version, and no extra equipment is required.
Quick Recap
Product prices and availability are accurate as of the date/time indicated and are subject to change. Any price and availability information displayed on Amazon at the time of purchase will apply.




