Crashes, No Sound, or Screen Glitches?
Random freezes, missing sound and display glitches usually trace back to one bad driver. Find and replace yours safely.Free scan · under a minutePC Slower Than It Used to Be?
A free scan shows the junk files, broken settings and background clutter dragging Windows down - then fixes them in one click.Free scan · Windows 10 & 11The reliable way to build a mo.co loadout is to start with the weapon’s job, then use a gadget and passive perk to cover what that weapon cannot do. A focused-damage weapon needs group control, uptime or protection; an area weapon benefits from slowing or interrupting enemies; a healing or pet-focused weapon can trade some personal damage for team durability.
That advice describes the documented gear-kit model, not a verified current “best build.” mo.co is back in beta, and the developers have announced a possible move from separate weapons, gadgets and passives to complete classes. Check your beta client before treating any pairing below as a live equipment rule.
As an Amazon Associate I earn from qualifying purchases.
What a mo.co weapon loadout is supposed to accomplish
In the earlier gear model documented by the July 28, 2026 mo.co gear guide, a loadout combined three kinds of equipment:
Recommended Free Tools
- Weapon: the main source of combat identity and damage pattern. Documented roles included focused single-target damage, area damage, healing and pet summoning.
- Gadget: a manually activated ability with a cooldown. Examples covered area damage, slowing, stuns, thrown bombs, shields, healing, enemy aggro and attack-speed support.
- Passive perk: an always-on effect. The guide described passives that supplied healing, damage or crowd-control benefits without a manual activation.
The pairing question is therefore not “Which item has the highest tier?” It is “What does my weapon already do, and which missing combat need should the other two slots solve?” That distinction matters because the available sources do not establish a current damage ranking, win rate or universally optimal combination.
#1 Best Overall

- BLUE LIGHT BLOCKING GLASSES: Our blue light glasses for women boast UV400 protection, blocking harmful blue rays from computer screens. With these bluelight glasses women, you can enjoy gaming, reading, or watching TV with no worries of eye strain.
- EYE RELIEF: Our blue light glasses are engineered to reduce blurry vision or strain caused by prolonged screen time. These womens blue light glasses aid in better sleep by preventing blue light from disrupting your natural sleep cycle, helping you fall asleep faster and enjoy a more restful night's sleep, making them the perfect christmas present.
- COMFORTABLE: Crafted from durable material, our trendy blue light glasses for woman or blue light glasses men ensure long-lasting comfort. The high-transmittance lenses accessories, gamer gifts for men, help keep your eyes relaxed. Perfect stocking stuffers, gifts for gamers men, christmas gifts for men, halloween costumes.
- LIGHTWEIGHT: These clear blue light glasses feature a lightweight frame, meaning they’ll stay comfy for long-term wear. Perfect as blue blockers glasses for women or mens blue light glasses, these non-prescription fake glasses for men can be worn throughout the day. The blue light blocking glasses women feature polycarbonate HD lenses, which are anti-reflective and restore true color.
- WORRY-FREE PURCHASE: If you experience any issues, our support team is ready to assist you quickly. These are the perfect costume glasses for cosplay dressing up.
Search wording such as “How can I get more weapons?” or “best builds for every weapon” can describe what a player wants to know, but neither phrase is evidence of a measured trend. More importantly, mastery rewards and equipment availability do not prove that a particular weapon is currently strongest.
Check which equipment system your beta uses
The official mo.co support index says the game is back in beta and lists Weapons under Gear & Resources, but the extracted support material does not document detailed, current loadout rules. That means an older guide can explain roles while still being out of date for the client you are playing.
A later post from the mo.co development team describes a planned redesign “from separate gear (weapons/gadgets/passives/rings) to classes.” The proposal says, Each class would be a complete, predefined build.
In that model, each weapon, gadget and passive would be unique to its class and designed to work together. The post is an announced direction, not confirmation that the redesign has shipped in the current beta. Read the client’s loadout screen, item descriptions and the newest official notes before assuming that free slot-by-slot mixing is still available.
The Tool Desk
Outbyte PC Repair FREERepair Windows errors before they cause bigger problemsFix Now →Outbyte Driver Updater FREEScan for outdated or missing drivers - takes under a minuteDriver Scan →The same developer post summarizes player feedback about repetitive gameplay, less meaningful progression, loss of progress at season end, social features, matchmaking and the pace of content updates. Those are the team’s stated feedback themes, not independent population measurements, and they explain why the class proposal exists rather than proving how a present-day build performs.
The role map: weapon first, then coverage
Use the following map when the older gear-kit terminology appears in a guide or in your client. The examples are role descriptions from the documented system; they are not a guarantee that every listed mechanic remains available in the beta.
| Weapon contribution | What it handles well | What the other slots should add | Typical encounter need |
|---|---|---|---|
| Focused single-target damage | One durable enemy or boss | Reliable damage uptime, survivability, or a way to control nearby threats | Bosses and priority targets |
| Area or splash damage | Several enemies in one zone | Slowing, stunning, grouping or another area-damage source | Enemy groups |
| Healing weapon | Restoring health and supporting allies | Shielding, control or modest damage so healing time is safer | Attrition fights and team support |
| Pet-summoning weapon | Adding an autonomous attacker or distraction | Protection, aggro management, attack-speed support or crowd control | Fights where space and attention are limited |
This is a coverage framework. It does not say that a healing weapon beats a damage weapon, or that an area weapon is superior to a focused one. The correct choice changes with enemy density, boss pressure, team composition and the activity’s objectives.
Rank #2
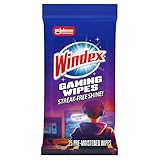
- WINDEX GAMING WIPES: effortlessly clean all your gaming gear and gaming electronics in one easy step with our new Windex Gaming Wipes
- AMMONIA FREE: our ammonia-free formula is safe to use on all of your favorite gaming equipment like consoles, headsets, controllers, screens, keyboards, and more
- PRE-MOISTENED WIPES: each wipe instantly removes dust, dirt, and stubborn smudges and fingerprints leaving a streak-free shine
- ANTI-STATIC: great for cleaning and wiping down your gaming gear and electronics leaving behind no visible residue
- COMPACT RESEALABLE PACKAGE: store your pack of Windex Gaming Wipes anywhere in your home for whenever a quick and easy wipedown is needed
How to build a loadout step by step
- Read the weapon’s primary contribution. Decide whether its main value is focused damage, area damage, healing or a pet. Do not begin by picking a gadget because its icon looks powerful; first identify the job the weapon already performs.
- Name the encounter problem. Before selecting the remaining slots, classify the activity as mostly groups, a boss or other single target, survival/team support, or a mastery/progression run. Mixed activities should be classified by the phase that usually causes failure.
- Select a gadget that changes the fight immediately. Manual abilities are best used to solve a timing problem: slow or stun a dangerous wave, throw area damage into a cluster, shield an ally during a heavy attack, heal after unavoidable damage, draw aggro away from a fragile teammate, or increase attack speed during a damage window. Account for the cooldown; a gadget that is unavailable for the next dangerous phase is not permanent coverage.
- Use the passive to make the plan repeatable. Choose ongoing healing when attrition is the issue, ongoing damage when the weapon already survives comfortably, or continuous control support when enemies repeatedly reach the team. A passive should reinforce the weapon-gadget plan rather than duplicate a benefit that is already sufficient.
- Test the complete loop, not one button. Ask whether the weapon creates the situation in which the gadget is useful and whether the passive remains valuable between cooldowns. For example, an area weapon can keep dealing damage while a slow holds enemies in its zone; a focused weapon can use a defensive gadget to stay active on a boss instead of disengaging.
- Recheck the client after updates. Beta balance, item availability and the equipment model can change. If your screen now presents a class with locked components, use the class’s stated synergy instead of trying to recreate an older free-form gear recipe.
Pairings by encounter need
Enemy groups: hold enemies together and keep them in the damage zone
For a wave-heavy activity, begin with an area or splash weapon. Add a gadget that slows or stuns so enemies remain in the weapon’s effective area, or use a second area-damage activation to cover a reload, downtime or a second spawn point. A passive that adds continuous damage or control can make the pattern less dependent on a single cooldown.
If the weapon already supplies reliable area coverage, a control gadget generally adds more practical value than another effect that hits the same targets at the same time. Slowing buys space and keeps enemies grouped; a stun interrupts a threat that would otherwise force the team to move. Those are role-based inferences from the documented area-damage and control examples, not tested claims about a current optimum.
Bosses and single targets: protect uptime
Use a focused-damage weapon when the encounter is decided by how quickly one target falls. The remaining slots should help you continue attacking: a damage or attack-speed support effect for a safe damage window, a shield or healing effect when incoming damage would otherwise force you away, and control if surrounding enemies interrupt the boss phase.
The available sources do not identify which weapon currently leads boss damage. Avoid presenting any focused weapon as the definitive boss choice unless a newer, official source supplies that evidence. Evaluate the pairing by whether you can maintain attacks through the boss’s dangerous phases, not by a presumed tier label.
Survival and team support: exchange some damage for resilience
A healing weapon is appropriate when the team’s limiting factor is health rather than time. Pair it with shielding or crowd control so you can heal without being interrupted. A healing passive can smooth out repeated chip damage, while a damage passive may be preferable if the team already has enough recovery and is failing a time limit.
A pet-summoning weapon can also support survival indirectly by adding another attacker or distraction. Pair it with aggro management, protection or attack-speed support when the extra body needs to keep enemies occupied or contribute more consistently. The trade-off is emphasis: these choices can improve resilience and utility while placing less of the load on immediate personal damage.
Rank #3

- Ergonomic & Adjustable Design: Fight "text neck" and improve your posture. Designed for comfort, it offers an adjustable height (7.1in-8.5in) (1.4in adjustable range) and angle (5°-85°) Please note: cell phone stand is only 9 inches tall—the length of a standard pencil
- Without blocking subtitles Perfect for office desk Tiktok Face Time Zoom video—this is the ultimate kitchen desk essential for phones! Perfect viewing experience while reducing neck back strain, A must-have for gamers streamers desk, and anyone who values both style and support!
- Sleek & Stable Design fits Otterbox Case: Say goodbye to bent cables, tangles, and tip-overs! LISEN’s stylish adjustable desk phone holder features a built-in charging hole and smart cable management, keeping your phone secure and your workspace clutter-free cool gadgets for men
- ANTI-SLIP DESIGN free hands: The under 10.00 items easy gadgets back and the bottom of this kitchen essentials for women are fully covered by anti-skid silicone, which LISEN stand up desk decor can provide maximum protection device from any scratches and slides
- Your Perfect Viewing Companion:If your product arrives damaged or breaks within 365 days, reach out to LISEN for a quick and hassle-free solution. Struggling with assembly, like tightening the screw? We’ve got your back! Your experience matters to us. (Product including: phone Holder stand*1, screw*1, hexagon screwdriver*1, specification*1)
Mixed missions: build for the failure point
If an activity starts with groups and ends with a boss, decide which phase actually ends your attempts. Choose area control when waves overwhelm the team, or focused damage and protection when the boss timer or damage checks are the problem. A theoretically balanced set of effects can be weaker than a specialized answer to the phase that causes a reset.
What each gadget role contributes
| Gadget role | Manual use case | Pairs naturally with | Cost to watch |
|---|---|---|---|
| Area damage | Cover a cluster, spawn point or short damage window | Area weapons or control that keeps enemies inside the effect | Cooldown timing and wasted damage on scattered targets |
| Slow | Reduce enemy movement so attacks connect or a zone remains effective | Splash weapons and other area effects | Enemies may leave the area once the effect ends |
| Stun | Interrupt or briefly disable a threatening enemy | Focused weapons that need uninterrupted attacks | Save it for a dangerous action rather than spending it on harmless targets |
| Thrown bomb | Deliver burst damage to a location from a distance | Weapons that need extra area coverage or ranged pressure | Positioning and the cooldown between throws |
| Shield | Absorb or mitigate a dangerous damage window | Healing, focused damage and pet support | Using it too early can leave no protection for the real threat |
| Healing | Recover health after unavoidable damage | Support weapons and teams with long attrition phases | Manual timing and the opportunity cost of another utility effect |
| Aggro | Redirect enemy attention or create breathing room | Pet weapons, healing and fragile damage dealers | It helps positioning but does not replace damage or healing by itself |
| Attack-speed support | Increase output during a sustained attack window | Focused weapons and pet attacks | Its value falls when movement or downtime prevents attacks |
These roles come from the earlier gear vocabulary described by the Mobi.gg guide. If an item or effect is absent from your current beta client, do not substitute an unverified name; use the role that the client actually exposes.
How to choose the passive perk
Passives matter because they operate while you move, wait for a gadget cooldown or handle secondary enemies. Start with the resource that repeatedly runs out:
Free tools Windows power users keep installed
One-click scans. No signup required.
- Health: choose ongoing healing or another sustain effect when chip damage accumulates between major attacks.
- Damage or time: choose ongoing damage when survival is already stable and the activity demands faster clears.
- Control: choose a continuous crowd-control effect when enemies repeatedly reach the team and a single stun or slow cannot cover every wave.
Do not automatically stack identical effects. A healing weapon plus a healing passive can be sensible for a long attrition mission, but it may be inefficient if the team already stays healthy and instead needs control. Likewise, a damage passive adds less value when the weapon spends most of the fight repositioning. The best passive is the one that remains useful during the seconds when your active gadget is unavailable.
A practical comparison method for two builds
When two loadouts seem plausible, compare them on the same axes instead of arguing from item names. Record the result for the specific activity you are playing.
| Comparison axis | Question to ask |
|---|---|
| Target profile | Does the activity demand single-target pressure, group clearing or both? |
| Damage source | Does most damage come from the weapon, a gadget burst or a passive effect? |
| Sustain | Can the setup restore health for itself or the team during the whole encounter? |
| Protection | Does it provide shielding, aggro management or another way to survive a dangerous phase? |
| Control | Can it slow, stun or otherwise stop threats often enough to matter? |
| Encounter fit | Does the cooldown cycle match the activity’s waves, boss windows and movement demands? |
The sources do not justify turning this comparison into a numerical tier list. If both builds complete the activity, prefer the one whose cooldowns and survivability fit your team; if one fails, identify the missing role rather than assuming the weapon itself is weak.
Rank #4

- Easy Installation: Our gaming lights have been designed to enhance your entertainment experience. Simply position the led light bar next to your TV or game console to create a game room environment with ease. They come with USB power and a 60 inch cord for direct mounting and mobility
- Audio Syncing & Extensive Mode: The built-in high-sensitivity music sensor allows you to sync the TV led lights to your favorite music. Lights react and move to the beat of music, film and game audio, creating an incredible immersive sound and light experience – and all without the need for an additional hub. You can choose from 64+ patterns, including strobe, illusion, jump, energy, gradient, running, chasing, fluttering mode etc. Each mode can be applied to different scenes
- 64+ Chasing IC+RGB & W Effect: The independent control design of IC+RGB and white all-in-one multifunctional rgbw led bar lights monitor backlight allows you to easily switch the led lights for desk between IC+RGB and white to enjoy a variety of lighting effects, you can choose white lighting mode with high brightness for better illumination when working, etc. Choose IC+RGB lighting mode when you need to create an entertaining atmosphere for the light show, 16 million colours of Color changing rgb light bar let you dance to the beat and create a dynamic party atmosphere
- Dynamic and Dimmable Lights: 1%-full brightness free brightness adjustment gives you the flexibility to adjust dimmable led light bar for room decorations or a variety of occasions
- USB Powered: USB light bars for room can be powered by powernank, usb charger, TV, Monitor, laptop PC mainframe, making behind TV led lighting bar easy to install in any location.TV led lights are powered by the TV usb interface / PC mainframe, can be turned on/off synchronously with TV / PC
Mastery and progression: what weapon choice actually affects
Supercell’s Masteries Update patch notes state that every weapon has its own mastery page with three tracks:
- Dojo challenges: three difficulty levels, with three challenges at each level.
- Milestones: goals such as defeating enemies, dealing damage and defeating bosses.
- Elite Contracts: milestone rewards that include Upgrade Cores; the final milestone unlocks a Golden Weapon Shader.
Completing every mastery goal for a weapon awards its Expert title and mo.gold. Mastery-specific Dojo challenges, milestones and Elite Contracts give you a reason to use the weapon you are actively progressing, even when another weapon might suit a particular encounter better. Mastery rewards do not establish current balance or prove that the mastered weapon has the best loadout.
Upgrade Cores are part of the game’s progression economy. The official Rooftop HQ support article explains that they can be applied to weapons and describes the in-game Shop/Merch area. It does not document a physical controller, phone accessory or external product as necessary for building a loadout.
Independent reader supportYour contribution helps us test, update, and keep practical guides available for everyone.Common mistakes and fixes
Copying an old gear list as if it were current
Symptom: a guide names weapons, gadgets or passives that your client does not show. Fix: treat the old list as a role glossary, then follow the current beta’s item descriptions and official announcements. The planned class transition makes this check especially important.
Choosing three damage effects with no control or protection
Symptom: the build looks powerful on a stationary target but collapses when enemies spread, interrupt attacks or reach the team. Fix: replace one redundant damage effect with slow, stun, shielding, healing or aggro support, depending on the failure point.
Do these 3 things before closing this tab:
1Scan for outdated or missing drivers - takes under a minute2Repair Windows errors before they cause bigger problems3Fix the driver behind crashes, sound loss and screen glitchesSpending every gadget cooldown immediately
Symptom: the ability is unavailable when a wave, boss attack or rescue moment arrives. Fix: reserve manual effects for the encounter event they solve. A slow is most valuable when it keeps a group inside area damage; a shield is most valuable during the known heavy-hit window.
Best Value

- Compatible with Wide Screens - To ensure compatibility with the dual monitor mount, your each monitor must meet three conditions at the same time: First, computer screens size range: 13 to 32 inches. Second, screen weight range: 4.4 to 19.8 lbs. Third, the back of the monitor screen must have VESA mounting holes with a pitch of 75x75mm or 100x100mm.
- Regarding the compatibility with desks - Your desk must meet three conditions at the same time: First, desk material: Only wooden desks are recommended, plastic or glass desks cannot be used. Second, desk thickness range: 0.59" - 3.54". Third, the bottom of the desk should not have any cross beams or panels, as this will interfere with installation. We recommend carefully checking that your desk and monitors meets all above conditions before purchasing.
- Dual C-Clamp Hold - Worried your dual monitors might wobble or slip? Our upgraded base uses a larger platform plus a dual C-clamp structure to lock the dual monitor arm firmly to your desk. Each arm safely keeps your screens steady while you type, click and game—no shaking, no sliding, just a clean and secure setup you can trust every day. It also provides Grommet Mounting installation choice, both options ensure stable and secure fixation for your 0.59" - 3.54" desk.
- Full-Motion Adjustment For Comfortable View - Pull the screen closer when you’re deep in a spreadsheet, push it back to watch videos, or rotate to portrait for coding — moving everything smoothly with just one hand. The monitor stand offers +85°/-50° tilt, ±90° swivel and 360° rotation. Raise your monitor up to 15.75″ to support a healthy sitting posture. Whether you’re working from home, gaming through the night, or switching between video calls and documents, getting the screens to your natural line of sight helps relieve neck, shoulder and back strain so you can stay focused longer with less fatigue.
- Keep Your Desk Organized: By lifting both screens off the desktop, this dual monitor stand opens up valuable space for your keyboard, notebook, docking station or a simple, clutter-free work area. Built-in cable management guides wires along the arms, keeping cords out of sight and out of the way. Enjoy a tidy, modern workstation that looks as good as it feels to use.
Assuming mastery completion proves superiority
Symptom: an Expert title or Golden Weapon Shader is treated as evidence that the weapon is the strongest. Fix: separate progression goals from performance evaluation. Master the weapon you enjoy or need for its rewards, then judge the loadout by target profile, uptime, sustain, protection and control.
Ignoring the class-system possibility
Symptom: you keep trying to swap individual components after the client has moved to predefined classes. Fix: inspect whether the game now locks a weapon, gadget and passive together. If it does, compare classes by the same encounter axes rather than rebuilding a discontinued gear-kit recipe.
Role templates you can adapt without claiming a “best build”
Wave-control template
Use an area weapon, a slow or stun gadget, and a damage-or-control passive. The weapon supplies sustained coverage, the gadget keeps enemies in range or interrupts the most dangerous target, and the passive fills the gaps between activations. Choose this pattern when groups, not a boss timer, cause failures.
Boss-uptime template
Use a focused weapon, a shield, healing or attack-speed gadget selected for the boss’s timing, and a passive that supports damage or sustain. The objective is uninterrupted attacks through dangerous phases, not maximum theoretical burst during a safe test.
Team-resilience template
Use a healing or pet weapon, a protection, healing or aggro gadget, and a sustain-or-control passive. This pattern sacrifices some immediate damage emphasis for the ability to recover from mistakes and keep allies active during long encounters.
These are composition patterns derived from the documented roles, not named in-game builds or performance guarantees.
What is and is not established about current “best” loadouts
Established: the earlier system separated weapons, manually activated gadgets and continuous passives; the documented roles support pairing damage patterns with healing, shielding, crowd control, aggro or attack-speed support; every weapon has a mastery page with the tracks and rewards listed above; and the developers have described a possible class-based replacement.
Not established by the available sources: a current universal tier list, the highest boss damage weapon, the most popular combination, numerical win rates, or proof that every item in the older gear guide remains in the beta. Any article or video making those claims needs newer, directly comparable evidence.
For now, build from the encounter backward: identify the weapon’s contribution, add the manual effect that solves the immediate threat, and choose a passive that keeps that plan working between cooldowns. Then verify that the client still uses the same equipment model before investing in a detailed recipe.
Quick Recap
Product prices and availability are accurate as of the date/time indicated and are subject to change. Any price and availability information displayed on Amazon at the time of purchase will apply.




