Free tools Windows power users keep installed
One-click scans. No signup required.
Some links on this page are affiliate links: if you buy through them we may earn a commission, at no extra cost to you.
Optimizing Nintendo Switch 2 for horror means preserving shadow detail without washing out the darkness, then setting the audio path so quiet movement and directional cues remain clear. Start with automatic brightness disabled while you calibrate in the room where you play, use the game’s own HDR or brightness screen when it provides one, and treat Compatible Software Only as the safest docked-TV HDR default for a mixed library. Audio should be matched to your actual route—TV speakers, a surround system, wired headset, or wireless headphones—because there is no universal brightness, HDR, or surround value that suits every game, display, room, and listener.
What should my starting horror-game profile be?
Use the following as a neutral starting point, then make small changes while viewing a representative dark scene. These are practical recommendations, not Nintendo-prescribed calibration numbers.
As an Amazon Associate I earn from qualifying purchases.
Do these 3 things before closing this tab:
1Fix the driver behind crashes, sound loss and screen glitches2Clear out junk files and repair common Windows errors3Scan for outdated or missing drivers - takes under a minute- Handheld/tabletop: Hold the HOME button for at least one second, turn Automatic Brightness off temporarily, set Screen Brightness for the actual room, and adjust volume from the same Quick Settings panel.
- Docked TV: Open System Settings > Display, leave TV Resolution on Automatic, set HDR Output to Compatible Software Only, run Adjust HDR on an HDR-capable television, and enable Automatic Low-Latency Mode if the TV supports it.
- Audio: Select the TV Sound mode that matches the connected equipment, use Test Output after changing it, and compare Headphone Virtual Surround on and off with the headphones you actually use.
These choices follow Nintendo’s documented controls. The final setting is the one that lets you read important dark detail and hear intended cues comfortably without making the game look or sound unnaturally flat.
How do I optimize HDR and brightness in handheld or tabletop mode?
Handheld and tabletop play use the Switch 2 screen, so the room around the console and the angle of the LCD matter as much as the sliders. Nintendo says Switch 2’s HDR can express a wider range of brightness, darkness, and color, but support and appearance vary by game; its official material does not specify a horror-game brightness target.
Popular on Amazon

- 【90 Degree Full Function USB C Adapter】Supports the latest USB4 standard for up to 40Gbps of bandwidth, 8K video support, and up to 240W Fast charging; Support USB PD 3.1 Extended Power Range (EPR) including 140W, 180W and 240W. Your productivity is easily doubled. *Warm Tip: For the best fit, please make sure the USB-C port is fully exposed; thick or bulky cases may affect compatibility.
- 【Reliable Quality】Made from high-quality, scratch-resistant aluminum alloy, delicate metal frame. get excellent wear resistance and heat dissipation. Non-Slip Design for easier insertion and removal.
- 【Small and portable】Ultra thin size, ultra compact design, a petite physique that matches the minimalist design of your modern laptops. Coming with a slim figure that won't block the port next to the one it's plugged into.
- 【Compatibility】Widely work with most usb c, thunderbolt 4/3 devices. Compatibilit for ROG Ally, Steam Deck, Switch, MacBook Pro, Quest 3 VR headset, Surface Book 2, iPhone 18/17/16/15, Samsung Galaxy S23/S22/S21, Note 20/10, Google Pixel, ChromeBook, etc.
- 【Excellence Customer Support】If you experience any issues or cable failure, simply reach out to our dedicated customer service team. We provide a prompt response within 18 hours, providing you with the necessary technical support to resolve any concerns.
1. Open the controls you need
- Start the game and reach a dark, representative area rather than calibrating on a bright title screen.
- Hold HOME for at least one second to open Quick Settings. Nintendo’s Quick Settings instructions expose Automatic Brightness, manual Screen Brightness, and volume.
- Turn Automatic Brightness off temporarily. This prevents the sensor from changing the image while you decide whether shadows are readable.
- Set Screen Brightness while sitting in the lighting in which you normally play. There is no official numeric target; increase it only until dark forms separate enough to identify hazards, characters, and paths.
2. Use the game’s calibration screen when available
If the horror game provides an HDR, gamma, black-level, or brightness test, follow its on-screen instructions after setting the console brightness. Look for the game’s intended distinction between a barely visible symbol and a symbol that should remain hidden. Do not force every game to the same slider position: different engines and HDR implementations can map the same console output differently.
When no calibration screen exists, pause on several scenes: an interior with weak lighting, an outdoor night scene, and a scene containing a bright lamp or flashlight. You want enough separation to see environmental detail while retaining the game’s intended black areas. If raising brightness makes every wall gray, lower it again and rely on a little more room light instead.
3. Account for the room and viewing angle
- In a dark room, a lower setting may preserve contrast and reduce eye strain; in daylight, the same setting can hide useful detail.
- Tabletop play changes the angle of the screen. Recheck the image after moving the console or handing it to another player.
- If you move between rooms, recalibrate rather than assuming one value works everywhere.
- Keep the console screen free of strong reflections. A reflection can look like lifted blacks and tempt you to raise brightness unnecessarily.
4. Do not confuse burn-in reduction with gameplay brightness
Screen Burn-In Reduction is a separate display feature. Nintendo says it dims the screen after five minutes of inactivity; it is not a horror-game brightness preset. Leave it enabled if you want the protection behavior, but do not evaluate a brightness change while the console is idle and dimmed. Return to active gameplay before judging the picture. Nintendo documents this distinction in its display-settings guide.
Which HDR setting should I use when the Switch 2 is docked?
For a library containing both HDR and non-HDR games, Compatible Software Only is a sensible starting point. Nintendo provides three HDR Output choices—For All Software, Compatible Software Only, and Off—and says HDR support varies by game; TV-mode HDR also requires an HDR-compatible television.
Also popular on Amazon

- 5-in-1 Connectivity: Equipped with a 4K HDMI port, a 5 Gbps USB-C data port, two 5 Gbps USB-A ports, and a USB C 100W PD-IN port. Note: The USB C 100W PD-IN port supports only charging and does not support data transfer devices such as headphones or speakers.
- Powerful Pass-Through Charging: Supports up to 85W pass-through charging so you can power up your laptop while you use the hub. Note: Pass-through charging requires a charger (not included). Note: To achieve full power for iPad, we recommend using a 45W wall charger.
- Transfer Files in Seconds: Move files to and from your laptop at speeds of up to 5 Gbps via the USB-C and USB-A data ports. Note: The USB C 5Gbps Data port does not support video output.
- HD Display: Connect to the HDMI port to stream or mirror content to an external monitor in resolutions of up to 4K@30Hz. Note: The USB-C ports do not support video output.
- What You Get: Anker 332 USB-C Hub (5-in-1), welcome guide, our worry-free 18-month warranty, and friendly customer service.
Set the output and verify the signal
- Open System Settings > Display.
- Choose Video Output Information to see what signal the Switch 2 and connected TV are negotiating.
- Set HDR Output to Compatible Software Only first. Use For All Software only when you deliberately want the console to send HDR output more broadly and your display handles that signal as expected. Choose Off for troubleshooting or for a display that does not support HDR.
- With an HDR-compatible TV connected, select Adjust HDR and follow the console’s visual prompts. Nintendo describes this as adjusting the balance of colors to your liking; it does not prescribe a universal nit value or a required TV picture profile.
Nintendo’s FAQ explains that HDR allows “a greater variety of light and color” and a richer expression of brightness, darkness, and vividness. The same FAQ cautions that support depends on the software and that a compatible display is required. If a game looks gray, clipped, or unexpectedly dim after enabling HDR, check the game’s own support and calibration first, then confirm the TV signal before changing several global options at once.
How should I choose TV resolution, RGB range, and low-latency mode?
Leave these controls at their automatic choices unless you are solving a specific compatibility problem. They affect signal negotiation and display behavior more than the artistic brightness balance inside a horror game.
Recommended Free Tools
- TV Resolution: Nintendo lists Automatic, 720p, 1080p, 1440p, and 2160p. Automatic is the practical default. Try a manual value only when a display fails to lock onto the expected signal or when you have a documented reason to use one.
- Automatic Low-Latency Mode: Enable it when supported by the television. Nintendo describes this as automatically switching the TV to its low-latency or game mode, which can make controls feel more immediate.
- RGB Range: Automatic is the safest default. Full Range and Limited Range are available, but the correct choice depends on the TV or monitor’s supported levels. Nintendo directs users to the display manufacturer when diagnosing color-range compatibility.
Nintendo says 4K output is limited to 60 frames per second, and that 4K, HDR, and VRR in TV mode require both compatible software and a compatible display. A September 10, 2026 system update added TV-mode VRR support, but VRR does not replace HDR or brightness calibration and is not a reason to force a particular resolution.
How do I calibrate a docked TV for dark horror scenes?
Calibrate in the TV picture mode you will actually use for games, with the room lights at their normal level. The objective is readable shadow detail and convincing highlights, not the brightest possible image.
Also popular on Amazon

- Sleek 7-in-1 USB-C Hub: Features an HDMI port, two USB-A 3.0 ports, and a USB-C data port, each providing 5Gbps transfer speeds. It also includes a USB-C PD input port for charging up to 100W and dual SD and TF card slots, all in a compact design.
- Flawless 4K@60Hz Video with HDMI: Delivers exceptional clarity and smoothness with its 4K@60Hz HDMI port, making it ideal for high-definition presentations and entertainment. (Note: Only the HDMI port supports video projection; the USB-C port is for data transfer only.)
- Double Up on Efficiency: The two USB-A 3.0 ports and a USB-C port support a fast 5Gbps data rate, significantly boosting your transfer speeds and improving productivity.
- Fast and Reliable 85W Charging: Offers high-capacity, speedy charging for laptops up to 85W, so you spend less time tethered to an outlet and more time being productive.
- What You Get: Anker USB-C Hub (7-in-1), welcome guide, 18-month warranty, and our friendly customer service.
- Choose the game’s intended output. If it supports HDR, use the Switch 2 HDR workflow above and the game’s own calibration screen. If it is SDR, do not assume enabling a TV’s generic HDR conversion will improve it.
- Disable competing automatic picture changes while calibrating. Features that dynamically alter contrast or brightness can make a dark scene change while you are deciding. You can restore them later if you prefer their look, but evaluate the baseline first.
- Check black detail. In a dark room, inspect a scene with subtle texture in walls, floors, or clothing. If all shadow areas merge, raise the relevant game or TV control slightly; if black areas turn uniformly gray, reduce it.
- Check highlight detail. Look at a flashlight, candle, window, or bright practical lamp. If its center loses texture or becomes a featureless white patch, reduce excessive contrast or HDR intensity rather than lifting the entire image.
- Recheck from the normal seat. TV viewing angle and distance can change perceived shadow detail. Make the final decision from the position used for play.
Do not copy a numeric “perfect” value from another panel. LCD, OLED, projector, and different TV picture modes can produce different results even with identical console settings; the official Nintendo documentation does not publish a horror-specific target.
Which Switch 2 audio setting is best for horror games?
The best mode is determined by where sound is going. Match the console’s output to the connected device, then use Test Output and a familiar scene to check that dialogue, ambience, and directional effects remain distinct.
TV speakers or a stereo soundbar
- Open System Settings > Audio.
- Under TV Sound, choose Automatic first. Choose Stereo when the connected system is definitely two-channel or when Automatic is negotiating an unsuitable mode.
- Use Test Output after changing the setting. Confirm that the test reaches the intended speakers and that the TV is not applying an unexpected mute or downmix.
Automatic is convenient, but it cannot know whether your TV, receiver, or soundbar’s preferred processing is the most intelligible for a particular room. If dialogue disappears or ambience overwhelms speech, adjust the audio system’s own center, night, or dynamic-range controls only after confirming the Switch 2 output mode.
5.1 surround equipment
Select Linear PCM 5.1 Surround when the connected equipment supports that signal path and you want discrete surround output. Run Test Output and verify each channel. If the receiver reports an unsupported format, returns silence, or collapses channels, go back to Automatic or Stereo rather than leaving a theoretically better mode that your setup cannot decode.
Also popular on Amazon

- Portable and powerful USB-C HUB: BENFEI USB Type-C HUB, with super-soft and knot-free silicone woven design cable, meets most mobile office needs. Compact, lightweight, stylish, and powerful portable USB C Hub equipped with 1 x HDMI port, 1 x 100W charging, and 3 x USB ports. 18-month warranty, 24-hour response, to ensure you feel at ease when using our product.
- Design centered on comfort and reliability: Thanks to BENFEI's end-to-end in-house cable production capability, in-house PCBA and assembly capability, using the industry's most advanced silicone woven design and process, 20cm cable in length, no knots, super-soft, the HUB is easy to use in all scenarios: laptop, tablet, stand etc. Super-soft, 25000+ life cycles, to meet your daily carrying and office needs.
- 100W Charging: Support up to 90W USB C pass-through charging via Type-C port to keep your laptop powered. 10W is reserved for other interface operations. No data and video function on the Type-C port.
- 4K HDMI Display: The HDMI port supports media display at resolutions up to 4K 30Hz, keeping every incredible moment detailed and ultra vivid. Please note that the C port of the Host device needs to support video output.
- Transfer Files in Seconds: Transfer files and from your laptop at speeds up to 10 Gbps with USB A 3.2 port. Extra 2 USB A 2.0 ports are perfectly for your keyboards and mouse.
Wired headset
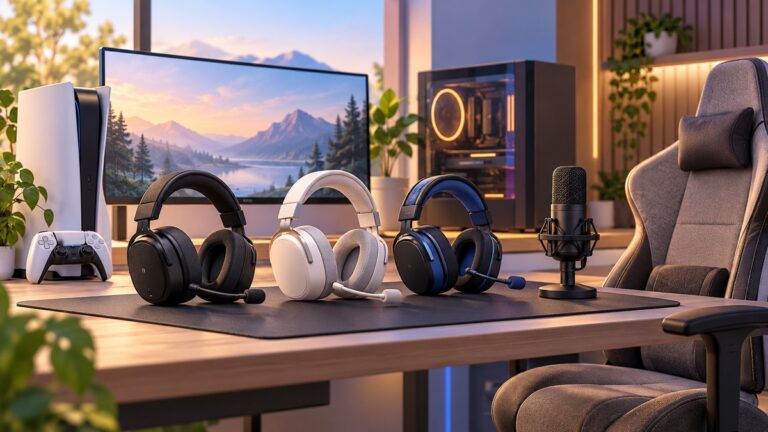
A compatible wired gaming headset is optional, not required, but it can make low-volume environmental cues easier to hear without raising the TV for everyone in the room. Nintendo’s Quick Settings volume control works with the active output, including a wired headset. Set the headset loud enough to hear footsteps and room tone clearly, then keep headroom for sudden effects; prolonged high volume can cause listening fatigue.
Wireless Bluetooth headphones
Use the active-output volume control in Quick Settings and compare the game’s quietest important cues, not only its loudest stingers. Wireless processing can add delay or alter spatial presentation, so judge lip-sync and directional movement in the actual game. Nintendo documents headphone and virtual-surround controls, but does not claim that one mode is universally superior for every headphone or title.
Outdated Drivers Are Slowing You Down
One free scan finds every outdated or missing driver and matches the right update for your exact hardware.Free scan · exact hardware matchPC Slower Than It Used to Be?
A free scan shows the junk files, broken settings and background clutter dragging Windows down - then fixes them in one click.Free scan · Windows 10 & 11Headphone Virtual Surround
In System Settings > Audio, compare Headphone Virtual Surround on and off. Keep the option that gives you a stable sense of front, rear, and side placement while keeping voices intelligible. Some games already apply their own spatial mix, and some headphones emphasize bass or reverberation; stacking processing can make a cue sound wider but less precise.
Headphones connected to a wireless Switch 2 Pro Controller
Nintendo provides Stable and Low Latency Audio Mode choices for headphones connected to a Pro Controller used wirelessly, and says these modes reduce audio lag. Try Low Latency if you notice a delay between an on-screen action and its sound; use Stable if the connection is unreliable. Run Test Output and then confirm timing in gameplay rather than judging only from a menu sound.
Also popular on Amazon

- 【Read before You Buy】 Note: This adapter is USB 2.0 version and cannot transmit HDM, VGA, or other video signals. Nevertheless, they are fully capable of charging devices,duplicating files, and can be seamlessly integrated with USB-C earphones, wireless network adapters, and SD card adapters.
- 【Easy to Use and Safe】Thanks to modern manufacturing techniques, we've made these adapters sufficiently compact so that they can remain inserted in your device without noticeable protrusion or inconvenience. This means you don't have to constantly plug and unplug them, reducing the likelihood of wear and misalignment, and making them more convenient to carry around.
- 【Reliable Quality】Engineered for enhanced durability, durable aluminum alloy shell material,get excellent wear resistance and heat dissipation,the male USB C and female USB connectors & the male USB and female USB C connectors are designed to be plugged and unplugged up to 20000 times. Provides data transfer, device charging, memory space expansion, and additional computer peripherals.
- 【Think more for you】Do you need to connect a USB-C-enabled device to an odd device that only has USB-A ports? Then these USB-A male to USB-C female adapters are made for you.Simply insert the adapter into the USB-A port on the device, and you can instantly connect your USB-C device to the device that originally didn't have the correct connection port.
- 【Trusted xiwxi Quality and Service】As a responsible brand seller, you will receive xiwxi's 12-month Quality assurance and lifetime friendly customer service, you're not just buying a product,you're investing in peace of mind with all-round quality and exceptional customer service.
What should I change when a horror game looks wrong?
Change one layer at a time so you can identify the cause. The following branches cover the most common mismatches without assuming that the console, game, or TV is defective.
The image is gray or blacks look lifted
- Check whether the game actually supports HDR and whether HDR Output is set to For All Software. Switch to Compatible Software Only or Off as a diagnostic.
- Run Adjust HDR again on the connected HDR TV.
- Check RGB Range on both the Switch 2 and TV. Leave both on Automatic unless the display documentation specifies a matching Full or Limited configuration.
- Inspect the TV’s dynamic contrast, black-level, and picture-mode controls. A TV processing feature can lift shadows independently of the console.
Important detail disappears in darkness
- Recheck the game’s own brightness or gamma screen before raising the global TV brightness.
- Temporarily disable Automatic Brightness in handheld mode and recalibrate in the current room.
- Reduce reflections or add a small amount of neutral room light. A completely dark room is not always the most readable environment for an LCD.
Highlights are clipped or painfully bright
- Repeat Adjust HDR and inspect a bright lamp or flashlight as well as a black area.
- Lower the game’s HDR exposure or peak-brightness control if it provides one; do not compensate by crushing all shadows.
- Confirm that the TV is in its intended game picture mode and not applying an aggressive vivid preset.
Sound is delayed, hollow, or missing channels
- Run Test Output in System Settings > Audio.
- For a receiver or surround system, verify that Linear PCM 5.1 is supported; otherwise select Automatic or Stereo.
- For Pro Controller headphones, try Low Latency Audio Mode, then Stable if wireless artifacts appear.
- Compare Headphone Virtual Surround on and off. Keep the setting that preserves positional clarity in the game, not the one that merely sounds wider in a menu.
Should I use different settings for every horror game?
Usually, keep one console baseline for each play mode and make game-level adjustments per title. HDR implementation, gamma curves, audio mixes, and intended darkness differ between games, so a value that works for one title can flatten another.
| Situation | Start with | Recheck |
|---|---|---|
| Handheld at night | Automatic Brightness off; moderate manual brightness | Shadow detail and eye comfort after several minutes |
| Handheld in daylight | Higher manual brightness than the night profile | Reflections and whether blacks still look black |
| HDR-capable TV, mixed game library | HDR Output: Compatible Software Only; TV Resolution: Automatic | Game support, Adjust HDR, and Video Output Information |
| TV speakers or stereo soundbar | TV Sound: Automatic, then Stereo if required | Test Output and dialogue clarity |
| 5.1 receiver | Linear PCM 5.1 Surround | Every channel with Test Output |
| Headphones | Virtual Surround off and on as a direct comparison | Directional accuracy, delay, and speech intelligibility |
What is the final pre-game checklist?
- Confirm whether the game supports HDR and whether the display supports HDR in the chosen play mode.
- Calibrate in the room, seat, and screen position you will actually use.
- Use the game’s own brightness or HDR test whenever it exists.
- Keep Automatic Brightness off while calibrating handheld play; turn it back on later only if its changing output suits your routine.
- On TV, verify Video Output Information, leave resolution on Automatic unless troubleshooting, and use Adjust HDR on an HDR-capable display.
- Leave RGB Range on Automatic unless the TV documentation calls for a matching range.
- Match TV Sound to the physical audio setup and run Test Output.
- Compare Headphone Virtual Surround on and off, and try Low Latency Audio Mode for wireless Pro Controller headphones if timing is noticeable.
- Recheck after moving rooms, changing TV picture modes, connecting a new headset, or starting a game with a different HDR implementation.
Nintendo’s official display support page, audio support page, FAQ, and feature overview define the available controls and compatibility requirements. The practical choices above adapt those controls to horror-game readability and cue clarity without pretending that one number works for every setup.
Frequently Asked Questions
Does every Nintendo Switch 2 game support HDR?
No. Nintendo says HDR support varies by game, and docked HDR additionally requires an HDR-compatible TV. If a title does not identify HDR support or its image looks incorrect, use the game’s documentation and test Compatible Software Only or HDR Off before changing other settings.
Can I use HDR in handheld mode without a 4K television?
Handheld play uses the console screen rather than a docked TV, so a 4K television is not part of that setup. The visible result still depends on the game’s HDR implementation and the room’s lighting; calibrate the handheld screen with Automatic Brightness temporarily disabled.
Why does my surround receiver show no sound with Linear PCM 5.1?
The receiver, cable path, or television may not accept that multichannel format. Run Test Output, then switch TV Sound to Automatic or Stereo and verify which modes the connected equipment documents as supported.
The Tool Desk
Outbyte PC Repair FREEClear out junk files and repair common Windows errorsFree Scan →Outbyte Driver Updater FREEScan for outdated or missing drivers - takes under a minuteDriver Scan →Is a wired headset required for horror games on Switch 2?
No. Nintendo supports TV audio, surround output, wired headsets, and wireless headphones. A compatible wired headset is simply an optional way to isolate quiet cues and avoid raising room volume; choose based on comfort, compatibility, and whether your current audio route is clear enough.