Fallen Village is Chapter 3, “Rendezvous,” in Valor Mortis. There is no confirmed official in-game map; an unofficial progression reference says the game has none. The reliable way through the chapter is to navigate between named Lanterns and landmarks while using this checklist for quests, Amber, Ferrofluid upgrades, keys, weapons, and the Iron Marshall route.
This guide follows the chapter in order through the Fields, Marketplace, and Orchard. It also explains the Fields shortcut, the two item-fetch quests, every documented chest in the chapter, and how Fallen Village fits into whole-game completion.
As an Amazon Associate I earn from qualifying purchases.
How to navigate Fallen Village without an official map
The available route walkthrough is anchored to Lanterns, houses, barns, wells, rivers, plague pillars, and other fixed landmarks rather than a numbered map. That is important because the map status is easy to overstate: an unofficial Valor Mortis progression reference reports that the game has no in-game map, while the chapter walkthrough is a route guide, not a developer-published map. Treat the directions below as a landmark route.
Do these 3 things before closing this tab:
1Clear out junk files and repair common Windows errors2Scan for outdated or missing drivers - takes under a minute3Repair Windows errors before they cause bigger problemsLanterns are your route anchors
The secondary progression reference describes Lanterns as rest points, fast-travel points, and places where Catalysts can be spent. Its account also says Lantern fast travel becomes available after Chapter 2. Catalysts come from kills and chests, are spent at Lanterns to raise stats, and drop when you die; if you die again before recovering them, they are permanently lost. Those system details come from an unofficial source, so use them as practical context rather than as an official specification.
#1 Best Overall

- BLUE LIGHT BLOCKING GLASSES: Our blue light glasses for women boast UV400 protection, blocking harmful blue rays from computer screens. With these bluelight glasses women, you can enjoy gaming, reading, or watching TV with no worries of eye strain.
- EYE RELIEF: Our blue light glasses are engineered to reduce blurry vision or strain caused by prolonged screen time. These womens blue light glasses aid in better sleep by preventing blue light from disrupting your natural sleep cycle, helping you fall asleep faster and enjoy a more restful night's sleep, making them the perfect christmas present.
- COMFORTABLE: Crafted from durable material, our trendy blue light glasses for woman or blue light glasses men ensure long-lasting comfort. The high-transmittance lenses accessories, gamer gifts for men, help keep your eyes relaxed. Perfect stocking stuffers, gifts for gamers men, christmas gifts for men, halloween costumes.
- LIGHTWEIGHT: These clear blue light glasses feature a lightweight frame, meaning they’ll stay comfy for long-term wear. Perfect as blue blockers glasses for women or mens blue light glasses, these non-prescription fake glasses for men can be worn throughout the day. The blue light blocking glasses women feature polycarbonate HD lenses, which are anti-reflective and restore true color.
- WORRY-FREE PURCHASE: If you experience any issues, our support team is ready to assist you quickly. These are the perfect costume glasses for cosplay dressing up.
Fallen Village route at a glance
| Subarea | Primary objectives | Important pickups and route functions |
|---|---|---|
| Approach to the Village | Optional Battlefield Lantern return; pass the Abandoned Church | Mysterious Stone Pyramid, Valen Duroc’s Emblem, Amber #10, Rapier #3 |
| Fields | Complete “The Scarecrow” and open the carriage route | Lover’s Pendant, Letter with a Drawing, Upgrade #3, Amber #11, Amber #12, Blunderbuss; shortcut to the previous Lantern |
| Marketplace | Complete “Lullaby” and clear the plague wall | Weathered Key, Toy, Amber #13, Upgrade #4, Amber #14, Storage Key |
| Orchard and onward path | Search after the Iron Marshall and continue beyond the Marketplace Lantern | Amber #15 and Empty Ferrofluid Flask #2 |
Before entering Fallen Village
There are two useful pieces of approach-route cleanup before you commit to the Village.
Optional return to the first Battlefield Lantern
- Pass the camp at the first Battlefield Lantern.
- At the enemy split, take the left branch.
- Shoot the weak wall.
- Defeat the Eternal Guardian.
- Collect the Mysterious Stone Pyramid and Valen Duroc’s Emblem.
- Open the chest behind that enemy for Amber #10: Duellist’s Focus.
This is an optional backtrack, so do it before moving deeper if you want the approach-area items handled in the same visit.
Abandoned Church progression pickup
At the Abandoned Church, Rapier #3 is stuck in the body blocking the route toward the Village. It is a required progress item, not an optional chest collectible. If the path appears blocked, inspect the body rather than searching the surrounding buildings for another entrance.
Quick wins for a faster PC:
Clear out junk files and repair common Windows errorsFree Scan →Fix the driver behind crashes, sound loss and screen glitchesFind Drivers →Repair Windows errors before they cause bigger problemsFix Now →Fields: Scarecrow quest, shortcut, and Amber
Use the Fields Lantern as your starting reference. The chapter’s first side quest and its most useful shortcut are both in this section.
Start “The Scarecrow”
- Find the body tied to the scarecrow post near the Fields Lantern.
- Interact with the body more than once. The additional interaction reveals the items the scarecrow requests.
- Walk toward the barn, then take the right-hand path to the large tree.
- At the tree’s base, take the Lover’s Pendant from the body.
Do not leave the pendant behind: it is one of the two delivery items required to finish the quest.
Rank #2
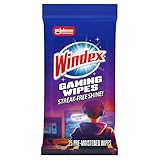
- WINDEX GAMING WIPES: effortlessly clean all your gaming gear and gaming electronics in one easy step with our new Windex Gaming Wipes
- AMMONIA FREE: our ammonia-free formula is safe to use on all of your favorite gaming equipment like consoles, headsets, controllers, screens, keyboards, and more
- PRE-MOISTENED WIPES: each wipe instantly removes dust, dirt, and stubborn smudges and fingerprints leaving a streak-free shine
- ANTI-STATIC: great for cleaning and wiping down your gaming gear and electronics leaving behind no visible residue
- COMPACT RESEALABLE PACKAGE: store your pack of Windex Gaming Wipes anywhere in your home for whenever a quick and easy wipedown is needed
Take the well-side chest and unlock the Fields shortcut
- Continue until the later split with a wooden gate and a Grenadier on the right.
- Take the opposite route, toward the large house.
- Open the chest beside the well for Ferrofluid Flask Power Upgrade #3.
The large-house route doubles as the shortcut back to the previous Lantern. This is the chapter’s clearest loop: the well chest is both a collectible stop and a navigation landmark for returning to the earlier rest point.
Find the “Letter with a Drawing”
- Continue past the tall haystacks and the four attacking human enemies.
- Go up the hill on the left.
- Enter the house and take the “Letter with a Drawing” from the upstairs table.
- Use the downstairs door to return near the earlier well chest.
With the pendant and letter collected, you have both items needed for the scarecrow.
Finish the scarecrow objective and collect two Ambers
- Return to the scarecrow post.
- Give the scarecrow the Lover’s Pendant and the Letter with a Drawing.
- Continue into the next field.
- Enter the barn filled with exploding bodies and search the rear chest for Amber #11: Volatile End.
- Climb to the barn’s top level and interact with both pillows.
- Completing that interaction awards Amber #12: Bountiful Harvest.
The two pillow interactions are the completion trigger described by the walkthrough; collecting the rear-chest Amber alone does not finish the quest.
Open the carriage route with the Blunderbuss
- Defeat the Volunteer carrying the large sword.
- Search the carriage behind that enemy.
- Take Weapon #4: Blunderbuss from the table.
Taking the Blunderbuss opens the route through the carriage. If the way forward still seems closed after the fight, check the carriage interior rather than circling the field.
Marketplace: Lullaby, chests, and the plague wall
The Marketplace section starts at the Marketplace Lantern and combines a fetch quest with the key needed to expose the plague wall’s weak point.
Rank #3

- Ergonomic & Adjustable Design: Fight "text neck" and improve your posture. Designed for comfort, it offers an adjustable height (7.1in-8.5in) (1.4in adjustable range) and angle (5°-85°) Please note: cell phone stand is only 9 inches tall—the length of a standard pencil
- Without blocking subtitles Perfect for office desk Tiktok Face Time Zoom video—this is the ultimate kitchen desk essential for phones! Perfect viewing experience while reducing neck back strain, A must-have for gamers streamers desk, and anyone who values both style and support!
- Sleek & Stable Design fits Otterbox Case: Say goodbye to bent cables, tangles, and tip-overs! LISEN’s stylish adjustable desk phone holder features a built-in charging hole and smart cable management, keeping your phone secure and your workspace clutter-free cool gadgets for men
- ANTI-SLIP DESIGN free hands: The under 10.00 items easy gadgets back and the bottom of this kitchen essentials for women are fully covered by anti-skid silicone, which LISEN stand up desk decor can provide maximum protection device from any scratches and slides
- Your Perfect Viewing Companion:If your product arrives damaged or breaks within 365 days, reach out to LISEN for a quick and hassle-free solution. Struggling with assembly, like tightening the screw? We’ve got your back! Your experience matters to us. (Product including: phone Holder stand*1, screw*1, hexagon screwdriver*1, specification*1)
Start “Lullaby” and obtain the Weathered Key
- From the Marketplace Lantern, head toward the water and the distant flames.
- Enter the house and approach the empty crib to start “Lullaby.”
- Leave through the back door area and take the Weathered Key from the ground near the enemies.
The key is outside the crib house, not inside the room with the crib. Mark the back-door area as your return point.
Use the key to retrieve the Toy
- Return toward the preceding area.
- After the Volunteer, turn right.
- Cross the river by jumping to the house at the end of the path.
- Use the Weathered Key on that house’s door.
- Take the Toy from the bed.
- Return to the crib house and place the Toy in the crib.
Completing Lullaby awards Amber #13: Tomorrow’s Promise.
Marketplace chest: Ferrofluid Flask Power Upgrade #4
- Enter the open village area with patrolling enemies.
- Take the first left.
- Search the corner house for the chest containing Ferrofluid Flask Power Upgrade #4.
The “first left” instruction is measured from the approach into the open village area, so do not use the Lantern-facing direction after you have already crossed the square.
Marketplace chest: Amber #14
- Find the house that is under enemy fire.
- Reach its upper floor.
- Jump from the balcony to the chest.
- Collect Amber #14: Warrior’s Fury.
The balcony jump is the intended access. Searching the ground floor of the same building will not reveal this chest.
Get the Storage Key and clear the plague wall
- Go behind the house used for the balcony jump.
- Descend the ladder into the underground area.
- Take the Storage Key from the box near the two enemies.
- Use the key on the nearby door.
- Use the access it opens to reach the weak point required to clear the plague wall.
The Storage Key is therefore a progression gate, not just an optional locked-room pickup. The walkthrough places the Iron Marshall encounter after this plague-wall sequence.
Windows Errors? Fix Them Before They Spread
Repair common Windows errors and clear accumulated junk for a smoother, more stable PC - no reinstall needed.Free scan · no reinstallOutdated Drivers Are Slowing You Down
One free scan finds every outdated or missing driver and matches the right update for your exact hardware.Free scan · exact hardware matchRank #4

- Easy Installation: Our gaming lights have been designed to enhance your entertainment experience. Simply position the led light bar next to your TV or game console to create a game room environment with ease. They come with USB power and a 60 inch cord for direct mounting and mobility
- Audio Syncing & Extensive Mode: The built-in high-sensitivity music sensor allows you to sync the TV led lights to your favorite music. Lights react and move to the beat of music, film and game audio, creating an incredible immersive sound and light experience – and all without the need for an additional hub. You can choose from 64+ patterns, including strobe, illusion, jump, energy, gradient, running, chasing, fluttering mode etc. Each mode can be applied to different scenes
- 64+ Chasing IC+RGB & W Effect: The independent control design of IC+RGB and white all-in-one multifunctional rgbw led bar lights monitor backlight allows you to easily switch the led lights for desk between IC+RGB and white to enjoy a variety of lighting effects, you can choose white lighting mode with high brightness for better illumination when working, etc. Choose IC+RGB lighting mode when you need to create an entertaining atmosphere for the light show, 16 million colours of Color changing rgb light bar let you dance to the beat and create a dynamic party atmosphere
- Dynamic and Dimmable Lights: 1%-full brightness free brightness adjustment gives you the flexibility to adjust dimmable led light bar for room decorations or a variety of occasions
- USB Powered: USB light bars for room can be powered by powernank, usb charger, TV, Monitor, laptop PC mainframe, making behind TV led lighting bar easy to install in any location.TV led lights are powered by the TV usb interface / PC mainframe, can be turned on/off synchronously with TV / PC
Iron Marshall, Orchard, and the onward flask
Amber after the Iron Marshall
After defeating the Iron Marshall, climb into the building to the right of the arena as you entered the arena. Break the boxes, then drop out through the back. A chest there contains Amber #15: Glass Soldier.
The chest is a post-boss pickup. If you leave the arena and later return to search the building, use the arena entrance as your orientation: the building is on the right from that approach.
Empty Ferrofluid Flask #2 on the route onward
A separate chest appears after you grapple across the water by the Marketplace Lantern and pass two plague pillars with grapple points. Immediately after the second pillar, look to the right for Empty Ferrofluid Flask #2.
This flask is a navigation pickup on the onward route. It is not an Orchard boss reward and should not be counted as part of the Iron Marshall building chest.
Fallen Village collectible checklist
Use this checklist to verify the chapter without relying on a map image.
Best Value

- Compatible with Wide Screens - To ensure compatibility with the dual monitor mount, your each monitor must meet three conditions at the same time: First, computer screens size range: 13 to 32 inches. Second, screen weight range: 4.4 to 19.8 lbs. Third, the back of the monitor screen must have VESA mounting holes with a pitch of 75x75mm or 100x100mm.
- Regarding the compatibility with desks - Your desk must meet three conditions at the same time: First, desk material: Only wooden desks are recommended, plastic or glass desks cannot be used. Second, desk thickness range: 0.59" - 3.54". Third, the bottom of the desk should not have any cross beams or panels, as this will interfere with installation. We recommend carefully checking that your desk and monitors meets all above conditions before purchasing.
- Dual C-Clamp Hold - Worried your dual monitors might wobble or slip? Our upgraded base uses a larger platform plus a dual C-clamp structure to lock the dual monitor arm firmly to your desk. Each arm safely keeps your screens steady while you type, click and game—no shaking, no sliding, just a clean and secure setup you can trust every day. It also provides Grommet Mounting installation choice, both options ensure stable and secure fixation for your 0.59" - 3.54" desk.
- Full-Motion Adjustment For Comfortable View - Pull the screen closer when you’re deep in a spreadsheet, push it back to watch videos, or rotate to portrait for coding — moving everything smoothly with just one hand. The monitor stand offers +85°/-50° tilt, ±90° swivel and 360° rotation. Raise your monitor up to 15.75″ to support a healthy sitting posture. Whether you’re working from home, gaming through the night, or switching between video calls and documents, getting the screens to your natural line of sight helps relieve neck, shoulder and back strain so you can stay focused longer with less fatigue.
- Keep Your Desk Organized: By lifting both screens off the desktop, this dual monitor stand opens up valuable space for your keyboard, notebook, docking station or a simple, clutter-free work area. Built-in cable management guides wires along the arms, keeping cords out of sight and out of the way. Enjoy a tidy, modern workstation that looks as good as it feels to use.
| Item | Where to find it | What it does in the route |
|---|---|---|
| Mysterious Stone Pyramid | Beyond the weak wall and Eternal Guardian near the first Battlefield Lantern | Optional approach-area pickup |
| Valen Duroc’s Emblem | With the Eternal Guardian encounter near the first Battlefield Lantern | Optional approach-area pickup |
| Amber #10: Duellist’s Focus | Chest behind the Eternal Guardian | Optional approach-area Amber |
| Rapier #3 | Body blocking the route at the Abandoned Church | Required progress weapon |
| Lover’s Pendant | Body at the base of the large tree in the Fields | Required for “The Scarecrow” |
| Ferrofluid Flask Power Upgrade #3 | Chest beside the well on the large-house route | Upgrade and Fields shortcut landmark |
| “Letter with a Drawing” | Upstairs table in the house beyond the haystacks | Required for “The Scarecrow” |
| Amber #11: Volatile End | Rear chest in the barn full of exploding bodies | Fields collectible |
| Amber #12: Bountiful Harvest | Reward for interacting with both pillows in the barn’s top level | “The Scarecrow” reward |
| Weapon #4: Blunderbuss | Table in the carriage behind the large-sword Volunteer | Opens the carriage route |
| Weathered Key | Ground outside the back door of the crib house near enemies | Required for “Lullaby” |
| Toy | Bed in the locked house across the river | Required for “Lullaby” |
| Amber #13: Tomorrow’s Promise | Reward for placing the Toy in the crib | “Lullaby” reward |
| Ferrofluid Flask Power Upgrade #4 | Chest in the corner house at the first left in the open village area | Marketplace upgrade |
| Amber #14: Warrior’s Fury | Chest reached by jumping from the balcony of the house under fire | Marketplace collectible |
| Storage Key | Box near two enemies in the underground area behind that house | Opens access to the plague-wall weak point |
| Amber #15: Glass Soldier | Chest behind the right-side building after the Iron Marshall | Post-boss collectible |
| Empty Ferrofluid Flask #2 | Chest right of the route after the second grapple-accessible plague pillar | Onward-route pickup |
How Fallen Village fits into 100% completion
PowerPyx’s whole-game guide, published October 13, 2026, reports 89 collectible locations: 55 Amber, 6 max-level Upgrade Materials, 21 Ferrofluid Power Upgrades, and 7 Ferrofluid Quantity Upgrades. The same guide reports 20 side quests. These are guide-published counts, not developer-published statistics.
| Whole-game figure | Reported amount | Attribution and qualification |
|---|---|---|
| Total collectible locations | 89 | PowerPyx whole-game guide, 2026 |
| Amber | 55 | PowerPyx whole-game guide, 2026 |
| Max-level Upgrade Materials | 6 | PowerPyx whole-game guide, 2026 |
| Ferrofluid Power Upgrades | 21 | PowerPyx whole-game guide, 2026 |
| Ferrofluid Quantity Upgrades | 7 | PowerPyx whole-game guide, 2026 |
| Side quests | 20 | PowerPyx whole-game guide, 2026 |
| Main quests | 11 across 10 regions | PowerPyx whole-game guide, 2026 |
Amber and upgrade expectations
PowerPyx describes Amber as equipment that can provide effects such as health regeneration or bonuses after dodging or parrying. Its guide reports 28 unique Ambers, with 15 upgradeable to level 3 through duplicates. The Ambersmith achievement requires obtaining each unique Amber at least once; it does not require every possible upgrade level.
Post-game cleanup
PowerPyx’s whole-game guide says missed items remain collectible in prior areas after the final boss. That means a missed Fields chest, quest reward, or post-Iron-Marshall pickup does not automatically require a new playthrough. Use Lantern travel and the named landmarks in this guide to return to the relevant subarea.
Recommended Free Tools
Common route problems and fixes
The Scarecrow does not advance
- Interact with the body tied to the scarecrow post more than once when first starting the quest.
- Confirm that you collected both the Lover’s Pendant and the Letter with a Drawing.
- After delivering both items, climb to the barn’s top level and interact with both pillows; the reward is tied to that interaction.
You cannot find the Fields shortcut
- Locate the split with the wooden gate and Grenadier.
- Take the route opposite the gate, toward the large house.
- Use the well-side chest containing Upgrade #3 as your landmark. That same route loops back to the previous Lantern.
The Lullaby door will not open
- Start Lullaby at the empty crib first.
- Pick up the Weathered Key outside the crib house’s back door.
- Cross the river after the Volunteer by jumping to the house at the end of the path, then use the key there.
The plague wall remains uncleared
- Search the underground area behind the balcony-jump house.
- Take the Storage Key from the box near the two enemies.
- Use it on the nearby door to reach the weak point.
You are missing the post-boss Amber
Return to the Iron Marshall arena and enter the building on the right from the approach used to enter the arena. Break the boxes, drop out the back, and open the chest containing Amber #15: Glass Soldier.
Quick Recap
Product prices and availability are accurate as of the date/time indicated and are subject to change. Any price and availability information displayed on Amazon at the time of purchase will apply.




